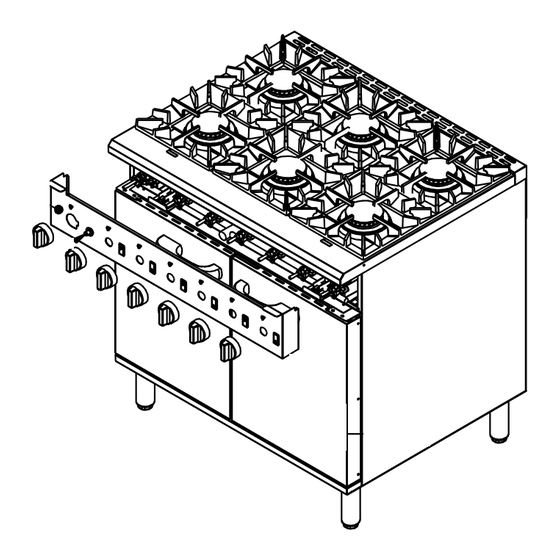
Lincat Silverlink 600 Installation, Operating, Servicing And Conversion Instructions
Medium duty gas oven range
Hide thumbs
Also See for Silverlink 600:
- Installation, operating and servicing instructions (20 pages) ,
- User, installation and servicing instructions (16 pages) ,
- User and installation instructions manual (9 pages)
Table of Contents

Summary of Contents for Lincat Silverlink 600
- Page 1 Installation, Operating, Servicing and Conversion Instructions Medium Duty Gas Oven Range LMR9 Please make a note of your product details for future use: Date Purchased: Model Number: Serial Number: Dealer: IS329 ECN4295 Page 1 of 16...
-
Page 2: Customer Information
Details are available from your local distributor or direct from us. Used for the purposes for which it is intended, and with careful maintenance as outlined in this User Guide, your Lincat product will give you years of trouble free service. IMPORTANT INFORMATION Please read all of the safety and operating instructions carefully before using this product. -
Page 3: Table Of Contents
CONTENTS Contents Page Customer Information……………………………………………………… Warnings and Precautions………………………………………………… 3 Technical Data……………………………………………………………….. 4 Commissioning………………………………………………………………. 5 Check List of Enclosures………………………………………………….. 5 Installation…………………………………………………….……………… 6 User…………………………………………………………………………….. 7-8 Cleaning……………………………………………………………………….. 9 Servicing……………………………………………………………………….. 10-11 Conversion ………..…………………………………………………………. 12 Fault Finding……………… ………………………………………….……… 13 Spare Parts List……………………………………………………………… 14 Accessories…………………………………………………………………. Service information………………………………………………………….. 16 Guarantee………………………………………………………….………….. -
Page 4: Technical Data
TECHNICAL DATA LMR9 Model Dimensions Overall height (mm) 925 to hob 960 to pan support Width (mm) Depth (mm) Weight (kg) 137kg (Nett) Hob cooking surface w x d (mm) 880 x 570 Usable oven capacity w x d x h (mm) 710 x 530 x 450 Oven shelf size (mm) 710 x 530... -
Page 5: Commissioning
1/2" BSP Nipple User Instructions SERIAL NUMBER Each appliance manufactured at Lincat has a unique identifying number found in NOTE the top right hand corner of the data plate attached at the rear of the appliance. Please record that number in the space provided should it be required for future reference. -
Page 6: Installation
INSTALLATION SITING The installer must ensure that all regulations are met and that there is an unobstructed minimum distance of 1000mm from the top of the flue to the ceiling, which must be of non- combustible material. The appliance should be installed on a level surface ensuring the unit is stable and firmly located. -
Page 7: User
USER INSTRUCTION APPLIANCE USE This appliance is only for professional use and should only be used by qualified personnel. Ensure that the person responsible understands how to light, safely operate, clean and shutdown the appliance and is made aware of the position and operation of the gas isolating cock in the event of an emergency. - Page 8 taper or piezo ignitor wand. On establishing a flame at the burner, keep the knob depressed for approximately 15 seconds then release. The burner should remain lit. If the appliance has stood unused for any length of time it may be necessary to purge the burner feed pipes of air.
-
Page 9: Cleaning
CLEANING Do not use a water jet or steam cleaner, and do not immerse this appliance. Clean all panels with warm water and mild detergent, do not use abrasive materials. Dry with a soft cloth. It is important that users of the appliance systematically check and clean down as necessary areas of the hob and oven cavity that have accumulated oils, fats and other combustible debris from previous cooking. -
Page 10: Servicing
SERVICING SERVICE ACCESS To access and service the gas control valves Remove the control knobs and fascia panel to gain access to the valves. Remove the two screws securing the valve boss and carefully withdraw the spindle from the valve. ... - Page 11 Refer to Conversion of Gas Types for pictorial representation Hob Thermocouple Remove the control knobs and fascia panel. Raise the hob top for access using the support supplied Remove nut F from valve body D. Remove the screw from the thermocouple retaining clamp and withdraw thermocouple.
-
Page 12: Conversion
CONVERSION OF GAS TYPES Replace burner jets see Section ‘Servicing page 11’ Add / Remove appliance regulator dependent on gas type Replace data plate and gas identification label. Conversion of Gas type Model Pressure Injector Mark Part No. -
Page 13: Fault Finding
FAULT FINDING Piezo oven ignitor not sparking Check for a short in the high tension lead Replace lead Check electrode for fracture Replace electrode Replace piezo ignitor Burner/s will not light or stay lit Is there gas at the burner? Check injector for blockages Are thermocouple connections loose? Tighten connections... -
Page 14: Spare Parts List
SPARE PARTS LIST Description Part number Braked castor CA112 Door bush BU55 Free running castor CA113 Hob burner complete BU143 Hob bypass injector (Natural) JE116 Hob bypass injector (Propane) JE117 Hob control knob KN155 Hob injector (Natural) JE151 Hob injector (Propane) JE152 Hob thermocouple TC34... -
Page 15: Accessories
ACCESSORIES Part Number Description Used on LMR9/SB PLATE SHELF LMR9 IS329 ECN4295 Page 15 of 16... -
Page 16: Service Information
Gas Appliance Regulations 2016/426. GUARANTEE This unit carries a comprehensive UK mainland warranty. The guarantee is in addition to, and does not diminish your statutory or legal rights. Contact Lincat for terms and conditions The guarantee does not cover: Accidental damage, misuse or use not in accordance with the manufacturer’s instructions ...


Need help?
Do you have a question about the Silverlink 600 and is the answer not in the manual?
Questions and answers