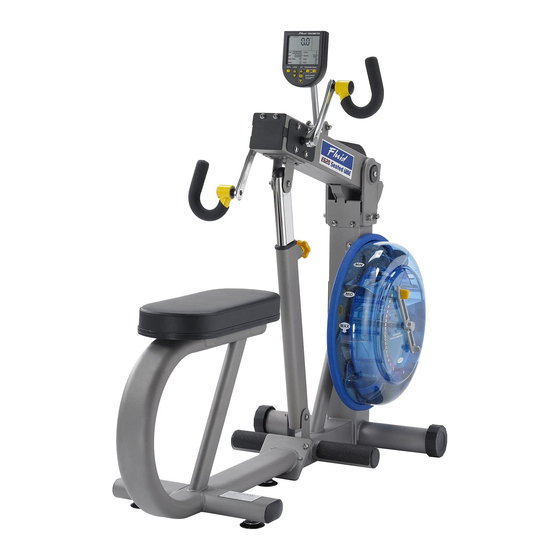
First Degree Fitness E620 Seated UBE Fluid Owner's Manual
Hide thumbs
Also See for E620 Seated UBE Fluid:
- Owner's manual (17 pages) ,
- Owner's manual (19 pages) ,
- Replacement manual (3 pages)
Table of Contents
Advertisement
Quick Links
Advertisement
Table of Contents

Subscribe to Our Youtube Channel
Related Manuals for First Degree Fitness E620 Seated UBE Fluid


Summary of Contents for First Degree Fitness E620 Seated UBE Fluid
- Page 1 Owners Manual...
- Page 2 E620 Training with 1. As with any piece of fitness equipment, consult a phy- sician before beginning your E620 exercise program. CAUTION: 2. Use two hands and follow all safety instructions when raising lowering the E620 control arm. 3. Do not remove hands while crank is in motion. The crank will continue to rotate and could cause injury.
-
Page 3: Table Of Contents
Assembly telescoping tube to control arm Assembly Seat Feamr to the Mainframe Tank Filling and Water Treatment Long Term Water Treatment and Basic Operation Rower Ergometer Using the First Degree Fitness USB Interface Maintenance chart Troubleshooting Adjusting the Chain Adjusting the Drive belt... -
Page 4: Box Contents
Box Contents... - Page 5 Item Qty Description Item Qty Description MainFrame M10 Nylock nut Seat Frame 4mm Allen key Seat 6mm Allen key M6x20mm bolt Multi-tool M8x15mm bolt AA Batteries M10x25mm blot Touch up paint M6 Washer Water Treatment Tablet M10 Washer Funnel and Hose M8 Spring Washer Owners Manual...
-
Page 6: Assembing Seat Frame And Seat
Assembling Seat Frame and Seat Chrome snap faces forward Remove Seat frame[2] and Seat[3] from box. Attach seat using 4x M6x20mm bolts[4] and 4x M6 washers[7]. -
Page 7: Assembly Telescoping Tube To Control Arm
Assembly telescoping tube to control arm Attach telescoping tube to con- trol arm using 4x M8x15mm bolts[5] and 4x M8 spring washers[9]. CAUTION: The control arm is heavy and may swing freely during this stage of assembly. The yellow tension knob is pre-tightened from the factory in the optimal position for assembly in relation to the control arm. -
Page 8: Assembly Seat Feamr To The Mainframe
Assembly Seat Frame to the Mainframe Attach the seat frame to the mainframe using 2x M10x25mm bolts, 2x M10 washers and 2x M10 nylock nuts. Tighten securely... -
Page 9: Tank Filling And Water Treatment
Tank filling and water treatment Note: A bucket is required for filling (Not included) In areas where tap water quality is known to be poor, FDF recommends the use of distilled water. Open the yellow fill plug on back of tank and insert hose (rotating the impeller slight- ly may be necessary to allow the hose to pass). -
Page 10: Long Term Water Treatment And Basic Operation
Long Term Water Treatment and Basic Operation Important: Important: Do not fill past the calibration mark as indicated on the tank level sticker or water spillage may occur. See tank filling/water treatment page for details. Long term water treatment: Water treatment schedules for the E620 will vary according to the fluid tanks exposure to sunlight, but expect 12+ months near a bright, sunlit window and 2 years or more for a darker location. -
Page 11: Rower Ergometer
Rower Ergometer Quick start: Provides instant workout information. Just start training to activate. You can choose to change UNITS displayed UNITS: Displays WATTS, SPM, HR, 500/m LEVEL: Adjustable from 1-20. Match LEVEL number with resistance level on the Fluid tank. SET: Changes Time, Distance parameters PROGRAM: Clears current exercise program... -
Page 12: Using The First Degree Fitness Usb Interface
Using the First Degree Fitness USB Interface Description: The USB connectivity now built in to all new models of FDF Console and IPM allow you to enhance your exercise experience by connecting to your home PC or Laptop. Using FDF's own sample applications you can exercise while enjoying your favorite movies. -
Page 13: Maintenance Chart
Maintenance Chart. Item Timeframe Instructions Seat and Frame. Monthly Wipe weekly with lint free cloth or more often with heavy club use. PK belt tension. Monthly. Check monthly for signs of slip- page. Adjust/tighten as required. See the tensioning belt section of this manual. -
Page 14: Troubleshooting
Troubleshooting Fault Probable Cause Solution Water changes Rower is in direct Change rower location to reduce direct color or be- sunlight or has not exposure to sunlight. Add water treat- comes cloudy. had water treatment. ment or change tank water as directed in the water treatment section of this manu- al. -
Page 15: Adjusting The Chain
Adjusting the Chain Chain tensioning bolts Crank arm bolts Axle Axle Axle Tightening left chain ten- Tightening left/right chain Tightening right chain ten- sioning bolt only tensioning bolts equally sioning bolt only To adjust chain tension/alignment, first loosen slightly the 8 crank arm bolts located on the sides of the crank arm axle covers. -
Page 16: Adjusting The Drive Belt
Adjusting the Drive belt The PK drive belt should rarely require tensioning, but should slippage be encoun- tered, first remove the inspection plate cover. This will expose the tank tensioning bolt which is tightened with a 13mm wrench. Turn clockwise and test until slippage ceases. -
Page 17: Warranty
Metal Frame – 10 Year Limited Warranty First Degree Fitness will repair or replace the metal Main Frame should it fail due to any defect in materials or work- manship within 10 years of the original purchase. Warranty does not apply to frame coating.
Need help?
Do you have a question about the E620 Seated UBE Fluid and is the answer not in the manual?
Questions and answers