
Subscribe to Our Youtube Channel
Related Manuals for First Degree Fitness E316


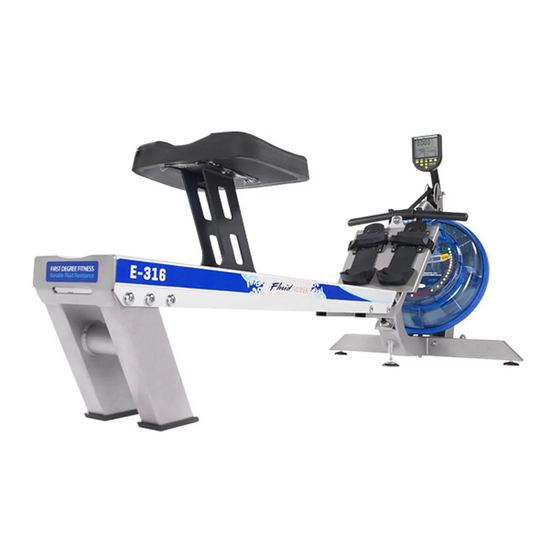
Summary of Contents for First Degree Fitness E316
- Page 1 USER GUIDE E316 VX-2 COMMERCIAL INDOOR ROWER REGISTER YOUR PRODUCT AT FIRSTDEGREEFITNESS.COM/SUPPORT...
- Page 2 INTRODUCTION WELCOME TO YOUR FLUID ROWER Congratulations on your purchase – FDF’s champion commercial indoor rowing machines are designed to accommodate all fitness levels and heavy use facilities. Featuring FDF’s variable fluid resistance technology, our water rowing machines accurately simulate propelling a boat through water, providing an instant catch and continuous resistance for a professional row stroke.
-
Page 3: Table Of Contents
CONTENTS IMPORTANT SAFETY INSTRUCTIONS ................1 GET TO KNOW YOUR ROWER ..................3 UNPACKING YOUR E316 ....................5 UNPACKING YOUR VX-2 ....................6 ASSEMBLY .......................... 7 OPERATING INSTRUCTIONS ....................19 INTEGRATED PERFORMANCE MONITOR OPERATIONS ..........22 MAINTENANCE & TROUBLESHOOTING ................ 23 BUNGEE CORD REPLACEMENT .................. -
Page 4: Important Safety Instructions
TANK CAN EXPAND AND CAUSE COMPONENTS TO CRACK. PROPER USAGE Do not use the E316/ VX-2 for any other purpose than it is designed for, with correct technique as outlined in this manual. CAUTION: INCORRECT OR EXCESSIVE TRAINING MAY RESULT IN INJURY. - Page 5 DEGREE FITNESS DISTRIBUTOR IF UNCERTAIN. OPERATING WARNINGS Children should be properly supervised at all times when near the E316/ VX-2 and should never be left alone to operate the indoor rower. When using the rower, it is recommended that comfortable clothing be worn that allows freedom of movement, including shoes with non-slip soles.
-
Page 6: Get To Know Your Rower
Extra Long Frame Air Glide Seat Rollers Transport Wheels E316 PRODUCT SPECIFICATIONS Product Class: SC Braking System: Speed Independent Product Net Weight: 50kg (110.23lb) Product Gross Weight: 60kg (132.28lb) Minimum Safe Operating Surface Area: 332cm (130.71”) Length x 201cm (79.13”) Width Maximum User Weight: 150kg (330lb) Footprint: 272cm x 141cm or upright 101.5cm x 81cm... - Page 7 GET TO KNOW YOUR ROWER VX-2 PRODUCT SPECIFICATIONS Product Class: SC Braking System: Speed Independent Product Net Weight: 49.5kg (109.13lb) Product Gross Weight: : 60.4kg (130.95lb) Minimum Safe Operating Surface Area: 325cm (127.95”) Length x 201cm (79.13”) Width Maximum User Weight: 150kg (330lb) Footprint: 265cm x 141cm or upright 1005cm x 81cm CAUTION: FOR YOUR SAFETY ALWAYS ENSURE YOUR ROWER HAS ADEQUATE SPACE AROUND IT.
-
Page 8: Unpacking Your E316
UNPACKING YOUR E316 E316 BOX CONTENTS ITEM DESCRIPTION ITEM DESCRIPTION Main Frame M6 Washer Left/Right Side Rail M10 Spring Washer Lower Main Frame M10 Washer Transport Wheel Assembly M10 Nylock Nut Footplate 4mm Allen Key Rower Seat 6mm Allen Key... -
Page 9: Unpacking Your Vx-2
UNPACKING YOUR VX-2 VX-2 BOX CONTENTS ITEM DESCRIPTION ITEM DESCRIPTION Main Frame M10x170mm Bolt Left/Right Side Rail M10 Nylon Nut Lower Main Frame M6 Washer Frame Tension Cable M10 Plastic Washer Footplate M10 Washer Rower Seat M10 Curved Washer Rear Leg 4mm Allen Key S-Bend 6mm Allen Key... -
Page 10: Assembly
ASSEMBLY STEP 1 INSTALL THE ROWER MONITOR NOTE: E316 FOLLOW STEPS 1 – 9. REQUIRED FOLLOW STEPS 3 – 9. VX-2 M10x60 Bolt [pre-attached to rower] a) Remove M10x60 Bolt and M10 Dome Nut from rower mainframe. M10 Dome Nut... - Page 11 AVOID SCRATCHING THE PAINT. Bolt Spring Washer WARNING Washer DO NOT ATTEMPT TO STAND E316 OR VX-2 ROWER UNTIL FOOTPLATE ATTACHED. SEE FOLLOWING PAGES c) Secure Lower Mainframe to Mainframe by installing the center bolt. FOR DETAILS. M10x90mm Bolt , M10 Washer...
- Page 12 PEOPLE FOR THIS SECTION OF ASSEMBLY. M10 Nyloc Nut M10 Washer M10x180mm Bolt NOTE: ONCE E316 FOOTPLATE IS SECURED, THE ASSEMBLY CAN BE CONTINUED FROM THIS POSITION FOR ADDED STABILITY. REQUIRED VX-2 2 x M10x170mm Bolt , 4 x M10 Washers...
- Page 13 ASSEMBLY STEP 5 ATTACH SEAT RAILS a) Attach the Left/Right Seat Rails to the Footplate using: REQUIRED E316 Left/Right Seat Rail E316 4 x M10x47.5mm Bolts , 4 x M6x20mm Bolts , 4 x M10 Washers 4 x M6x20mm Bolts and 4 x M6 Washers 4 x M10x47.5mm Bolts...
- Page 14 ASSEMBLY STEP 6 ASSEMBLE AND MOUNT THE SEAT a) Attach the Rower Seat to the Rower Seat Frame using 4 x M6x20mm Bolts REQUIRED E316 and 4 x M6 Washers Rower Seat Left/Right Seat Rail 4 x M6x20mm Bolts 4 x M6 Washers...
- Page 15 Slide the assembled Seat onto the Seat Rails . The seat indentation must CAUTION be towards the rear of the rower. THE SEAT IS HEAVY, USE BOTH HANDS AND KEEP E316 FINGERS CLEAR OF THE ROWER CHANNELS WHEN GUIDING THE SEAT DOWN THE SEAT RAILS. Assembled Seat...
- Page 16 ASSEMBLY STEP 7 INSTALL REAR LEG a) Mount the Rear Leg onto the Seat Rails and secure. REQUIRED E316 E316 Rear Leg 4 x M6x20mm Bolts 4 x M10x47.5mm Bolts Rear Leg 4 x M6 Washers 4 x M10 Washers...
- Page 17 STEP 8 INSTALL S-BEND AND FRAME TENSIONING BOLT NOTE: E316 FOLLOW STEPS A – D. REQUIRED E316 VX-2 FOLLOW STEPS A,B,E, F AND G S-Bend a) Carefully lower the rower to its normal operating position to complete assembly M10x80mm Bolt with installation of S-Bend and Frame Tensioning Bolt.
- Page 18 ASSEMBLY STEP 8 CONTINUED b) Install rear of S-Bend onto the Mainframe using M10x80mm Bolt , M10 Nyloc Nut and 2 x M10 Washers E316 M10x80mm Bolt M10 Nyloc Nut M10 Washer VX-2 M10x80mm Bolt M10 Washer...
- Page 19 CONTINUED c) Tilt Mainframe slightly forward and secure front of S-Bend to Footplate using M10x15mm Bolt and M10 Washer [pre-installed]. E316 M10 Washer M10x15mm Bolt d) Install the Frame Tensioning Bolt and tighten as far as it can go. This will pretension the frame to the proper position and complete the assembly.
- Page 20 ASSEMBLY STEP 8 CONTINUED f) Align Frame Tension Cable eyelet with Lower Frame bracket and secure using M10x40mm Bolt , 4 x M10 Plastic Washers and M10 Nyloc Nut VX-2 M10 Nyloc Nut M10 Washer M10x40mm Bolt g) Secure the opposite end of Frame Tension Cable to the Rear Leg and tighten as far as it can go.
- Page 21 ASSEMBLY STEP 9 TREAT THE WATER AND FILL THE TANK a) Remove rubber fill plug from the top of the tank. REQUIRED b) Place a large bucket of water next to the rower. Position the Siphon with rigid Siphon 25 hose in the bucket, and flexible hose in the tank.
-
Page 22: Operating Instructions
OPERATING INSTRUCTIONS LONG-TERM WATER TREATMENT The amount of time between water treatments can vary greatly depending on your unit’s location and exposure to sunlight. Typically, you can expect to treat your tank water every 12-24 months. If water becomes discoloured or shows signs of algae/bacterial growth simply add one Water Treatment Tablet. - Page 23 OPERATING INSTRUCTIONS CHANGING RESISTANCE LEVEL Changing the resistance on your rower is simple. The level of resistance is determined by the level indicator located on the front of the tank. Level 1 indicates lightest resistance, 16 represents heaviest resistance. The tank’s variable fluid resistance technology ensures an instant catch and constant resistance throughout the entire stroke by moving water between the passive and active chambers of the tank.
- Page 24 OPERATING INSTRUCTIONS START ROWING There are six phases to completing a rowing stroke. 1. Sit with straight legs and back, leaning forward slightly at the hips with arms out straight and hands level with the lower ribs. Swing back. 2. Legs and back straight, leaning slightly forward from the hips, arms out in front. Lean and slide forward. NOTE: HANDS SHOULD NOW BE AROUND YOUR KNEES, KEEPING LEGS STRAIGHT.
-
Page 25: Integrated Performance Monitor Operations
Our advanced computer consoles and performance monitors provide a motivational platform from which to improve your fitness and interact with peers via web-racing software and applications. Your E316/VX-2 has USB connectivity allowing you to connect your training sessions to your personal Windows PC or Laptop via standard USB cable. -
Page 26: Maintenance & Troubleshooting
MAINTENANCE & TROUBLESHOOTING For further information, manuals and warranty requests visit www.firstdegreefitness.com/support Problem Solution The water tank appears cloudy or tank Check to see that your unit has not been positioned in direct water has changed colour. sunlight as this can impact the water quality. Your tank requires a water treatment every 12-24 months. -
Page 27: Bungee Cord Replacement
BUNGEE CORD REPLACEMENT STEP 1 REMOVE PERSPEX COVER a) Remove the Perspex cover from the rear of Mainframe. WARNING MAKE SURE YOU DISCONNECT THE SENSOR LEAD BEFORE REMOVING THE COVER COMPLETELY. STEP 2 DETACH BUNGEE CORD a) Position rowing handle to a resting point on top of the tank, this helps line up the bungee hole for easier removal/ replacement. - Page 28 BUNGEE CORD REPLACEMENT STEP 4 OPEN TANK PLUG a) Open yellow tank plug, insert wrench to catch the impeller blades. Loosen rear Mainshaft Bolt using 6mm Allen Key. CAUTION DO NOT ALLOW DISSIMILAR METAL DIRECT CONTACT TO IMPELLER BLADES, RUSTING CAN OCCUR. WARNING DO NOT INSERT FINGERS INTO THE WATER TANK,...
- Page 29 BUNGEE CORD REPLACEMENT STEP 7 DETACH BUNGEE CORD a) Move the Rowing Handle from the S-Bend to a point where it is resting on top of the tank. This helps line up the Bungee Cord hole for easier removal/replacement. b) Dettach Bungee Cord from rear attachment point. STEP 8 RE-WRAP BUNGEE CORD a) To re-wrap Bungee Cord, start at lower left pulley, wrap the bungee cord in a...
- Page 30 BUNGEE CORD REPLACEMENT STEP 8 CONTINUED f) Lower rear left to upper left rear. g) Upper left rear pulley to tie off point. STEP 9 TIE CORD a) Finish the Bungee rewrap by tying off the Bungee. You may elect to not use a tie wrap as the metal tab is designed as a stand-alone attachment point.
-
Page 31: International Warranty
Metal Frame – 10 Year Limited Warranty First Degree Fitness will repair or replace the metal Main Frame of the Rower should it fail due to any defect in materials or workmanship within 10 years of the original purchase. Warranty does not apply to frame coating. - Page 32 FITNESS PRODUCTS INSPIRED BY REAL LIFE WWW.FIRSTDEGREEFITNESS.COM CONTACT US For customer support please visit firstdegreefitness.com/support TAIWAN T: +886 3 478 3306 764 Chung Shan South Rd Yangmei Taoyuan Taiwan R.O.C.
Need help?
Do you have a question about the E316 and is the answer not in the manual?
Questions and answers