Table of Contents
Advertisement
Quick Links
Advertisement
Table of Contents

Subscribe to Our Youtube Channel
Related Manuals for First Degree Fitness E520A


Summary of Contents for First Degree Fitness E520A
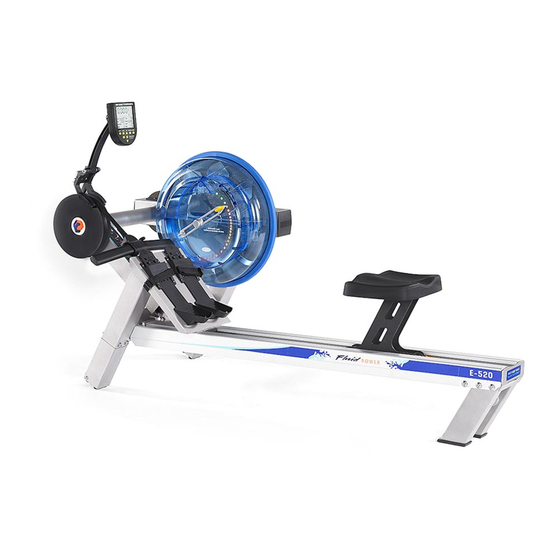
- Page 1 USER GUIDE E520A...
- Page 3 Introduction Congratulations on your purchase of Rower. FIRST DEGREE FITNESS is proud to present the Rower as a full commercial use product featuring patented Adjustable Fluid Resistance. Follow all instructions carefully for correct assembly, Tank filling, water treatment, service and safety.
-
Page 4: Table Of Contents
Contents Safety ................... 5 Assembly ................7 Box 1 & 2 Contents ................ 8 Assembly Instructions ..............9 Operating Instructions ............14 Bluetooth Auto-Adjust Monitor ..........18 Console and APP Connectivity ..........19 Calibration Procedure ............20 Maintenance Troubleshooting ..............22 Tank Belt Adjustment Bungee Cord Replacement. -
Page 5: Safety
Safety Safety Information • Before using this product, it is essential to read this ENTIRE operation manual and ALL instructions. The Rower is intended for use solely in the manner described in this manual. • UNDERSTANDING EACH AND EVERY WARNING TO THE FULLEST IS IMPORTANT •... - Page 6 Inspection • DO NOT use or permit use of any equipment that is damaged and/or has worn or broken parts. For all FIRST DEGREE FITNESS equipment use only replacement parts supplied by FIRST DEGREE FITNESS. • Cables and belts pose an extreme liability if used when frayed. Always replace any cable or belt at first sign of wear (consult FIRST DEGREE FITNESS if uncertain).
-
Page 7: Assembly
Assembly Product Specifications Product Class: SC Braking System: Speed Independent Product Net Weight: 61.9kg (136.47lb) Product Gross Weight: 71.5kg (157.63lb) Minimum Safe Operating Surface Area: 315cm (124.02”) Length x 201cm (79.13”) Width Dimensions: 1950mm (76.77”) Length x 810mm (31.89”) Width x 860mm (33.86”) Height Maximum User Weight: 150kg (330lb) Compact Footprint: 2550mm x 1410mm or upright 860mm x 810mm Product Highlights... -
Page 8: Box 1 & 2 Contents
Box 1 & 2 Contents Box 2 Contents Box 1 Contents Item Qty. Description Item Qty. Description Main Frame Front Leg Left/Right Seat Rail D Cell Duracell Battery Rower Seat Touch Up Paint Rear Leg User Guide Funnel and Hose Hardware KIT M6 Washer M10x70mm Bolt... -
Page 9: Assembly Instructions
Assembly Instructions STEP 1 Installation Rowing Front Leg for E520A REQUIRED Remove the Main Frame[1] and all components from Box Main Frame [1] 1 Check all parts against the box contents. 2 x Front Leg [6] b) Lay on soft surface such as carpet as shown. Tilt frame... - Page 10 Assembly Instructions STEP 2 Attach Seat Rails to Frame REQUIRED Locate and unwrap the Bungee Shock Cord from the Main Frame [1] frame before moving onto the installation of the seat rails. . Left/Right Seat Rail [2] 4 x M10 Washers [11] 4 x M10 Nylock Nuts [12] 2 x M10 x 70mm Bolts [16] CAUTION...
- Page 11 Assembly Instructions Attach Seat Rails to Frame Begin with left Seat Rail[2]. using the preinstalled M10x70mm[16] secure from behind with M10 Nylock[12]. Left Seat Rail Install lower left Seat Rail[2] using M10x70mm Bolts[16], Nylock Nuts[12] and M10 Washers[11]. Left Seat Rail Note: 2 x M10x70mm Bolts are Preinstalled on the Seat Rails for your Convenience Before installation of the right Seat Rail[2], thread the Bungee Shock Cord through the top of the Seat Rail, around the Bungee Pulley and out the bottom as shown...
- Page 12 Assembly Instructions STEP 3 Assemble Rowing Seat CAUTION a) Slide the assembled Seat Rails[2] facing in the direction of the arrow in the above graphic. The Seat indentation Must The Rower Seat[3] is Heavy. Use Both Hands be towards the rear of the Rower. and Keep Fingers Clear Indentation of the Rower Channels...
- Page 13 Assembly Instructions STEP 5 Attach Bungee Shock Cord Connect the Bungee Shock Cord to the Seat Rail and install CAUTION The Bungee Shock Cord will be Under Tension when Stretching to Install. Do Not Let Go Connect the Bungee Shock Cord to the Seat of the Bungee While Rail as shown.
-
Page 14: Operating Instructions
(rechargeable via USB) available as an option. We recommend this to any commercial facility, with multiple units, that has a need to drain and refill Tanks from time to time. To purchase, contact your nearest First Degree Fitness distributor or go to our website on www.firstdegreefitness.com for details. - Page 15 Your E520A computer will automatically adjust to the resistance level selected on the Tank. Allow three to four seconds after adjusting resistance handle for the correct resistance level to be achieved.
- Page 16 Operation Instructions Adjust Footplates The Footplate Slider accommodates most foot sizes, and is designed to keep your feet securely in place as you row. The feet should be positioned so that the foot strap Mounting Pegs covers the section of the foot naturally bend as row.
- Page 17 Operation Instructions Start Rowing There are six phases to completing a rowing stroke 1. Sit with straight legs and back, leaning forward slightly at the hips with arms out straight and hands level with the lower ribs. Swing back. 2. Legs and back straight, leaning slightly forward from the hips, arms out in front. Lean and slide forward.
-
Page 18: Bluetooth Auto-Adjust Monitor
Bluetooth Auto-Adjust Monitor Auto Start: Commence exercise to activate. Reset all values: Press and hold RESET button for 3 seconds. Auto Power Down: Over 5 minutes. All values revert to zero after restart. 500M TIME: Time to row 500 meters. WATT: Unit of power updated per rowing stroke. -
Page 19: Console And App Connectivity
Console and APP Connectivity Download the FluidRower App for IOS and Android. Download Link below: IOS: https://itunes.apple.com/tw/app/fluidrower/ id1449683562?mt=8 Android: https://play.google.com/store/apps/details? id=com.firstdegreefitness.fluidworkout Hold UP and DOWN buttons together for 5 seconds to initiate Bluetooth function. Open APP and connect. Demo Video: https://drive.google.com/file/ d/1uE1U5kXwawropkinD_hVAAWAOesDhnwH/view?usp=sharing Requires Heart Rate Receiver Kit and Heart Rate Chest Strap in order to... -
Page 20: Calibration Procedure
Calibration Procedure Press and hold 「RESET」and「DOWN」for 5 seconds. Display will show “ - - - - “ Turn handle to Level 1. Press Reset. Display will now show Level 2. Level 1 Calibration is complete. Turn handle to Level 2. Press Reset. -
Page 21: Maintenance
First degree fitness is not responsible for performing regular inspection and maintenance actions for your machines. Instruct all personnel in equipment inspection and maintenance actions and also in accident reporting and recording. First degree fitness representatives are available to answer any questions that you may have. Item... -
Page 22: Troubleshooting
Troubleshooting Fault Probable Cause Solution Water changes color Rower is in direct Change Rower location to reduce direct or becomes cloudy. sunlight or has not had exposure to sunlight. Add water treatment water treatment. or change Tank water as directed in the water treatment section of this manual. -
Page 23: Tank Belt Adjustment
Tank Belt Adjustment 1. Remove large metal inspection plate. 2. Using a long tool, push out the rear end cap as pictured below left. This will give you access to the Tank tensioning Bolt (shown lower right). End Cap 4. Using a 6mm Allen Key, tighten the 3. -
Page 24: Bungee Cord Replacement. Dealer Assistance Required
Bungee Cord Replacement. Dealer Assistance Required (Expect 2-5 years bungee life in commercial use. Damage during initial Rower assembly is not covered under warranty) 1. Unhook Bungee Cord Hook. Remove 2. Carefully peel back and remove the computer mount with 6mm Allen key. Belt Pulley Sticker. -
Page 25: International Warranty
Metal Frame – 10 Year Limited Warranty FIRST DEGREE FITNESS will repair or replace the metal Main Frame of the Rower should it fail due to any defect in materials or workmanship within 10 years of the original purchase. Warranty does not apply to frame coating. - Page 28 NOUS CONTACTER Pour le soutien à la clientèle, veuillez visiter firstdegreefitness.com/support TAÏ WAN T: +886 3 478 3306 764 Chung Shan South Rd Yangmei Taoyuan Taiwan R.O.C.
Need help?
Do you have a question about the E520A and is the answer not in the manual?
Questions and answers