Advertisement
Quick Links
Advertisement

Related Manuals for First Degree Fitness PREDATOR E620ST


Summary of Contents for First Degree Fitness PREDATOR E620ST
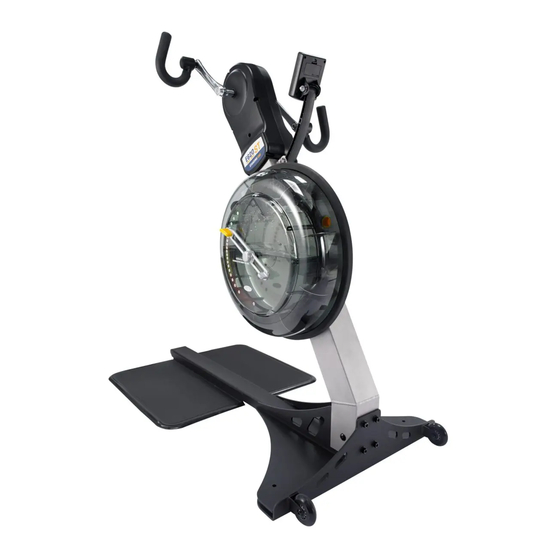
- Page 1 USER GUIDE PREDATOR E620ST STANDING UPPER BODY ERGOMETER...
- Page 2 Introduction WELCOME TO YOUR PREDATOR E620ST Congratulations on your purchase – the Predator is constructed for high intensity, power- ful workouts. The unit’s step on design, small footprint and wide foot plates provide in- stant access and total stability as power is transmitted from the ground up.
-
Page 3: Table Of Contents
Contents Important Safety Instructions…….. .…………………………………………. Get to Know Your PREDATOR E620ST…...………………………………….. Unpacking Your PREDATOR E620ST.………………………………………….. Assembly………………………………………………………….…………………. Operating Instructions…..………………………………………………………. Computer Operation…………………………….………………………………... Maintenance and Troubleshooting……………………………………………... -
Page 4: Important Safety Instructions
Important Safety Instructions All users should read the operating instructions contained within this manual and under- stand how to use the Predator E620ST before use. Visit www.firstdegreefitness.com for additional information on technique and training instruction. NOTE THE FOLLOWING SAFETY PRECAUTIONS: 1. -
Page 5: Get To Know Your Predator E620St
Get to Know Your PREDATOR E620ST PRODUCT SPECIFICATIONS PRODUCT HIGHLIGHTS Bi-directional rotation Product Class: for complete muscle engagement Braking System: Speed Independent Product Gross Weight: 56.5kg (124.5lbs) Fixed crank arm for robust dura- Minimum Safe Operating Surface bility. Area: 1,910mm x 1,350mm... -
Page 6: Unpacking Your Predator E620St
Unpacking Your PREDATOR E620ST Item Qty. Description Item Qty. Description Upper Main Frame 8mm Allen Key Lower Main Frame 6mm Allen Key Left Handle Multi-tool Right Handle AA Battery M10x130 Hex Head Bolt Touch Up Paint M8x15 Dome Head Bolt... -
Page 7: Assembly
Assembly ATTACH THE LOWER FRAME TO THE UPPER FRAME Place the lower frame [2] on a flat surface. Lift the upper frame[1] carefully and inser slowly into the low- er frame’s [2] bracket. SECURE UPPER AND LOWER FRAME Secure the upper frame to the lower frame using the M10 x REQUIRED 130mm Bolt [5] and M10 Nylock Nuts[9] ... - Page 8 Assembly SECURE UPPER AND LOWER FRAME Secure either side of bracket using the 2xM8x15mm [6] and REQUIRED M8 Washers [8], tightening with the 6mm Allen Key [11]. 2xM8x15mm [6] 2xM8 Washers 6mm Allen Key [11] Torque: 180Kgf.cm M8 Washer M8 Washer M8x15 Bolt...
- Page 9 Assembly CONTINUED Secure right and left handle onto Re-assemble the M8 Bolt and M15 corresponding crank arms by screw- Washer onto the handle on each side ing the handle counter- clockwise using the 6mm Allen Key [11] using the Multi-tool [12] Multi-tool NOTE: Handle threads have a blue coating which will feel very tight when threaded on- to crank arm.
-
Page 10: Operating Instructions
Opearating Instructions CHANGING RESISTANCE LEVEL Changing resistance on your Predator E620ST is simple. The level of resistance is determined by the level indicator located on the side of tank. Level one indicates lightest resistance, level twenty represents heaviest resistance. The tank’s variable fluid resistance technology ensures an instant catch and constant resistance throughout the pedaling. -
Page 11: Computer Operation
Computer Operation FUNCTIONS Auto Start: Commence exercise. Reset all values: Press and hold RESET button for 3 seconds. Changing Units [KPH/MPH]: Press and hold RESET and LEVEL UP for 5 seconds. Use LEVEL UP to toggle between KPH and MPH. Press RESET once to confirm. Distance: Each single press of RESET adds 100m distance, up to 1000m then adds 500m. -
Page 12: Maintenance And Troubleshooting
Maintenance & Troubleshooting For further information, manuals and warranty requests visit www.firstdegreefitness.com/support Problem Solution The water tank appears cloudy or tank Check to see that your unit has not been water has changed colour. positioned in direct sunlight as this can im- pact the water quality. - Page 13 CONTACT US For customer support please visit firstdegreefitness.com/support TAIWAN T: +886 3 478 3306 764 Chung Shan South Rd Yangmei Taoyuan Taiwan R.O.C.
Need help?
Do you have a question about the PREDATOR E620ST and is the answer not in the manual?
Questions and answers