Table of Contents
Advertisement
Quick Links
BLOOMFIELD INDUSTRIES
10 Sunnen Drive
St. Louis, MO 63143
telephone: 800-807-9054
fax: 314-781-2714
www.wellsbloomfield.com
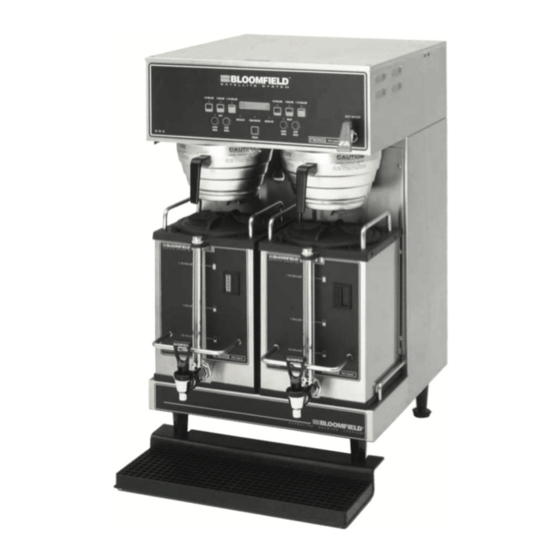
Model 9520 Dual Satellite Brewer
with optional 3901 Drip Tray
74345
DD-
Rev.M
OWNERS MANUAL
for
SS2 - SERIES
DUAL SATELLITE
COFFEE BREWERS
with
ELECTRONIC
PROGRAMMABLE
CONTROL
and
INTERNALLY HEATED
SATELLITE SERVERS
MODELS:
9520
9520FB
9521
9521FB
Includes:
Installation
Operation
Use & Care
Servicing Instructions
09
M672
0804
672
Advertisement
Table of Contents

Subscribe to Our Youtube Channel
Related Manuals for Bloomfield 9520


Summary of Contents for Bloomfield 9520
- Page 1 SS2 - SERIES DUAL SATELLITE COFFEE BREWERS with ELECTRONIC PROGRAMMABLE CONTROL INTERNALLY HEATED SATELLITE SERVERS MODELS: 9520 9520FB 9521 9521FB Includes: Installation Operation Use & Care Servicing Instructions Model 9520 Dual Satellite Brewer with optional 3901 Drip Tray 74345 Rev.M M672 0804...
-
Page 2: Warranty Statement
The prices charged by Wells Bloomfield for its products are installation or eighteen (18) months from the date of shipment based upon the limitations in this warranty. Seller’s obligation... -
Page 3: Table Of Contents
TABLE OF CONTENTS Thank You for purchasing this WARRANTY STATEMENT Wells Bloomfield appliance. SPECIFICATIONS Proper installation, professional FEATURES & OPERATING CONTROLS operation and consistent PRECAUTIONS & GENERAL INFORMATION maintenance of this appliance will AGENCY APPROVAL INFORMATION ensure that it gives you the very... -
Page 4: Features & Operating Controls
FEATURES AND OPERATING CONTROLS Fig 1. SS-2 Satellite Brewing System Features & Operating Controls... - Page 5 FEATURES AND OPERATING CONTROLS (continued) Brewer Adjustable Legs Allows brewer to be leveled. Also allow clearance for cleaning underneath brewer. Brewing Controls Start or stop brew and select brew volume. Right and left section are independent. Also, used to program brewer in programming mode.
-
Page 6: Precautions & General Information
GENERAL INFORMATION AND PRECAUTIONS This appliance is intended for use in commercial establishments only. WARNING: SHOCK HAZARD This appliance is intended to brew hot beverage, specifically coffee, for human consumption. No other use is recommended or All servicing requiring access authorized by the manufacturer or its agents. -
Page 7: Installation
Plumbing installer must supply the shut-off valve. A 1/4-turn ball valve is recommended. Bloomfield recommends the use of a water strainer to help prevent S C R E W IN TO deposits in the brewing system. - Page 8 * Check inlet solenoid for When power is first applied to the brewer, the display will debris and verify proper read “BLOOMFIELD” briefly, and a “beep” will sound. operation Press the POWER key on the front panel. The inlet valve will NOTE: Brewer will not oper- energize and the tank will begin filling.
-
Page 9: Operating Instructions
OPERATING INSTRUCTIONS Fig. 3 Control Panel GETTING STARTED Check the brewer and satellites: Check that the brewer is clean and the drip tray (if used) is empty. Check that the satellites are empty and clean with lids properly installed. Check the spray heads: Remove the brew chambers. - Page 10 Make sure the wire rack is properly installed in each brew PAPER chamber. FILTER Insert one (1) Bloomfield paper filter into each brew chamber. Make sure the filter is properly supported by the wire rack. WIRE RACK Add a measured amount of grounds to each brew basket.
- Page 11 OPERATING INSTRUCTIONS (continued) WATER FLOW Fig. 6 Water Flow Diagram The SS-2 Brewer has INLET The INLET VALVE is controlled by a signal from the CONTROL two independent brewer BOARD. If the WATER LEVEL PROBE does not detect water, the inlet systems sharing a common solenoid is opened until water is again sensed.
-
Page 12: Cleaning Instructions
CLEANING INSTRUCTIONS CLEANING INSTRUCTIONS PROCEDURE: Clean Coffee Brewer CAUTION: BURN HAZARD PRECAUTIONS: Press POWER key to OFF. Allow brewer to cool. Brewing and serving temperatures of coffee are FREQUENCY: Daily extremely hot. Hot coffee will cause TOOLS: Mild Detergent, Clean Soft Cloth or Sponge serious skin burns. - Page 13 CLEANING INSTRUCTIONS (continued) PROCEDURE: Clean Satellite CAUTION: BURN HAZARD PRECAUTIONS: Drain Satellite before Cleaning Brewing and serving temperatures of coffee are FREQUENCY: Twice Weekly extremely hot. Hot coffee will cause TOOLS: Sight Glass Brush, Sanitizer serious skin burns. Soft Clean Cloth, Bucket WARNING: 1.
-
Page 14: Programming Instructions
PROGRAMMING MANUAL, p/n 74346. Check Tank Temperature: Press POWER key to enter ON mode This brewer can be Press 3rd & 6th keys at the same time programmed with a personal computer. Please contact your Bloomfield Representative for details... - Page 15 PROGRAMMING INSTRUCTIONS (continued) FEATURES 1. Energizing the Brewer: Turn the brewer on by pressing the POWER key. The brewer will start to fill the tank with the message on the screen “filling…”. With the proper water supply the tank should be filled in about 2½ minutes. Once filled, the heating element will come on until the proper tank temperature has been reached, (which will take about 20 minutes on 120-Volt models or about 12 minutes on 120/240...
- Page 16 PROGRAMMING (continued) 5. View Water Temperature in Tank: To view the water ON/OFF – Normal Operation temperature on the screen, the brewer must be ON, and not (Non Automatic Timer): brewing or in the filling mode. Press and hold the 4th key, and depress the 6th key.
- Page 17 PROGRAMMING (continued) Brew Volume 7. Automatic Start-Up in Previous Mode: The 1st key is the Standard If the Satellite Brewer automatic timer is OFF (the factory Brew Volume. setting) and power is disconnected, the brewer will start up When a brew volume other when power is restored, in the mode it had been in prior to than standard brew volume is the power disconnection.
- Page 18 PROGRAMMING (continued) The factory programming has 12. After Hours™: The After Hours™ can be programmed to the After Hours™ mode turned come on from 1 to 6 hours after the last brew. When the OFF. Brewer goes into the After Hours™ mode, the water in the tank will be allowed to drop from the normal brewing While in the After Hours mode, temperature and will reheat less frequently –...
-
Page 19: Troubleshooting Suggestions
Brewer overflows Dirt in inlet valve or valve damaged Replace inlet valve Brew valve damaged Replace brew valve Use one genuine Bloomfield paper filter per Too many paper filters or wrong filter used. brew Brew chamber overflows Chamber discharge hole plugged... -
Page 20: Servicing Instructions
SERVICING INSTRUCTIONS CAUTION: PROCEDURE: Delime the Water Tank CHEMICAL BURN HAZARD PRECAUTIONS: Disconnect brewer from electric power. Allow brewer to cool. Deliming chemicals are caustic. Wear appropriate protective gloves and goggles during this FREQUENCY: As required (Brewer slow to heat) procedure. - Page 21 Should deliming hoses down clamps. become necessary, Bloomfield 11. Remove spray disks and gaskets. Rinse both brew heads recommends replacing the hoses.
-
Page 22: Exploded Views / Parts Lists
EXPLODED VIEW CABINET AND EXTERIOR COMPONENTS... - Page 23 PARTS LIST - CABINET AND EXTERIOR COMPONENTS ITEM PART NO DESCRIPTION ITEM PART NO. DESCRIPTION COVER TOP HOUSING SS2 TOP HOUSING WLD ASSY SS2 2E-72936 SWITCH ROCKEER ON-OFF .125 BODY WLD ASSY SS2 2E-37780 CONTACTOR 3P, 240V, 40A ALT3 BASE WLD ASSY SDS-2 2E-73552 WIRE ASSY WATER LEVEL PRO LUG GROUND SOLDERLESS 6-14G...
- Page 24 EXPLODED VIEW INTERIOR COMPONENTS...
- Page 25 PARTS LIST - INTERIOR COMPONENTS ITEM PART NO DESCRIPTION ITEM PART NO DESCRIPTION 2A-73384 TUBE SPRAY HEAD 2 3/8” LG DD-74427 SOLENOID SINGLE 120V 1.0 A6-73537 TUBE SIL .312 ID X 9” LG DD-73778 RETAINING CLIP TANK LID 2V-73388 VALVE ADJUST WATER OUTLET 2C-73457 NUT 8-32 HEX HEAD KEPS MS TUBE INLET HOSE, SIL .375 ID...
-
Page 26: Wiring Diagram
EXPLODED VIEW WIRING DIAGRAM... -
Page 27: 9340 Exploded View / Parts List / Wire Dia
SATELLITE EXPLODED VIEW, PARTS LIST & WIRING DIAGRAM SATELLITE ASSEMBLY 9340 120V N E U T. 4 5W S C H E M ATIC P /N 73 06 1 MODEL VOLTS WATTS 9340 ITEM PART NO DESCRIPTION ITEM PART NO DESCRIPTION WS-83172 RECEPTACLE PIN WIRED ASSY... - Page 28 10 SUNNEN DRIVE, P.O. BOX 430129, St. Louis, MO 63143 telephone: 314-781-2777 fax: 314-781-2714 www.wellsbloomfield.com...
Need help?
Do you have a question about the 9520 and is the answer not in the manual?
Questions and answers