Table of Contents
Advertisement
Quick Links
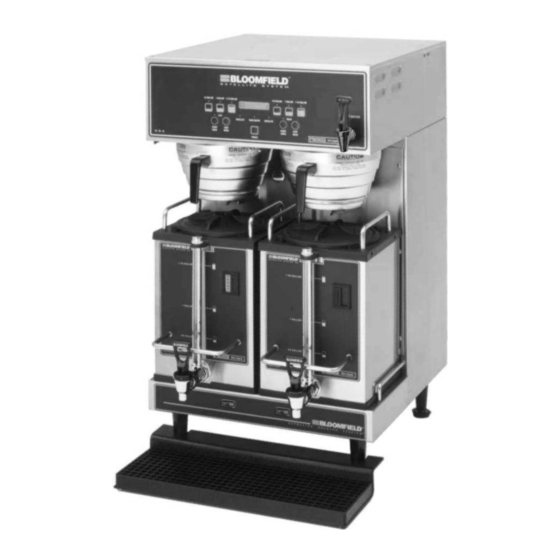
Model 900051 Dual Satellite Brewer
with optional
3901 Drip Tray
76200
p/n
Rev. B
ECN-12821
PRINTED IN UNITED STATES OF AMERICA
OWNERS MANUAL
for
SS2J - SERIES
DUAL SATELLITE
COFFEE BREWERS
with
ELECTRONIC
PROGRAMMABLE
CONTROL
and
INTERNALLY HEATED
SATELLITE SERVERS
MODELS:
SS2J
900051
Includes:
Installation
Operation
Use & Care
Servicing Instructions
05
M672J
672J
0125 cps
Advertisement
Table of Contents

Subscribe to Our Youtube Channel
Related Manuals for Bloomfield SS2J


Summary of Contents for Bloomfield SS2J
- Page 1 672J OWNERS MANUAL SS2J - SERIES DUAL SATELLITE COFFEE BREWERS with ELECTRONIC PROGRAMMABLE CONTROL INTERNALLY HEATED SATELLITE SERVERS MODELS: SS2J 900051 Includes: Installation Operation Use & Care Servicing Instructions Model 900051 Dual Satellite Brewer with optional 3901 Drip Tray PRINTED IN UNITED STATES OF AMERICA 76200 Rev.
- Page 2 INTERNATIONAL WARRANTY POLICY Wells/Bloomfield products are warranted by the covered by warranty. • authorized distributor/dealer. Please contact your Calibration of thermostat. Replacement of dealer/distributor for their warranty policy. items subject to normal wear which include such items knobs, baskets, grids,...
-
Page 3: Table Of Contents
TABLE OF CONTENTS Thank You for purchasing this WARRANTY STATEMENT Bloomfield Industries appliance. SPECIFICATIONS Proper installation, professional FEATURES & OPERATING CONTROLS operation and consistent PRECAUTIONS & GENERAL INFORMATION maintenance of this appliance will AGENCY APPROVAL INFORMATION ensure that it gives you the very... -
Page 4: Features & Operating Controls
FEATURES AND OPERATING CONTROLS Fig 1. SS-2 Satellite Brewing System Features & Operating Controls... - Page 5 FEATURES AND OPERATING CONTROLS (continued) Brewer Adjustable Legs Allows brewer to be leveled. Also allow clearance for cleaning underneath brewer. Brewing Controls Start or stop brew and select brew volume. Right and left section are independent. Also, used to program brewer in programming mode.
-
Page 6: Precautions & General Information
GENERAL INFORMATION AND PRECAUTIONS This appliance is intended for use in commercial establishments WARNING: only. Electric Shock hazard This appliance is intended to brew hot beverage, specifically coffee, for human consumption. No other use is recommended or authorized All servicing requiring by the manufacturer or its agents. -
Page 7: Installation
FEET Brewer must be connected to a potable water supply. Fig. 2 Adjustable Legs Bloomfield recommends not less than 1/4” (6mm) copper tubing for installations of 12’ (4 meters) or less, and not less than 3/8” (10mm) CAUTION: copper tubing for installations exceeding 12’ (4 meters). Brewer Electric Shock must be connected to a COLD water line. - Page 8 When power is first applied to the brewer, the display will operation read “BLOOMFIELD” briefly, and a “beep” will sound. NOTE: Brewer will not operate Press the POWER key on the front panel. The inlet valve will unless a satellite is properly energize and the tank will begin filling.
-
Page 9: Operating Instructions
OPERATING INSTRUCTIONS Fig. 3 Control Panel GETTING STARTED Check the brewer and satellites: Check that the brewer is clean and the drip tray (if used) is empty. Check that the satellites are empty and clean with lids properly installed. Check the spray heads: Remove the brew chambers. - Page 10 PAPER Make sure the wire rack is properly installed in each brew FILTER chamber. Insert one (1) Bloomfield paper filter into each brew chamber. WIRE Make sure the filter is properly supported by the wire rack. RACK Add a measured amount of grounds to each brew basket.
- Page 11 OPERATING INSTRUCTIONS (continued) WATER FLOW Fig. 6 Water Flow Diagram INLET The SS-2 Brewer has two independent brewer The INLET VALVE is controlled by a signal from the CONTROL systems sharing a common BOARD. If the WATER LEVEL PROBE does not detect water, the inlet hot water tank.
-
Page 12: Cleaning Instructions
CLEANING INSTRUCTIONS CLEANING INSTRUCTIONS CAUTION: PROCEDURE: Clean Coffee Brewer Burn Hazard PRECAUTIONS: Press POWER key to OFF. Allow brewer to cool. Brewing and serving temperatures of coffee are FREQUENCY: Daily extremely hot. Hot coffee will cause TOOLS: Mild Detergent, Clean Soft Cloth or Sponge Bristle Brush serious skin burns. - Page 13 CLEANING INSTRUCTIONS (continued) CAUTION: PROCEDURE: Clean Satellite Burn Hazard PRECAUTIONS: Drain Satellite before Cleaning Brewing and serving FREQUENCY: Twice Weekly temperatures of coffee are extremely hot. TOOLS: Sight Glass Brush, Sanitizer Hot coffee will cause Soft Clean Cloth, Bucket serious skin burns. 1.
-
Page 14: Programming Instructions
PROGRAMMING MANUAL, p/n 75990. Check Tank Temperature: Press POWER key to enter ON mode This brewer can be Press 3rd & 6th keys at the same time programmed with a personal computer. Please contact your Bloomfield Representative for details... - Page 15 PROGRAMMING INSTRUCTIONS (continued) FEATURES 1. Energizing the Brewer: Turn the brewer on by pressing the POWER key. The brewer will start to fill the tank with the message on the screen “filling…”. With the proper water supply the tank should be filled in about 2½ minutes. Once filled, the heating element will come on until the proper tank temperature has been reached, (which will take about 20 minutes on 120-Volt models or about 12 minutes on 120/240...
- Page 16 PROGRAMMING (continued) 5. View Water Temperature in Tank: To view the water ON/OFF – Normal Operation temperature on the screen, the brewer must be ON, and not (Non Automatic Timer): brewing or in the filling mode. Press and hold the 4th key, and depress the 6th key.
- Page 17 PROGRAMMING (continued) Brew Volume 7. Automatic Start-Up in Previous Mode: The 1st key is the Standard If the Satellite Brewer automatic timer is OFF (the factory Brew Volume. setting) and power is disconnected, the brewer will start up When a brew volume other when power is restored, in the mode it had been in prior to than standard brew volume is the power disconnection.
- Page 18 PROGRAMMING (continued) The factory programming has 12. After Hours™: The After Hours™ can be programmed to the After Hours™ mode turned come on from 1 to 6 hours after the last brew. When the OFF. Brewer goes into the After Hours™ mode, the water in the tank will be allowed to drop from the normal brewing While in the After Hours mode, temperature and will reheat less frequently –...
-
Page 19: Troubleshooting Suggestions
Dirt in inlet valve or valve Replace inlet valve damaged Brew valve damaged Replace brew valve Brew chamber overflows Too many paper filters or wrong Use one genuine Bloomfield filter used. paper filter per brew Chamber discharge hole Clean brew chamber plugged Improper programming... -
Page 20: Servicing Instructions
SERVICING INSTRUCTIONS CAUTION - PROCEDURE: Delime the Water Tank CHEMICAL BURN HAZARD PRECAUTIONS: Disconnect brewer from electric power. Allow brewer to cool. Deliming chemicals are caustic. Wear appropriate protective FREQUENCY: As required (Brewer slow to heat) gloves and goggles during this procedure. - Page 21 Should deliming hoses become necessary, Remove spray disks and gaskets. Rinse both brew heads with clean water. Using a stiff brush, scrub spray disk to Bloomfield recommends remove any lime or calcium build-up. Reinstall gaskets replacing the hoses. and spray disks.
-
Page 22: Exploded Views / Parts Lists
EXPLODED VIEW CABINET AND EXTERIOR COMPONENTS... - Page 23 PARTS LIST - CABINET AND EXTERIOR COMPONENTS ITEM SERVICE # DESCRIPTION QTY. COVER TOP HOUSING SS2 TOP HOUSING WLD ASSY SS2 BODY WLD ASSY SS2 BASE WLD ASSY SDS-2 BTM PLATE WLD ASSY PANEL BACK SS2 PANEL FRONT SS2 BKT CONTROL BOARD MTG SS2 BKT TANK SUPPORT TOP SS2 8543-69 BUSHING SHORTY HEYCO...
- Page 24 EXPLODED VIEW INTERIOR COMPONENTS...
- Page 25 PARTS LIST - INTERIOR COMPONENTS ITEM SERVICE # DESCRIPTION QTY. ITEM SERVICE # DESCRIPTION QTY. 84427 VALVE SOLENOID 120V SA 9052 STRAINER 83778 RETAINING CLIP TANK LID 83571 INSERT SPRAY-HEAD SS2 BLANKING PLATE 83618 BYPASS VALVE ASSEMBLY 8043-12 GASKET COVER TANK INCLUDE DELTROL VALVE (BLUE COIL) 8812-57 FITTING UNION 1/4X1/4...
-
Page 26: Wiring Diagram
EXPLODED VIEW WIRING DIAGRAM... - Page 27 SATELLITE EXPLODED VIEW, PARTS LIST & WIRING DIAGRAM SATELLITE ASSEMBLY 9340 120V ITEM PART NO. DESCRIPTION 83863 TANK LID ASSY 83099 HANDLE, SATELLITE TOP SCREW, 8-32x3/8“ BLK OXIDE STIFFENER BRACKET, LEFT 83558 TOPCOVER, SATELLITE FRAME, DECAF (PART OF #9) 83092 DOOR, DECAF 83112 FAUCET w/SIGHT GLASS, 10“...
- Page 28 Bloomfield Industries proudly supports CFESA Commercial Food Equipment Service Association Bloomfield Industries, Inc. Division of Carrier Commercial Refrigeration In US and Canada Telephone: 775-689-5700 Fax: 888-492-2783 Fax: 800-356-5142 ( for orders only website: www.wellsbloomfield.com PRINTED IN UNITED STATES OF AMERICA...
Need help?
Do you have a question about the SS2J and is the answer not in the manual?
Questions and answers