Jenn-Air JMD2124WS Technical Education
Hide thumbs
Also See for JMD2124WS:
- Use and care manual (32 pages) ,
- Installation instructions manual (12 pages) ,
- Installation instructions manual (12 pages)
Table of Contents
Advertisement
Advertisement
Table of Contents

Related Manuals for Jenn-Air JMD2124WS


Summary of Contents for Jenn-Air JMD2124WS
- Page 2 FORWARD This Jenn-Air, Drawer Microwave Oven job aid (Part No. 8178775), provides the technician with information on the installation, operation, and service of the Drawer Microwave Oven. It is to be used as a training Job Aid and Service Manual. For specific information on the model being serviced, refer to the “Use and Care Guide,”...
-
Page 3: Table Of Contents
To Avoid Possible Exposure To Excessive Microwave Energy ........1-5 R.F. Leakage Test ......................1-6 Model & Serial Number Label Location................1-7 Specifications ........................1-8 Jenn-Air Cooking Appliance Warranty ................1-10 INSTALLATION REQUIREMENTS ..................2-1 Product Dimensions ......................2-2 THEORY OF OPERATION ..................... 3-1 Microwave Operating Sequence .................. - Page 4 Page COMPONENT TESTING ......................5-1 Microwave Oven Power Output Test .................. 5-1 Switching Power Supply (Switching Regulator) ..............5-3 DIAGNOSIS & TROUBLESHOOTING .................. 6-1 Troubleshooting ......................... 6-1 Primary Secondary And Monitor Interlock Switch Checkout Procedures......6-2 Diagnostics......................... 6-3 WIRING DIAGRAM ........................ 7-1 Schematic Diagram ......................
-
Page 5: General
GENERAL SAFETY FIRST Your safety and the safety of others is very important. We have provided many important safety messages in this Job Aid and on the appliance. Always read and obey all safety messages. This is the safety alert symbol. This symbol alerts you to hazards that can kill or hurt you and others. - Page 6 Before touching any oven component or wiring, Attaching the adaptor ground terminal to the always unplug the oven from its power source wall receptacle cover screw does not ground and discharge the high voltage capacitor . the appliance unless the cover screw is metal and not insulated and the wall receptacle is grounded through the house wiring.
- Page 7 ELECTROSTATIC DISCHARGE • Before removing the part from its package, touch the antistatic bag to a green ground (ESD) SENSITIVE ELECTRONICS connection point or unpainted metal in the ESD problems are present everywhere. ESD appliance. may damage or weaken the electronic control •...
-
Page 8: Important Information For Service Technicians
IMPORTANT INFORMATION FOR SERVICE TECHNICIANS To avoid possible exposure to microwave Jenn-Air microwave ovens have a monitoring radiation or energy, visually check the oven system designed to assure proper operation for damage to the drawer and drawer seal of the safety interlock systems. -
Page 9: Precautions To Be Observed Before And During Servicing To Avoid Possible Exposure To Excessive Microwave Energy
PRECAUTIONS TO BE OBSERVED BEFORE AND DURING SERVICING TO AVOID POSSIBLE EXPOSURE TO EXCESSIVE MICROWAVE ENERGY Do not operate or allow the oven to be the magnetron, wave guide or transmis- operated with the drawer open. sion line, and cavity for proper alignment, integrity, and connections. -
Page 10: R.f. Leakage Test
R.F. LEAKAGE TEST EQUIPMENT NOTE: Enter leakage readings in space BE- FORE and AFTER on the service document. • Electromagnetic energy leakage monitor (NARDA 8100B, HOLADAY H 1501 ). All microwave ovens exceeding the emission level of 4 mw/cm must be reported to Dept. •... -
Page 11: Model & Serial Number Label Location
MODEL & SERIAL NUMBER LABEL LOCATION The Model/Serial Number label location is shown below. Model & Serial Number Label Location Right Side Wall Behind the Drawer... -
Page 12: Specifications
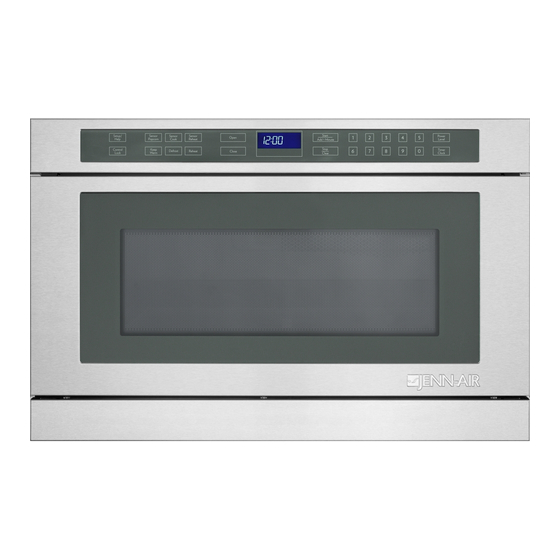
SPECIFICATIONS Setup/Help Pad, Control Lock Pad, Sensor Popcorn Pad, Keep Warm Pad, Sensor Clock Pad, Defrost Pad, Sensor Reheat Pad, Reheat Pad, Open Pad, Close Pad, START/Add 1 Minute Pad, Stop/Clear Pad, Power Level Pad, Timer Clock Pad. - Page 13 SPECIFICATIONS Model JMD2124WS Brand Jenn-Air Platform Built-in Microwave Drawer Size-Configuration 24” 1.0 Cu. Ft. Feature Level Series Sensor Fuel Type Electric Color Stainless Dimensions Overall Height (in) 15 13/32” Overall Width (in) 23 7/8” Overall Depth (in) 26 3/16” Door Swing (in) Drawer Open 15”...
- Page 14 In the second through fifth years from the date of purchase, when this appliance is operated and maintained according to instructions attached to or furnished with the product, Jenn-Air will pay for factory specified parts for the following components (if applicable to the...
-
Page 15: Installation Requirements
INSTALLATION REQUIREMENTS WARNING WARNING WARNING Excessive Weight Hazard Excessive Weight Hazard Use two or more people to move Use two or more people to move and install the microwave oven. and install the microwave oven. Failure to do so can result in back or Failure to do so can result in back or other injury. -
Page 16: Product Dimensions
PRODUCT DIMENSIONS Product Dimensions Minimum Cutout Dimensions " ¹⁹⁄₃₂ " (59.72 cm)* ¹⁄₂ (54.9 cm) 28" (71.1 cm)** " (4.4 cm) ²³⁄₃₂ " (11.9 cm) 4¹¹⁄₁₆ " ¹³⁄₃₂ " ¹⁹⁄₃₂ " (56.2 cm) ¹⁄₈ (39.1 cm) (37.1 cm) " ¹³⁄₁₆ (37.6 cm) "... -
Page 17: Theory Of Operation
THEORY OF OPERATION MICROWAVE OPERATING SEQUENCE The following is a description of component 4. The microwave energy produced by the functions during oven operation. magnetron is channelled through the waveguide into the cavity feedbox, and OFF CONDITION then into the cavity where the food is Closing the drawer activates the door sens- placed to be cooked. -
Page 18: Sensor Cooking Condition
SENSOR COOKING CONDITION switch, relay(RY1) and secondary inter- lock relay (RY2), causing the fuse to blow. Using the SENSOR function, food is cooked POWER LEVEL P-0 TO P-90 COOKING without figuring time, power level or quantity. When the oven senses enough steam from the food, it relays the information to its micro- When Variable Cooking Power is pro- processor which will calculate the remaining... -
Page 19: The Absolute Humidity (Ah) Sensor Circuit
THE ABSOLUTE HUMIDITY Cooking Sequence 1. Touch one of the SENSOR pads. (AH) SENSOR CIRCUIT NOTE: The oven should not be operated on (1) Structure of Humidity Sensor sensor immediately after plugging in the unit. The humidity sensor includes two therm- Wait two minutes before cooking on SENSOR. - Page 20 THE ABSOLUTE HUMIDITY (AH) SENSOR CIRCUIT (cont'd) moisture by which the resistance Absolute humidity vs, output voltage characteristic balance of the bridge circuit is deviated to Operational amplifier Output increase the voltage available at AN6 voltage terminal of the LSI. Then the LSI observes S : Thermistor that voltage at AN7 terminal and com- open vessel...
-
Page 21: Schematic (Off Condition)
SCHEMATIC (OFF CONDITION) - Page 22 – NOTES –...
-
Page 23: Component Access
COMPONENT ACCESS This section instructs you on how to service each component inside the Microwave Drawer. The components and their locations are shown below. WARNING Electrical Shock Hazard Disconnect power before servicing. Replace all parts and panels before operating. Failure to do so can result in death or electrical shock. -
Page 24: Accessing Internal Components
ACCESSING INTERNAL COMPONENTS WARNING Top Cover Screws Electrical Shock Hazard Disconnect power before servicing. Replace all parts and panels before operating. Failure to do so can result in death or electrical shock. Unplug microwave drawer or disconnect power. Before removing Microwave Drawer, Figure 2 take measures to protect the Drawer 6. - Page 25 ACCESSING INTERNAL COMPONENTS (continued) Remove exhaust duct and back cover To remove the Control Panel Assembly, (see figures 5 & 6). remove the top panel as outlined in step 5 in this section. Remove (2) screws on each end on the back of the control panel, see figure 7.
-
Page 26: Removing The Power Cord
REMOVING THE POWER CORD WARNING Electrical Shock Hazard Disconnect power before servicing. Replace all parts and panels before operating. Failure to do so can result in death or electrical shock. Unplug microwave drawer or disconnect power. Follow procedures to remove the back panel as outlined in the steps Un-hook Ground to metal Tab on Back Panel under“ACCESSING INTERNAL COM-... -
Page 27: Removing The Secondary Interlock Switch, Monitor Switch And Front And Rear Door Switch
REMOVING THE SECONDARY INTERLOCK SWITCH, MONITOR SWITCH AND FRONT AND REAR DOOR SWITCH WARNING Remove Connectors Stopper Tabs Electrical Shock Hazard Disconnect power before servicing. Replace all parts and panels before Figure 2 operating. Disconnect the wire leads of each Failure to do so can result in death or switch. - Page 28 REMOVING THE SECONDARY INTERLOCK SWITCH, MONITOR SWITCH AND FRONT AND REAR DOOR SWITCH (continued) Re-install Connectors Re-install each switch in its place. The Rear Door Switch secondary interlock switch is in the lower position and the monitor switch is in the top position, located on the left side of the unit, see figure 3.
-
Page 29: Removing The Oven Lamp
REMOVING THE OVEN LAMP WARNING Lamp Holder Screws Electrical Shock Hazard Disconnect power before servicing. Connectors Replace all parts and panels before operating. Lamp Lamp Failure to do so can result in death or Holder electrical shock. Figure 2 Unplug microwave drawer or disconnect Unscrew the lamp and replace, power. -
Page 30: Removing The Drawer Assembly
REMOVING THE DRAWER ASSEMBLY Open drawer and extend it fully. Drawer Bottom Center Drawer Support Locate the drawer support cover on the (Rack Gear) back of the frame on both sides of the Drawer Assembly. Using a putty knife gently pry on the side Screws of the cover until it snaps out, see figure 1. -
Page 31: Removing The Stirrer Cover And Stirrer Fan Assemblies
REMOVING THE STIRRER COVER AND STIRRER FAN ASSEMBLIES Stirrer Fan Assembly Remove the Drawer Assembly, see Removing the Drawer Assembly page 4-8. Remove the two canoe clips that secure the front of the stirrer cover. These clips are removed by gently prying them from their mounting holes, see figure1. -
Page 32: Removing The Stirrer Motor
REMOVING THE STIRRER MOTOR WARNING Disengage two tabs on the bracket from the mounting holes in the motor, see figure 2. Remove two connectors and replace motor, see figure 2. Electrical Shock Hazard Stirrer Motor Disconnect power before servicing. Replace all parts and panels before Bracket operating. -
Page 33: Removing The Humidity Sensor
REMOVING THE HUMIDITY SENSOR WARNING Remove two screws securing the humidity sensor to the microwave top, see figure 1. Disconnect the connector with the shielded black red and white wires from the control PCB at location CNF, see figure 2. Electrical Shock Hazard Disconnect power before servicing. -
Page 34: Interior Components Locations
INTERIOR COMPONENTS LOCATIONS WARNING Electrical Shock Hazard Disconnect power before servicing. Replace all parts and panels before operating. Failure to do so can result in death or electrical shock. High Voltage Capacitor Fan Bracket Magnetron Fan Motor Noise Filter Line Fuse Transformer Relay Board Switching Regulator Board... -
Page 35: Removing The High Voltage Capacitor And Diode
REMOVING THE HIGH VOLTAGE CAPACITOR AND DIODE WARNING White Wire To Red Wire To Transformer Transformer Electrical Shock Hazard Red Wire To Disconnect power before servicing. Magnetron Replace all parts and panels before Diode Screw High Voltage Diode operating. Failure to do so can result in death or Figure 2 electrical shock. -
Page 36: Removing The High Voltage Transformer
REMOVING THE HIGH VOLTAGE TRANSFORMER WARNING Two Slots Behind Two Screws Transformer Electrical Shock Hazard Disconnect power before servicing. Replace all parts and panels before operating. Failure to do so can result in death or Figure 1 electrical shock. Remove two screws securing the Unplug microwave drawer or disconnect base of the transformer to the microwave. -
Page 37: Removing The Magnetron
REMOVING THE MAGNETRON WARNING Four Screws Electrical Shock Hazard Disconnect power before servicing. Replace all parts and panels before operating. Failure to do so can result in death or Figure 2 electrical shock. Remove four connectors. Unplug microwave drawer or disconnect Remove one screw that secures the power. -
Page 38: Removing The Cooling Fan Assembly
REMOVING THE COOLING FAN ASSEMBLY WARNING Screw Two Connectors Electrical Shock Hazard Disconnect power before servicing. Replace all parts and panels before operating. Failure to do so can result in death or Figure 2 electrical shock. Disconnect two connectors, white wires Unplug microwave drawer or disconnect from the front terminal and black wire power. -
Page 39: Removing The Relay, Noise Filter And Power Supply Boards
REMOVING THE RELAY, NOISE FILTER AND POWER SUPPLY BOARDS Remove two screws that secure the relay board to the microwave, WARNING see figure 1. Disengage two tabs that hold the board in place, see figure 2. Noise Filter Board Remove one screw that secures the noise filter board to the microwave, see figure 1. -
Page 40: Removing The Auto Drawer Gear
REMOVING THE AUTO DRAWER GEAR WARNING Screwdriver Base Plate Bottom Cover Figure 1b Electrical Shock Hazard Remove the (4) screws holding the auto Disconnect power before servicing. drawer gear to the bottom cavity angle, Replace all parts and panels before see figure 2. -
Page 41: Removing The Rack Gear
REMOVING THE RACK GEAR WARNING Rack Gear Clip Top side of center slide rail Figure 2 Electrical Shock Hazard Disconnect power before servicing. Replace all parts and panels before operating. Failure to do so can result in death or electrical shock. Unplug microwave drawer or disconnect power. - Page 42 — NOTES — 4-20...
-
Page 43: Component Testing
COMPONENT TESTING WARNING Electrical Shock Hazard Disconnect power before servicing. Replace all parts and panels before operating. Failure to do so can result in death or electrical shock. MICROWAVE OVEN POWER OUTPUT TEST 1. Place 8 oz (250 mL) of lukewarm water in the center of the NOTE: If the water takes longer than 2 minutes to heat, this microwave oven. - Page 44 COMPONENT TESTING (continued) Components Test/Results H.V. Capacitor 1. Unplug microwave oven or disconnect power. 2. Remove wire leads. 3. Prepare the DC 9-volt battery and 10k ohms resistance including wire leads. 4. Connect the DC 9-volt battery to the H.V. capacitor. 5.
-
Page 45: Switching Power Supply (Switching Regulator)
COMPONENT TESTING (continued) Switching Power Supply (Switching Regulator) 950W power output 120V Switching power supply- "switching regulator" is a 24Vdc switching power supply (SW PSU). It is used to power the drawer motor to open/ close drawer. When Relay RY5 is active it allows the 24Vdc to get to the drawer motor. -
Page 46: Diagnosis & Troubleshooting
DIAGNOSIS & TROUBLESHOOTING TROUBLESHOOTING WARNING IMPORTANT: If the oven becomes inopera- tive because of a blown monitor fuse, check the monitor switch, relay RY1, secondary in- terlock relay RY2, secondary (door sensing) interlock switch, and primary interlock switch before replacing the monitor fuse. If monitor fuse is replaced, the monitor switch must also be replaced. -
Page 47: Primary Secondary And Monitor Interlock Switch Checkout Procedures
A. Cavity thermostat F. Drawer sensing switch K AC line filter B. Magnetron G. Front drawer switch L. H.V. transformer PRIMARY SECONDARY AND MONITOR INTERLOCK C. Stirrer motor H. H.V. capacitor M. Secondary interlock switch D. Cavity light I. H.V. diode N. -
Page 48: Diagnostics
TROUBLESHOOTING DIAGNOSTICS Do not continue with the diagnostics of appliance if the 3. Check for loose wiring or incorrect wiring within microwave household fuse is blown, a circuit breaker is tripped or if there is oven. less than 120-volt power supply at the wall outlet. 4. - Page 49 – NOTES –...
-
Page 50: Wiring Diagram
WIRING DIAGRAM SCHEMATIC DIAGRAM... -
Page 51: Product Specifications
PRODUCT SPECIFICATIONS WARRANTY INFORMATION SOURCES IN THE UNITED STATES: FOR PRODUCT SPECIFICATIONS AND WARRANTY INFORMATION CALL: FOR WHIRLPOOL PRODUCTS: 1-800-253-1301 FOR KITCHENAID PRODUCTS: 1-800-422-1230 FOR ROPER PRODUCTS: 1-800-447-6737 FOR TECHNICAL ASSISTANCE WHILE AT THE CUSTOMER’S HOME CALL: THE TECHNICAL ASSISTANCE LINE: 1-800-253-2870 HAVE YOUR STORE NUMBER READY TO IDENTIFY YOU AS AN AUTHORIZED SERVICER FOR LITERATURE ORDERS:...
Need help?
Do you have a question about the JMD2124WS and is the answer not in the manual?
Questions and answers