
Subscribe to Our Youtube Channel
Related Manuals for Santec SNC-311RINA


Summary of Contents for Santec SNC-311RINA
- Page 1 USER MANUAL SANTEC IP Cameras Models: SNC-311RINA SNC-311RDIA SNC-311RBIA SNC-311FEIF SNC-311FBIF SNC-311RINA SNC-311RDIA SNC-311RBIA SNC-311FBIF SNC-311FEIF Version 1.0sfi/0115/engl/A5...
- Page 2 Please follow all instructions and observe the warnings contained in this manual. Please contact your local dealer or SANTEC directly if you have any questions or if you wish to claim for a service or warranty. You will find further information on our website: www.santec-video.com...
- Page 3 User manual SNC-311RINA, SNC-311RDIA, SNC-311RBIA SNC-311FEIF, SNC-311FBIF www.santec-video.com _________________________________________________________________________________ - 3 -...
-
Page 4: Table Of Contents
User manual SNC-311RINA, SNC-311RDIA, SNC-311RBIA SNC-311FEIF, SNC-311FBIF Table of contents Safety precautions Safety instructions About this user manual Items included in the delivery PART I: CAMERA DESCRIPTION, TECHNICAL SPECIFICATIONS, INSTALLATION 1. Camera connections 2. SNC-311RINA 2.1 Special features 2.2 Technical drawing 2.3 Note on power supply... - Page 5 User manual SNC-311RINA, SNC-311RDIA, SNC-311RBIA SNC-311FEIF, SNC-311FBIF PART II: CAMERA CONFIGURATION AND CONTROL VIA THE WEB 1. Live view 2. Playback 2.1 Preparations 2.1.1 Manual recordings/snapshots 2.1.2 Alarm-based and schedule based recordings/snapshots 2.2 Playback of videos and snapshots 3. Setup 3.1 Setup ...
- Page 6 User manual SNC-311RINA, SNC-311RDIA, SNC-311RBIA SNC-311FEIF, SNC-311FBIF 3.7 Setup System 3.7.1 Setup System General 3.7.2 Setup System Account 3.7.3 Setup System Default 3.7.4 Setup System Import/Export 3.7.5 Setup System Auto Maintain 3.7.6 Setup ...
-
Page 7: Safety Precautions
User manual SNC-311RINA, SNC-311RDIA, SNC-311RBIA SNC-311FEIF, SNC-311FBIF Safety precautions Caution Description of symbols Danger: This symbol is intended to alert the user to the presence of un-insulated "dangerous voltage" within the product’s enclosure that may be of sufficient magnitude to constitute a risk of electric shock to a person. -
Page 8: Safety Instructions
User manual SNC-311RINA, SNC-311RDIA, SNC-311RBIA SNC-311FEIF, SNC-311FBIF Safety instructions Before operating the appliance, please read this manual carefully and retain it for further reference. Before cleaning the appliance, it has to be switched off and unplugged from the power outlet. Wipe the appliance with a soft damp cloth. -
Page 9: About This User Manual
User manual SNC-311RINA, SNC-311RDIA, SNC-311RBIA SNC-311FEIF, SNC-311FBIF Upon completion of any service or repairs to the appliance, ask the service technician to perform safety checks to verify that the appliance is in proper operating condition. The appliance should only be installed by qualified service personnel and has to comply with local specifications and regulations. -
Page 10: Part I: Camera Description, Technical Specifications, Installation
User manual SNC-311RINA, SNC-311RDIA, SNC-311RBIA SNC-311FEIF, SNC-311FBIF Part I: Camera description, technical specifications, installation 1. Camera connections SNC-311RINA, SNC-311RDIA, SNC-311FEIF, SNC-311FBIF: The camera is equipped with the following connectors: Power Network SNC-311RBIA: The camera is equipped with the following connectors:... - Page 11 Here you can insert a micro SD card (not included in the deliver), e.g. to store snapshots. (If you also use SANTEC network recorder SNVR-1412P or SNVR-1812P, you can use the ANR (Automatic Network Reproduction) function.) Service connector (only for manufacturer service purpose)
- Page 12 User manual SNC-311RINA, SNC-311RDIA, SNC-311RBIA SNC-311FEIF, SNC-311FBIF Camera SNC-311RINA comes with the following additional connections: Use the supplied Allen wrench to open the camera housing. Connection interface Reset button Slot for micro SD card for video, audio, (max. 32 GB)
-
Page 13: Snc-311Rina
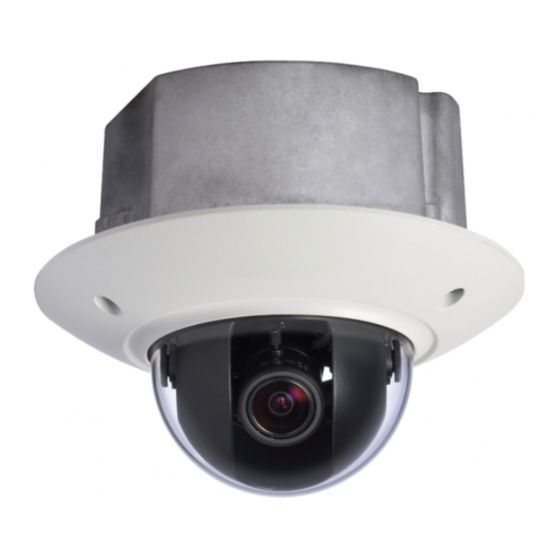
User manual SNC-311RINA, SNC-311RDIA, SNC-311RBIA SNC-311FEIF, SNC-311FBIF 2. SNC-311RINA 2.1 Special features IP dome camera for outdoor applications Excellent image quality, even under poor light conditions Easy to use thanks to intuitive user interface 3x streaming, dual streaming, multicast Digital Wide Dynamic Range (DWDR) -
Page 14: Technical Specifications
User manual SNC-311RINA, SNC-311RDIA, SNC-311RBIA SNC-311FEIF, SNC-311FBIF 2.4 Technical specifications Model SNC-311RINA Camera type 3 MP IP dome camera Installation Outdoor applications Video norm PAL / NTSC 1/3” Progressive Scan CMOS Image sensor Resolution 3 MP (2048 x 1536) Video codec (compression) H.264 / MJPEG... -
Page 15: Snc-311Rdia
User manual SNC-311RINA, SNC-311RDIA, SNC-311RBIA SNC-311FEIF, SNC-311FBIF 3. SNC-311RDIA 3.1 Special features IP dome camera for outdoor applications Excellent image quality, even under poor light conditions Easy to use thanks to intuitive user interface 3x streaming, dual streaming, multicast Digital Wide Dynamic Range (DWDR) -
Page 16: Technical Specifications
User manual SNC-311RINA, SNC-311RDIA, SNC-311RBIA SNC-311FEIF, SNC-311FBIF 3.4 Technical specifications Model SNC-311RDIA Camera type 3 MP IP dome camera Installation Outdoor applications Video norm PAL / NTSC 1/3” Progressive Scan CMOS Image sensor Resolution 3 MP (2048 x 1536) Video codec (compression) H.264 / MJPEG... -
Page 17: Snc-311Rbia
User manual SNC-311RINA, SNC-311RDIA, SNC-311RBIA SNC-311FEIF, SNC-311FBIF 4. SNC-311RBIA 4.1 Special features IP camera for outdoor applications Excellent image quality, even under poor light conditions Easy to use thanks to intuitive user interface 3x streaming, dual streaming, multicast Digital Wide Dynamic Range (DWDR) -
Page 18: Technical Specifications
User manual SNC-311RINA, SNC-311RDIA, SNC-311RBIA SNC-311FEIF, SNC-311FBIF 4.3 Technical specifications Model SNC-311RBIA Camera type 3 MP IP IR outdoor camera Installation Outdoor applications Video norm PAL / NTSC 1/3” Progressive Scan CMOS Image sensor Resolution 3 MP (2048 x 1536) Video codec (compression) H.264 / MJPEG... -
Page 19: Snc-311Feif
User manual SNC-311RINA, SNC-311RDIA, SNC-311RBIA SNC-311FEIF, SNC-311FBIF 5. SNC-311FEIF 5.1 Special features IP mini dome camera for outdoor applications Excellent image quality, even under poor light conditions Easy to use thanks to intuitive user interface 3x streaming, dual streaming, multicast... -
Page 20: Technical Specifications
User manual SNC-311RINA, SNC-311RDIA, SNC-311RBIA SNC-311FEIF, SNC-311FBIF 5.3 Technical specifications Model SNC-311FEIF Camera type 3 MP IP day/night mini IR dome camera Installation Outdoor applications Video norm PAL / NTSC 1/3” Progressive Scan CMOS Image sensor Resolution 3 MP (2048 x 1536) Video codec (compression) H.264 / MJPEG... -
Page 21: Snc-311Fbif
User manual SNC-311RINA, SNC-311RDIA, SNC-311RBIA SNC-311FEIF, SNC-311FBIF 6. SNC-311FBIF 6.1 Special features IP mini camera for outdoor applications Excellent image quality, even under poor light conditions Easy to use thanks to intuitive user interface 3x streaming, dual streaming, multicast Digital Wide Dynamic Range (DWDR) P2P App capable 1/3“... -
Page 22: Technical Specifications
User manual SNC-311RINA, SNC-311RDIA, SNC-311RBIA SNC-311FEIF, SNC-311FBIF 6.3 Technical specifications Model SNC-311FBIF Camera type 3 MP IP day/night mini IR outdoor camera Installation Indoor and outdoor applications Video norm PAL / NTSC 1/3” Progressive Scan CMOS Image sensor Resolution 3 MP (2048 x 1536) Video codec (compression) H.264 / MJPEG... -
Page 23: Installation
You will find the firmware here: www.santec-video.com Products & Shop Camera part number Downloads Firmware/Software 2. Insert SD card (only for camera models with SD card slot): It is recommended to insert a micro SD card prior to the camera installation. -
Page 24: Web Access Via Configtool
When you use the ConfigTool for the first time, you will be prompted to install the plugin. Please accept the plugin installation. The latest version of the ConfigTools can be downloaded in the SANTEC webshop in the product section of the respective camera model (www.santec-video.com). -
Page 25: Part Ii: Camera Configuration And Control Via The Web
User manual SNC-311RINA, SNC-311RDIA, SNC-311RBIA SNC-311FEIF, SNC-311FBIF Part II: Camera configuration and control via the web Once you have connected the camera and accessed it using the web browser (ConfigTool), the live view of the camera along with the configuration menu and some setting options are displayed. - Page 26 User manual SNC-311RINA, SNC-311RDIA, SNC-311RBIA SNC-311FEIF, SNC-311FBIF 4. Configuration menu: Live Playback (only available for camera models with SD card slot) Setup Alarm Setup Assistance Logout Each menu topic will be further explained in the following chapters. 5. Function fields:...
- Page 27 User manual SNC-311RINA, SNC-311RDIA, SNC-311RBIA SNC-311FEIF, SNC-311FBIF Symbol Description Record: Click on the record symbol. It will turn blue and the recording of the live image starts. Click again to stop the recording (turns white).The recordings will be stored at the path which you have defined here (see chapter 3.2.4): Setup ...
- Page 28 User manual SNC-311RINA, SNC-311RDIA, SNC-311RBIA SNC-311FEIF, SNC-311FBIF 6. Display settings: Symbol Description Image adjustment: Click this symbol to display a small panel for image adjustment options. Brightness Contrast Saturation Use the slide ruler to adjust the video image. Click „Reset“ to reset all items to default values (50). Click again to hide the small display.
-
Page 29: Playback
User manual SNC-311RINA, SNC-311RDIA, SNC-311RBIA SNC-311FEIF, SNC-311FBIF 2. Playback Note: The playback function is only available for cameras with SD card slot. 2.1 Preparations It is recommended to adjust and correct (if necessary) the date and time setting for the camera. -
Page 30: Alarm-Based And Schedule Based Recordings/Snapshots
User manual SNC-311RINA, SNC-311RDIA, SNC-311RBIA SNC-311FEIF, SNC-311FBIF 2.1.2 Alarm-based and schedule-based recordings/snapshots Recordings (videos) resp. snapshots which are triggered by an alarm/event or by schedule, are not automatically stored to your computer (in contrast to manual recordings/snapshot) but there are several storage paths available (see chapter 3.6.2): Setup ... - Page 31 User manual SNC-311RINA, SNC-311RDIA, SNC-311RBIA SNC-311FEIF, SNC-311FBIF Use this button to move from the calendar view to the list view. All recordings of this day are listed here. For longer lists, use the arrows to go to the next page.
- Page 32 User manual SNC-311RINA, SNC-311RDIA, SNC-311RBIA SNC-311FEIF, SNC-311FBIF Video cut (clip): You may cut out sections of interest of the recorded video (video clips). 1. Click on the start time and then on the cut icon. Then enter a start time and click again on the cut symbol.
-
Page 33: Setup
User manual SNC-311RINA, SNC-311RDIA, SNC-311RBIA SNC-311FEIF, SNC-311FBIF 3. Setup 3.1 Setup Camera Condition 3.1.1 Setup Camera Condition Condition Here you can define various settings for the video image. The settings are effective in the image immediately as soon as they are set. - Page 34 User manual SNC-311RINA, SNC-311RDIA, SNC-311RBIA SNC-311FEIF, SNC-311FBIF White balance: Auto: The camera automatically activates the white balance function. Sunny: For sunny (bright light) days. Night: For dark days and nights. Outdoor: For outdoor applications. Customized: Here you can manually set the red and blue gain values.
-
Page 35: Setup Camera Conditions Profile Management
User manual SNC-311RINA, SNC-311RDIA, SNC-311RBIA SNC-311FEIF, SNC-311FBIF 3.1.2 Setup Camera Conditions Profile Management Switching between profiles can be schedule-based or sensor-based. Normal Full time: Day or night Schedule: Use the ruler to define the duration resp. the time. -
Page 36: Setup Camera Video
User manual SNC-311RINA, SNC-311RDIA, SNC-311RBIA SNC-311FEIF, SNC-311FBIF 3.2 Setup Camera Video 3.2.1 Setup Camera Video Video Here you can adjust the settings for the main stream and the sub stream. Code stream type: The camera supports the active control of frame rates, i.e. it allows you to record in different frame rates. -
Page 37: Setup Camera Video Snapshot
User manual SNC-311RINA, SNC-311RDIA, SNC-311RBIA SNC-311FEIF, SNC-311FBIF Watermark: If enabled, a watermark is stored in the video image. By including a watermark you can varify if the video has been tempered or not. Max. watermark text length is 128 characters. -
Page 38: Setup Camera Video Overlay
User manual SNC-311RINA, SNC-311RDIA, SNC-311RBIA SNC-311FEIF, SNC-311FBIF 3.2.3 Setup Camera Video Overlay Here you can define different elements to be displayed or hidden in the video image. Privacy masking: Enable the privacy masking function. Use the mouse to draw up to 4 privacy zones into the video image (size and position), i.e. - Page 39 User manual SNC-311RINA, SNC-311RDIA, SNC-311RBIA SNC-311FEIF, SNC-311FBIF Time title: Enable this function and move the yellow „time title“ box to the desired position in the video image. If needed, you may also add the day of the week. Finally click on „Save“.
-
Page 40: Setup Camera Video Path
User manual SNC-311RINA, SNC-311RDIA, SNC-311RBIA SNC-311FEIF, SNC-311FBIF Picture overlay: You can display one of your own pictures in the video image. Click on “Enable” and move the yellow box to the desired position. Click on “Upload picture” and select the image you wish to upload. -
Page 41: Setup Camera Audio
User manual SNC-311RINA, SNC-311RDIA, SNC-311RBIA SNC-311FEIF, SNC-311FBIF 3.3 Setup Camera Audio Note: This function is not available for camera models SNC-311FEIF and SNC-311FBIF. Preconditions for audio streaming and bi-directional communication (sound, talk) are: A microphone/speaker (not included in the delivery) is connected to the audio input/output of the camera. -
Page 42: Setup Network
User manual SNC-311RINA, SNC-311RDIA, SNC-311RBIA SNC-311FEIF, SNC-311FBIF 3.4 Setup Network 3.4.1 Setup Network TCP/IP TCP/IP: Here you can define the following settings: Host name: Max. 15 digits Ethernet card Mode: Static or DHCP. For IPV4, DHCP can be used. IPV6 only supports static addresses. - Page 43 To access the camera via an App, the camera needs to be integrated into a network with Internet access. If you now enable the P2P function, the camera establishes a connection to the SANTEC BW P2P server. Once the connection has been established successfully, the status changes to „Online“...
-
Page 44: Setup Network Connection
Please don’t use any ports which are default ports for other services. ONVIF: ONVIF = Open Network Video Interface Forum) All SNC cameras are ONVIF compatible which enables the configuration and integration of a SANTEC camera into most video management solutions know on the market. _________________________________________________________________________________ - 44 -... -
Page 45: Setup Network Pppoe
User manual SNC-311RINA, SNC-311RDIA, SNC-311RBIA SNC-311FEIF, SNC-311FBIF 3.4.3 Setup Network PPPoE PPPoE can be used to establish an Internet connection. You need the registration data (user name, password) from your provider. Once you have saved your entries, you have to re-boot the camera so that is able to connect via PPPoE. - Page 46 User manual SNC-311RINA, SNC-311RDIA, SNC-311RBIA SNC-311FEIF, SNC-311FBIF Domain name: For server type „No-IP DDNS” and “Dyndns DDNS“: You can self-define the domain name. For server type „Quick DDNS“: Depending on the selected mode („Auto“ or „Manual“) The domain name will be set automatically or you enter your self-defined domain name (the latter can be tested by using the „Test“...
-
Page 47: Setup Network Ip Filter
User manual SNC-311RINA, SNC-311RDIA, SNC-311RBIA SNC-311FEIF, SNC-311FBIF 3.4.5 Setup Network IP filter Here you can set up trusted sites (IP or MAC addresses), i.e. these addresses are granted access to the camera. Enable the function „Trusted sites“. If you don’t tick this box, the camera can be accessed from any computer. -
Page 48: Setup Network Smtp (E-Mail)
User manual SNC-311RINA, SNC-311RDIA, SNC-311RBIA SNC-311FEIF, SNC-311FBIF 3.4.6 Setup Network SMTP (E-Mail) Here you can define, if, when and how an e-mail notification is sent in case of an event. SMTP server, port: Please enter the IP of your e-mail SMTP server and its port (default = 25). -
Page 49: Setup Network Upnp
User manual SNC-311RINA, SNC-311RDIA, SNC-311RBIA SNC-311FEIF, SNC-311FBIF Mail receiver: Enter the e-mail address to receive e-mail notifications and click on the plus icon. The e-mail address will be added to the list. You may add up to 3 e-mail recipients. -
Page 50: Setup Network Snmp
User manual SNC-311RINA, SNC-311RDIA, SNC-311RBIA SNC-311FEIF, SNC-311FBIF 3.4.8 Setup Network SNMP SNMP version: Select either SNMP v1, SNMP v2 or SNMP v3. Only one SNMP version can be selected at a time. For SNMP v3, additional authorisations and encryptions can be defined. -
Page 51: Setup Network Bonjour
User manual SNC-311RINA, SNC-311RDIA, SNC-311RBIA SNC-311FEIF, SNC-311FBIF 3.4.9 Setup Network Bonjour If Bonjour is enabled and the Bonjour protocol is supported, this device is automatically identified in the network as an IP camera. In the network, the IPC server name connects to the Bonjour protocol. -
Page 52: Setup Network 802.1X
User manual SNC-311RINA, SNC-311RDIA, SNC-311RBIA SNC-311FEIF, SNC-311FBIF Port: Valid ports: 1025 to 65534. Default port for main stream: 40000 Default port for sub stream: 40002 If you change the multicast address or the port, please re-boot the camera. 3.4.11 Setup Network 802.1x... -
Page 53: Setup Network Qos
User manual SNC-311RINA, SNC-311RDIA, SNC-311RBIA SNC-311FEIF, SNC-311FBIF 3.4.12 Setup Network QoS QoS (Quality of Service) allows to transmit packets in the network traffic based on priority. This is particularly important when network congestion occurs. According to the DSCP... -
Page 54: Setup Event
User manual SNC-311RINA, SNC-311RDIA, SNC-311RBIA SNC-311FEIF, SNC-311FBIF 3.5 Setup Event 3.5.1 Setup Event Video detect Here you can define settings for motion detection and tampering detection. Motion detect: Enable this function. Working period: Click on „Setup“. For each day of the week, up to 6 periods can be defined. - Page 55 User manual SNC-311RINA, SNC-311RDIA, SNC-311RBIA SNC-311FEIF, SNC-311FBIF Anti-Dither: The camera can only process one event/alarm at the same time. Here you can define the interval (0-100 seconds) between two events/alarms. Area: You can define up to 4 areas for motion detection. By default, the whole area is activated. If you wish to select only a few areas in the grid, empty the grid by clicking „Remove all“...
- Page 56 User manual SNC-311RINA, SNC-311RDIA, SNC-311RBIA SNC-311FEIF, SNC-311FBIF Send e-mail: If enabled, an e-mail notification is sent to the defined e-mail address(es) in case of a detected motion (see chapter 3.4.6). Snapshot: If enabled, a snapshot is made in case of a detected motion.
-
Page 57: Setup Event Alarm
User manual SNC-311RINA, SNC-311RDIA, SNC-311RBIA SNC-311FEIF, SNC-311FBIF 3.5.2 Setup Event Alarm Note: This function is not available for camera models SNC-311FBIF and SNC-311FEIF. Here you can define the settings for a detected alarm. Please make your settings as described in chapter 3.5.1 for motion detection. -
Page 58: Setup Event Abnormality
User manual SNC-311RINA, SNC-311RDIA, SNC-311RBIA SNC-311FEIF, SNC-311FBIF 3.5.3 Setup Event Abnormality Here you can define alarms for abnormal events. SD card (not available for camera models SNC-311FEIF and SNC-311FBIF): Possible events are: No SD card inserted SD card error Capacity warning Select the desired action and click on „Save“. -
Page 59: Setup Storage
User manual SNC-311RINA, SNC-311RDIA, SNC-311RBIA SNC-311FEIF, SNC-311FBIF 3.6 Setup Storage 3.6.1 Setup Storage Schedule Here you can define the schedule for recordings, snapshots and holidays (i.e. the period where you are absent). Record and snapshot scheduel: Click on „Setup“. For each day of the week, up to 6 periods can be defined. -
Page 60: Setup Storage Destination
User manual SNC-311RINA, SNC-311RDIA, SNC-311RBIA SNC-311FEIF, SNC-311FBIF 3.6.2 Setup Storage Destination Note: The definition of storage paths on this page only applies to recordings/snapshots which are generated by an event or schedule. Settings on this page do not apply to manual recordings/snapshots. - Page 61 User manual SNC-311RINA, SNC-311RDIA, SNC-311RBIA SNC-311FEIF, SNC-311FBIF Local (not available for camera models SNC-311FEIF and SNC-311FBIF): To store recordings/snapshots on the camera’s SD card, make sure that a micro SD card is inserted in the camera. As a next step, it is important to format the SD card. Click on “Format”.
- Page 62 User manual SNC-311RINA, SNC-311RDIA, SNC-311RBIA SNC-311FEIF, SNC-311FBIF NAS: In order to store data on the NAS server, please tick „Enable“. Enter the parameter of the NAS server Note: The box „Enable“ can only be checked if you have selected NAS as storage path on the previous page.
-
Page 63: Setup Storage Record Control
User manual SNC-311RINA, SNC-311RDIA, SNC-311RBIA SNC-311FEIF, SNC-311FBIF 3.6.3 Setup Storage Record control Pack duration: Define the maximum file size on the storage path (5-120 minutes; default = 8 minutes). Pre-event record: The time you have defined here (0-20 seconds; default = 5 seconds) will be the pre-event recording time, thus prior to the event. -
Page 64: Setup System
User manual SNC-311RINA, SNC-311RDIA, SNC-311RBIA SNC-311FEIF, SNC-311FBIF 3.7 Setup System 3.7.1 Setup System General General: You can define a device name, i.e. a camera name. You can select the language (English or German). Alternatively, click on the German/English flag on the top of the screen. -
Page 65: Setup System Default
User manual SNC-311RINA, SNC-311RDIA, SNC-311RBIA SNC-311FEIF, SNC-311FBIF 3.7.3 Setup System Default If you click here, all settings will be restored to default values. 3.7.4 Setup System Import/Export Click on „Import“ to save settings on the camera (e.g. from your computer). -
Page 66: Setup Information
User manual SNC-311RINA, SNC-311RDIA, SNC-311RBIA SNC-311FEIF, SNC-311FBIF 3.8 Setup Information 3.8.1 Setup Information Version Here you find various version numbers. This is for reference only and can not be edited. Here you also find the P2P code which you can scan with your mobile device to access the camera via the App. -
Page 67: Setup Information Log
User manual SNC-311RINA, SNC-311RDIA, SNC-311RBIA SNC-311FEIF, SNC-311FBIF 3.8.2 Einstellungen Information Log The log (history) shows all information regarding users, events, alarms, settings, etc. Select a type you wish to search for: All, system, setting, data, event, recording, account, clear log. -
Page 68: Alarm
User manual SNC-311RINA, SNC-311RDIA, SNC-311RBIA SNC-311FEIF, SNC-311FBIF 4. Alarm Here you can define the parameters for an alarm. Alarm type: Here you can select for which types of events an alarm should be triggered, e.g. motion detection, tampering, illegal access, usw. -
Page 69: Setup Assistance
User manual SNC-311RINA, SNC-311RDIA, SNC-311RBIA SNC-311FEIF, SNC-311FBIF 5. Setup Assistance The Setup Assistance helps you to adjust camera settings quickly and in a convenient way. Here you can adjust the major settings for Main Stream, Sub Stream 1 and Sub Stream 2. -
Page 70: Logout
User manual SNC-311RINA, SNC-311RDIA, SNC-311RBIA SNC-311FEIF, SNC-311FBIF 6. Logout If you want to logoff from the camera, click on „Logout“ and you will be immediately logged off without further prompting. The login page appears and you may logon again if you wish, e.g. - Page 71 User manual SNC-311RINA, SNC-311RDIA, SNC-311RBIA SNC-311FEIF, SNC-311FBIF Notes: _________________________________________________________________________________ - 71 -...
- Page 72 User manual SNC-311RINA, SNC-311RDIA, SNC-311RBIA SNC-311FEIF, SNC-311FBIF Notes: _________________________________________________________________________________ - 72 -...
- Page 73 User manual SNC-311RINA, SNC-311RDIA, SNC-311RBIA SNC-311FEIF, SNC-311FBIF Your local distributor: __________________________________________________________________________ _________________________________________________________________________________ - 73 -...
- Page 74 www.santec-video.com...
Need help?
Do you have a question about the SNC-311RINA and is the answer not in the manual?
Questions and answers