
Related Manuals for Santec SNC-P3601M


Summary of Contents for Santec SNC-P3601M
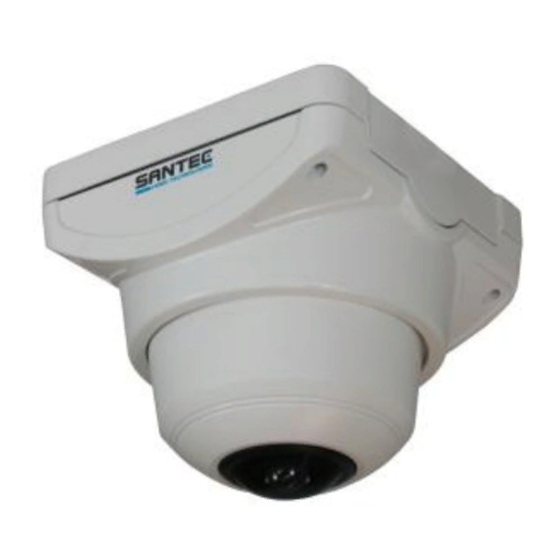
- Page 1 USER MANUAL Panorama IP camera 1.3 MP Model SNC-P3601M Version 1.0m-f/0311/engl/A6...
- Page 2 Please follow all instructions and observe the warnings contained in this manual. Please contact your local dealer or use the SANTEC Service Hotline if you have any questions or if you wish to claim for a service or warranty.
-
Page 3: Table Of Contents
User manual SNC-P3601M Table of contents Safety precautions Safety instructions About this user manual Items included in the delivery 1. Installation 1.1 Lens 1.2 Camera installation 1.3 Power supply 1.4 Camera overview 2. IP settings 3. Web interface 3.1 Calling-up the camera web interface 3.2 Live-view... -
Page 4: Safety Precautions
User manual SNC-P3601M Safety precautions Caution Description of symbols Danger: This symbol is intended to alert the user to the presence of un-insulated "dangerous voltage" within the product’s enclosure that may be of sufficient magnitude to constitute a risk of electric shock to a person. -
Page 5: Safety Instructions
User manual SNC-P3601M Safety instructions Before operating the appliance, please read this manual carefully and retain it for further reference. Before cleaning the appliance, it has to be switched off and unplugged from the power outlet. Wipe the appliance with a soft damp cloth. -
Page 6: About This User Manual
About this user manual This manual aims at assisting the user on how to operate camera SNC-P3601M. This manual is subject to rigid quality control. However, no guarantee can be given that mistakes are not present. We reserve the right to make changes to the manual without prior notice. -
Page 7: Installation
1. Installation (also see the pictures on the following pages) Camera SNC-P3601M is a colour camera with electronic day/night switching and a pre- installed 360° lens. You will find the technical data at the end of the manual. 1.1 Lens This camera is equipped with a pre-installed and pre-set 360°... - Page 8 User manual SNC-P3601M Ensure that the main screw and the focus screw are loose. They have to be loose but don’t need to be taken out completely. Turn the focus ring left or right until the picture is sharp and clear.
-
Page 9: Camera Installation
User manual SNC-P3601M 1.2. Camera installation Make sure to fix the camera onto a solid basis which is capable to carry the weight of the camera. Ensure that the camera is safely installed by using only suitable screws. If the included screws are not suitable, please replace them by other appropriate screws. - Page 10 User manual SNC-P3601M Picture 2: Reset button Reset button Picture 3: Lens adjustment Screws Screws to adjust the position of the elliptical picture _________________________________________________________________________________ - 10 -...
- Page 11 User manual SNC-P3601M Picture 4: Dimensions (mm) Picture 5: Surface mounting Screws for surface mounting _________________________________________________________________________________ - 11 -...
- Page 12 User manual SNC-P3601M Picture 6: Connections Ethernet connection Voltage 12 V DC Audio input/output Alarm input/output _________________________________________________________________________________ - 12 -...
-
Page 13: Ip Settings
User manual SNC-P3601M 2. IP settings The SANTEC IP cameras come with the following default settings: IP-address 192.168.1.168 Subnet mask : 255.255.255.0 Gateway 0.0.0.0 DNS-server 0.0.0.0 User ID admin Password 9999 To retain the default settings, press the reset button. -
Page 14: Web Interface
User manual SNC-P3601M 3. Web interface 3.1. Calling-up the camera web interface Open the Microsoft Internet Explorer and start the connection of the network camera as follows: Click on the URL field. Type in the URL address of the network camera and press the ENTER key. You will then access the web interface of the camera. -
Page 15: Live-View
User manual SNC-P3601M 3.2. Live view Page for camera adjustments Page for Live-View Live-View with 50% resolution Live-View with defined resolution Digital output (relay) on Digital output (relay) off Audio on (camera -> web interface) Audio off (camera -> web interface) Audio on (web interface ->... - Page 16 In order to save a snapshot or a video sequence, select the storage location by using the button. During live mode of the web interface, digital PTZ control is not possible. Please use the SanGuard or NUUO software which you can purchase from SANTEC. _________________________________________________________________________________ - 16 -...
-
Page 17: Setting Overview
User manual SNC-P3601M 3.3. Setting overview _________________________________________________________________________________ - 17 -... -
Page 18: System Settings
User manual SNC-P3601M 3.4. System settings 3.4.1. Time / date Local time: The local time is the one as set in the camera. Desired time: You can change the time which is set in the camera as follows: o Set manually: Select the desired time and date from the drop-down list. -
Page 19: Time Stamp
User manual SNC-P3601M 3.4.2. Time stamp Enable time stamp: The time stamp is displayed. Time stamp position: o UPPER LEFT o UPPER RIGHT o BOTTOM LEFT o BOTTOM RIGHT Time stamp format: o YY/MM/DD o MM/DD/YY o DD/MM/YY o YY/MM/DD TITLE (YY = year, DD = day, MM = month) Submit: Click here to apply the new time stamp settings to the network camera. -
Page 20: Language
User manual SNC-P3601M User list: This list displays the user(s) and their respective authorisations. Delete user: Select a user from the list to be deleted and click this button. User name: Enter the user name here which is to be added or modified. -
Page 21: Update Firmware
User manual SNC-P3601M 3.4.6. Update firmware This page displays information on the installed firmware version and the ActiveX components. Search: Select the firmware file from your PC. Update: Start the update process. Restart: Restart the camera. _________________________________________________________________________________ - 21 -... -
Page 22: Network
User manual SNC-P3601M 3.5 Network 3.5.1 IP-address IP-address: Enter the 4-Byte IP-address (value from 0 to 255). Every network camera has to have its own IP-address which can be identified in the network. Netmask: Enter the 4-Byte subnet-mask (value from 0 to 255). By this, the netmask can be identified in which the network camera is located. -
Page 23: Sntp (Time Server For Time Synchronization)
User manual SNC-P3601M 3.5.2. SNTP (time server for time synchronisation) SNTP server: IP-address of the SNTP server. Can be entered as 4-Byte IP-address or as domain name. Submit: Click here to apply the new network settings to the network camera. -
Page 24: Smtp
User manual SNC-P3601M 3.5.4. SMTP If necessary, enable the option „My server requires authentication”. Account name: Account on e-mail server. Password: Password of account on e-mail server. Sender: This information is displayed as e-mail sender. SMTP server: IP-address of SMTP server. Can be entered as 4-Byte IP-address or as domain name. -
Page 25: Ddns (Dynamic Domain Name System)
User manual SNC-P3601M 3.5.5. DDNS (dynamic domain name system) DDNS host name: IP-address of DDNS server. Can be entered as 4-Byte IP-address or as domain name. DDNS account: Account on DDNS server. DDNS password: Password of account on e-mail server. -
Page 26: Video Settings
User manual SNC-P3601M 3.6 Video settings 3.6.1 Encoding Stream type: Adjustment of video streaming mode o Single o Dual o Triple Video codec: Adjustment of encoding procedure o Stream type: single: H.264 MPEG4 o Stream type: dual ... - Page 27 User manual SNC-P3601M Stream type Video codec Resolution 1280x1024 1280x960 H.264 1280x720 720x480 640x480 Single 1280x1024 1280x960 MPEG4 1280x720 720x480 640x480 1280x720 + 640x352 H.264 + JPEG 640x480 + 640x480 1280x720 + 640x352 MPEG4 + JPEG 640x480 + 640x480 1280x720 + 390x192 Dual H.264...
-
Page 28: Camera Settings
User manual SNC-P3601M 3.6.2 Camera settings On this page, you can change the following picture settings: o Sens up: OFF / ON o Day and night: AUTO / B/W / COLOR o White balance: AUTO / SUNNY / SHADOW / INDOOR / LAMP... -
Page 29: Audio Settings
User manual SNC-P3601M 3.7. Audio settings Audio: Set the audio mode to: o OFF: audio is turned off o one-way: audio only from camera to PC o two-way: audio in both directions Audio out volume: 0 - 4 Submit: Click here to save the new audio settings. -
Page 30: Extended Settings
User manual SNC-P3601M 3.8. Extended settings 3.8.1. Motion detection Motion detection: Activation/deactivation of motion detection Sensitivity: Set the sensitivity level of the motion detection o Lowest o Low o Medium o High o Highest CCD reference: CCD reference (20 - 50) Motion detection mask: Click on the picture to set or to delete an element of the motion detection mask. -
Page 31: Alarm Settings
User manual SNC-P3601M 3.8.2. Alarm settings Alarm in (sensor): Activate/deactivate the alarm input o Active type “low”: This means 0 V. The camera will trigger an alarm if the alarm input has 0 V. To achieve 0 V at the alarm input, the contacts are closed. -
Page 32: Sd-Card
User manual SNC-P3601M 3.8.3. SD-card 3.8.3.1 SD-card settings SD-card enable: Activate/deactivate the SD-card. SD-card rewrite: Activate/deactivate the rewriting of the SD-card. Format: The SD-card is being formatted. Submit: Click here to save the new SD-card settings. 3.8.3.2 SD-card content This page displays the content of the SD-card. -
Page 33: Recording
User manual SNC-P3601M 3.8.4. Recording 3.8.4.1 Recording settings On this page you can set the recording modes: o Schedule record – upload via FTP o Schedule record – save into SD-card o Alarm record – upload via FTP o Alarm record – save into SD-card o Alarm record –... -
Page 34: Recording Schedules
User manual SNC-P3601M 3.8.4.2 Recording schedules You can set up to 7 schedules in the camera. Submit: Click here to save the new schedule settings. Remove all schedules: All existing schedules are deleted. _________________________________________________________________________________ - 34 -... -
Page 35: Technical Specifications
User manual SNC-P3601M 4. Technical specifications Camera SNC-P3601M colour dome camera Sensor 1/3" 1.3 MP Sony Progressive Scan CMOS Resolution (pixel) 1.3 MP (1280 x 1024) Max. frame rate (fps) 25 at 1.3 MP (1280 x 1024) Compression (video) MJPEG / MPEG-4 / H.264... - Page 36 Your local distributor: __________________________________________________________________________ www.santec-video.com...
Need help?
Do you have a question about the SNC-P3601M and is the answer not in the manual?
Questions and answers