
Related Manuals for Santec SNC-670ID


Summary of Contents for Santec SNC-670ID
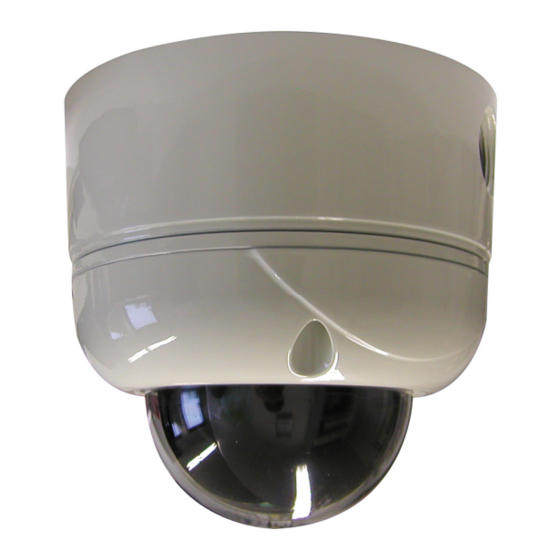
- Page 1 USER MANUAL IP day/night PTZ camera in weather-proof housing Model SNC-670ID/W Version 1.1 /0910/engl/A6...
- Page 2 Please follow all instructions and observe the warnings contained in this manual. Please contact your local dealer or use the SANTEC Service Hotline if you have any questions or if you wish to claim for a service or warranty.
-
Page 3: Table Of Contents
User manual SNC-670ID/W Table of contents Safety precautions Safety instructions About this user manual Items included in the delivery 1. Installation 1.1 Camera overview 1.2 Connections 1.3 How to open the housing 1.4 Connections for power supply and video 1.5 DIP-switch settings 1.6 Reset the camera to default settings... - Page 4 User manual SNC-670ID/W 4.5 Network 4.5.1 IP-address 4.5.2 SNTP (time server for time synchronisation) 4.5.3 FTP 4.5.4 SMTP 4.5.5 DDNS (dynamic domain name system) 4.5.6 Event protocol 4.6 Video settings 4.6.1 Encoding 4.6.2 Camera settings 4.7 Audio settings 4.8 Extended settings 4.8.1 Motion detection...
-
Page 5: Safety Precautions
User manual SNC-670ID/W Safety precautions Caution Description of symbols Danger: This symbol is intended to alert the user to the presence of un-insulated "dangerous voltage" within the product’s enclosure that may be of sufficient magnitude to constitute a risk of electric shock to a person. -
Page 6: Safety Instructions
User manual SNC-670ID/W Safety instructions Before operating the appliance, please read this manual carefully and retain it for further reference. Before cleaning the appliance, it has to be switched off and unplugged from the power outlet. Wipe the appliance with a soft damp cloth. -
Page 7: About This User Manual
About this user manual This manual aims at assisting the user on how to operate camera SNC-670ID/W. This manual is subject to rigid quality control. However, no guarantee can be given that mistakes are not present. We reserve the right to make changes to the manual without prior notice. -
Page 8: Installation
User manual SNC-670ID/W 1. Installation (also see the pictures on the following pages) This camera is a PTZ camera in a vandal-proof housing, class IP-66. You will find the technical data at the end of the manual. 1.1. Camera overview 1. - Page 9 User manual SNC-670ID/W Audio input/output Alarm input/output _________________________________________________________________________________ - 9 -...
-
Page 10: How To Open The Housing
User manual SNC-670ID/W 1.3. How to open the housing Open the housing by carefully loosening the housing’s screws. Pull off the housing module from the camera module. Make sure not to damage the rubber gasket. Improper handling of the appliance will invalidate the warranty. -
Page 11: Dip-Switch Settings
User manual SNC-670ID/W 1.5. DIP-switch settings By default, the DIP-switch settings are as follows: Protocol By default, the following settings apply: ID: 01 Baud rate: 9600 Protocol: Pelco D These settings of the analogue camera module must not be changed because they are aligned with the RS-485 settings of the IP camera module. -
Page 12: External Rs-485 Connection
User manual SNC-670ID/W 1.7. External RS-485 connection PTZ camera control can also be done by the RS-485 interface. Please note the following: The DIP-switch SM10 is used for 100 Ohm. DIP-switch SW10 must only be used for the last camera at the bus (even if only one camera is used). -
Page 13: Dimensions
User manual SNC-670ID/W 1.9. Dimensions 1.10. PTZ control via Pelco D protocol Command Description Function 1 - 64, 100-200 +Preset Presets Execute preset 1 – 165 65 + Preset Preset status Preset status display 66 +Preset Autoscans Execute autoscan 1 – 8... -
Page 14: Diagnosis
User manual SNC-670ID/W 1.11. Diagnosis When the camera is switched on, the DIAGNOSIS menu appears. The following notification is displayed: CAMERA ID : 001 PAN ORIGIN BAUD RATE : 2400 BPS TILT ORIGIN TX CONNECTION TEST OK WAITING……… CAMERA COMM... -
Page 15: Adjustment Of Analogue Camera Module
User manual SNC-670ID/W 1.12. Adjustment of analogue camera module The camera adjustments of the analogue camera module are done by an OSD (on-screen display) menu. Follow the instructions in chapter „OSD menu“ for more detailed information. The OSD menu can be displayed by using the web interface of the camera on the page „live view“. -
Page 16: Osd Menu
User manual SNC-670ID/W 2. OSD menu 2.1. Overview _________________________________________________________________________________ - 16 -... -
Page 17: Dome: Ptz Adjustment
User manual SNC-670ID/W Main menu: MAIN MENU DOME SETUP CAMERA SET AUTO SCAN TOUR PRAVACY PATTERN ALARM SECTOR EXIT Use the up/down arrows to go the desired position. Use the left/right arrows to confirm your choice. 2.2. Dome: PTZ adjustments... - Page 18 User manual SNC-670ID/W DOME-SETUP -> RECOVER: The camera is able to return to those previous settings which were used before you operated the camera manually (auto scan, group tour, preset, pattern or sectors). After the set time, the camera goes into operation again in case it has been switched off. The recovery time can vary between 15 –...
- Page 19 User manual SNC-670ID/W DOME-SETUP -> PASSWORD: Use the left/right arrows to enter the password on this page. The password has to contain numbers from 001 to 255. The default password is 99. ENTER PASSWORD BY ENTERING PRESET CODE PASSWORD *** CONFIRM In the password field, enter a number from 001-255 using the PRESET button.
- Page 20 User manual SNC-670ID/W DOME-SETUP -> OSD DISPLAY: Camera information is displayed. SYSTEM STATUS PROTOCOL : PELCO D, P BAUD RATE : 9600 BPS FIRMWARE VER. : 2.01 Default setting UPGRADED DATE : 24.01.08 CAMERA MODULE : SDM100 [PREVIOUS PAGE] ...
-
Page 21: Camera Adjustments
User manual SNC-670ID/W LOAD OPTIMIZED DEFAULT ALL DATA INITIALIZING ARE YOU SURE? YES NO To delete the data, select YES and press FOCUS -. The screen displays„ALL DATA INITIALIZING“ for 5-7 seconds. The previous menu page is displayed automatically. DOME-SETUP -> SAVE AND EXIT: Data is saved and the page is exited. - Page 22 User manual SNC-670ID/W CAMERA SET -> APERTURE: This function enables to show details and to emphasise picture borders. The granularity is increased. The default setting is 10 (the aperture can be set from 0-15). CAMERA SET -> D ZOOM: Switches on the 10x digital zoom.
-
Page 23: Preset
User manual SNC-670ID/W 2.4. Preset PRESET SET PRESET NO :001 PRESET ID :PRESET001------- Default setting PAN :XXX.XX TILT : XXX.XX SAVE EXIT PRESET -> PRESET NO: There are 165 preset numbers available. Use the left/right arrows to select a preset number. -
Page 24: Auto Scan
User manual SNC-670ID/W 2.5. Auto scan AUTO SCAN SET START ANGLE : XXX.X.XX.X END ANGLE : XXX.X.XX.X DIRECTION : CW ENDLES : OFF Default setting SPEED : 20 °/S DWELL TIME : 03 SAVE AND EXIT EXIT AUTO SCAN -> START ANGLE: Press FOCUS + to select a start position. -
Page 25: Tour
User manual SNC-670ID/W 2.6. Tour There are 8 programmable tours available. Each tour can contain up to 60 preset positions. TOUR SET TOUR NO : 01 TOUR TITLE : TOUR01□□□□□□□□□□ Default setting TOUR STEP : 01 PRESET NO. : 001... -
Page 26: Privacy Zones
User manual SNC-670ID/W 2.7. Privacy zones The camera contains 4 privacy zones which can be used to hide certain areas. PRIVACY SET PRIVACY NO : 01 DISPLAY : OFF Default setting ACTION : MOVE SAVE EXIT PRIVACY -> PRIVACY NO: There are 4 privacy zones available. -
Page 27: Patterns
User manual SNC-670ID/W 2.8. Patterns There are 8 programmable patterns available. PATTERN SET Default setting PATT NO : 01 PATT TITLE: PATTERN01□□□□□□□ DATA FILL : 100% SAVE EXIT PATTERN -> PATT NO: There are 8 patterns available. Use the left/right arrows to select a pattern number. -
Page 28: Alarm
User manual SNC-670ID/W 2.9. Alarm The camera has 4 analogue alarm inputs which can be connected with presets, tours and patterns. ALARM SET ALARM NO : 01 Default setting ALARM INPUT : OFF ALARM ACT : 001 SAVE EXIT ALARM -> ALARM NO: There are 4 alarm inputs available. -
Page 29: Sector
User manual SNC-670ID/W 2.10. Sector SECTOR SET Start Position SECTOR NO : 01 SECTOR ID : SECTOR1 SECTOR START : XXX.X.XX.X SECTOR END : XXX.X.XX.X End Position SAVE EXIT Default setting SECTOR -> SECTOR NO: There are 8 sectors available. Use the left/right arrows to select a sector number. -
Page 30: Ip Settings
User manual SNC-670ID/W 3. IP settings The SANTEC IP cameras come with the following default settings: IP-address 192.168.1.168 Subnet mask : 255.255.255.0 Gateway 0.0.0.0 DNS-server 0.0.0.0 User ID admin Password 9999 To retain the default settings, press the reset button. - Page 31 User manual SNC-670ID/W c. SanView software Every SANTEC IP camera comes with the SanView-Lite software. In order to change the network settings, open the device adjustment page via the context menu (also see brief instructions on SanView software). You will find the respective control elements on the network parameter tab. To copy the parameters, click on Apply.
-
Page 32: Web Interface
User manual SNC-670ID/W 4. Web interface 4.1. Calling-up the camera web interface Open the Microsoft Internet Explorer and start the connection of the network camera as follows: Click on the URL field. Type in the URL address of the network camera and press the ENTER key. You will then access the web interface of the camera. -
Page 33: Live-View
User manual SNC-670ID/W 4.2. Live-View Page for camera adjustments Page for Live-View Live-View with 50% resolution Live-View with defined resolution PTZ-control: tilt confirmation/ OSD menu PTZ speed: S = slow, F = fast Zoom in Zoom out... - Page 34 User manual SNC-670ID/W Start autoscan Digital output (relay) on Digital output (relay) off Audio on (camera -> web interface) Audio off (camera -> web interface) Audio on (web interface -> camera) Audio off (web interface -> camera) Storage location for snapshots and video sequences...
-
Page 35: Setting Overview
User manual SNC-670ID/W 4.3. Setting overview _________________________________________________________________________________ - 35 -... -
Page 36: System Settings
User manual SNC-670ID/W 4.4. System settings 4.4.1. Time / date Local time: The local time is the one as set in the camera. Desired time: You can change the time which is set in the camera as follows: o Set manually: Select the desired time and date from the drop-down list. -
Page 37: Time Stamp
User manual SNC-670ID/W 4.4.2. Time stamp Enable time stamp: The time stamp is displayed. Time stamp position: o UPPER LEFT o UPPER RIGHT o BOTTOM LEFT o BOTTOM RIGHT Time stamp format: o YY/MM/DD o MM/DD/YY o DD/MM/YY... -
Page 38: Language
User manual SNC-670ID/W User list: This list displays the user(s) and their respective authorisations. Delete user: Select a user from the list to be deleted and click this button. User name: Enter the user name here which is to be added or modified. -
Page 39: Rs-485 Settings
User manual SNC-670ID/W 4.4.5. RS-485 settings The RS-485 settings define the communication via the RS-485 interface between the camera IP module and the camera PTZ module. Baud rate: o 2400 o 4800 o 9600 o 19200 o 38400 o 57600 o 115200 ... -
Page 40: Ptz Settings
User manual SNC-670ID/W 4.4.6. PTZ settings PTZ-control: tilt PTZ speed: S = slow, F = fast Zoom in Zoom out Focus close Focus far Select preset number Save preset position Go to preset position _________________________________________________________________________________ - 40 -... -
Page 41: Camera Name
User manual SNC-670ID/W 4.4.7. Camera name Camera name: Enter the name/title of the camera. Submit: Click here to apply the new camera name to the network camera. 4.4.8. Update firmware This page displays information on the installed firmware version and the ActiveX components. -
Page 42: Network
User manual SNC-670ID/W 4.5 Network 4.5.1 IP-address IP-address: Enter the 4-Byte IP-address (value from 0 to 255). Every network camera has to have its own IP-address which can be identified in the network. Netmask: Enter the 4-Byte subnet-mask (value from 0 to 255). By this, the netmask can be identified in which the network camera is located. -
Page 43: Sntp (Time Server For Time Synchronisation)
User manual SNC-670ID/W 4.5.2. SNTP (time server for time synchronisation) SNTP server: IP-address of the SNTP server. Can be entered as 4-Byte IP-address or as domain name. Submit: Click here to apply the new network settings to the network camera. -
Page 44: Smtp
User manual SNC-670ID/W 4.5.4. SMTP If necessary, enable the option „My server requires authentication”. Account name: Account on e-mail server. Password: Password of account on e-mail server. Sender: This information is displayed as e-mail sender. SMTP server: IP-address of SMTP server. Can be entered as 4-Byte IP-address or as domain name. -
Page 45: Ddns (Dynamic Domain Name System)
User manual SNC-670ID/W 4.5.5. DDNS (dynamic domain name system) DDNS host name: IP-address of DDNS server. Can be entered as 4-Byte IP-address or as domain name. DDNS account: Account on DDNS server. DDNS password: Password of account on e-mail server. -
Page 46: Video Settings
User manual SNC-670ID/W 4.6 Video settings 4.6.1 Encoding Compression: Setting of the video streaming mode o Single MPEG4 o MPEG4 Half D1 o MPEG4 + MPEG4 o MPEG4 + JPEG: Pre-set mode. This mode is used in the SanView software. -
Page 47: Camera Settings
User manual SNC-670ID/W MPEG4_1 setting o Bit rate: 200 - 4000 Kbit/sec o Bild rate: 25 / 13 / 6 / 3 fps MPEG4_2 setting o Bitrate: 200 - 4000 Kbit/sec o Bildrate: 25 / 13 / 6 / 3 fps ... -
Page 48: Audio Settings
User manual SNC-670ID/W 4.7. Audio settings Audio: Set the audio mode to: o OFF: audio is turned off o one-way: audio only from camera to PC o two-way: audio in both directions Audio out volume: 0 - 4 ... -
Page 49: Extended Settings
User manual SNC-670ID/W 4.8. Extended settings 4.8.1. Motion detection Motion detection: Activation/deactivation of motion detection Sensitivity: Set the sensitivity level of the motion detection o Lowest o Low o Medium o High o Highest CCD reference: CCD reference (20 - 50) ... -
Page 50: Alarm Settings
User manual SNC-670ID/W 4.8.2. Alarm settings Alarm in (sensor): Activate/deactivate the alarm input o Active type “low”: This means 0 V. The camera will trigger an alarm if the alarm input has 0 V. To achieve 0 V at the alarm input, the contacts are closed. -
Page 51: Sd-Card
User manual SNC-670ID/W 4.8.3. SD-card 4.8.3.1 SD-card settings SD-card enable: Activate/deactivate the SD-card. SD-card rewrite: Activate/deactivate the rewriting of the SD-card. Format: The SD-card is being formatted. Submit: Click here to save the new SD-card settings. -
Page 52: Recording
User manual SNC-670ID/W 4.8.4. Recording 4.8.4.1 Recording settings On this page you can set the recording modes: o Schedule record – upload via FTP o Schedule record – save into SD-card o Alarm record – upload via FTP o Alarm record – save into SD-card o Alarm record –... -
Page 53: Recording Schedules
User manual SNC-670ID/W 4.8.4.2 Recording schedules You can set up to 7 schedules in the camera. Submit: Click here to save the new schedule settings. Remove all schedules: All existing schedules are deleted. _________________________________________________________________________________ - 53 -... -
Page 54: Technical Specifications
User manual SNC-670ID/W 5. Technical specifications Camera SNC-670ID/W Camera type Day/night IP PTZ camera Housing Weather-proof, IP-66 Sensor 1/4" Sony Super HAD CCD 540 TVL Day/night adjustment mode Auto, colour, black/white IR cut filter Mechanic, automatically operated Lens Motor zoom, 3.8-38.0 mm, DC-controlled min. - Page 55 User manual SNC-670ID/W NOTES: _________________________________________________________________________________ - 55 -...
- Page 56 Your local distributor: __________________________________________________________________________ www.santec-video.com...
Need help?
Do you have a question about the SNC-670ID and is the answer not in the manual?
Questions and answers