Table of Contents
Advertisement
Quick Links
Advertisement
Table of Contents

Related Manuals for Zebex Z-608


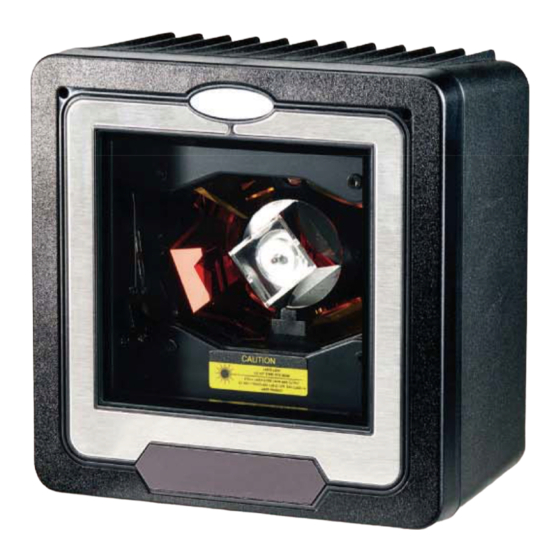
Summary of Contents for Zebex Z-608
-
Page 2: Revision History
Important Notice No warranty of any kind is made in regard to this material, including, but not limited to, implied warranties of merchantability or fitness for a particular purpose. We are not liable for any errors contained herein or incidental or consequential damages in connection with furnishing, performance or use of this material. - Page 3 Laser Safety The Miniature Dual-Laser Omnidirectional Hands-free Scanner complies with safety standard IEC 60825 for a Class I laser product. It also complies with CDRH as applicable to a Class IIa laser product. Avoid long term staring into direct laser light. Radiant Energy: The Miniature Dual-Laser Omnidirectional Hands-free Scanner uses two low-power visible laser diodes operating at 650nm in an opto-mechanical scanner resulting in less than 3.9μW radiated power as observed through a 7mm aperture and averaged over 10 seconds.
-
Page 4: Table Of Contents
Table of Contents Important Notice ..........................i Introduction ............................1 Unpacking ..........................1 Finding Your Way Around........................2 Connecting and Mounting ......................2 Power ........................2 Verifying Scanner Operation ................3 Mounting......................4 Mounting Plate Installation.................5 Auxiliary Handheld Scanner Connection (optional) ..........6 Back Mounting ....................7 Connecting to the Host ..................7 Setting Up the Scanner........................8 Scan Test............................8 Set Up........................8... -
Page 5: Introduction
’ ANUAL Introduction This advanced scanner is a proud to be among the world's first dual-laser presentation scanners, and it incorporates numerous record-breaking features. Its pioneering application of dual laser diodes drastically enhances scanning power by doubling the scan lines, broadening scan angle and intensifying the scan pattern across the scan field. -
Page 6: Finding Your Way Around
’ ANUAL Finding Your Way Around Connecting and Mounting Power The scanner requires a minimum of 300mA at 5 V DC power. The interface cable that comes with the scanner supports both direct power (where the scanner takes power from the host machine) and external power (that's what the sup- plied power adapter is for). -
Page 7: Verifying Scanner Operation
’ ANUAL Unless you are sure your POS system can handle the load, it is recommended that you use the supplied power adapter. When an external adapter is connected, the scan- ner does not take power from the host. The scanner turns on when power is supplied, and turns off when power is removed. There is no on/off switch on the scanner itself. -
Page 8: Mounting
’ ANUAL Insert the 8-pin modular plug of the power link cable into the “host” connector in the back of the scanner until a firm click is heard. Plug the power adapter into the jack on the power link cable. (See page 2 Figure) Plug the AC end of the power adapter into an AC outlet. -
Page 9: Mounting Plate Installation
’ ANUAL Mounting Plate Installation Position the mounting plate in the desired location and secure it in place. If desired, use the full-size boring template in page 21 Figure. Insert the connecting cable in the slot in the mounting plate. 3. -
Page 10: Auxiliary Handheld Scanner Connection (Optional)
’ ANUAL 4. Move the scanner into position on the mounting plate, engaging the tab on the underside. Be careful not to pinch the cable. Install Scanner on Mounting Plate Replace the mounting plate screws. Auxiliary Handheld Scanner Connection (optional) The scanner supports the operation of an auxiliary handheld scanner, which may be connected via a 10-pin RS-232 modular plug to the connector marked “aux”... -
Page 11: Back Mounting
’ ANUAL 2. Insert the 8-pin modular plug of the power link cable into the “host” connector in the back of the scanner until a firm click is heard. 3. Insert the auxiliary cable connector into the 10-pin “aux” jack until it clicks and route the cable through the space above the scanner interface cable. -
Page 12: Setting Up The Scanner
’ ANUAL Setting Up the Scanner In some cases no setup is required. The scanner is either pre programmed to suit the situation, or it auto detects and is ready to go. In other cases the scan- ner must be informed about what kind of system it is connected to. -
Page 13: Operation
’ ANUAL Operation The scanner can read barcodes in either sweep or presentation mode to accommodate different requirements. Sweep mode means moving items through the scan volume. Left to right, right to left, top to bottom, bottom to top, etc. are all okay. This scanner is truly omnidirectional. -
Page 14: Beeps
’ ANUAL Beeps A beeper gives audible feedback on scanner operation. Beeps Indication One beep A barcode has been successfully decoded. Four beeps in series This indicates the scanner passed the power on self-test and is operating properly. Two beeps: low-high scanner entered programming mode. -
Page 15: Sleep Mode
’ ANUAL Sleep Mode After the scanner has been inactive for a period of time, the laser automatically turns off; after some more time, the motor turns off and the scanner enters “sleep mode,” indicated by the blue status LED blinking once a second. To wake up the unit, simply present an object close to the scanner window, or press the push button. -
Page 16: Connecting To Eas System (Optional)
’ ANUAL Connecting to EAS System (Optional) To install an EAS, the deactivator must be equipped with EAS connector. Make sure that the power of the EAS system is off. D emagnetizing coil can be installed around the scan window. Please see your EAS User’s Manual or contact the manufacturer for assistance. -
Page 17: Maintaining The Scanner
’ ANUAL Maintaining the Scanner The scanner is designed for long-term trouble-free operation and rarely needs any maintenance. Only an occasional cleaning of the scanner window is necessary in order to remove dirt and fingerprints. Cleaning the Scan Window Wipe the scan window with a soft lint-free cloth and a non-abrasive cleaner to avoid scratching. -
Page 18: Specifications
’ ANUAL Specifications OPERATIONAL Light Source Dual 650nm visible laser diodes Depth of Scan Field 0-216mm Width of Scan Field 90mm @ contact, 218mm @ 216mm Number of Scan Lines Scan Pattern 8-direction scan field Scan Speed 2400 scans per second Minimum Bar Width 5mil @ PCS 90% Print Contrast... - Page 19 ’ ANUAL POWER Input Voltage 5VDC±10% Power 1.5 watts Operating Current 300mA @ 5 V Laser Class CDRH: Class II a; IEC 60825-1: Class I CE & FCC DOC compliance ENVIRONMENT Operating Temperature 0°C - 40°C Storage Temperature -20°C - 60°C Humidity 5% - 95% RH (non-condensing) Light Level...
-
Page 20: Dimension
’ ANUAL Dimension Dimension Dual-Laser Omnidirectional Vertical Scanner... - Page 21 ’ ANUAL Scan Field Dual-Laser Omnidirectional Vertical Scanner...
-
Page 22: Pin Assignments
’ ANUAL Pin Assignments Connecting Ports HOST Port Connector Type Keyboard Wedge RS-232C DC + 5 V input Keyboard Clock N.C. PC Clock RTS_CMOS Ground N.C. TXD_CMOS N.C. RXD_CMOS Keyboard Data N.C. PC Data CTS_CMOS AUX Port Function +5 V out. 150mA max. RTS_Out Ground TXD_Out... -
Page 23: Troubleshooting
’ ANUAL Troubleshooting Problem Diagnostic Tips The scanner is on but cannot The scanner window is dirty. Clean the scan- ner read barcodes. The LED stays window as described in the Maintenance blue. section. The presented barcode type is not enabled. Use the Programming Guide to tell the scan- ner to accept that type of barcode. - Page 24 ’ ANUAL Problem Diagnostic Tips A barcode is read by the The communication cable is not connected to the scanner but not accepted by correct port of your POS system. Refer to the the POS system. manual of your POS system to locate the serial port.
- Page 25 ’ ANUAL Mounting Plate Boring Template Dual-Laser Omnidirectional Vertical Scanner...
Need help?
Do you have a question about the Z-608 and is the answer not in the manual?
Questions and answers