
Subscribe to Our Youtube Channel
Related Manuals for Spirit 16117680US


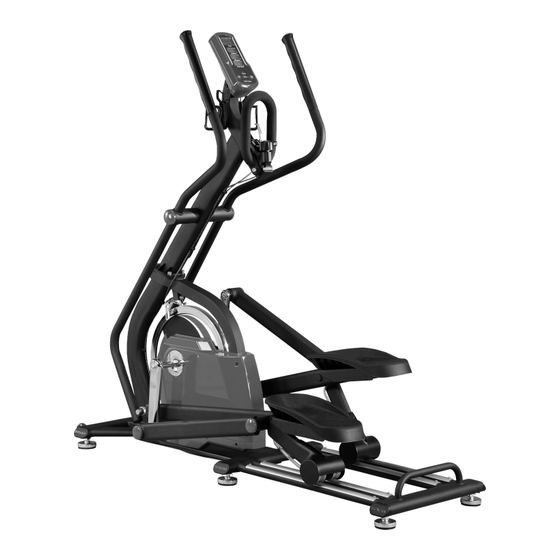
Summary of Contents for Spirit 16117680US
- Page 1 OWNER’S MANUAL MODEL NO. 16117680US Assembly Operation Trouble –Shooting Parts Warranty CAUTION: You must read and understand this owner’s manual before operating unit.
-
Page 2: Table Of Contents
Manufacture’s Limited Warranty Dyaco Canada Inc. warrants all it’s home use e-glide parts for a period of time listed below, from the Dyaco date of retail sale, as determined by a sales receipt or in the absence of a sales receipt. Canada Inc.’s Dyaco Canada Inc.’s responsibilities include providing new or remanufactured parts, at... -
Page 3: Safety Precautions
SAFETY PRECAUTIONS Thank you for purchasing our product. Even though we go to great efforts to ensure the quality of each product we produce, occasional errors and/or omissions do occur. In any event should you find this product to have either a defective or a missing part please contact us for a replacement. -
Page 4: Important Operation Instructions
Important Operation Instructions ● NEVER operate this e-glide without reading and completely understanding the results of any operational change you request from the computer. ● Understand that changes in resistance do not occur immediately. Set your desired level on the computer console and release the adjustment key. The computer will obey the command gradually. -
Page 5: Hardware List
HARDWARE LIST Step1 #58. M10 x 20mm #65. M10 Stainless Steel Bolt(x4) Split Washer (x8) #129. M10 x 1.5 - 25mm Stainless Steel Bolt(x4) Step2 #58. M10 x 20mm #32. Cup washer (x2) Stainless Steel Bolt (x2) #59. M5 x 10mm Phillips Head Screw (x12) CUSTOMER SERVICE 1-888-707-1880 Dyaco Canada Inc. - Page 6 Step3 #45. 5/16” x7T #44 . 5/16” x 1-3/4” Nylon Nut (X2) Button Head Socket Bolt(X2) #59. M5 x 10mm Phillips Head Screw(X8) Step4 #74. M10 x 38mm #110. M10 x 8T Shoulder Bolt(X2) Nylon Nut (X2) CUSTOMER SERVICE 1-888-707-1880 Dyaco Canada Inc.
- Page 7 Tools #117. 17mm Wrench(X1) #115. Phillips Head #116. 8mm Allen Screw Driver (X1) Wrench(X1) #120. 13m/m_ #118. 12mm Allen #119. 5mm Allen (X1) Wrench Wrench(X1) Wrench(X1) CUSTOMER SERVICE 1-888-707-1880 Dyaco Canada Inc. ©2013...
- Page 8 STEP 1: CONSOLE MAST • The tension adjustment cable and speed sensor wire are pre-installed to the console mast and main frame so be careful not to pull too hard on the console mast during assembly to avoid damaging them. Connect the two speed sensor wires together. •...
- Page 9 STEP 2: SWING ARMS & PEDALS • Slide the two swing arms (9 &10) onto the console mast axle. There is a left and right swing arm so make sure you assemble the correct one on each side. Do not force the arms onto the axle or use a hammer as damage to the bearings could occur.
- Page 10 STEP 3: CONSOLE • Assemble the transport wheels (79) with the two 5/16” x 1-3/4” bolts (44) and 5/16” nuts (45) • Unpack the console and install the 3 AA batteries. Connect the speed sensor wire into the white two pin connector accessed through the opening in the back of the console. Mount the console onto the console mast plate and secure with four M5 x 10mm phillips head screws (59).
- Page 11 STEP 4: SWING ARMS • Assemble the bracket at the bottom of the swing arms to the rod ends on the pedal arms using the M10 x 38mm shoulder bolts (74) and the M10 nuts (110). Tighten securely. CUSTOMER SERVICE 1-888-707-1880 Dyaco Canada Inc.
- Page 12 STEP 5: LEVELERS & END CAPS • Tilt the e-glide to one side and put something under the unit for support and install the three levelers (40) for that side. Tilt the unit to the other side and install those three levelers (40).
-
Page 13: Console Operation
CONSOLE OPERATION Power The power for the console is provided by 3 AA alkaline batteries (provided) and will operate on rechargeable NiCd AA batteries. Once the batteries are installed the console will power on, the Time window will display an hour meter reading, the Distance window will display an odometer reading and the RPM/Cadence window will display the software version. - Page 14 Display Time: Displays workout time two ways; either count up (accumulated time) or count down (remaining time), depending on your preference selected before starting the timer. Speed/Cadence/ RPM: Displays the current pedaling speed as revolutions per minute. Displays Speed in mph or kph, depending on setting, when the Display key is pressed. Distance/Calories: Displays virtual distance traveled in miles or kilometers (units selected through management mode, see page 13 for details).
- Page 15 Features This all new product from Spirit is a next generation e-glide machine specially designed for use with group exercise workouts or for serious training at home. Here are the top reasons why we believe the Spirit group exercise e-glide is among the best e-glide machines available, for everyone: •...
-
Page 16: Parts List
PARTS LIST KEY NO. PART NO. DESCRIPTION Q'TY 1768001 Main Frame 1768002 Console Mast 1768003 Handlebar Assembly 1768004 Sliding Pedal Arm (R) 1768005 Sliding Pedal Arm (L) 1768006 Connecting Pedal Arm (R) 1768007 Connecting Pedal Arm (L) 1768008 Main Crank Axle 1768009 Swing Arm (R) 1768010... - Page 17 KEY NO. PART NO. DESCRIPTION Q'TY 1768053 Socket Head Cap Bolt M8 x 1.25 - 12mm 1768054 Socket Head Cap Bolt M8 x 1.25 - 15mm 1768056 Socket Head Cap Bolt M8 x 1.25 - 35mm 1768057 Socket Head Cap Bolt M8 x 1.25 - 70mm 1768058 Socket Head Cap Bolt M10 x 1.5 - 20mm (Stainless steel) 1768059...
- Page 18 KEY NO. PART NO. DESCRIPTION Q'TY 17680101 Emergency Brake Cable 17680102 Sliding Wheel (PU 72mm dia ) 17680103 Brake Return Spring (52 x 3.5 x 50L) 17680104 Brake Magnet N35 ( 25 x 10L ) 17680105 Sweat Tube Retainers 17680106 Ø1/4 × 1.5-450m/m_Drainage Tube, PVC 17680110 Nyloc Nut M10 - 8t 17680111 Tapping Screw M4 x 12mm, Black 17680113 Ø5 ×...
- Page 19 CUSTOMER SERVICE 1-888-707-1880 Dyaco Canada Inc. ©2013...
-
Page 20: Maintenance
MAINTENANCE The E-glide is practically maintenance free. Just keep it clean by wiping down the unit with a damp cloth after each use. Do not use harsh detergents. Every month check that all the hardware is securely tightened. Do not use the e-glide if any parts are loose or broken. The wheels and aluminum tracks will need to be kept clean to prevent noise and maintain smoothness. -
Page 21: Training Guideline
TRAINING GUIDELINES Exercise Exercise is one of the most important factors in the overall health of an individual. Listed among its benefits are: Increased capacity for physical work (strength endurance) Increased cardiovascular (heart and arteries/veins) and respiratory efficiency Decreased risk of coronary heart disease Changes in body metabolism, e.g. - Page 22 Working through your program and gradually increasing the overload factor is important. Specificity Different forms of exercise produce different results. The type of exercise that is carried out is specific both to the muscle groups being used and to the energy source involved. There is little transfer of the effects of exercise, i.e.
- Page 23 Don’t push yourself too hard to reach the figures on this table. It can be very uncomfortable if you overdo it. Let it happen naturally as you work through your program. Remember, the target is a guide, not a rule, a little above or below is just fine.
-
Page 24: Stretching
STRETCHING Stretching should be included in both your warm up and cool down, and should be performed after 3-5 minutes of low intensity aerobic activity or callisthenic type exercise. Movements should be performed slowly and smoothly, with no bouncing or jerking. Move into the stretch until slight tension, not pain, is felt in the muscle and hold for 20-30 seconds. - Page 25 CUSTOMER SERVICE 1-888-707-1880 Dyaco Canada Inc. ©2013...
Need help?
Do you have a question about the 16117680US and is the answer not in the manual?
Questions and answers