
Related Manuals for Spirit XE 100


Summary of Contents for Spirit XE 100
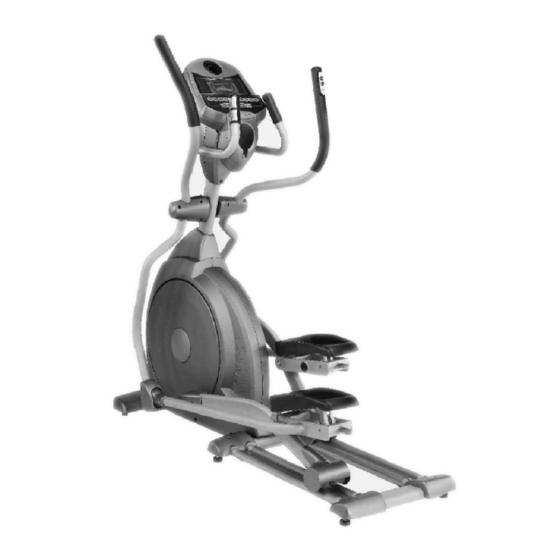
- Page 1 Z100 / Z300 Z500 Z700 XE 100 XE 200 XE 300 Elliptical Elliptical Elliptical OWNER’S MANUAL PLEASE CAREFULLY READ THIS ENTIRE MANUAL BEFORE OPERATING YOUR NEW ELLIPTICAL!
-
Page 2: Table Of Contents
Table of Contents Product Registration Important Safety Instructions Important Electrical Information Important Operation Instructions Assembly Instructions Features Operation of Your New Elliptical Maintenance Manufacturer s Limited Warranty ATTENTION- THIS ELLIPTICAL IS INTENDED FOR RESIDENTIAL USE ONLY AND IS WARRANTED FOR THAT APPLICATION. ANY OTHER APPLICATION VOIDS THIS WARRANTY IN ITS ENTIRETY. -
Page 3: Product Registration
Through your dealer, Spirit will do all we can to make your ownership experience as pleasant as possible for many years to come. The local dealership where you purchased this elliptical is your administrator for all Spirit warranty and service needs. -
Page 4: Important Safety Instructions
Important Safety Instructions WARNING - Read all instructions before using this appliance. elliptical Do not operate elliptical carpet and may result. Keep children away from the caution areas that can cause harm. Keep hands away from all moving parts. Never operate the elliptical if it has a damaged cord or plug. If the elliptical is not working properly, call your dealer. -
Page 5: Important Electrical Information
Pushing harder is not going to make the unit go faster or slower. If you feel the buttons are not functioning properly with normal pressure, contact your Spirit dealer. to rain or moisture. This product is NOT designed for... - Page 6 Assembly Pack Check List (XE100) Step 1 #96. 3/8" x 2T Split Washer (1pc) #103. 3/8" x 3/4" Hex Head Bolt (2pcs) Step 2 #79.5/16"x23x1.5T Flat Washer (2pcs) Step 3 #80. 5/16" x 20x 1.5T Flat Washer (2 pcs) #84. 3/8" x 23 x 1.5T #66.
- Page 7 Step 4 #87. 3.5x12m/m Self Tapping Screw (10pcs) Tools #108. Phillips Head Screw Driver (1 pc) #109. 12m/m Wrench (1pc) #105.M5 x 15m/m Phillips Head Screw (17pcs) #107. Short Phillips Head Screw Driver (1 pc) #106. 13/14m/m Wrench (1pc) XE100 / XE200 / XE300 Elliptical...
- Page 8 Assembly Pack Check List (XE200) Step 1 #96. 3/8" x 2T Split Washer (1pc) #103. 3/8" x 3/4" Hex Head Bolt (2pcs) Step 2 #97.3/8"x30x2T Flat Washer (2pcs) Step 3 #80. 5/16" x 20 x 1.5T Flat Washer (2 pcs) #84.
- Page 9 Step 4 #87. 3.5x12m/m Self Tapping Screw (18pcs) Tools #108. Phillips Head Screw Driver (1 pc) #109. 12m/m Wrench (1pc) #105.M5 x 15m/m Phillips Head Screw (21pcs) #107. Short Phillips Head Screw Driver (1 pc) #106. 13/14m/m Wrench (1pc) XE100 / XE200 / XE300 Elliptical...
-
Page 10: Assembly Instructions
Assembly Instructions( XE100 / XE200) UNPACKING THE UNIT 1. Using a razor knife (Box Cutter) cut the outside, bottom, edge of box along the dotted Line. Lift Box over the unit and unpack. 2. Carefully remove all parts from carton and inspect for any damage or missing parts. If damaged parts are found, or parts are missing, contact your dealer immediately. - Page 11 *STEP 2: XE100 ONLY 1. Install the two 17m/m Wave Washers (83) onto the Left and Right side of the Handle Bar axle. 2. Slide the Left (10) and Right (11) Handle Bars onto the appropriate side of the axle. The handlebars have a small sticker on them indicating L (left) and R (right).
- Page 12 2. Install the connecting arm covers (57,57-1 & 58,58-1) over the connection of the rod end and handle bars (10 & 11) with eight M5 x 15m/m Phillips Head Screws (105) and eight 3.5x12m/m self tapping screws (87) by using the Phillips head screw driver. 3.
- Page 13 Assembly Drawing (XE100) XE100 / XE200 / XE300 Elliptical...
- Page 14 Assembly Drawing (XE200) XE100 / XE200 / XE300 Elliptical...
- Page 15 Assembly Pack Check List (XE300) Step 1 #96. 3/8" x 2T Split Washer (1pc) #103. 3/8" x 3/4" Hex Head Bolt (2pcs) Step 2 #97.3/8"x30x2T Flat Washer (2pcs) #87. Self Tapping Screw (8pcs) #84. 3/8" x 23 x 1.5T Curved Washer (2pcs) 3.5x12m/m #66.
- Page 16 Step3 #80. 5/16" x 20x 1.5T Flat Washer (2 pcs) #87. 3.5x12m/m Self Tapping Screw (10pcs) Step 4 #91. 5/16"x 3/4 Hex Head Bolt (4 pcs) #104. 5/16 x 1-1/4 Hex Head Bolt (2 pcs) #105.M5 x 15m/m Phillips Head Screw (11pcs) #105.M5 x 15m/m Phillips Head Screw #71.
- Page 17 Tools #108. Phillips Head Screw Driver (1 pc) #107. Short Phillips Head Screw Driver (1 pc) #109. 12m/m Wrench (1pc) #106. 13/14m/m Wrench (1pc) XE100 / XE200 / XE300 Elliptical...
- Page 18 Assembly Instructions (XE300) UNPACKING THE UNIT 1. Using a razor knife (Box Cutter) cut the outside, bottom, edge of box along the dotted Line. Lift Box over the unit and unpack. 2. Carefully remove all parts from carton and inspect for any damage or missing parts. If damaged parts are found, or parts are missing, contact your dealer immediately.
- Page 19 STEP 2: HANDLE BAR ASSEMBLY 1. Install the two 28m/m Wave Washers (81) onto the Left and Right side of the Handle Bar axle. 2. Slide the Left (10) and Right (11) Handle Bars onto the appropriate side of the axle. The handlebars have a small sticker on them indicating L (left) and R (right).
- Page 20 7. Install the center support brace by sliding the front tab between the plastic side case and stabilizer tube. Secure in the rear with two 5/16 x3/4 Hex Head Bolt (91). PLEASE ENSURE ALL FASTENERS ARE TIGHT AFTER THE COMPONENTS HAVE BEEN ASSEMBLED.
- Page 21 Assembly Drawing (XE300) XE100 / XE200 / XE300 Elliptical...
-
Page 22: Features
Through research performed with a leading sports scientist and physical rehabilitation expert, Spirit engineering has developed a breakthrough in pedal design. No other elliptical, at any price, offers these unique features. The history of elliptical use over the past few years tells us that many users suffer from numb toes while working out on elliptical trainers. - Page 23 Operation of Your Elliptical Getting familiar with the control panel XE100 & XE200 Console Power up The Elliptical is supplied with an external power supply. When power is connected to the Elliptical, the console will automatically power up. If there is no input to the console for 20 minutes the console will go to stand-by mode.
-
Page 24: Console Operation
Console Operation Quick Start This is the quickest way to start a workout. After the console powers up you just press the Start key to begin, this will initiate the Quick Start mode. In Quick Start the Time will count up from zero and the workload may be adjusted manually by pressing the Up or Down buttons. - Page 25 Programming the console Each of the programs can be customized with your personal information and changed to suit your needs. Some of the information asked for is necessary to ensure the readouts are correct. You will be asked for your Age and Weight. Entering your Age is necessary during the Heart Rate control programs to ensure the correct settings are in the program for your Age.
-
Page 26: Preset Programs
Next is Time. You may adjust the Time and press enter to continue. 5. Now you are finished editing the settings and can begin your workout by pressing the Start key. You can also go back and modify your settings by pressing the Enter key. NOTE: At any time during the editing of Data you can press the Stop key to go back one level, or screen. -
Page 27: Fat Burn
9. When the program ends you may press Start to begin the same program again or Stop to exit the program or you can save the program you just completed as a custom user program by pressing a User key and following the instructions in the message window. Fat Burn The Fat Burn program is designed, as the name implies, to maximize the burning of fat. - Page 28 2. The message window will ask you to enter your Age. You may enter your Age, using the Up and Down keys or the numeric key pad, then press the Enter key to accept the new number and proceed on to the next screen. 3.
- Page 29 Interval The Interval program takes you through high levels of intensity followed by periods of low intensity. This program increases your endurance by depleting your oxygen level followed by periods of recovery to replenish oxygen. Your cardio vascular system gets programmed to use oxygen more efficiently this way.
- Page 30 3. The message window will ask you to enter your Age. You may enter your Age, using the Up and Down keys or the numeric key pad, then press the Enter key to accept the new number and proceed on to the next screen. 4.
- Page 31 Consult your physician before participating in any exercise program. With all Spirit Heart Rate Control elliptical machines you may use the heart rate monitor feature without using the Heart Rate Control program. This function can be used during manual mode or during any of the nine different programs.
-
Page 32: Rate Of Perceived Exertion
Rate of Perceived Exertion Heart rate is important but listening to your body also has a lot of advantages. There are more variables involved in how hard you should workout than just heart rate. Your stress level, physical health, emotional health, temperature, humidity, the time of day, the last time you ate and what you ate, all contribute to the intensity at which you should workout. - Page 33 Normally the transmitter will be oriented so the spirit logo is right side up. (6) The antenna that picks up your heart rate is very sensitive. If there is an outside noise source, turning the whole machine 90 degrees may de-tune the interference.
- Page 34 Heart Rate Control Program 1 & 2 (HR 1, HR 2) operation Both programs operate the same, the only difference is that HR 1 is set to 60% and HR 2 is set to 80% of maximum heart rate. They both are programmed the same way. To start the HR 1 or HR 2 programs follow the instructions below or just press the HR 1 or HR 2 button then the Enter button and follow the directions in the message window.
- Page 35 Getting familiar with the control panel XE300 Console Power up The XE Series Elliptical is supplied with an external power supply. When power is connected to the XE Series Elliptical, the console will automatically power up. If there is no input to the console for 20 minutes the console will go to stand-by mode.
-
Page 36: Quick Start
Quick Start This is the quickest way to start a workout. After the console powers up you just press the Start key to begin, this will initiate the Quick Start mode. In Quick Start the Time will count up from zero and the workload may be adjusted manually by pressing the Up or Down buttons. - Page 37 each program key is a number. If you are setting new data, such as Age, weight etc., you can use these keys to enter the numbers quickly. The XE series consoles include a built-in fan to help keep you cool. To turn the fan on, flip the switch on the right side of the console case.
- Page 38 9. Press the Manual key then press the Enter key. 10. The message window will ask you to enter your Age. You may enter your Age, using the Up and Down keys or the numeric key pad, then press the Enter key to accept the new number and proceed on to the next screen.
- Page 39 the level and then press enter. 15. Now you are finished editing the settings and can begin your workout by pressing the Start key. You can also go back and modify your settings by pressing the Enter key. NOTE: At any time during the editing of Data you can press the Stop key to go back one level, or screen.
- Page 40 the program or you can save the program you just completed as a custom user program by pressing a User key and following the instructions in the message window. Cardio The Cardio program is designed to increase your Cardio vascular function. This is, simply said, exercise for your heart and lungs.
- Page 41 13. Next is Time. You may adjust the Time and press enter to continue. 14. Now you are asked to adjust the Max Level. This is the peak exertion level you will experience during the program. The factory setting is level eight. Adjust the level and then press enter.
- Page 42 pressing a User key and following the instructions in the message window. Custom User Defined Programs There are two customizable User programs that allow you to build and save your own workout. The two programs, User 1 and User 2, operate exactly the same way so there is no reason to describe them separately.
- Page 43 SEE PAGE 30 FOR MORE INFORMATION ABOUT HEART RATE Heart Rate Control Program 1 & 2 (HR 1, HR 2) operation Both programs operate the same, the only difference is that HR 1 is set to 60% and HR 2 is set to 80% of maximum heart rate.
-
Page 44: Maintenance
Maintenance: 1. Wipe down all areas in the sweat path with a damp cloth after each workout. 2. If a squeak, thump, clicking or rough feeling develops the main cause is most likely one of two reasons: The hardware was not sufficiently tightened during assembly. All bolts that were installed during assembly need to be tightened as much as possible. -
Page 45: Manufacturer S Limited Warranty
3. If there is a question as to where to obtain service, contact our service department at (870) 935-1107. 4. If no local service is available, Spirit will repair or replace the parts, at Spirit s option, within the warranty period at no charge for parts.
Need help?
Do you have a question about the XE 100 and is the answer not in the manual?
Questions and answers