Table of Contents
Advertisement
Quick Links
Advertisement
Table of Contents

Related Manuals for Spirit 161171400


Summary of Contents for Spirit 161171400
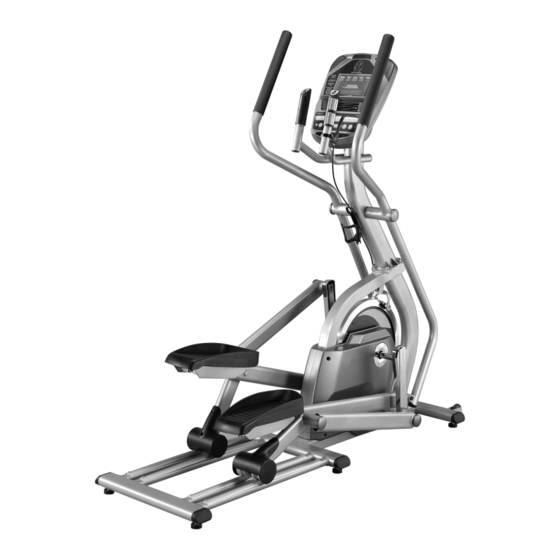
- Page 1 OWNER’S MANUAL MODEL NO. 161171400 Assembly Operation Trouble –Shooting Parts Warranty CAUTION: You must read and understand this owner’s manual before operating unit. CUSTOMER SERVICE 1-888-707-1880 Maurice Pincoffs Canada Inc. ©2012 OR EMAIL CUSTOMERSERVICE@PINCOFFS.CA...
-
Page 2: Table Of Contents
Manufacture’s One-Year Limited Warranty Maurice Pincoffs Canada Inc. warrants all its elliptical parts for a period of time listed below, from the date of retail sale, as determined by a sales receipt or in the absence of a sales receipt. Maurice Pincoffs Canada Inc.’s responsibilities include providing new or remanufactured parts, at Maurice Pincoffs Canada Inc.’s option, and technical support to our independent dealers and servicing organizations. -
Page 3: Safety Precautions
SAFETY PRECAUTIONS MPORTANT SAFETY INFORMATION THIS UNIT IS INTENDED FOR HOUSEHOLD USE ONLY READ ALL INSTRUCTIONS BEFORE USING THIS ELLIPTICAL CAUTION: Before starting any exercise program, it is recommended that you consult your physician. WARNING: Connect this unit to a properly grounded outlet only. DANGER: To reduce the risk of electric shock, always unplug the elliptical from the electrical outlet immediately after using and before cleaning. - Page 4 When you stop exercising, allow the pedals to slowly come to a complete stop. The elliptical exerciser does not have a free wheel; the pedals will continue to move until the flywheel stops. Always unplug the power cord immediately after use and before cleaning the elliptical exerciser. If decals on the elliptical exerciser are missing or illiegible, please call our customer service department toll free at 1-888-707-1880 and order a replacement decal.
-
Page 5: Assembly Instruction
ASSEMBLY INSTRUCTION This manual is designed to help you easily assemble, adjust and use this machine. Please read this manual carefully. Set all parts in a clear area on the floor and remove the packing material. Refer to the parts list for help to identify the parts. - Page 6 1 CONSOLE MAST ASSEMBLY 1. Feed the computer cable (95) up through the console mast tube (pulse grip posts at the top) with the end of the twist tie that is attached to it. 2. Place the console mast tube onto the mating plate of the main frame; Be careful not to pinch the Computer cable between the console mast and the main frame plates during assembly.
-
Page 7: Swing Arm Assembly
2 SWING ARM ASSEMBLY 1. Remove the foam from the console mast axles and the plastic ties from the tubes that slide onto the console mast axles. 2. Slide the two swing arms (8 Right & 9 Left) onto the console mast axle. There is a left and right swing arm (marked with an “R”... - Page 8 3 CAPS & WHEELS 1. Attach the transport wheels (77) to each bracket with the two bolts (44) and nuts (34). Partially tighten with the wrenches provided (110 & 111). Over tightening the hardware won’t allow the wheels to rotate. 2.
- Page 9 4ARM ATTACHMENTS Assemble the brackets at the bottom of the swing arms to the pedal arms using a shoulder bolt (55) and a nut (56) on each side. Tighten securely with the wrenches provided (109 & 116). HARDWARE #56. M10 Nut (2 pcs) #55.
- Page 10 5 LEVELERS & END CAPS Tilt the elliptical to one side and put something under the unit for support and install the three levelers (83) for that side. Tilt the unit to the other side and install those three levelers (83). Level the elliptical once it is positioned where it will be used.
-
Page 11: Features
FEATURES Here are the top reasons why we believe this elliptical trainer is among the best elliptical machines available for everyone: State of the Art patent-pending, industry-leading, super-smooth, super-fast elliptical motion that opens up vast new possibilities for riders to vary their workouts, by duration, intensity, frequency and personal goals, whether health, fitness, endurance, strength, or professional athletic. - Page 12 CONSOLE MUSCLE ACTIVATION FIGURE There is an anatomical figure located at the top of the console. This figure will light all areas that are activated when using the elliptical trainer. These will light up during any of the programs. You can control which muscles are activated by changing up the pedal pattern or switching your hand position during the manual program.
-
Page 13: Computer Instructions
OPERATION OF YOUR CONSOLE GETTING FAMILIAR WITH THE CONTROL PANEL POWER UP When the A.C. power cord is connected to the Elliptical, the console will automati- cally power up. If there is no input to the console for 20 minutes the console will go to stand- by mode. - Page 14 QUICK START This is the quickest way to start a workout. After the console powers up you just press the Start key to begin, this will initiate the Quick Start mode. In Quick Start the Time will count up from zero and the workload may be adjusted manually by pressing the Level Up or Down buttons.
- Page 15 PROGRAM KEYS The Program Keys are used to preview each program. When you first turn the console on you may press each program key to preview what the program profile looks like. If you decide that you want to try a program, press the corresponding program key and then press the Enter key to select the program and enter into the data-setting mode.
-
Page 16: Programmable Features
PROGRAMMABLE FEATURES MANUAL The Manual program works as the name implies, manually. This means that you control the workload and not the computer. To start the Manual program, follow the instructions below or just press the Manual button, then the Enter button and follow the directions in the Message Center. -
Page 17: Preset Programs
PRESET PROGRAMS The elliptical has five different programs that have been designed for a variety of workouts. These five programs have factory preset work level profiles for achieving different goals. Hill RESISTANCE This program follows a triangle or pyramid type of gradual progression from approximately 10% of maximum effort (the level that you chose before starting this program) up to a maximum effort which... - Page 18 PROGRAMMING PRESET PROGRAMS Select the desired program button then press the Enter key. The Message Center will ask you to enter your Age. You may adjust the age setting, using the Level Up and Down keys, then press the Enter key to accept the new number and proceed on to the next screen.
- Page 19 CUSTOM USER DEFINED PROGRAMS There are two customizable User programs that allow you to build and save your own workout. The two programs, User 1 and User 2, operate exactly the same way so there is no reason to describe them separately. You can build your own custom program by following the instructions below or you can save any other preset program you complete as a custom program.
- Page 20 Heart Rate programs The old motto, “no pain, no gain”, is a myth that has been overpowered by the benefits of exercising comfortably. A great deal of this success has been promoted by the use of heart rate monitors. With the proper use of a heart rate monitor, many people find that their usual choice of exercise intensity was either too high or too low and exercise is much more enjoyable by maintaining their heart rate in the desired benefit range.
- Page 21 RATE OF PERCEIVED EXERTION Heart rate is important but listening to your body also has a lot of advantages. There are more variables involved in how hard you should workout than just heart rate. Your stress level, physical health, emotional health, temperature, humidity, the time of day, the last time you ate and what you ate, all contribute to the intensity at which you should workout.
- Page 22 HEART RATE CONTROL PROGRAM OPERATION Note: You must wear the heart rate transmitter strap for these programs Both programs operate the same, the only difference is that HR1 is set to 60% and HR2 is set to 80% of the maximum heart rate. They both are programmed the same way. To start an HRC program follow the instructions below or just select the HR1 or HR2 program, then the Enter button and follow the directions in the Message Center.
- Page 23 USING HEART RATE TRANSMITTER(Optional) How to wear your wireless chest strap transmitter: Attach the transmitter to the elastic strap using the locking parts. Adjust the strap as tightly as possible as long as the strap is not too tight to remain comfortable. Position the transmitter with the logo centered in the middle of your body facing away from your chest (some people must position the transmitter slightly left of center).
-
Page 24: Maintenace
GENERAL MAINTENANCE Wipe down all areas in the sweat path with a damp cloth after each workout. If a squeak, thump, clicking or rough feeling develops the main cause is most likely one of two reasons: The hardware was not sufficiently tightened during assembly. All bolts that were installed during assembly need to be tightened as much as possible. -
Page 25: Parts List & Diagram
EXPLODED VIEW DIAGRAM CUSTOMER SERVICE 1-888-707-1880 Maurice Pincoffs Canada Inc. ©2012 OR EMAIL CUSTOMERSERVICE@PINCOFFS.CA... - Page 26 PARTS LIST KEY NO. PART NO. DESCRIPTION O'TY Main Frame 17140001 Console Mast 17140002 17140003 Sliding Pedal Arm (R) Sliding Pedal Arm (L) 17140004 Connecting Pedal Arm (R) 17140005 Connecting Pedal Arm (L) 17140006 Main Crank Axle 17140007 17140008 Swing Arm (R) 17140009 Swing Arm (L) 17140010...
- Page 27 KEY NO. PART NO. DESCRIPTION O'TY Split Washer M5 17140047 17140048 Split Washer M6 17140049 Split Washer M8 Split Washer M10 17140050 Nut M5 - 4t 17140051 Set screw M5 - 5mm 17140052 Idler Adj. Bolt M10 × 1.5 × 220L 17140053 17140054 Woodruff Key ( 7 ×...
- Page 28 KEY NO. PART NO. DESCRIPTION O'TY 17140078-12 Speaker Cover (R) 78-12 17140078-13 Fan Assembly 78-13 17140078-14 270m/m W/Receiver, HR 78-14 17140078-15 21-21-004-1 78-15 17140078-16 Interface Board 78-16 17140078-17 300m/m_Earphone socket with cable and securing metal 78-17 17140078-18 Amplifier Controller 78-18 17140078-19 250m/m Speaker W/Cable 78-19 17140078-220 250m/m Amplifier Cable...
- Page 29 KEY NO. PART NO. DESCRIPTION O'TY 171400108 5m/m_L Allen Wrench 171400109 17m/m_Combination Wrench 171400110 M6_L Allen Wrench 171400111 13.14m/m_Wrench 171400112 Phillips Head Screw M5 × 0.8 - 12mm 171400113 Magnet Bracket 171400114 Tension Cable Pulley 171400115 E Retaining Ring E-5 171400116 M8_L Allen Wrench 171400118 Ø6 ×...
-
Page 30: Training Guideline
TRAINING GUIDELINES Exercise Exercise is one of the most important factors in the overall health of an individual. Listed among its benefits are: Increased capacity for physical work (strength endurance) Increased cardiovascular (heart and arteries/veins) and respiratory efficiency Decreased risk of coronary heart disease Changes in body metabolism, e.g. - Page 31 Specificity Different forms of exercise produce different results. The type of exercise that is carried out is specific both to the muscle groups being used and to the energy source involved. There is little transfer of the effects of exercise, i.e. from strength training to cardiovascular fitness. That is why it is important to have an exercise program tailored to your specific needs.
- Page 32 Don’t push yourself too hard to reach the figures on this table. It can be very uncomfortable if you overdo it. Let it happen naturally as you work through your program. Remember, the target is a guide, not a rule, a little above or below is just fine. Two final comments:(1) don’t be concerned with day to day variations in your pulse rate, being under pressure or not enough sleep can affect it;(2) your pulse rate is a guide, don’t become a slave to it.
-
Page 33: Stretching
STRETCHING Stretching should be included in both your warm up and cool down, and should be performed after 3-5 minutes of low intensity aerobic activity or callisthenic type exercise. Movements should be performed slowly and smoothly, with no bouncing or jerking. Move into the stretch until slight tension, not pain, is felt in the muscle and hold for 20-30 seconds. - Page 34 INNER THIGH STRETCH TOUCHES Sit with the soles of your feet together with your Slowly bend forward from your waist, letting knees pointing outward. Pull your feet as close your back and shoulders relax as you stretch Into your groin as possible. Gently push your toward your toes.
Need help?
Do you have a question about the 161171400 and is the answer not in the manual?
Questions and answers