Table of Contents
Advertisement
Quick Links
Advertisement
Table of Contents

Subscribe to Our Youtube Channel
Related Manuals for Insportline 9071 MultiTrainer


Summary of Contents for Insportline 9071 MultiTrainer
- Page 1 USER MANUAL – EN IN 9071 inSPORTline MultiTrainer universal booster...
-
Page 2: Table Of Contents
CONTENTS COMPONENTS..............................4 SET-UP AND ANCHORING ..........................5 ANCHORING GUIDELINES ..........................5 PROPER USE OF THE OPTIONAL DOOR ANCHOR ................... 6 ADJUSTMENTS ..............................7 SINGLE HANDLE MODE ............................ 7 USING FOOT CRADLES ............................8 ADJUSTING RESISTANCE ..........................10 ADJUSTING STABILITY ........................... 10 EXERCISE GUIDELINES ........................... - Page 3 Legal Disclaimer Consult your physician before starting this or any other exercise program. This product should be used on a non- slip surface and only as directed. The user assumes the risk of injury and all liability resulting from using this product.
-
Page 4: Components
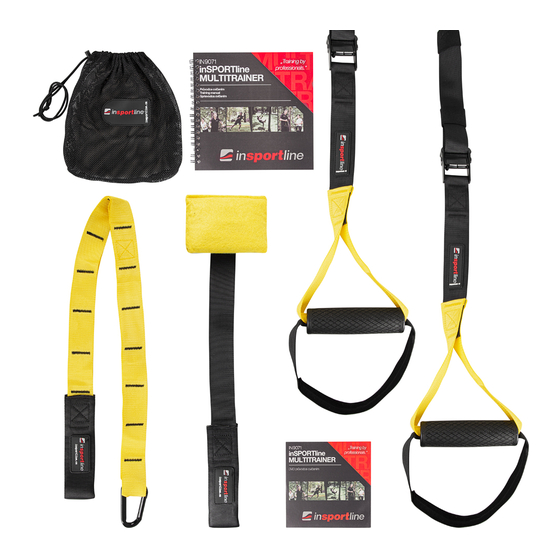
COMPONENTS... -
Page 5: Set-Up And Anchoring
SET-UP AND ANCHORING The Trainer can be used safely indoors or out on a non-slip surface. For optimal use, you will need a flat workout area measuring roughly 8 ft. (2.43 m) by 6 ft. (1.83 m) wide. All models come with a Suspension Anchor, allowing you to “anchor”... -
Page 6: Proper Use Of The Optional Door Anchor
You have two options: 1. Wrap strap several times and then clip into one of the intermediate loops. 2. Wrap over attachment point and clip carabiner over main strap of the Suspension Trainer. ! WARNING: NEVER clip the carabiner into the main loop of the Suspension Anchor. PROPER USE OF THE OPTIONAL DOOR ANCHOR The Door Anchor can only be used on solidly constructed doors that support the user’s weight. -
Page 7: Adjustments
TIP: Place Door placard on other side of door to prevent unexpected interruption and possible injury. ADJUSTMENTS Place Door placard on other side of door to prevent unexpected interruption and possible injury. TIP: For many standing exercises (presses, flys, lateral rotation, etc), the Trainer needs to be extended to provide maximum range of motion. -
Page 8: Using Foot Cradles
2. Pass handle A upward through webbing (upper part of handle) of handle B and switch hands. You are now holding A in your left hand. 3. Repeat the process by using your right hand to pass handle B upward through handle A and use your left hand to grasp handle B to lock. - Page 9 3. Straighten legs and prepare for supine suspended leg exercises. For face-down (prone) exercises: Start Position Sit facing the Trainer with the bottom of the foot cradles hanging 12 in. (.3 m) - 18 in. (.46 m) above the ground. Your knees should be about 1 ft. (.3 m) from foot cradles. Place right foot into left foot cradle as shown here.
-
Page 10: Adjusting Resistance
ADJUSTING RESISTANCE The Trainer allows you to instantly adjust the level of resistance for any exercise from0 to 100% of your own body weight. STANDING EXERCISES Body Angle: Move your feet towards the attachment point to increase resistance. T-ing the feet: For standing exercises that face the anchor point, such as back flys and shoulder raises, T-ing the feet will make the movement easier, while ensuring proper tension on the straps. -
Page 11: Exercise Guidelines
TIP: Try different positions of your free leg for additional stability challenges. Performing plank position exercises from the elbow position is more stable and requires less upper body strength and less core strength. EXERCISE GUIDELINES POSTURE For all exercises, engage your core and maintain a neutral spine with your shoulders, hips and ears in alignment. Wrong Correct Posture KEEP STRAPS TIGHT... - Page 12 Correct Tension Wrong NO SAWING The Trainer is NOT a pulley. Avoid sawing motions with the handles to prevent premature wear to the Suspension Anchor. Keep equal pressure on handles throughout all movements. Wrong Correct Movement NO RUBBING Never allow straps to rub against arms in order to stabilize. Move hands higher to prevent rubbing. Wrong Correct position...
-
Page 13: Workout Log
WORKOUT LOG We strongly encourage you to create your own Suspension Training workouts plan with the template provided below. As your functional strength and skill with the Trainer increase, your custom workouts should evolve as well! TERMS AND CONDITIONS OF WARRANTY, WARRANTY CLAIMS General Conditions of Warranty and Definition of Terms All Warranty Conditions stated hereunder determine Warranty Coverage and Warranty Claim Procedure. - Page 14 The Seller provides the Buyer a 24 months Warranty for Goods Quality, unless otherwise specified in the Certificate of Warranty, Invoice, Bill of Delivery or other documents related to the Goods. The legal warranty period provided to the Consumer is not affected. By the Warranty for Goods Quality, the Seller guarantees that the delivered Goods shall be, for a certain period of time, suitable for regular or contracted use, and that the Goods shall maintain its regular or contracted features.
- Page 15 Date of Sale: Stamp and Signature of Seller:...
Need help?
Do you have a question about the 9071 MultiTrainer and is the answer not in the manual?
Questions and answers