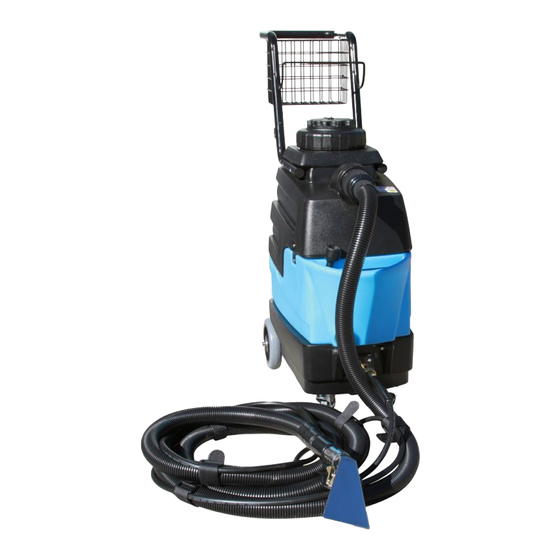
Mytee 8070 -Lite Instruction Manual
Hide thumbs
Also See for 8070 Mytee-Lite:
- Instructions manual (13 pages) ,
- Instructions manual (12 pages)
Table of Contents
Advertisement
Quick Links
Download this manual
See also:
Instruction Manual
Instructions for
Mytee- Lite
8070
Please read before use.
Please read before use.
Register your product
at http://www.mytee.com/
support/register
Set up p. 2
General information p. 6
Parts & pricing p. 9
Wiring diagram p. 11
Notes p.12
™
13655 Stowe Dr., Poway, Ca. 92064
1
Model #
Serial #
Form # ADM-8070
3-14
Advertisement
Table of Contents

Summary of Contents for Mytee 8070 Mytee-Lite
- Page 1 Instructions for Mytee- Lite 8070 ™ Please read before use. Please read before use. Register your product at http://www.mytee.com/ support/register Model # Set up p. 2 General information p. 6 Serial # Parts & pricing p. 9 Form # ADM-8070 Wiring diagram p.
- Page 2 When installing the handle on your new Mytee-Lite™, make sure you use a hand tool (screwdriver) for the screws and NOT a power tool. This will insure you H122 Cuff-Lynx™...
- Page 3 Attach female end of a solution hose to a wand or tool After the machine has been plugged into a 20 amp and the male end to the Mytee-Lite’s QD. Then connect grounded outlet, turn on pump. Key tool until upholstery a vacuum hose to a wand and the male Cuff-Lynx™...
- Page 4 4 – 5 minutes. RECOVERY TANK DRAIN VACUUM STACK FILTER Located at the rear of the Mytee-Lite™ is a bucket high The Mytee-Lite’s™ internal filter must be cleaned regu- drain valve. Simply unscrew the tethered cap to release larly and is located in the recovery tank.
- Page 5 Twist counter clockwise for release. build-up, improving pump life, performance and pressure. To close unit, place latch, twist clockwise and press latch to secure. DEFOAMER Add defoamer in the recovery tank to reduce foam, prolonging the life of the Mytee Lite™ vacuum motor .
-
Page 6: General Information
If damage is evident, save the shipping carton so that it can we at Mytee Products Inc. strive to keep you on the cutting edge with superior be inspected by the carrier that delivered it. Contact the carrier immediately to file a quality and technology. -
Page 7: Setup
4. Filters clogged, remove filters and rinse clean with water. 8. Wait 8–10 minutes for unit to pre-heat. 5. Heater is blocked; flush out with Mytee’s system maintainer. 9. Re-key upholstery tool until hot water begins flowing. 6. If brass check valve is stuck replace valve. - Page 8 EVENT SHALL MYTEE BE LIABLE FOR ANY INCIDENTAL OR CONSEQUENTIAL DAMAGES, PROPERTY DAMAGES, OR PERSONAL INJURIES. All limited warranties are void for, and Mytee does not warrant in any way, any prod- uct that evidences misapplication, improper installation, abuse, lack of maintenance,...
-
Page 9: Parts & Pricing
8070 MYTEE-LITE™ PARTS & PRICING Part prices are subject to change. Order parts at: www.mytee.com/products/8070-mytee-lite-ii-automotive-detail-extractor/#.UtltKv16ho5... - Page 10 8070 MYTEE-LITE™ PARTS & PRICING...
-
Page 11: Wiring Diagram
8070 MYTEE-LITE™ WIRING DIAGRAM... -
Page 12: Notes
NOTES Mytee Products Inc. 13655 Stowe Dr. Poway, Ca. 92064 www.mytee.com © 2014 Mytee Products Inc. Printed in the U.S.A.


Need help?
Do you have a question about the 8070 Mytee-Lite and is the answer not in the manual?
Questions and answers