Mytee Speedster LTD3 Instructions For
Hide thumbs
Also See for Speedster LTD3:
- Instructions manual (27 pages) ,
- User manual (18 pages) ,
- User manual (18 pages)
Table of Contents
Advertisement
Quick Links
Advertisement
Table of Contents

Related Manuals for Mytee Speedster LTD3


Summary of Contents for Mytee Speedster LTD3
- Page 1 Instructions for Speedster LTD3, LTD5 & LTD12 ® Please read before use. Register your product at www.mytee.com/help Model # LTD3 p.2 LTD5 p.9 Serial # LTD12 p.16 Form # ADM-SLTD General & Maintenance information p.23 3-12 13655 Stowe Dr., Poway, Ca. 92064...
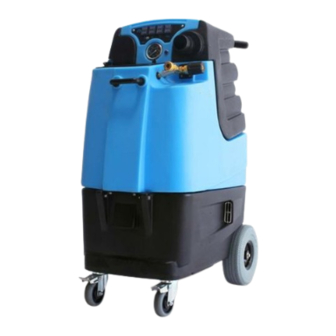
- Page 2 SPEEDSTER® LTD3 SPEEDSTER LTD3 FRONT SPEEDSTER LTD3 BACK ® ® 1. Switch Plate 7. Front Fan 13. Recovery Tank 19. Auto Fill/Pump Out 2. 2” Male Cuff-Lynx™ Inlet 8. Side Vents 14. Solution Tank Hose Connections 3. Prime Value 9. Solution Lid 15.
- Page 3 SPEEDSTER® LTD3 SPEEDSTER LTD3 VAC/SOL SPEEDSTER LTD3 SWITCHES ® ® HOSE CONNECTIONS Vac 1 Vac 2 Pump Pump Heater Attach female end of a solution hose to a wand or tool and the To use vacuum, turn on Vac 1 and Vac 2. To use pump, turn on male end to the LTD’s QD.
- Page 4 SPEEDSTER® LTD3 SPEEDSTER LTD3 AUTO-FILL CONECTIONS ® SPEEDSTER LTD3 ® FLOAT SWITCHES Electronic shut-off switches prevents water from getting into the vacuum stack & monitors water level in solution tank. The LTD is equipped with an electronic float switch inside the Using one end of a ½”...
- Page 5 The rear latches can be unlatched from the lower half of the unit to open it for internal repairs and cleaning. To unlatch, flip Weekly flushing of the solution system with Mytee System Main- and twist latches. The hour meter activates when the pump tainer helps keep lines clean and prevents chemical build-up, is turned on.
- Page 6 SPEEDSTER® LTD3 PARTS & PRICING Order parts at: www.mytee.com/products/product.php?id=LTD3 Part prices are subject to change.
- Page 7 SPEEDSTER® LTD3 PARTS & PRICING...
- Page 8 SPEEDSTER® LTD3 WIRING DIAGRAM Color diagram at: www.mytee.com/products/product.php?id=LTD3...
- Page 9 SPEEDSTER® LTD5 SPEEDSTER LTD5 FRONT SPEEDSTER LTD5 BACK ® ® 13. Push Handle 19. Hour Meter 14. Recovery Tank 20.10” foam filled 1. Switch Plate 7. Front Handle 15. Recovery Tank Drain Valve semi-pneumatic wheels 2. PSI Gauge 8. Solution Tank 16.
- Page 10 SPEEDSTER® LTD5 SPEEDSTER LTD5 VAC/SOL SPEEDSTER LTD5 SWITCHES ® ® HOSE CONNECTIONS Vac 1 Vac 2 Pump Pump Attach female end of a solution hose to a wand or tool and the To use vacuum, turn on Vac 1 and Vac 2. To use pump, turn on male end to the LTD’s QD.
- Page 11 SPEEDSTER® LTD5 SPEEDSTER LTD5 AUTO-FILL CONECTIONS ® SPEEDSTER LTD5 ® FLOAT SWITCHES Electronic shut-off switches prevents water from getting into the vacuum stack & monitors water level in soultion tank. Using one end of a ½” garden hose, attach it to the mounted connection behind the LTD unit, then attach the other end to The LTD is equipped with an electronic float switch inside the the desired faucet connection.
- Page 12 The rear latches can be unlatched from the lower half of the unit to open it for internal repairs and cleaning. To unlatch, flip Weekly flushing of the solution system with Mytee System Main- and twist latches. The hour meter activates when the pump tainer helps keep lines clean and prevents chemical build-up, is turned on.
- Page 13 SPEEDSTER® LTD5 PARTS & PRICING Order parts at: www.mytee.com/products/product.php?id=LTD5 Part prices are subject to change.
- Page 14 SPEEDSTER® LTD5 PARTS & PRICING...
- Page 15 SPEEDSTER® LTD5 WIRING DIAGRAM Color diagram at: www.mytee.com/products/product.php?id=LTD5...
- Page 16 SPEEDSTER® LTD12 SPEEDSTER LTD12 FRONT SPEEDSTER LTD12 BACK ® ® 13. Push Handle 19. 10” foam filled 1. Switch Plate 7. Front Handle 14. Recovery Tank semi-pneumatic wheels 2. PSI Gauge 8. Solution Tank 15. Recovery Tank Drain Valve 20. Auto Fill Connection 3.
- Page 17 SPEEDSTER® LTD12 SPEEDSTER LTD12 VAC/SOL SPEEDSTER LTD12 SWITCHES ® ® HOSE CONNECTIONS Vac 1 Vac 2 Pump Pump Attach female end of a solution hose to a wand or tool and the To use vacuum, turn on Vac 1 and Vac 2. To use pump, turn on male end to the LTD’s QD.
- Page 18 SPEEDSTER® LTD12 SPEEDSTER LTD12 AUTO-FILL CONECTIONS ® SPEEDSTER LTD12 ® FLOAT SWITCHES Electronic shut-off switches prevents water from getting into the vacuum stack & monitors water level in soultion tank. Using one end of a ½” garden hose, attach it to the mounted connection behind the LTD unit, then attach the other end to The LTD is equipped with an electronic float switch inside the the desired faucet connection.
- Page 19 The rear latches can be unlatched from the lower half of the unit to open it for internal repairs and cleaning. To unlatch, flip Weekly flushing of the solution system with Mytee System Main- and twist latches. The hour meter activates when the pump tainer helps keep lines clean and prevents chemical build-up, is turned on.
- Page 20 SPEEDSTER® LTD12 PARTS & PRICING Order parts at: www.mytee.com/products/product.php?id=LTD12 Part prices are subject to change.
- Page 21 SPEEDSTER® LTD12 PARTS & PRICING...
- Page 22 SPEEDSTER® LTD12 WIRING DIAGRAM Color diagram at: www.mytee.com/products/product.php?id=LTD12...
-
Page 23: General Information
You can use the space provided on the front of this the quality and standard you’d expect out of the Mytee Products Inc. line. manual to note down both for future referencing. -
Page 24: Operating Instructions
Clean machine with all-purpose cleaner 19. Do not leave operating unattended. and cloth. Check spray nozzles. Preparation Flush solution system with Mytee System ® 1. Remove furniture and other items from the area you are going to clean. Maintainer. Remove and float shut-off screen from 2. -
Page 25: Trouble Shooting
GENERAL INFORMATION the vacuums and cause damage. To maintain these filters: 5. Remove the solenoid screen and check for any debris or damage to 1. Remove the 7” clear vacuum lid. screen. Rinse the screen of any debris or replace if damaged. 2. - Page 26 GENERAL INFORMATION 7. Using the Philips head screw driver, remove the two Philips head 7. Check to ensure the float switch still works by turning on both vacuums screws and pull the blue face box out. with the vacuum tank lid off. Reach inside and lift the float finger. If vacu- 8.
- Page 27 Q: Does Mytee® recommend tools for this machine? A: All upholstery tools and wands can be used with the All limited warranties are void for, and Mytee does not warrant in any way, Speedster® LTD series. any product that evidences misapplication, improper installation, abuse,...
- Page 28 The exclusive jurisdiction of any legal action arising 2. All defective parts must be returned to Mytee Products, Inc. with the RMA/claim from or related to this warranty policy shall be in the State of California and form for evaluation at the customer’s expense.
Need help?
Do you have a question about the Speedster LTD3 and is the answer not in the manual?
Questions and answers