Table of Contents
Advertisement
CONTENTS
1.
Warnings And Operation Notes..........................................3
2.
Unpacking....................................................................5
3.
Installation.....................................................................6
4.
Mounting.........................................................................10
5.
Connecting Ax68R/78R To The Srx-Pro Server...............17
Please read this guide carefully before you install the dome camera. Keep this guide for future reference.
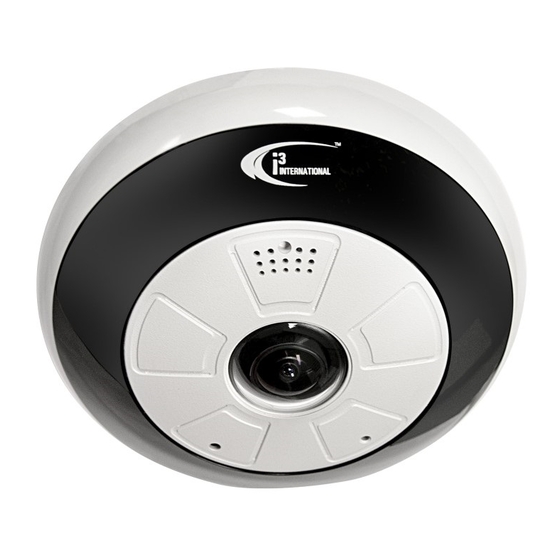
Ax68R/Ax78R
360-degree IR camera
User Guide
Rev. 150505
Advertisement
Table of Contents

Related Manuals for i3 International Ax68R/Ax78R


Summary of Contents for i3 International Ax68R/Ax78R
- Page 1 Ax68R/Ax78R 360-degree IR camera User Guide Rev. 150505 CONTENTS Warnings and operation notes..........3 Unpacking..............5 Installation..............6 Mounting.................10 Connecting Ax68R/78R to the SRX-Pro Server....17 Please read this guide carefully before you install the dome camera. Keep this guide for future reference.
-
Page 2: I3-Trng-Cams-68R_78R.indd
Neither i3 International Inc. nor its dealers or distributors shall be liable to any person or entity with respect to any liability, loss, or damage, caused or alleged to have been caused directly or indirectly by this information. -
Page 3: Warnings And Operation Notes
Thank you for purchasing an i3 Ax68R/78R-series 360-degree camera. If the system needs to be modified or repaired, contact a certified i3 International Dealer/Installer. When serviced by unauthorized technician, the system warranty will be voided. Should you have any problems or questions regarding our products, contact your local i3 International Dealer/Installer. -
Page 4: Power Supply
1.2 Power Supply Ax68R/Ax78R Power consumption requirement: 12V DC / PoE (IEEE 802.3af). Ensure the supplied voltage meets the power consumption requirements of this camera before powering the camera on. Incorrect voltage may cause irreparable damage to the video camera and will effectively void the camera warranty. -
Page 5: Unpacking
2. Unpacking Ensure that the items received match those listed on the order form and the packing slip. In addition to this manual and a fully assembled camera, the dome camera packing box includes: 1. Waterproof RJ45 connector (x1 package with 4 pcs). Use to protect RJ45 cable connector from the elements. -
Page 6: Installation
To re-attach the camera cover, match up the safety lock screw with the screw (10) hole on the camera body , then Figure 2. Disassembling Ax68R/Ax78R push straight down onto the camera cover to engage the clips. The camera Step 4 cover will re-attach. - Page 7 3.2 Dimensions & Parts Identification 52 mm 52 mm Figure 4. Ax68/Ax78 Camera, Top view, with camera Figure 3. Ax68/Ax78 Camera cover attached. Lift the safety lock screw Side view, with cover to reveal the safety lock screw (1). camera cover Use a Phillips screwdriver to loosen the lock attached screw, then grip the camera cover and flex...
- Page 8 Figure 6. Camera module with camera cover removed. 6. Built-in speaker 9. IR LEDs x3 7. MicroSD card slot 10. Camera cover lock screw hole Insert a micro SDHC card for backup/ 11. Mounting screw hole/slot x3 emergency recording and/or storage. 12.
-
Page 9: Surface Mounting
3.3 Surface Mounting Important. Please Read: • Use sealant at the locations shown on the mounting diagrams to maintain IP66 rating when installing outside. • It is the installer’s responsibility to ensure that the mounting surface is suitable for the chosen installation method. • Based on installation location and surface type, supplied screws and anchors may not be adequate. -
Page 10: Mounting
5. Remove the camera cover. Use a Phillips screwdriver to loosen the safety lock screw, then grip the camera cover and flex on one side, towards the center. Lift UP to remove. 6. Feed the camera cabling through the cable opening drilled in the mounting surface. - Page 11 3.4 Wall Mount w/ Back Box and Gooseneck Bracket Note on supplied mounting hardware and IP66 rating Based on installation location and surface type, supplied screws and anchors may not be adequate. Mounting hardware is site-specific and may need to be supplied by the installer. It is the installer’s responsibility to ensure that the mounting surface is suitable for installation method.
- Page 12 5. Feed the camera cabling through the gooseneck bracket. 6. Slide the protruding mounting screws through three matching mounting screw holes on the camera body n IP66 and rotate the camera clockwise to secure the camera body on the mounting surface. Use a Phillips screwdriver to tighten three mounting screws in place.
- Page 13 3.5 Wall Mount w/ Angle Mount Bracket Note on supplied mounting hardware and IP66 rating Based on installation location and surface type, supplied screws and anchors may not be adequate. Mounting hardware is site-specific and may need to be supplied by the installer. It is the installer’s responsibility to ensure that the mounting surface is suitable for installation method.
- Page 14 5. Slide the protruding mounting screws through three matching mounting screw holes on the camera body and rotate the camera clockwise to secure the camera body on the mounting surface. Use a Phillips screwdriver to tighten three mounting screws in place. Figure 20.
- Page 15 3.6 Wall Mount w/ Back Box Note on supplied mounting hardware and IP66 rating Based on installation location and surface type, supplied screws and anchors may not be adequate. Mounting hardware is site-specific and may need to be supplied by the installer. It is the installer’s responsibility to ensure that the mounting surface is suitable for installation method.
- Page 16 5. Slide the protruding mounting screws through three matching mounting screw holes on the camera body and rotate the camera clockwise to secure the camera body on the mounting surface. Use a Phillips screwdriver to tighten three mounting screws in place. Figure 25.
- Page 17 3.7 Pendant Pole Mount Note on supplied mounting hardware and IP66 rating Based on installation location and surface type, supplied screws and anchors may not be adequate. Mounting hardware is site-specific and may need to be supplied by the installer. It is the installer’s responsibility to ensure that the mounting surface is suitable for installation method.
- Page 18 5. Feed the camera cabling through the ridgid pipe bracket. 6. Slide the protruding mounting screws through three matching mounting screw holes on the camera body and rotate the camera clockwise to secure the camera body on the mounting surface. Use a Phillips screwdriver to tighten three mounting screws in place.
- Page 19 4. Connecting Ax68R/78R to SRX-Pro Server 4.1 Network Topology Options Connection Option 1 (Single camera) Important: Must use 12V DC Power for this connection type. PoE not supported. Crossover direct connection i3 SRX-Pro Server Connection Option 2 (Multiple cameras) Via Gigabit Switch i3 SRX-Pro Server 4.2 Hardware/Software Requirements...
- Page 20 4.3 Configuring Internet Explorer for Video Display Your Internet Explorer (v.8.0 or higher) must first be configured in order to properly display video stream from your Annexxus camera. Follow these instructions to configure your Internet Explorer browser. Enable Cookies 1. In Internet Explorer window, click Tools -> Internet Options 2.
- Page 21 Live video stream will be displayed on the screen. If you do not see live video image on the screen, call i3 International tech support for help. 5. Proceed to the following sections to assign a unique IP address to your Ax68R/78R camera and to add it to your SRX-Pro Server.
- Page 22 4.5 Assigning New IP Address to Ax68R/78R with Annexxus Configuration Tool. Camera’s default IP address is 192.0.0.16 Camera’s default Subnet mask address is 255.255.255.0. Default camera User Name: i3admin and default Password: i3admin To add your Annexxus IP camera to SRX-Pro Server, assign a unique IP address: 1.
- Page 23 8. Double-click ACT icon on the Desktop to launch the application. The application window will appear displaying a list of active network cameras 9. Next, select one or more desired Ax68/78 cameras in the ACT software. To select a single camera, click on the camera line in the list. To select multiple consecutive cameras, click while holding the Shift key.
- Page 24 Live video stream will be displayed on the screen. If you see Live video image, the IP address has been successfully changed. Proceed to the next section. Note: If you do not see live video image on the screen, call i3 International tech support for help.
- Page 25 4.6 Adding your IP Camera to your SRX-Pro Server 1. Make sure that the latest version of GiPi updater is installed on your SRX-Pro Server. You can download the updates from http://i3international.com/index.php/software-downloads 2. Once the latest GiPi updater has been installed, restart i3 SRX-Pro Server software.
- Page 26 6. In the Select IP Camera window, enter the default camera User Name: i3admin and default Password: i3admin, then click Add. 7. The selected camera will be added to the IP Camera list. i3-TRNG-CAMS-68R_78R.indd Rev. 150505...
- Page 27 Annexxus 68/78 Channels Ax68/78 cameras support four (4) separate video channels/inputs, all four are detected and added to IP Camera setup tab of the SRX-Pro Server automatically. Only one (1) IP license is required for all four channels. Channel 1 - 360-degree fisheye video input, supports Main and Sub streams. Channels 2-4 - three separate dewarped video streams that can be used as PTZ channels.
- Page 28 INTERNATIONAL INC. 1.866.840.0004 U.S.A. 4450 Witmer Industrial Canada 780 Birchmount Road, www.i3international.com Estates Unit 4 Unit 16, Scarborough, Niagara Falls, NY 14305 ON, M1K 5H4...
Need help?
Do you have a question about the Ax68R/Ax78R and is the answer not in the manual?
Questions and answers