Table of Contents
Advertisement
Quick Links
Ax63Z
User Guide
CONTENTS
1. Warnings and operation notes.................................3
2. Unpacking...............................................................5
3. Installation..........................................................6
4. Connecting to the SRX-Pro Server.........................21
5. Advanced Camera Setup......................................29
6. Specifications.......................................................44
Please read this guide carefully before you install the dome camera. Keep this guide for future reference.
Advertisement
Table of Contents

Subscribe to Our Youtube Channel
Related Manuals for i3 International Ax63Z


Summary of Contents for i3 International Ax63Z
-
Page 1: Table Of Contents
Ax63Z User Guide CONTENTS 1. Warnings and operation notes.........3 2. Unpacking...............5 3. Installation............6 4. Connecting to the SRX-Pro Server......21 5. Advanced Camera Setup........29 6. Specifications............44 Please read this guide carefully before you install the dome camera. Keep this guide for future reference. - Page 2 Neither i3 International Inc. nor its dealers or distributors shall be liable to any person or entity with respect to any liability, loss, or damage, caused or alleged to have been caused directly or indirectly by this information.
-
Page 3: Warnings And Operation Notes
Keep this guide for future reference. Thank you for purchasing i3 Ax63Z High-Speed Network Dome camera. If the system needs to be modified or repaired, contact a certified i3 International Dealer/Installer. When serviced by an unauthorized technician, the system warranty will be voided. Should you have any problems or questions regarding our products, contact your local i3 International Dealer/Installer. -
Page 4: Power Supply
Ensure the supplied voltage meets the power consumption requirements of this camera before powering the camera on. Ax63Z power consumption requirement: Indoor - PoE+ (IEEE 802.3at) or AC24V; Low temperature outdoor: AC24V only. PoE+ power is supported in indoor installations only. For the most reliable PoE please use i3 switches S81, S243, or S242. -
Page 5: Unpacking
3. Torx driver (Torx key) x1 4. RJ45 Female / Female Coupler x1 5. CD (Documentation, Annexxus Finder) x1 Parts illustrated above are not to scale. If any parts are missing or damaged, contact the dealer you purchased the camera from. i3-TRNG-CAMS-Ax63Z.indd Rev. 160929... -
Page 6: Installation
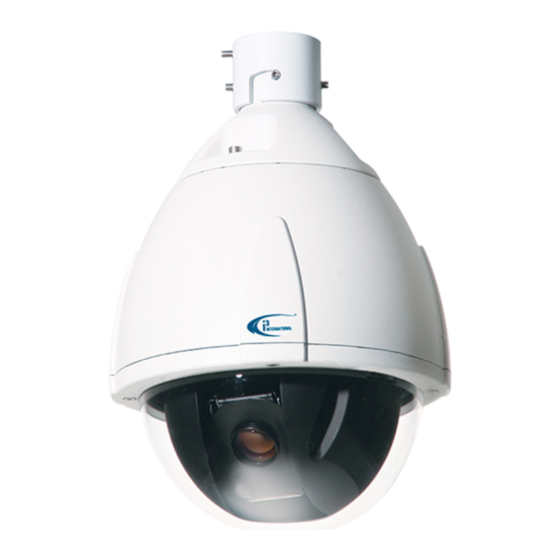
3. Installation Use the appropriate brackets and equipment to mount the camera. After installing the camera, your network camera should be accessed from your local network. 3.1 Dimensions 3.2. Camera Parts and Definitions i3-TRNG-CAMS-Ax63Z.indd Rev. 160929... - Page 7 PoE+ via an Ethernet cable for indoor applications only. 8. Connect the control inputs to terminals GND, Alarm in, Alarm out, Audio in, Default and Reset. 9. Connect the camera either to a network device or your DVR. i3-TRNG-CAMS-Ax63Z.indd Rev. 160929...
- Page 8 • Make sure there are no damaged parts during assembly. • Remove the connector ring from the speed dome and replace with the connec- tor ring that comes with the support, if applicable. i3-TRNG-CAMS-Ax63Z.indd Rev. 160929...
- Page 9 8. Pull out the cables and connect the main unit to the connector ring in the clock- wise direction. Use hex driver to secure the set screw to the connector ring and fasten the safety cable to the tube (Figure 6). 9. This completes the mounting (Figure 7). i3-TRNG-CAMS-Ax63Z.indd Rev. 160929...
- Page 10 Diameter 3/8” (9.5mm), depth 1/1/2” (40mm). 2. Hammer 4 screw mounts into the holes and then secure the plate. 3. Fasten the connector ring to the wall hang support in the clockwise direction (Figure 2). i3-TRNG-CAMS-Ax63Z.indd Rev. 160929...
- Page 11 3.3.3 Wall Mount With Power Box 1. Attach the mounting holes guide onto the wall. 2. Drill 4 holes on the wall matching the mount holes on the plate. Diameter 3/8” (9.5mm), depth 1/1/2” (40mm) (Figure 1). i3-TRNG-CAMS-Ax63Z.indd Rev. 160929...
- Page 12 7. After all cables are connected, please make sure the cables are properly fitted to avoid water leaks (Figure 5). 8. Return the lid to position and securely fasten the security screws. 9. This completes the mounting (Figure 6). i3-TRNG-CAMS-Ax63Z.indd Rev. 160929...
- Page 13 3. Hammer 4 screw mounts into the holes. Secure the water-proof box to the L tube with a hex driver (Figure 2). Loosen the security screws of the lid with a hex driver (leave the single lower right screw in) (Figure 4). i3-TRNG-CAMS-Ax63Z.indd Rev. 160929...
- Page 14 5. After all cables are connected, please make sure the cables are properly fitted to avoid water leaks (Figure 5). 6. Return the lid to position and securely fasten the security screws. 7. This completes the mounting (Figure 6). i3-TRNG-CAMS-Ax63Z.indd Rev. 160929...
- Page 15 3.3.5 Parapet Wall Mount 1. Remove the secure plate and drill 8 holes on the wall matching the mount holes on the plate. Diameter of 3/8” (9.5mm), depth 1/1/2” (40mm) (Figure 1). i3-TRNG-CAMS-Ax63Z.indd Rev. 160929...
- Page 16 7. Insert the entire tube (including the main unit) into the hole fitting on the secure plate (Figure 6). 8. Rotate the tube clockwise until 180° with the secure plate, and then fasten the screws (Figure 7). 9. This completes the mounting (Figure 8). i3-TRNG-CAMS-Ax63Z.indd Rev. 160929...
- Page 17 2. Use a Philips screwdriver to tighten the metal strap, and then line up the holes on the water-proof box to the holes on the support. Use a hex driver to secure in a clockwise direction (Figure 2). 3. This completes the mounting (Figure 3). i3-TRNG-CAMS-Ax63Z.indd Rev. 160929...
- Page 18 2. Hammer screw mounts into the drilled holes (Figure 1). 3. Line up the holes on the water-proof box to the holes on the support, and use a hex driver to secure in the clockwise direction (Figure 2). 4. This completes the mounting (Figure 3). i3-TRNG-CAMS-Ax63Z.indd Rev. 160929...
- Page 19 2. Secure the connector ring to the original connection unit in the clockwise direc- tion (Figure 1). 3. Secure the extension pole to the connector ring and use a hex driver to secure the set screws in place (Figure 2). 4. This completes the mounting. i3-TRNG-CAMS-Ax63Z.indd Rev. 160929...
- Page 20 1. Remove the sun shade. 2. Place the sun shade over the main unit from above (Figure 1). 3. Use a hex driver to secure the screw to the connector ring clockwise (Figure 2). 4. This completes the mounting (Figure 3). i3-TRNG-CAMS-Ax63Z.indd Rev. 160929...
-
Page 21: Connecting To The Srx-Pro Server
SRX-Pro Server 4.2 Hardware/Software Requirements The following requirements must be met to achieve a successful network connection with the Ax63Z IP camera. SRX-Pro Server: • i3 SRX-Pro Version 3.0 or higher • Latest GiPi adapter is installed. GiPi adapters can be downloaded from i3 FTP website. - Page 22 Script ActiveX controls marked safe for scripting -> Enable 5. Click OK to save the Internet Security Settings 6. Close all open Internet Explorer and open a new Internet Explorer window. This will allow the new settings to take effect. i3-TRNG-CAMS-Ax63Z.indd Rev. 160929...
- Page 23 7. Follow the Annexxus Finder installation instructions until the application has been successfully installed on your SRX-Pro Server. 8. Double-click Annexxus Finder icon on the Desktop to launch the application. The application window will appear displaying a list of active network cameras. i3-TRNG-CAMS-Ax63Z.indd Rev. 160929...
- Page 24 192.138.10.122, change your Annexxus camera’s IP address to 192.138.10.XXX. Remember: Annexxus Cameras cannot share an IP address, each camera requires its own unique IP address. 11. Enter the default camera password in the Password field and click Save. i3-TRNG-CAMS-Ax63Z.indd Rev. 160929...
- Page 25 17. Annexxus camera interface will be displayed in the Internet Explorer window. You should be able to see the camera image on the screen. If you do not see the camera image on the screen, call i3 International technical support for help.
- Page 26 Server. You can download the updates from ftp://ftp.i3international.com/drivers/gipi Contact i3 Technical Support team for information about GiPi 2. Once the latest GiPi updater has been installed, restart i3 SRX-Pro Server software. 3. Log In and go to Setup -> IP Camera. i3-TRNG-CAMS-Ax63Z.indd Rev. 160929...
- Page 27 4. Click the Search button to display connected Annexxus cameras. 5. Select the detected camera in the list and click Select. i3-TRNG-CAMS-Ax63Z.indd Rev. 160929...
- Page 28 Your Annexxus camera is now connected to SRX-Pro Server and is ready to record. You may change resolution and frame rate for the Annexxus camera in the IP Cam- era tab menu or you may choose to configure the camera’s advanced settings (see the following section). i3-TRNG-CAMS-Ax63Z.indd Rev. 160929...
-
Page 29: Advanced Camera Setup
Password. Camera’s user interface will be displayed in a separate Internet Explorer window. Default Login/Password: FW ver. ANNEXXUS 63Z.0.1.4670 | Login: admin / PW: 1234 FW ver. ANNEXXUS 63Z.0.1.5025, or higher | Login: i3admin / PW: i3admin i3-TRNG-CAMS-Ax63Z.indd Rev. 160929... - Page 30 You may switch to the advanced setup at any time by clicking the button in the bottom left-hand corner. To switch back to the Basic Setup, click the same button again. Basic Setup is divided into Camera and Network settings. After making any setting adjustments, remember to click the Save button i3-TRNG-CAMS-Ax63Z.indd Rev. 160929...
-
Page 31: Camera Settings
Default Gateway: Provide the IP address of the network’s router if necessary. Contact your network administrator for this information. • DNS: Specify a DNS if necessary. Contact your network administrator for this information. • Physical Address: This is the camera’s unique MAC Address. It cannot be changed. i3-TRNG-CAMS-Ax63Z.indd Rev. 160929... - Page 32 BOTH: flip both horizontally and vertically. The Annexxus 63Z camera supports triple streaming, where Primary Streaming is the default stream used for video recording and Third Streaming is used for Live Viewing. Each stream can be configured separately. i3-TRNG-CAMS-Ax63Z.indd Rev. 160929...
- Page 33 H264 GOP (for H264 codec): Set the GOP rate from 1-60. (Same as Primary) • H264 Rate Control Mode (for H264 codec): VBR (Variable Bit Rate) or CBR (Constant Bit Rate). See p. 31 for details. • Quality (for MJPEG codec only): HIGH, MID, LOW i3-TRNG-CAMS-Ax63Z.indd Rev. 160929...
- Page 34 Sharpness: Adjust the image sharpness level. Values range from 0 to 15. • Hue: Adjust the image hue. Values range from 0 to 15. After making any setting adjustments, remember to click the Save button to save any changes made. i3-TRNG-CAMS-Ax63Z.indd Rev. 160929...
-
Page 35: Alarm Input Settings
In the Privacy Zone setup tab, select an area to be blocked off with a rectangle on Live View and video recording because of privacy or other concerns. Up to 5 separate Privacy Zones can be configured. i3-TRNG-CAMS-Ax63Z.indd Rev. 160929... - Page 36 After making any setting adjustments, remember to click the Save button to save any changes made. 5.5 Exposure Set the exposure level for your camera. Exposure time determines how much light passes through the camera aperture to the focus. i3-TRNG-CAMS-Ax63Z.indd Rev. 160929...
- Page 37 Noise Reduction: Set the Noise Reduction value. The values range from 0 to 255. • BLC: When parts of the environment are poorly lit, BLC can be configured to compensate for inadequate lighting conditions. Set BLC to OFF or ON. i3-TRNG-CAMS-Ax63Z.indd Rev. 160929...
- Page 38 Contact your network administrator for this information. • DNS: Specify a DNS if necessary. Contact your network administrator for this information. • HTTP Port: Use the default Port 80 if possible. Contact your network administrator if the setting needs to be changed. i3-TRNG-CAMS-Ax63Z.indd Rev. 160929...
-
Page 39: Upnp Settings
After making any setting adjustments, remember to click the Save button to save any changes made. 5.7 User Management User Management tab displays the list of users that have access to the Annexxus camera. The username and password from this setup tab are used when connecting i3-TRNG-CAMS-Ax63Z.indd Rev. 160929... - Page 40 Confirm Password fields of the Modify User area. 4. To change permission type, select either Administrator or Viewer in the Permission drop-down menu. 5. Click Update User button to apply changes. 6. Click OK in the confirmation message. i3-TRNG-CAMS-Ax63Z.indd Rev. 160929...
-
Page 41: System Setup
If in the future software updates are released, you can update your camera’s software by first downloading the software file from i3 International’s website or FTP site. After downloading software file, click the Browse... button in the camera’s System setup tab and locate the new software file. - Page 42 Proportional P/T: Select ON or OFF. Panning and tilting speeds will adjust to accomodate for the zoom factor, thus preventing the image from moving too quickly when the zoom is high. • Max Speed: Set a value between 30 to 430°/second. i3-TRNG-CAMS-Ax63Z.indd Rev. 160929...
- Page 43 Frame Scan: Perform a Frame Scan. » Random Scan: Perform a Random Scan. • Angle: Set a value for the tilt of the camera from 1-85°. • Scan Speed: Set a value for the scanning speed from 1 to 90°/second. i3-TRNG-CAMS-Ax63Z.indd Rev. 160929...
-
Page 44: Specifications
Zoom Limit: Select either 18 or 180. • Zoom Speed: Select between High, Medium or Low zoom speed • Focus Sens: Select either Normal or Low. After making any setting adjustments, remember to click the Save button to save any changes made. i3-TRNG-CAMS-Ax63Z.indd Rev. 160929... - Page 45 6. Specifications Features Ax63Z Image System Image Sensor 1/2.8”-type CMOS Optical Zoom F-Stop Range (F-number) F1.6 to 2.8 Focal Length f=4.7mm (wide) to 84.6mm (tele) View Angle 67.3° (wide) to 2.4° (tele) Minimum Working Distance 1.5 M Sync System Internal S/N Ratio >50dB...
- Page 46 Features Ax63Z Network Specifications (cont.) Maximum Framerate vs NTSC: 1080P(1920x1080) @30 fps ; 3M(2048x1536) @15 fps Resolution PAL: 1080P(1920x1080) @25 fps ; 3M(2048x1536) @ 12 fps Video Streaming Triple streaming IPv4, HTTP, TCP, RTSP/RTCP/RTP, ICMP, UDP, IGMP, DNS, DHCP, Supported Protocols...
- Page 47 INTERNATIONAL INC. 1.866.840.0004 U.S.A. 1967 Wehrle Drive, Canada 780 Birchmount Road, www.i3international.com Suite 1, PMB# 034 Buffalo Unit 16, Scarborough, NY, 14221 ON, M1K 5H4...
Need help?
Do you have a question about the Ax63Z and is the answer not in the manual?
Questions and answers