
Subscribe to Our Youtube Channel
Related Manuals for DCS DCS-C-24W


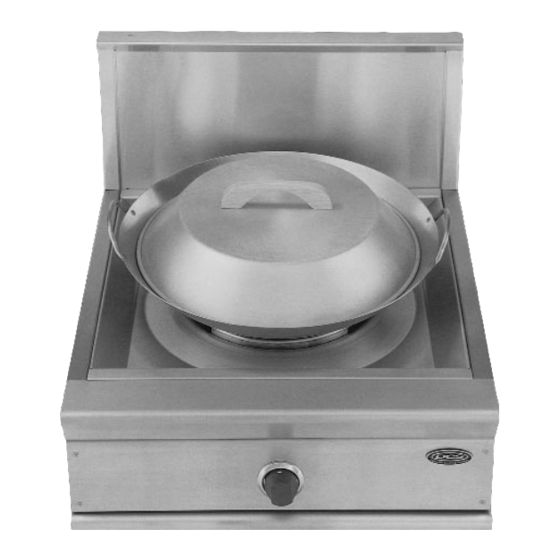
Summary of Contents for DCS DCS-C-24W
- Page 1 CARE & INSTALLATION MANUAL PROFESSIONAL DCS-C-24W WOK COOKTOP MODEL ® Retain this manual for future reference.
-
Page 2: Table Of Contents
TABLE OF CONTENTS I N S T A L L A T I O N I N S T R U C T I O N S : U S E A N D C A R E I N S T R U C T I O N S : STEP 1: Safety Precautions ......2 Wa rning............10 Section One: Precautions... -
Page 3: Step 1: Safety Precautions
HEADER SAFETY PRECAUTIONS STEP 1: PRECAUTIONS CAUTION WARNING: When connecting unit to LP gas make certain the LP gas tank is equipped with its own high pressure regulator in addi- Disconnect power before installing tion to the pressure regulator supplied Before turning power on, be sure that all with the cooktop. -
Page 4: Step 2: Cabinet Preparation
CABINET PREPARATION STEP 2: COOKTOP INSTALLATION FIG. 6 1. To ensure professional results, the cabinet and countertop openings should be prepared by a qualified cabinet worker. 2. The clearances shown in Fig.1 are required for installations of cooktop and islands. Counter-Sunk Screws 3. - Page 5 CABINET PREPARATION 5. Establish the centerline of the cooktops desired location. It should be the same as the center or FIG. 5 the overhead ventilation hood. Wok Front projects 6. Cut the opening for the following installations: outward from cabinets * Standard countertop installations (See Fig.3).
-
Page 6: Step 3: Placing & Anchoring
PLACING & ANCHORING - ELECTRICAL STEP 3: PLACING & ANCHORING STEP 4: ELECTRICAL CONNECTIONS Lift and place the cooktop in the opening. Be careful POWER REQUIREMENTS: not to pinch the power cord or gas inlet between 120 VAC, 60 Hz. anything. - Page 7 ELECTRICAL - GROUNDING ALTERNATE GROUNDING METHOD CAUTION: If installation of a properly grounded wall receptacle is impossible at the time of installation, consult your Attaching the adapter ground wire to local electrical inspector for permission to connect a wall receptacle cover screw does not temporary adapter (with polarized blades) which could ground the appliance unless the cover be plugged into your present 2-wire receptacle;...
-
Page 8: Step 5: Gas Requirements
GAS REQUIREMENTS STEP 5: GAS CONVERSION CAUTION: Verify the type of gas supplied to the location. The The appliance must be isolated from the buildings- cooktop is shipped from the factory set up and adjusted for natural gas. The unit can be readily gas supply piping system by closing its individual converted to LP as described below. -
Page 9: Step 6: Backguard Installation
HEADER BACKGUARD INSTALLATION - TEST & ADJUSTMENT STEP 6: BACKGUARD INSTALLATION STEP 7: TEST & ADJUSTMENT The backguard must be installed when there is less Check for proper burner flame characteristics and than a 12” clearance between combustibles and adjust the air shutter if necessary. Each burner and back edge of cooktop. -
Page 10: Step 8: Final Checklist
HEADER FINAL CHECKLIST To Adjust: Gas Supply: 1) Light burner. Pressure regulator (shipped with unit) connected to manifold and is set for 5.0” 2) Turn knob to lowest setting (all the way W.C. for natural gas and 10.0” W.C. for LP. counterclockwise). -
Page 11: Warning
A Special Message to our Customers, P R O PANE GAS INSTALLATION: We are glad you selected one or more of these DCS Professional Appliances. By following a few simple Each unit is ready for use with natural gas. It may be... -
Page 12: Safety
HEADER PRECAUTIONS S E C T I O N O N E : S A F E T Y Your new DCS Professional appliances have been Caution: designed to be safe, reliable appliances. However, use extreme care when using these restaurant cal-... - Page 13 HEADER PRECAUTIONS California Proposition 65 - Do not use aluminum foil as a shield against Wa rning: Burning gas cooking fuel generates some food spills or drippings around any of these appli- by-products which are on the list of substances ances.
-
Page 14: Operation
HEADER BEFORE USING YOUR APPLIANCE S E C T I O N T W O : O P E R A T I O N Before using wok remove all packaging and labels before use or seasoning the wok. 1. Be sure the drip trays are in place before use. -
Page 15: General Use
HI and LO. To turn burner on, push in on Your new DCS Professional wok is equipped with a the control knob and turn it counterclockwise to the heavy cast iron burner typical of those used in LITE-HI position. -
Page 16: Cleaning
It is necessary to clean these only when (888) 281-5698 there is a severe spill over, the burner does not light DCS Parts / Customer service: even though the electric spark igniter sparks. The... -
Page 17: Section Five: Warranty
HOW TO OBTAIN SERVICE For warranty service, contact your local DCS authorized service agency. Provide him with the Model #, Serial #, gas type and date of installation, and a brief description of the problem. If you need assistance in locating the authorized service agency in your area, contact your local dealer.
Need help?
Do you have a question about the DCS-C-24W and is the answer not in the manual?
Questions and answers