
Related Manuals for LifeSpan R-1


Summary of Contents for LifeSpan R-1
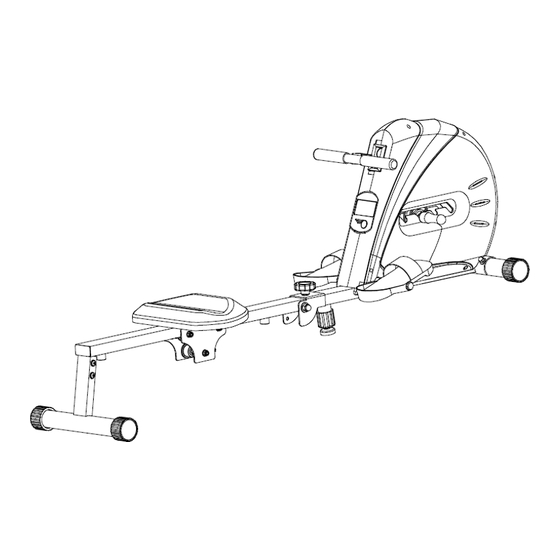
- Page 1 R-1 ROWING MACHINE OWNER’S MANUAL Product may vary slightly from the item pictured due to model upgrades Read all instructions carefully before using this product. Retain this owner’s manual for future reference.
-
Page 2: Table Of Contents
TABLE OF CONTENTS IMPORTANT SAFETY INSTRUCTIONS CARE INSTRUCTIONS EXPLODED DIAGRAM PARTS LIST ASSEMBLY INSTRUCTIONS BATTERY REPLACEMENT DISPLAY WARRANTY... -
Page 3: Important Safety Instructions
1. IMPORTANT SAFETY INSTRUCTIONS WARNING - Read all instructions before using this machine. It is important your machine receives regular maintenance to prolong its useful life. Failing to regularly maintain your machine may void your warranty. Please keep this manual with you at all times It is important to read this entire manual before assembling and using the equipment. -
Page 4: Care Instructions
the equipment or that may restrict or prevent movement. This equipment is designed for indoor and family use only Care must be taken when lifting or moving the equipment so as not to injure your back. Always keep this instruction manual and assembly tools at hand for reference. The equipment is not suitable for therapeutic use. -
Page 5: Exploded Diagram
3. EXPLODED DIAGRAM... -
Page 6: Parts List
4. PARTS LIST Description Description Main frame Plug Front stabilizer Handlebar End cap Foam grip Bolt M8x65 Rope Curved washer d8x1.5xΦ20xR30 Bolt Spring washer D8 Bolt M10x80 Nut M8 Sensor wire Bolt φ12.5x130xM12x18 Extended wire Washer D13xφ26x2 Washer D10xφ20x1.5 Pedal Nut M10 Screw ST4.2x18 End cap... -
Page 7: Assembly Instructions
5. ASSEMBLY INSTRUCTIONS STEP 1: 1. Fix the handlebar (22) to the axle (24) STEP 2: Fix the front stabilizer (2) to the main frame (1) with bolt (4), curved washer (5), spring washer (6) and nut (7). Install the adjustable foot pad (40) to the main frame (1) as shown.(Adjust it to the suitable position to connect the rail tube(45)) - Page 8 STEP 3: 1. Fix the pedals (10) to the main frame (1) with bolts (8) and washers (9).
- Page 9 STEP 4: 1. Fix the saddle (52) to the saddle post (51) with screws (48), spring washers (49) and washers (50). 2. Fix the rear support frame (47) to the rail tube (45) with screw (46), spring washers (6) and washers (15).
- Page 10 STEP 5: 1. Connect the extended wire (36) to the sensor wire (35), 2. Attach the rail tube (45) to the main frame (1) with bolts (34), washers (37) and nuts (38). 3. Attach the bolt (33) and the washer (15) to the main frame (1).
- Page 11 STEP 6: Adjusting Tension 1. Pull up the handlebar (22) from the groove as shown by the arrows 2. Pull handlebar (22) forward or backward , then insert to another groove as arrow shown.
- Page 12 STEP 7: Folding the machine 1. Before folding the machine, please remove the bolt (33) and washer (15). 2. Use the bolt (33) and washer (15) to secure the machine in the folded position.
-
Page 13: Battery Replacement
6. BATTERY REPLACEMENT Push the Clip at the bottom of the Computer as shown above. Remove the Computer from the holder taking care not to damage the connective Computer Wire. Requires 2x 1.5 v AA batteries ( Not Included) CAUTION: Install batteries to correct polarity. -
Page 14: Display
7. DISPLAY FUNCTIONAL BUTTON: MODE - Push down to select functions. - Push down and hold for 2 seconds to reset all functional value. FUNCTIONS AND OPERATIONS 1. SCAN: When in SCAN position, the meter will rotate through the following functions: time, count, total count, calorie, count/min and pulse (if applicable). -
Page 15: Warranty
8. WARRANTY AUSTRALIAN CONSUMER LAW Many of our products come with a guarantee or warranty from the manufacturer. In addition, they come with guarantees that cannot be excluded under the Australian Consumer Law. You are entitled to a replacement or refund for a major failure and compensation for any other reasonably foreseeable loss or damage. You are entitled to have the goods repaired or replaced if the goods fail to be of acceptable quality and the failure does not amount to a major failure.
Need help?
Do you have a question about the R-1 and is the answer not in the manual?
Questions and answers