Table of Contents
Advertisement
Quick Links
Advertisement
Chapters
Table of Contents

Subscribe to Our Youtube Channel
Related Manuals for Sagem FAX 3245


Summary of Contents for Sagem FAX 3245
- Page 1 FAX 3245 MF 3265 User Manual...
-
Page 2: Dear Customer
Dear Customer, Copier Th ank you very much for having decided to purchase a SAGEM fax machine. We hope that you will have lots of fun using your new laser fax machine. With your new fax • 64 grey tones machine you can send and receive faxes, make tele phone •... -
Page 3: Table Of Contents
Table of Contents Table of Contents Printing Multiple Copies ....24 Safety Instructions... 4 Time Stamp ....24 Broadcast Transmissions . -
Page 4: Safety Instructions
Chapter Safety Instructions Safety Instructions In order to avoid possible dangers, damage or malfunc- if you see smoke coming from the device, you must im- tions, please heed the following safety instructions for the mediately pull the mains cable out of the power socket. setup and operation of your fax machine. - Page 5 Chapter Safety Instructions Neither telephone nor fax will operate during power ¿ failure. Never open the toner cartridge. If toner dust es- ¿ capes, you should avoid allowing it to contact your skin and eyes. Store both new and used cartridges in a place where they will not come into the hands of chil- dren.
-
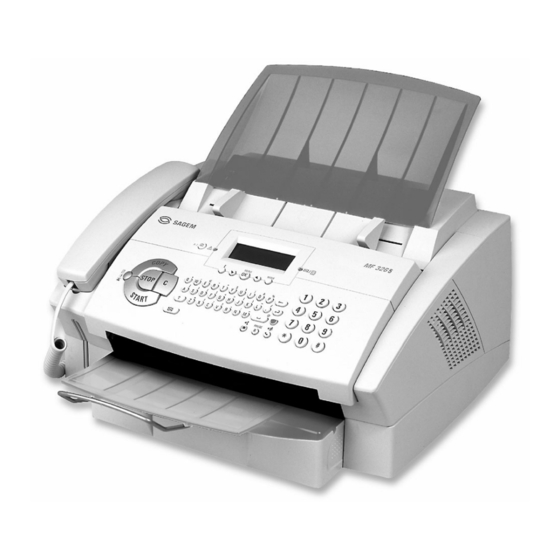
Page 6: Overview
Chapter Overview Overview Description of the Machine Document support Document guide Document feed slot Cover Operation panel with LCD display Document outlet Print-out and fax outlet (extendable) Telephone handset Paper tray with spiral cable Opening for Plug’n’Print card Toner cartridge Connections on the Rear Side Telephone handset External device... -
Page 7: Operation Panel With Lcd Display
Chapter Overview Operation Panel with LCD Display Symbols on the LCD Display — SFINE resolution confi gured — Access telephone Green Lamp —It fl ash- — PHOTO resolution confi gured » book functions es whenever an SMS message — FINE resolution confi gured has arrived or when a docu- Red lamp —If the lamp... -
Page 8: Package Contents
Chapter 1. Installation Package Contents 1. Installation Fax machine Unpacking and Connecting Attaching the Document Support Insert the document support into the two openings in the cover. Th e document support should snap securely into place. Paper tray Document support Document outlet tray Extending the Print-out and fax outlet tray... -
Page 9: Toner Cartridge
In order to guarantee a good print quality, For all other countries ¡ use only original SAGEM toner cartridges. Other toner cartridges can cause damage to the fax machine. Use of other toner cartridges also voids the guarantee. 1. Installation... - Page 10 Chapter 1. Installation Open the cover by taking hold of both document Remove the black protective foil and other packaging material, but do not yet remove the protective strip guides and tipping the cover backward. from the cartridge. Shake the new toner cartridge back and forth several times in order to distribute the toner evenly, thereby Remove the old toner cartridge, by gripping it at the improving the print quality.
- Page 11 Chapter 1. Installation 12 Pull the Plug’n’Print card out of the fax machine. Close the cover. Make sure that the cover snaps se- curely into position on both sides. You can interrupt the recharging process at any time by simply pressing STOP. However, the toner level memo- new cartridge? appears on the display.
-
Page 12: Paper
Chapter 1. Installation Forms that have been printed out by a laser Paper ¡ printer are not suitable for further printing. Th is can lead to a paper jam. If a paper jam should Before your fax machine will be ready to make copies occur, follow the suggestions set forth in the chap- ter entitled Troubleshooting / Paper Jam. -
Page 13: Additional Devices
Chapter 1. Installation der to get a connection to the public telephone network If you are using cordless telephone with SMS function from a private branch exchange. on the same connection, then the specifi c device at which you will receive and SMS message will depend on the Press MENU/OK, and OK. -
Page 14: Easylink
Chapter 1. Installation In GB For all other countries Easylink Th e Easylink function provides assistance in the use of external devices that are connected to the same telephone line. To this end, additional telephones must be set to the tone dialling mode (DTMF tones). Refer to your telephone’s user manual to determine how you may set your device to the tone dialling mode. -
Page 15: Settings
Chapter 2. Settings Setting the Date and Time 2. Settings To set the date and time on the display, press MENU/OK, and OK. When needed, your fax machine can print out lists con- taining the most important functions and settings of the machine. -
Page 16: Ring Tone
Chapter 2. Settings With , select whether or not the page header ¾ Protected Fax Reception should appear on every fax transmission. Confi rm with OK. Pressing C will return you to the You can secure your fax reception with a code. In that previous menu step;... -
Page 17: Locking The Machine
Chapter 2. Settings Enter the four-digit locking code and confi rm by Locking the Machine pressing OK. Select only direct. with ¾ Confi rm with OK. Pressing C will return you to the With the locking function, you can prevent unauthor- previous menu step;... -
Page 18: Manual Mode
Chapter 2. Settings Manual Mode Manual In the mode, your fax machine behaves like a normal telephone. If you receive a fax call, you must start fax reception manually (either a whistle tone or silence will be heard in the handset). In order to receive the fax, you must press START. -
Page 19: Telephone
Chapter 3. Telephone Enter a name using the letter keyboard. To enter 3. Telephone capital letters, press and the desired key simultane- ously. You may add a space by pressing the key. ½ Th e symbols are displayed directly above the letter keys. -
Page 20: Quick Search
Chapter 3. Telephone Enter the initial letters or select the entry you would a recipient from the telephone book, press , then press OK. Confi rm with OK. like to delete with ¾ Confi rm the deletion by pressing OK. If necessary, enter a new number for the group. -
Page 21: Calling Line Identifi Cation
Chapter 3. Telephone Calling Line Identification (Depending on the country and telephone network) Your fax machine will show a caller’s telephone number before you pick up the handset. To make use of this func- tion, Calling Line Identifi cation Presentation (CLIP) must be enabled for your telephone line. -
Page 22: Fax
Chapter 4. Fax Inserting Documents 4. Fax Separate the documents by fanning them ¡ As much as possible, use fax documents printed with out, then align them by tapping the edge darker coloured text (black or dark-blue). Yellow, orange of the stack gently against a fl at surface. Th is will and green are not suitable. -
Page 23: Manually Sending A Fax
Chapter 4. Fax Redial list or caller list: To select a number from Transmission Report the redial list, press . To select a º ¾ number from the caller list, press the blue key and Your fax machine will print you a transmission report— º... -
Page 24: Sorted Print-Outs
Chapter 4. Fax Sorted Print-Outs Broadcast Transmissions If your fax machine receives fax transmissions with You have two options for sending a fax transmission to multiple pages, it will sort the pages as it prints several recipients: You can either enter the numbers of them out. -
Page 25: Time-Deferred Sending
Chapter 4. Fax Time-Deferred Polling Time-Deferred Sending Press MENU/OK, and OK. With this function, you can send fax transmissions at a later time—within a 24-hour period. For example, you Enter the number from which you would like to poll can use this feature to take advantage of better telephone a fax or select an entry from the telephone book, the redial list or the caller list. -
Page 26: Journal
Chapter 4. Fax Immediate Job Execution Enter the fax number. Add a dialling pause to the number by pressing the blue key along with R/PAUSE. Now en- Press MENU/OK, and OK. Select the job that ter the direct dial number, the sub-address or the code, R/PAUSE for example you would like to execute immediately by pressing... -
Page 27: Copier
Chapter 5. Copier Push the document guide inwards, so that it lies level on 5. Copier the documents. You can copy documents with your fax machine. You have two diff erent options available for copying. It is pos- sible either to make copies automatically or to adjust the copies through your own settings. -
Page 28: Sms
Chapter 6. SMS Redial list: Press , then select the desired º 6. SMS number from the redial list by pressing . Press ¾ . Th e fax machine will now send the SMS message. (Short Message Service) Caller list: To select a number from the caller list, press the blue key and . -
Page 29: Printing Sms Messages
Chapter 6. SMS Sending SMS Messages to Printing SMS Messages E-mail or Fax If you have turned the automatic printing function off , (Depending on country and telephone network) use this function to print your SMS messages. print SMS Press , select with and con-... -
Page 30: Sms Settings
Chapter 6. SMS Turning Off the Automatic Printing sub-address (depending on country and telephone net- work). If the sub-address of the machine is 1, for exam- ple, you should dial Received SMS messages are printed out automatically. 123 45 67 You have the option of turning this function off... -
Page 31: Text2Fax
Chapter 6. SMS Confi rm with OK. Pressing C will return you to the Text2Fax previous menu step; pressing STOP will return you to the root menu. (Depending on country and telephone network) Sending of SMS notifi cations may involve ¡... -
Page 32: Pc Connection
Chapter 7. PC Connection automatically, select the CD-ROM drive in the Win- 7. PC Connection dows® Explorer and start the program S. with a double-click.) (MF 3265) Th e C S window appears on the screen. You can install or uninstall C S or load the user manual for P... -
Page 33: Uninstalling The Software
Chapter 7. PC Connection Only after the restart, connect the laser fax machine Next you will be asked to accept the licensing conditions. Click on Y. to your PC with a typical USB cable. Th e USB port of your device can be found on the rear side. Uninstalling the Software Th e program can now commence with the installation. -
Page 34: Using The Companion Suite
Chapter 7. PC Connection cally or whether you would like to restart the computer as well as in Microsoft Outlook®. Click on the A yourself at a later time. Click on F. B button. After rebooting has occurred, removal of the C S... -
Page 35: Settings
Chapter 7. PC Connection Add group Settings Click on the S button to modify the basic set- tings of your fax machine. Among other setting, you can enter your name and number, set the date and time, select the connection type and set the parameters for the fax machine. -
Page 36: Scanning
Chapter 7. PC Connection use any other printer. Simply select the L P Select the Twain Scanner Driver as your scanner. Se- S as your printer. lect whether you would like to scan a document or a photograph. Click on S. Th e Twain Scanner Driver Th e L... -
Page 37: Troubleshooting
Chapter 8. Troubleshooting inadvertently pressed STOP, you can start the re- 8. Troubleshooting charging process by pressing MENU/OK, and OK and then selecting new black with . Confi rm with OK. ¾ Paper or Document Jams If a document jam should occur in the front area: Work the panel upwards until it snaps into position. -
Page 38: Appendix
Chapter Appendix Error Correction Mode (ECM): the person whom you are calling. Your Th e Appendix telephone company must off er both serv- ECM method reduces transmission er- ices and must enable them for your PTT rors that result, for example, from bad line. -
Page 39: Abbreviations
Chapter Appendix grey tones. After the fax transmission has been completed and before the connec- Abbreviations tion is terminated, the receiving device confi rms receipt of the transmission (see Answering Machine Fax Groups). bps: Bits per second (transfer rate) Hard modem: Th e hard modem is a fi... - Page 40 Chapter Appendix Toner Level Memory: can be branch exchanges. To establish a Update the toner connection to the public telephone net- level memory of your fax machine with work from a private branch exchange, one the Plug’n’Print card that is included must dial a number or press a key before with each new toner cartridge.
-
Page 41: Functions List
Chapter Appendix Functions List 1 Installation ....30, 31 parameters Settings for sending and receiving SMS ....15 country List of the available countries . -
Page 42: Technical Data
Chapter Appendix Technical Data Copier Measurements (W × H × D) ..370 × 200 × 330 mm Type ..Black-and-white, 64 grey tones Weight ....approx. 7.25 kg Resolution . -
Page 43: Guarantee
SAGEM shall have no liability under the guarantee in respect of: SAGEM. Th e repair and delivery costs will be invoiced to the customer. • damage, defects breakdown or malfunction due to:... - Page 44 Chapter Appendix...
-
Page 45: Index
Chapter Appendix Index Connect Error correction mode . . . additional devices ..Execute Handshake ..EXT socket ..jobs immediately ..Holding . -
Page 46: Toner Level Memory
Chapter Appendix Manual settings of machine ..Save Stand-alone ..fax reception ..USB connection ..entry telephone book . . Start fax reception mode . - Page 47 Chapter Appendix drivers ..Paper Port ..software ..Unpacking ... Update toner level memory .
-
Page 48: United Kingdom
Telephone: 02 07 - 536 54 00 Hereby, SAGEM Communication Austria GmbH, de- Fax: 02 07 - 519 50 24 clares that this SAGEM LF 3245 or LF 3265 is in compli- ance with the essential requirements and other relevant provi- sions of Directive 1999/5/EC.
Need help?
Do you have a question about the FAX 3245 and is the answer not in the manual?
Questions and answers