
Related Manuals for Elation Vision Scan 250


Summary of Contents for Elation Vision Scan 250
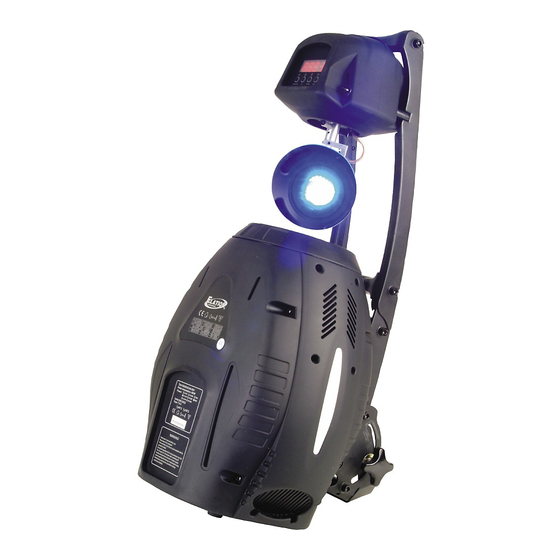
- Page 1 Vision Scan 250 Elation Professional 4295 Charter Street Los Angeles, Ca 90058 www.elationlighting.com Rev. 11/29/2005...
-
Page 2: Table Of Contents
Vision Scan 250™ Contents General Information……………………………………………………………………… 3 a. Introduction………………………………………………………………………. a. Unpacking………………………………………………………..…………..….. 3 a. Customer Support…………………………………………….………………… 3 a. Warranty Registration……………………………………………………..…… a. Discharge Lamp Warning……………………………………………………… 4 Safety Instructions………………………………………………………..…………. 6 Features…………………………………………………………………………………… 8 General Guidelines………………………………………………………………………. 9 Lamp Installation…………………………………………………………………………. 10 a. Lamp installation…………………………………………………….………….. 10 a. Lamp optimization……………………………………………………..………… 11 Mounting and Installation………………………………………………………….……. -
Page 3: General Information
INTRODUCTION: Congratulations, you have just purchased one of the most innovative and reliable lighting fixtures on the market today! The Vision Scan 250,™ has been designed to perform reliably for years when the guidelines in this booklet are followed. Please read and understand the instructions in this manual carefully and thoroughly before attempting to operate this unit. -
Page 4: Warranty Registration
Please do not discard the shipping carton in the trash. Please recycle whenever possible. WARRANTY REGISTRATION: The Vision Scan 250™ carries a two year (730 days) limited warranty. Please fill out the enclosed warranty card to validate your purchase. All returned service items whether under warranty or not, must be freight pre-paid and accompany a return authorization (R.A.) number. - Page 5 Vision Scan 250™ This risk is increased with age; added care is encouraged when dealing with older lamps. Thus, lamp should always be replaced at the end of their recommended duty cycle. Extreme caution should be used when operated this or any fixture fitted with a gas discharge lamp.
-
Page 6: Safety Instructions
1. Never touch the fixture during normal operation. This can cause severe personal injuries and/or damage to the fixture. 3. Be sure to unplug the VISION SCAN 250™ from the power outlet before performing any service related issues. 1. Lamp Replacement; Allow at least 30 minutes after disconnecting main power before you open the VISION SCAN 250™. - Page 7 Vision Scan 250™ may increase the risk of damage and/or personal injury. 1. To reduce the risk of fire or shock, do not expose this fixture to rain or moisture. 1. Do not attempt to operate this fixture if the power cord has become damaged or frayed.
-
Page 8: Features
Vision Scan 250™ 3. Features • Pan movement: 180° / Tilt movement: 50° • 3 operation mode: DMX controlled, stand alone or sound activated • 8 colors plus white (including UV filter), with two direction rainbow effect • User selectable color change (mode 1: full colors, mode 2: split-colors) •... -
Page 9: General Guidelines
Vision Scan 250™ 4. GENERAL GUIDELINES This fixture is a professional lighting effect designed for use on stage, in nightclubs, in theatres, etc. Do not attempt operation or installation without a proper knowledge on how to This fixture was designed for indoor use only. -
Page 10: Lamp Installation
Vision Scan 250™ 5. LAMP INSTALLATION INSTRUCTIONS Installing or replacing the lamp Only install the lamp with the device unplugged from the mains. The lamp has to be replaced when it is damaged or deformed. Before replacing the lamp be sure the unit has ample time to cool, to avoid injury to yourself never touch the lamp when it is hot. -
Page 11: Lamp Optimization
The minimum deviation amount is 1.0mm. Running the fixture within a lower deviation can cause damage to the lamp and/or lens. The Vision Scan 250™ lamp holder is aligned at the factory. However, due to slight imperfections in all lamps, fine adjustments will improve light performance. Please follow the procedure below for proper lamp optimization: 1. - Page 12 Vision Scan 250™ adjust the lamp until the light is even. 3. To reduce a hot-spot, pull the lamp in by turning all three screws clockwise a 1/4-turn at a time until the light is evenly distributed. 4. If the light is brighter around the edge than it is in the center, or if light output is low, the lamp is too far back in the reflector.
-
Page 13: Mounting And Installation
0,5m Mounting The VISION SCAN 250™ is fully operational in three different mounting positions, hanging upside-down from a ceiling, side mounted, or set on a flat level surface (see illustration below). Be sure this fixture is kept at least 0.5m away from any flammable materials (decoration etc.). -
Page 14: Mounting Points
Be sure to complete all rigging and installation procedures before connecting the main power cord to the appropriate wall outlet. Clamp Mounting The Vision Scan 250™ provides a unique mounting bracket assembly that integrates the ©Elation Professional® Vision Scan 250™... -
Page 15: Securing
Securing the VISION SCAN 250™ Regardless of the rigging option you choose for your VISION SCAN 250™ always be sure to secure your fixture with a safety cable. The fixture provides a built-in rigging point for a safety cable on the hanging bracket as illustrated above. -
Page 16: Understanding Dmx
Vision Scan 250™ 7. Understanding DMX Data Cable (DMX Cable) Requirements (For DMX and Master/Slave Operation): Your fixture and your DMX controller require a standard 3-pin XLR connector for data input and data output (see figure below). If you are constructing your own cables be sure to use two conductor shielded digital cable rated at a 120 ohms (this cable can be purchased at almost all professional sound and lighting stores). -
Page 17: Dmx Terminator
Vision Scan 250™ connections unless you are using an approved DMX splitter such as the Elation Opto Branch 4™ or DMX Branch/4™. DMX-512 connection with DMX terminator When longer runs of cable are used, you may need to use a terminator on the last fixture to avoid erratic behavior. -
Page 18: Dmx Addressing
In the case of the Vision Scan 250™, which is a 14 channel fixture, you should set the starting DMX address of the first unit to 1, the second unit to 15 (14 + 1), the third unit to 29 (14 + 15), and so on. -
Page 19: Display Indicators
Vision Scan 250™ 8. Display LED Indicators. The Vision Scan 250™ has two LED indicators on the display. These indicators are designed to give a quick visual indication of the fixtures’ status. The illustration below details the functionality of the LED indicators. -
Page 20: Fixture Menu
LED Control Panel: The control panel located on the top, front of the fixture allows you to access the main menu and make all necessary adjustments to the Vision Scan 250™. During normal operation, tapping the “MODE” key once will access the fixture’s main menu. - Page 21 Vision Scan 250™ AUTO OFF/ RUN / AUDI Runs fixture for no DMX LAMP ON/OFF Manually switches lamp “on” and “off” Reset all motors and returns fixture to home SCAN Reset only motors for pan/tilt COLR Reset only motors for colors...
-
Page 22: Menu Functions
DMX signal the display will flash continuously. To set or adjust a DMX address, please follow the procedure below: 1. Switch on the VISION SCAN 250™ and wait for the fixture reset process to finished. 2. Press the Mode/Esc button to access the main menu. Toggle through the menu by pressing the Up and Down buttons until the display shows A001. - Page 23 Vision Scan 250™ 2. TEST MENU - T-01 - T -XX (Test) - T ests the functions of each channel. There are 14 DMX channels, and all except channels 7 and 13 can be tested. To enter the test menu follow the procedure below: 1.
- Page 24 Vision Scan 250™ 5. Press MODE/ESC to return to the main menu. AUTO – Runs the unit without any DMX signal in stand-alone mode. Follow the procedure below to enter the auto menu: 1. Access the main menu. 2. Tap the UP or DOWN button until “PLAY” is displayed, press ENTER.
- Page 25 Vision Scan 250™ - When you activate this reset function, the fixture will begin to reset all motors. 1. Access the main menu. 2. Tap the UP button until “RESE” is displayed, press ENTER. 3. Tap the UP button until “ALL” is displayed, press ENTER.
- Page 26 Vision Scan 250™ SHTR - When you activate this reset function, the fixture will only reset the shutter/dimmer motor. 1. Access the main menu. 2. Tap the UP button until “RESE” is displayed, press ENTER. 3. Tap the UP button until “SHTR” is displayed, then press ENTER to confirm.
- Page 27 Vision Scan 250™ 4. Press MODE/ESC to return to the main menu. LAMP - With this function you can display the running time of the lamp. 1. Access the main menu. 2. Tap the UP button until“TIME”is displayed, press ENTER.
- Page 28 Vision Scan 250™ 8. RTLT MENU - This menu function will reverse the mirror TILT movements. 1. Access the main menu. 2. Tap the UP button until“RTLT”is displayed, press ENTER. 3. The display will show“ON/OFF”. 4. Press the UP button to select “O N ” to activate this function, or “ O F F ” to deactivate this function.
- Page 29 Vision Scan 250™ 6. Press MODE/ESC to return to the main menu. 11. DISPLAY MENU - This menu function will control the various on-board display features. VALU – This function will display the DMX value of each channel as it is adjusted through the use of a DMX console.
- Page 30 Vision Scan 250™ deactivate this function. 6. Press ENTER to confirm. 7. Press MODE/ESC to return to the main menu. 12. SPEC MENU – This menu option access all the special functions listed below. LAAU - Automatic lamp start with power.
- Page 31 Vision Scan 250™ functions: Fixture Settings: 1. Access the main menu. 2. Tap the UP button until “SPEC” is displayed, press ENTER. 3. Tap the UP button until “RDMX” is displayed, press ENTER. 4. The display will show “ON/OFF.” 5. Press the UP button to display “ON” to activate this function, or “OFF” to deactivate this function.
- Page 32 Vision Scan 250™ deactivate this function. 6. Press ENTER to confirm. 7. Press MODE/ESC to return to the main menu. DLAY – This function allows the user to set a lamp “strike” delay time. 1. Access the main menu. 2. Tap the UP button until “SPEC” is displayed, press ENTER.
- Page 33 Vision Scan 250™ 1. Access the main menu. 2. Tap the UP button until “SPEC” is displayed, press ENTER. 3. Tap the UP button until “DFSE” is displayed, press ENTER. 4. The display will show “ON/OFF.” 5. Press the UP button to display “ON” to activate this function, or “OFF” to deactivate this function.
- Page 34 Vision Scan 250™ internal homing mechanism become slightly out of adjustment. This function is protected with a password to prevent unauthorized personal from tampering with the fixture. To enter the calibration menu follow the steps below: 1. Access the main menu.
- Page 35 Vision Scan 250™ REC – Auto save function. RUN – Program test mode. - With the function “RUN”, you can run your pre-made program. You can set the number of steps under Step (S-01- S-48). You can edit the individual scenes under Edit.
- Page 36 Vision Scan 250™ 1. Access the main menu. 2. Tap the UP button until “EDIT” is displayed, press ENTER. 3. Tap the UP button until “SC01” is displayed. 4. The display indicates “SC01,” this stands for the first scene of your program.
- Page 37 Vision Scan 250™ to run. Note: “XX” is always three seconds not one second. 11. Adjust the time needed by tapping the UP button. 12. Press ENTER to save the settings for the scene you are editing, the display will change to the next scene automatically.
-
Page 38: Dmx Channel Traits
Vision Scan 250™ . DMX Channel Traits: The chart below details the channel layout for 14 DMX channels (default). In 8bit mode the “Pan Fine” and “Tilt Fine” channels are not used, thus converting the fixture into a 12 channel DMX fixture. -
Page 39: Dmx Channel Values
Vision Scan 250™ DMX channel function and values: Channel 1 - PAN movement 8bit: Channel 2 – Pan fine 16bit: Channel 3 - TILT movement 8bit: Channel 4 – Tilt fine 16bit: Channel 5 - Color Wheel : 0-13 Open / White... - Page 40 Vision Scan 250™ Channel 7 - Rotating Gobo Index, Rotating Gobo Rotation : 0-127 Gobo Indexing 128-187 CW Gobo Rotation from fast to slow 188-193 No rotation 194-255 CCW Gobo Rotation from slow to fast Channel 8- Fixed Gobos :...
- Page 41 Vision Scan 250™ 216-223 Macro 12 224-231 Macro 13 232-239 Macro 14 240-247 Macro 15 248-255 Macro 16 Channel 10 – Focus : Continuous adjustment from far to near 0-255 Channel 11 - Shutter, strobe: 0-31 Shutter closed 32-63 No function (shutter open)
- Page 42 Vision Scan 250™ 100-119 Internal program 1 120-139 Internal program 2 140-159 Internal program 3 160-179 Internal program 4 180-199 Internal program 5 200-219 Internal program 6 220-239 Internal program 7 240-255 Auto program by music ©Elation Professional® Vision Scan 250™...
-
Page 43: Error Codes
Vision Scan 250™ 11. ERROR CODES: When power is applied, the unit will automatically enter a “reset/test” mode. This mode brings all the internal motors to a home position. If there is an internal problem with one or more of the motors an error code will flash in the display in the form of “XXer” were as XX will represent a function number. - Page 44 Vision Scan 250™ command. This message will appear after a fixture reset if the gobo wheel’s magnetic-indexing circuit malfunctions (sensor failed or magnet is missing) or there is a stepper motor failure (defective motor or a defective motor IC drive on the main PCB).
-
Page 45: Cleaning And Maintenance
There are no user serviceable parts inside this fixture with the exception of the lamp. Please refer all other service issues to an authorized Elation service technician. Should you need any spare parts, please order genuine parts from your local dealer. -
Page 46: Warranty
® defective parts at its expense, and will absorb all expenses for warranty service and repair labor by reason of defects in material or workmanship. The sole responsibility of Elation Professional under this warranty shall be limited to the repair of the product, or ®... - Page 47 The consumer’s and or Dealer’s sole remedy shall be such repair or replacement as is expressly provided above; and under no circumstances shall Elation Professional® be liable for any loss or damage, direct or consequential, arising out of the use of, or inability to use, this product.
-
Page 48: Photometric Data
Vision Scan 250™ 14. Photometric Data: 15. Gobos: ©Elation Professional® Vision Scan 250™... -
Page 49: Dimensional Drawings
Vision Scan 250™ 16. Dimensional Drawings: ©Elation Professional® Vision Scan 250™... -
Page 50: Circuit Schematic
Vision Scan 250™ 17. Circuit Schematic ©Elation Professional® Vision Scan 250™... -
Page 51: Technical Specifications
Vision Scan 250™ 18. TECHNICAL SPECIFICATIONS Power supply (user selectable): _98VAC,50Hz;_120VAC,50Hz;_208VAC,50Hz; _220VAC,50Hz;_230VAC,50Hz;_240VAC,50Hz; or _98VAC,60Hz;_120VAC,60Hz;_208VAC,60Hz; _220VAC,60Hz;_230VAC,60Hz;_240VAC,60Hz; Power consumption: Max. 400w Lamp: MSD 250/2 GY9.5 socket, Metal Halide (250w, 8500˚K, 3000hrs, 18,000lm) Fuse: GMA 250v/10A Motors: 10 micro motors Pan Movement: 180˚ in 2.0 sec. - Page 52 Vision Scan 250™ Elation Professional 4295 Charter Street Los Angeles, CA. 90058 323-582-3322 / 323-582-3108 fax www.ElationLighting.com / Info@ElationLighitng.com ©Elation Professional® Vision Scan 250™...
Need help?
Do you have a question about the Vision Scan 250 and is the answer not in the manual?
Questions and answers