Table of Contents
Advertisement
Quick Links
XX204-20-00
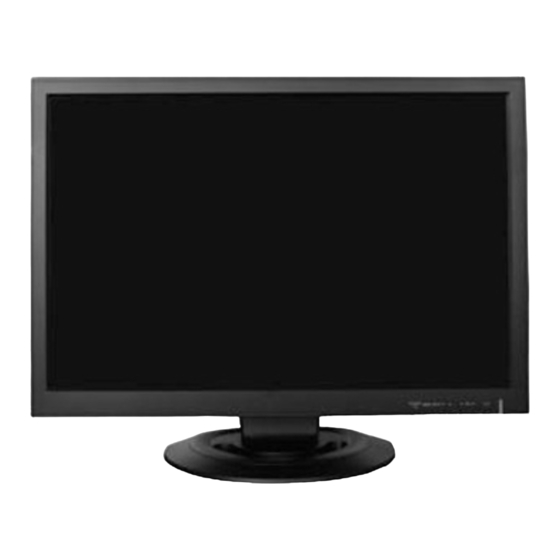
VM-622LCD
Flat Panel LCD Monitor
Vicon Industries Inc. does not warrant that the functions contained in this equipment will meet your
requirements or that the operation will be entirely error free or perform precisely as described in the
documentation. This system has not been designed to be used in life-critical situations and must not
be used for this purpose.
Copyright © 2009 Vicon Industries Inc. All rights reserved.
Product specifications subject to change without notice.
VICON INDUSTRIES INC., 89 ARKAY DRIVE, HAUPPAUGE, NEW YORK 11788
TEL: 631-952-CCTV (2288) FAX: 631-951-CCTV (2288) TOLL FREE: 800-645-9116
24-Hour Technical Support: 800-34-VICON (800-348-4266)
UK: 44/(0) 1489-566300 WEB: www.vicon-cctv.com
Vicon Part No. 8009-8204-20-00
Rev 1009
Advertisement
Table of Contents

Subscribe to Our Youtube Channel
Related Manuals for Vicon VM-622LCD


Summary of Contents for Vicon VM-622LCD
- Page 1 VM-622LCD Flat Panel LCD Monitor Vicon Industries Inc. does not warrant that the functions contained in this equipment will meet your requirements or that the operation will be entirely error free or perform precisely as described in the documentation. This system has not been designed to be used in life-critical situations and must not be used for this purpose.
- Page 3 SAFETY INSTRUCTION ………………………………………………………………….. 2 ~ 3 CAUTIONS ………………………………………………………………......FCC RF INTERFERENCE STATEMENT ……………………………......CONNECTING WITH EXTERNAL EQUIPMENT ………………………………………. REMOTE FUNCTIONS …………………………………………………………………… CONTROLS AND FUNCTIONS ………………………………………………………….. 8 ~ 41 MOUNTING GUIDE ……………………………………………………………………….. D-SUB CONNECTOR PIN ASSIGNMENTS ……………………………………………. POWER MANAGEMENT …………………………………………………………………. SPECIFICATIONS …………………………………………………………………………. TROUBLE SHOOTING GUIDE …………………………………………………………...
-
Page 4: Important Safeguards - Indoor Use
The product shows a significant change in performance. 2. Retain Instructions - Retain all safety and operating 18. Replacement Parts - Use only Vicon specified replacement instructions for future reference. parts or an approved equivalent to prevent unit damage and 3. - Page 5 Important Safeguards – Indoor Use (Cont) 22. For Rack-Mounted Units Only – The following precautions apply to all rack-mounted units. Elevated Operating Ambient - If installed in a closed or multi- unit rack assembly, the operating ambient temperature of the rack environment may be greater than room ambient.
- Page 6 CAUTION The power supply cord is used as the main disconnect device, ensure that the socket-outlet is located/installed near the equipment and is easily accessible. ATTENTIONN Le cordon d`alimentation est utillsé comme interrupteur général. La prise de courant doit être située ou installée à...
-
Page 7: Fcc Notice
FCC Notice Note: Complies with Federal Communications Commission Rules & Regulations Part 15, Subpart B for a Class A digital device. WARNING This equipment generates and uses radio frequency energy and if not installed and used properly, that is, in strict accordance with the manufacturer’s instruction, may cause interference to radio and television reception. - Page 8 A. BOTTOM PANEL CONTROL 6, 7 1. VIDEO2(AV2) OUT 2. VIDEO2(AV2) IN 3. VIDEO1(AV1) OUT 4. VIDEO1(AV1) IN 5. TRIGGER INPUT 6, 7. AUDIO IN(R+L) for AV1, AV2 and S-VIDEO 8. S-VIDEO(Y/C) IN 9. AUDIO OUT(Speaker) 10. PC STEREO IN 11.
-
Page 9: Remote Controller(Option)
B. REMOTE CONTROLLER(Option) 1. POWER( Turn the power ON or OFF. There will be a few seconds delay before the display appears. 2. SOURCE Select pc or video(AV1/AV2/S-Video/HDMI/DVI/PC) sources. 3. AUTO Auto geometry adjustment in PC Source. 4. HOLD Stop the Trigger & Auto switching functions. 5. - Page 10 C. FRONT KEY CONTROL 8, 9 1. SOURCE/ Select PC or video. Select On Screen Display menu. 2. MENU/EXIT Activate and exit the On Screen Display. 3, 4. AUTO/▼, ▲ These buttons allow user to enter the sub-menu of the activated function. The up(▲) button is HOLD function and stop the Trigger &...
-
Page 11: Osd Menu Description
OSD MENU DESCRIPTION A: Custom Menu (Only Video Input) 1) Press the MENU button and then press the up(▲) or down(▼) button to select the Custom. 2) Press the up(▲) or down(▼) button to select the sub menu. 3) Press the left(◀) or right(▶) button to adjust the picture setting. 4) Press the MENU button to save. - Page 12 A: Custom Menu (For RGB-PC & HDMI Input) 1) Press the MENU button and then press the up(▲) or down(▼) button to select the Custom. 2) Press the up(▲) or down(▼) button to select the sub menu. 3) Press the left(◀) or right(▶) button to adjust the picture setting. 4) Press the MENU button to save.
- Page 13 B. Picture / Sound Menu (Only Video Input) 1. Picture Mode 1) Press the MENU button and then press the up(▲) or down(▼) button to select the Picture / Sound. 2) Press the right(▶) or SOURCE/ button. 3) Press the up(▲) or down(▼) button to select the Picture Mode. 4) Press the right(▶) or SOURCE/ button.
- Page 14 2-1. Color Tone 1) Press the up(▲) or down(▼) button to select the Color Tone. 2) Press the right(▶) or SOURCE/ button. 3) Press the right(▶) or SOURCE/ button again. 4) Press the up(▲) or down(▼) button to select the Color Tone option. 5) Press the MENU button to save.
- Page 15 2-2. Color Tone (User) 1) Press the up(▲) or down(▼) button to select the User. 2) Press the MENU button. 3) Press the up(▲) or down(▼) button to select the User option. 4) Press the left(◀) or right(▶) button to adjust the Red, Green or Blue setting. 5) Press the MENU button to save.
- Page 16 3. Mute 1) Press the up(▲) or down(▼) button to select the Mute. 2) Press the right(▶) or SOURCE/ button. 3) Press the up(▲) or down(▼) button to select the On or Off. 4) Press the MENU button to save. 14 …………………………………………………………………….
- Page 17 4. Volume 1) Press the up(▲) or down(▼) button to select the Volume 2) Press the left(◀) or right(▶) button to adjust Volume setting. 3) Press the MENU button to save. INSTRUCTION MANUAL ……………………………………………………………………. 15...
- Page 18 5. Size 1) Press the up(▲) or down(▼) button to select the Size 2) Press the right(▶) or SOURCE/ button. 3) Press the up(▲) or down(▼) button to select the Size option. 4) Press the MENU button to save. 16 ……………………………………………………………………. INSTRUCTION MANUAL...
- Page 19 6. NR (Noise Reduction) 1) Press the up(▲) or down(▼) button to select the NR. 2) Press the right(▶) or SOURCE/ button. 3) Press the up(▲) or down(▼) button to select the On or Off. 4) Press the MENU button to save. INSTRUCTION MANUAL …………………………………………………………………….
- Page 20 7. 3D Comb 1) Press the up(▲) or down(▼) button to select the 3D Comb. 2) Press the right(▶) or SOURCE/ button. 3) Press the up(▲) or down(▼) button to select the On or Off. 4) Press the MENU button to save. 18 …………………………………………………………………….
- Page 21 B. Picture / Sound Menu (For RGB-PC & HDMI Input) 1. Size 1) Press the up(▲) or down(▼) button to select the Size. 2) Press the right(▶) or SOURCE/ button. 3) Press the up(▲) or down(▼) button to select the Size option. INSTRUCTION MANUAL …………………………………………………………………….
- Page 22 Input 2. PC (Only RGB-PC 1) Press the up(▲) or down(▼) button to select the PC. 2) Press the right(▶) or SOURCE/ button. 3) Press the up(▲) or down(▼) button to select the PC sub menu. 4) Press the right(▶) or SOURCE/ button.
- Page 23 C. PIP Menu 1) Press the MENU button and then press the up(▲) or down(▼) button to select the PIP. 1. PIP 1) Press the right(▶) or SOURCE/ button. 2) Press up(▲) or down(▼) button to select the On or Off. 3) Press the MENU button to save.
- Page 24 2. Input Source 1) Press the up(▲) or down(▼) button to select the Input Source. 2) Press the right(▶) or SOURCE/ button. 3) Press the up(▲) or down(▼) button to select the Source option. 4) Press the MENU button to save. ※...
- Page 25 3. PIP Mode 1) Press the up(▲) or down(▼) button to select the PIP Mode. 2) Press the right(▶) or SOURCE/ button. 3) Press the up(▲) or down(▼) button to select the PIP Mode option. 4) Press the MENU button to save. ※...
- Page 26 4. PIP Size 1) Press the up(▲) or down(▼) button to select the Size. 2) Press the right(▶) or SOURCE/ button. 3) Press the up(▲) or down(▼) button to select the Size option. 4) Press the MENU button to save. 24 …………………………………………………………………….
- Page 27 5. Position 1) Press the up(▲) or down(▼) button to select the Position. 2) Press the right(▶) or SOURCE/ button. 3) Press the up(▲) or down(▼) button to select the Position option. 4) Press the MENU button to save. ※ RB: Right of Bottom, LB: Left of Bottom, LT: Left of Top & RT: Right of Top. INSTRUCTION MANUAL …………………………………………………………………….
- Page 28 6. Swap 1) Press the up(▲) or down(▼) button to select the Swap. 2) Press the right(▶) or SOURCE/ button to swap the main image for the sub one. 26 ……………………………………………………………………. INSTRUCTION MANUAL...
- Page 29 7. Sound Select 1) Press the up(▲) or down(▼) button to select the Sound Select. 2) Press the right(▶) or SOURCE/ button. 3) Press the up(▲) or down(▼) button to select the Sound Select option. 4) Press the MENU button to save. INSTRUCTION MANUAL …………………………………………………………………….
-
Page 30: Setup Menu
D. Setup Menu 1) Press the MENU button and then press the up(▲) or down(▼) button to select the Setup. 1. Reset 1) Press the right(▶) or SOURCE/ button 2) Press the right(▶) or SOURCE/ button again. 3) Press SOURCE/ button to execute the reset. - Page 31 2. Language 1) Press the up(▲) or down(▼) button to select the Language. 2) Press the right(▶) or SOURCE/ button. 3) Press the up(▲) or down(▼) button to select language. 4) Press the MENU button to save. INSTRUCTION MANUAL ……………………………………………………………………. 29...
- Page 32 3. OSD Tone 1) Press the up(▲) or down(▼) button to select the OSD Tone. 2) Press the right(▶) or SOURCE/ button 3) Press the up(▲) or down(▼) button to select the OSD Tone option. 4) Press the MENU button to save. 30 …………………………………………………………………….
- Page 33 4. Blue Screen 1) Press the up(▲) or down(▼) button to select the Blue Screen. 2) Press the right(▶) or SOURCE/ button. 3) Press the up(▲) or down(▼) button to select the On or Off. 4) Press the MENU button to save. INSTRUCTION MANUAL …………………………………………………………………….
- Page 34 5. Key Lock 1) Press the up(▲) or down(▼) button to select the Key Lock. 2) Press the right(▶) or SOURCE/ button 3) Press the up(▲) or down(▼) button to select the On or Off 4) Press the MENU button to save. ※...
- Page 35 6. Trigger 1) Press the up(▲) or down(▼) button to select the Trigger. 2) Press the right(▶) or SOURCE/ button. 6-1. Trigger Enable 1) Press the up(▲) or down(▼) button to select the Trigger Enable. 2) Press the right(▶) or SOURCE/ button.
- Page 36 6-2. Trigger Input 1) Press the up(▲) or down(▼) button to select the Trigger Input . 2) Press the right(▶) or SOURCE/ button. 3) Press the up(▲) or down(▼) button to select the Trigger Input option. 4) Press the Menu button to save. 34 …………………………………………………………………….
- Page 37 6-3. Buzzer 1) Press the up(▲) or down(▼) button to select the Buzzer. 2) Press the right(▶) or SOURCE/ button. 3) Press the up(▲) or down(▼) button to select the On or Off. 4) Press the Menu button to save. INSTRUCTION MANUAL …………………………………………………………………….
- Page 38 6-4. Trigger Time 1) Press the up(▲) or down(▼) button to select the Trigger Time. 2) Press left( ) ◀ or right(▶) button to adjust Trigger Time setting. 3) Press the MENU button to save. 36 ……………………………………………………………………. INSTRUCTION MANUAL...
- Page 39 6-5 Trigger Option 1) Press the up(▲) or down(▼) button to select the Trigger Option. 2) Press the right(▶) or SOURCE/ button. 3) Press the up(▲) or down(▼) button to select the Trigger Option setting. 4) Press the Menu button to save. ※...
- Page 40 6-6. Display Type 1) Press the up(▲) or down(▼) button to select the Display Type. 2) Press the right(▶) or SOURCE/ button. 3) Press the up(▲) or down(▼) button to select the Display Type option. 4) Press the Menu button to save. ※...
-
Page 41: Auto Switching
7. Auto switching 1) Press the up(▲) or down(▼) button to select the Auto switching. 2) Press the right(▶) or SOURCE/ button. 7-1. Auto switching On/Off 1) Press the right(▶) or SOURCE/ button. 3) Press the up(▲) or down(▼) button to select the On or Off . 4) Press the Menu button to save. - Page 42 7-2. Auto switching Input enabled 1) Press the up(▲)or down(▼) button to select the Inputs enabled. 2) Press the right(▶) or SOURCE/ button. 3) Press the up(▲) or down(▼) button to select the Input. 4) Press the right(▶) or SOURCE/ button.
- Page 43 7-3. Auto switching Time 1) Press the up(▲) or down(▼) button to select the Time. 2) Press the left( ) ◀ or right(▶) button to adjust the Time setting. 3) Press the MENU button to save. INSTRUCTION MANUAL ……………………………………………………………………. 41...
-
Page 44: Wall Mounting
Wall mounting The LCD monitor is suitable for wall mounting by using the VESA 100 standard wall mount (not included in the delivery). 42 ……………………………………………………………………. INSTRUCTION MANUAL... -
Page 45: Pin Assignments
▶ PIN ASSIGNMENTS Pin 1 RED VIDEO GREEN VIDEO SIGNAL CABLE DETECT BLUE VIDEO GROUND GROUND SDA(for DDC) GROUND H-SYNC.(or H+V SYNC.) RED GROUND V-SYNC. GREEN GROUND SCL(for DDC) BLUE GROUND ACCESSORIES ▶ 1. Power cord 2. Power adaptor 3. User’s manual 4. -
Page 46: Power Consumption
POWER CONSUMPTION MODE POWER CONSUMPTION < 55W < 3W POWER OFF LED INDICATOR The power management feature of the monitor is comprised of two stages: ON(BLUE) and POWER OFF(RED). MODE LED COLOR MONITOR OPERATION BLUE Normal Operation Not Operation POWER OFF 44 ……………………………………………………………………. -
Page 47: Input Signal
22” 22˝ Diagonal AM-TFT(Active-Matrix) Pixel pitch(mm) : 0.282(H) x 0.282(V) BRIGHTNESS: 300cd/㎡(Typical) LCD-Type CONTRAST RATIO: 1000:1(Typical) VIEWING ANGLE: 160°/160°(H/V) RESPONSE TIME: 5msec(Typical) RESOLUTION (H x V) 1680X1050@60Hz FREQUENCY HORIZONTAL: 31~80KHz, VERTICAL: 56~75Hz VIDEO(2ch input 1.0Vp-p, 75Ω terminated, loop-through out) S-VIDEO(1ch input (Y/C)) DVI D(Digital Video Interface) HDMI(High Definition Multimedia Interface) INPUT SIGNAL... -
Page 48: Weee Symbols
WEEE Symbols Correct Disposal of This Product (Waste Electrical & Electronic Equipment) (Applicable in the European Union and other European countries with separate collection systems) This marking shown on the product or its literature, indicates that it should not be disposed with other household wastes at the end of its working life. - Page 49 MEMO...
- Page 50 MEMO...
-
Page 51: Vicon Standard Equipment Warranty
Vicon Security Management Systems (SMS) All Models: All hardware is warranted for two years from date of original retail purchase. Any product sold as “special” or not listed in Vicon’s commercial price list: One year from date of original retail purchase. - Page 52 Vicon Industries Inc. Corporate Headquarters 89 Arkay Drive Hauppauge, New York 11788 631-952-CCTV (2288) 800-645-9116 Fax: 631-951-CCTV (2288) Vicon Europe Headquarters Brunel Way Fareham, PO15 5TX United Kingdom +44 (0) 1489 566300 Fax: +44 (0) 1489 566322 Vicon Germany Kornstieg 3...
Need help?
Do you have a question about the VM-622LCD and is the answer not in the manual?
Questions and answers