Table of Contents
Advertisement
Advertisement
Table of Contents

Related Manuals for La San Marco 95 Series


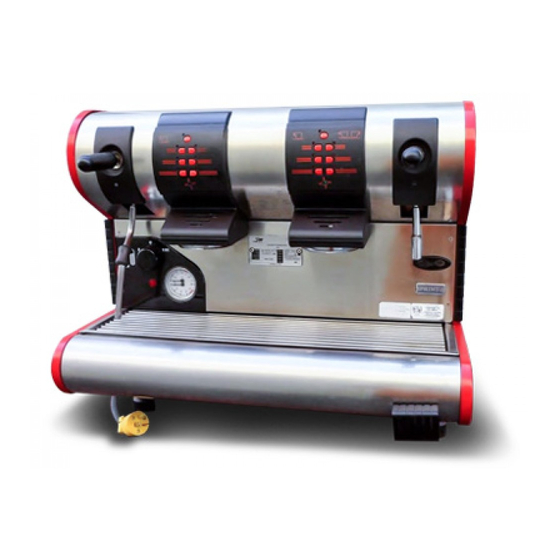
Summary of Contents for La San Marco 95 Series
- Page 1 USO E MANUTENZIONE MACCHINE CAFFÈ ESPRESSO - SERIE 95 USE AND MAINTENANCE MANUAL ESPRESSO COFFEE MACHINES - 95 SERIES MANUEL D’INSTRUCTIONS POUR L’EMPLOI ET L’ENTRETIEN MACHINES À CAFÉ EXPRESS - SERIE 95 BEDIENUNGS- UND WARTUNGSANLEITUNG ESPRESSOMASCHINEN - SERIE 95...
-
Page 2: Table Of Contents
CONTENTS RECOMMENDATIONS (reference, use, warranty) ........30 TECHNICAL CHARACTERISTICS OF DIFFERENT MODELS . -
Page 3: Recommendations (Reference, Use, Warranty)
Any repairs on the machine must only be carried out by the manufacturer or by an authorized LA SAN MARCO service center. For your safety, always request original LA SAN MARCO spare parts. The use of any other than original spare parts voids the guarantee and the conformity certifications provided with the machine. -
Page 4: Technical Characteristics Of Different Models
TECHNICAL CHARACTERISTICS OF DIFFERENT MODELS POWER INPUT (W) BOILER DIMENS. WEIGHT MODEL CAPACITY POWER CONNECTION FUNCTIONAL CHARACTERISTICS OF UNITS (kg) (liters) PUMP WARMER (mm) MONO. THREE PH. (Optional) 1 • Coffee served with push button start and stop. 95-PRACT-S 2000 –... -
Page 5: Machine Characteristics
MACHINE CHARACTERISTICS... -
Page 6: General Hydraulic Diagram
GENERAL HYDRAULIC DIAGRAM... -
Page 7: Water Supply Diagram
WATER SUPPLY DIAGRAM... -
Page 8: Legend
LEGEND Grounds collecting plate with grill Pressure switch Automatic level control valve Pressure adjusting screw Automatic level control valve Side Boiler discharge valve Display Displacement meter valve Gas valve Displacement meter valve Gas burner Displacement meters Gas safety push button Grounds collecting tray Gas thermal probe Non-return valve... -
Page 9: For The Installer
The machine is delivered packed. After having removed the packing, make sure that the machine is complete and in good condition. If in doubt, contact the qualified and authorized La San Marco S.p.A. personnel. Dispose the packing material through the relative waste collecting centers, separating wood from styrofoam and nylon, as required by the relative laws in the country where the machine is to be used. -
Page 10: Electrical Connections
To avoid overheating of the power cable, uncoil it completely. If the power cable needs to be replaced or is damaged, switch the machine off and contact an authorized LA SAN MARCO centre for its replacement. A cutoff switch, rated according to the electrical characteristics of the machine (power and voltage) should be installed uphill of the power supply cable;... -
Page 11: Gas Fired Boiler (Optional)
I N S T R U C T I O N S F O R A U T H O R I Z E D I N S T A L L E R Gas fired Boiler (optional) Read the instructions before installing and using the appliance. ATTENTION This appliance can only be installed and used in permanently ventilated places according to UNI-CIG 7129 and UNI-CIG 7131 Standards. - Page 12 I N S T R U C T I O N S F O R A U T H O R I Z E D I N S T A L L E R Fig.A Fig.B 1° UNIT 2° UNIT Fig.C Table 1 –...
-
Page 13: Charging The Boiler
F O R T H E I N S T A L L E R Before starting the machine, check the condition and perfect efficiency of the safety devices. Before starting to use the machine, it is necessary to become familiar with the machine controls, particularly with the push buttons and the emergency procedures, following the instructions of this manual. -
Page 14: For The User
F O R T H E U S E R MACHINE OPERATING INSTRUCTIONS Before starting the machine, check the condition and perfect efficiency of the safety devices. Before starting to use the machine, it is necessary to become familiar with the machine controls, particularly with the push buttons and the emergency procedures, following the instructions of this manual. -
Page 15: Drawing Hot Water On All Automatic Models
F O R T H E U S E R DRAWING HOT WATER ON ALL AUTOMATIC MODELS Hot water can be drawn through the push button strip shown in the following figure, in which it is possible to have manual servings by pressing the button 40 (for a maximum of 1.5 liters;... -
Page 16: Additional Notes For 95-26 And 95-36 Models
F O R T H E U S E R ADDITIONAL NOTES FOR 95-26 AND 95-36 MODELS These models are provided with a panel with a button strip and a lighted display installed on the lower part of the working area (91, in the figure on page 45). - Page 17 F O R T H E U S E R MACHINE START AND STOP CONTROL FROM CLOCK When the display on the panel 91 shows “AUTO”, it means that it is in the condition of “MACHINE OFF AS PROGRAMMED”. If the display shows the “time of day and day of the week”, it means that it is in the condition of “MACHINE ON AS PROGRAMMED”.
- Page 18 F O R T H E U S E R 1st UNIT 2nd UNIT LEDS DISPLAY OF BOILER WATER TEMPERATURE AND PRESSURE ON DISPLAY 48 This display normally shows the temperature of the water in the boiler in °C. To check the corresponding pressure, just press the button 43 beside the display (for not more than 5 seconds).
-
Page 19: Additional Notes For 95-23 And 95-33 Models
F O R T H E U S E R ADDITIONAL NOTES FOR 95-23 AND 95-33 MODELS These models are prearranged for connection with external electronic units (e.g., personal computer) used for controlling the work performed by the machine. The systems adopted are outlined below, while the general operation of the machine is as described for the automatic models. HARTEK WALLA RS-232... - Page 20 F O R T H E U S E R MEMOBOX 2 OPERATION (display - programming unit) Explanation of buttons P (1) - Advances data reading (2) - Increments selected digit † (3) - Decrements selected digit S (4) - Selects digit to modify R (5) - Memorizes selected data / Reset / Pass Display of data When MEMOBOX 2 is connected to the machine through the...
- Page 21 F O R T H E U S E R OPERATION WITH WAITERS CONTROL IN THE RS 232 AND MEMOBOX 2 SYSTEMS The electronic control unit is supplied with seven WAITER’S keys and one OWNER RESET key that enable the operation of the espresso machine, the cycle counts and resetting.
-
Page 22: Additional Notes For 95-31, 95-32, 95-33 And 95-36 Models
F O R T H E U S E R ADDITIONAL NOTES FOR 95-31, 95-32, 95-33 AND 95-36 MODELS The new cooling system installed on the 95-32, 95-33, 95-36 automatic models and on the 95-31 semiautomatic model has been introduced to guarantee the thermal stability of the water used for the coffees served, both during the periods of maximum use of the machine and during extended pauses. -
Page 23: Routine Maintenance
F O R T H E U S E R ROUTINE MAINTENANCE BOILER WATER DRAIN If it becomes necessary to empty the boiler, cut off power to the machine by turning the main switch 30 to position “zero” or, in the case of gas-heated machines, put off the flame by closing the gas supply valve 49. Remove the grounds collecting tray and its grill and open the boiler water drain valve 4 (see water supply diagram on page 34). -
Page 24: Emergency Situations
In case of failure or malfunction of the machine, shut the machine down and do not attempt any repairs. Any repairs on the machine must be carried out by the manufacturer or by an authorized LA SAN MARCO service center. -
Page 25: For The Programmer
F O R T H E P R O G R A M M E R PROGRAMMING THE DOSES FOR ESPRESSO COFFEE AND FOR HOT WATER ONLY FOR AUTOMATIC MODELS Entering the programming mode Turn the main switch 30 to position “zero” (machine switched off). Holding the key 33 of the first unit pressed, turn the main switch 30 to position 2 (machine switched on). -
Page 26: Programming The Boiler Working Temperature And Pressure
F O R T H E P R O G R A M M E R PROGRAMMING THE BOILER WORKING TEMPERATURE AND PRESSURE ONLY FOR AUTOMATIC 95-26 AND 95-36 MODELS These models are provided with a TRIAC electronic device which allows the adjustment of the boiler water temperature and pressure. -
Page 27: Main Defects Caused By The Incorrect Use Of The Equipment
F O R T H E U S E R MAIN DEFECTS CAUSED BY THE INCORRECT USE OF THE EQUIPMENT PROBLEM CAUSE SOLUTION The boiler fills with water, • Leak in one of the boiler filler • Check the automatic level circuit with venting from the pipes or in one of the unit circuits •... - Page 28 F O R T H E U S E R PROBLEM CAUSE SOLUTION A whistling noise is heard • Malfunction of the expansion • Replace the seal and the spring in the valve and reset it to after coffee has been de- valve 12 bar livered...
- Page 29 34072 GRADISCA D'ISONZO (GO) Italia Via Padre e Figlio Venuti, 10 Tel. ++39 0481 967111 - Fax ++39 0481 960166 www.lasanmarco.com...
Need help?
Do you have a question about the 95 Series and is the answer not in the manual?
Questions and answers