Table of Contents
Advertisement
Advertisement
Table of Contents

Related Manuals for La San Marco 100 Series


Summary of Contents for La San Marco 100 Series
- Page 1 UsE AnD MAinTEnAnCE sERiEs 100 Translation of the original instructions...
-
Page 2: Table Of Contents
Index Introduction ........... . pag. 27 1.1 Using the manual . -
Page 3: Introduction
In case of doubt, do not use the appliance, and contact La San Marco S.p.A. • All of the packaging must be carefully conserved in case the machine needs to be transported in the future. -
Page 4: Maintenance - Warnings
• In case of malfunctions or failure of any machine component, contact the authorized service centre and request original La San Marco spare parts. The use of any other than original spare parts voids the con- formity certifications and the warranty that accompany the machine. • Any changes carried out on the machine and/or failure to carry out the scheduled maintenance will release the Manufacturer from any liability for any resulting damages and voids the conformity declara- tion and the warranty. -
Page 5: Technical Characteristics
1.4 Technical characteristics INSTAllED POWER (W) BOIlER HEATING ElEMENT 100 PRACTiCAl 51,5 57 2000 275 300 100 sPRinT 51,5 57 3000 4500 275 300 100 sPRinT 10l 10 55 51,5 57 2800 4200 275 300 100 2 12 62 73,5 51,5 57 3500/4500 275 300 100... -
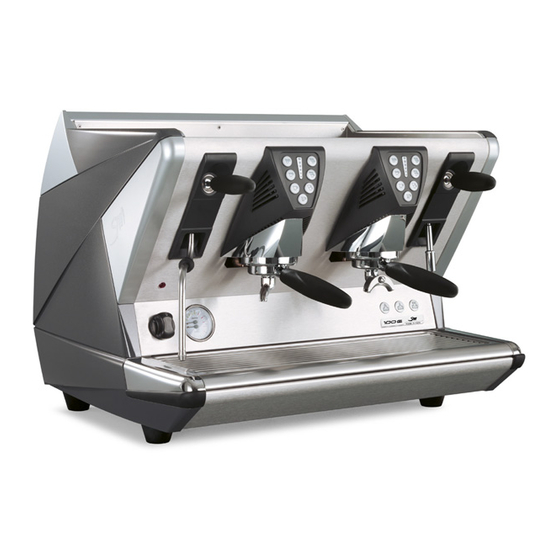
Page 6: Description Of The Machine
2. Description of the machine Note: The terms used in this description will commonly be used throughout the following pages. (100 E) lEGENDA: Main switch Main switch indicator light Double-scale pressure gauge Cup heater switch (optional) Espresso coffee serving unit filter cup with handle Serving unit push button panel (100 E) Push button panel for hot water serving valve (100 E) -
Page 7: General Water System Diagram
2.1 General water system diagram... -
Page 8: Water System Diagram Key
2.2 Water system diagram key: Water softener Water softener outflow valve Water softener inflow valve Supply from water mains Electric motor pump Pressure gauge Non-return and safety valve Automatic level control valve filter Automatic level solenoid valve Automatic level control valve Boiler water filling valve Non-return valve Boiler water drain valve... -
Page 9: Installation
After opening the packing, check the proper condition of the coffee machine and its components. In case of doubt, do not use the appliance, and contact La San Marco S.p.A. • All of the packaging must be carefully conserved in case the machine needs to be tran- sported in the future. -
Page 10: Installation Of Water System
3.4 Installation of water system INTERNAl PUMP Use the pipe a (900 mm, provided with the machine) to connect the cut-off valve of the mains to the tap 1 for water inlet to the water softener (figure 3). Connect the pipe b for internal pump suction to the tap 2 of the water softener (figure 4). figure 3 figure 4 ExTERNAl PUMP (OPTIONAl) -
Page 11: Connection To The Equipotential Clamp
Connect the power cord to the electrical mains as shown in the attached diagram: 110V/ 230 MONO-PHASE 1 HEATING ElEMENT ONly fOR BlUE BlUE MODElS BROWN BROWN 100 PRACTICAl yE/GR yE/GR 230V MONO-PHASE 2 HEATING ElEMENTS BlUE BlACK ONly fOR BlACK GREy MODElS... -
Page 12: Start-Up
In models100 Practical, when water reaches the level probe, filling stops and the green “MAx” lED of the electronic level control comes on. In other models of the 100 series, when water reaches the level probe, filling stops and the blue “OK” lED of the electronic level control comes on. -
Page 13: Adjustment Of The Boiler Water Level Probe
The steam pressure in the boiler is shown on the upper graduated scale of the pressure gauge. The calibra- tion of the steam in the boiler is set by lA SAN MARCO SPA at 1.0 bar. If you wish to modify this value, you will need to turn the pressure switch adjustment screw on the inside of the machine, which can be accessed directly from the work zone (figure 13-14). -
Page 14: Adjustment Of Temperature Of Dispenser Groups: (Models 100)
(2, 3, 4, 5) for each serving group (figure 16). The valve is normally set to number 3 (this is the default setting provided by lA SAN MARCO SPA). If you want to change the serving temperature, you will need to use the valve (flow variator) of the group. -
Page 15: Operating Instructions
figure 15 figure 16 figure 17 6. Operating instructions During the flow of espresso coffee, tea or steam, these substances can cause burns due to acci- dental skin contact. 6.1 Serving of espresso coffee Remove the filter-holding cup from the serving unit and fill it with a dose of ground coffee (filter cup with one spout) or with two doses of ground coffee (filter cup with two spouts). -
Page 16: Drawing Hot Water
6.3 Drawing hot water Hot water is drawn by the appropriate spout and can be used to prepare infusions, tea, camomile tea, to heat cups, to add water to an espresso and to obtain American-style coffee, and so on. Modelli 100 S Use the hot water drawing lever (lowering it, raising it or moving it to the side) to dispense hot water from the spout. -
Page 17: Cleaning The Serving Units And The Filter Holder
• Do not use harsh or harmful detergents such as alcohol, petrol or solvents to clean the coffee machine; use water and neutral detergents. Note: The daily cleaning operations must be carried out in order to maintain the efficiency of the machine and to guarantee the safety of the user and of the persons around it. 8.1 Cleaning the serving units and the filter holder To clean the dispensing unit use the filter-cup with blind filter supplied. Nota: For cleaning of the dispensing unit use only the cup with blind filter supplied. -
Page 18: Idle Periods
9. idle periods If the machine is to remain idle for long periods (weekly closing days, holidays, etc.), take the following precautions: Turn the main switch to 0 (zero) and as necessary disconnect the power cord or the main switch of the electrical mains. -
Page 19: Safety Valve
8. la San Marco S.p.A declines every responsibility for eventual damage that could derive, directly or indi- rectly to people, animals of things as a consequence of the missing observance of all the prescriptions indicated in the user manual that accompanies every product and concerning, especially, the warnings about the installation, use and maintenance of the machine. -
Page 20: Declaration Of Conformity
12. la San Marco S.p.A doesn’t answer to warranty conditions , beyond those listed , conceded by the im- porters/dealers to their clients Also the obligations of labour are excluded from the warranty of la San Marco , travel and added costs relative to the reparation or substitution of the defective components of the machine. - Page 21 PROBlEM CAUsE sOlUTiOn • There is no water • Coffee ground too fine or • Adjust the grinding coarseness and/ flowing from a serving excessive quantity for type of or the quantity of ground coffee. unit. filter used. • Check that the injector, the upper • Clogged water circuit. circulation pipe, the valve (flow • Defective solenoid. variator) of the group, the water dispenser and the solenoid valve of the group are not clogged.
- Page 22 PROBlEM CAUsE sOlUTiOn 14. • Small drops flow out of • Tap requires adjustment (100 • Adjust tap (100 S). the water tap. • Replace gasket (100 S). • Worn gasket on tap (100 S). • Check the solenoid valves (hot • Leak in solenoid valve (100 E). and cold water) and replace as necessary (100 E). 15. • The unit emits a whistle • Faulty operation of expansion • Check the expansion valve and if after serving the coffee. valve. necessary replace it. Calibrate the • High pump pressure. valve at 12 bar. • Check the pump operating pressure.
- Page 23 PROBlEM CAUsE sOlUTiOn 22. • Coffee with too little • Sprinkler filter on unit clogged. • Check and clean with blind filter or cream in cup (spurts out replace. of spout). 23 • The cream in the cup is • Coffee extraction takes a long • Clean or replace the filter. too thin (it disappears time due to clogged filter. • Clean or replace the sprinkler filter. after a few seconds). • Coffee extraction too fast due • Lower the temperature in the boiler. to clogged sprinkler filter. • Adjust valve (flow variator) of serving • Water temperature too high.
Need help?
Do you have a question about the 100 Series and is the answer not in the manual?
Questions and answers