Chapters
Table of Contents

Related Manuals for NTT docomo Optimus LTE L-01D


Summary of Contents for NTT docomo Optimus LTE L-01D
- Page 1 Contents / Precautions L-01D Con rmation and Settings before Using docomo Palette UI Calling / Network Services Settings Mail / Internet INSTRUCTION MANUAL File Management Application Using Overseas Appendix / Index...
- Page 2 Introduction • This terminal encodes sound communication by wireless and also as digital data. When you are Thank you for purchasing "L-01D". operating your terminal while moving to a location Before or while using, be sure to thoroughly read this subject to weaker radio wave conditions, the manual to ensure its correct use.
- Page 3 Unlocking SIM Download the latest information of this manual from DOCOMO website. Also you can check the Unlocking SIM is available on this terminal. Unlocking latest information from this terminal. SIM enables a SIM card from other makers to be used. •...
-
Page 4: Supplied Accessories
Quick Start Guide Supplied Accessories About other optional accessories and related equipment → P207 L-01D (with warranty and back cover L28) Battery Pack L15 Contents / Precautions... - Page 5 USB Connection Cable L02 microSDHC card (16GB) (sample) (with manual) AC Adapter L03 (with warranty) Contents / Precautions...
-
Page 6: How To Use This Manual
How to Use this Manual • Any reprint of this manual is prohibited. Description Operation description • This manual is subject to change without prior notice. • "This terminal" indicates "L-01D" in this manual. Tap and hold the displayed on Touch Please keep this in mind. -
Page 7: Table Of Contents
Table of Contents Supplied Accessories …………………………………… 2 Home Application Information ……………………… 76 How to Use this Manual ………………………………… 4 Notes on Using this Terminal …………………………… 8 Calling / Network Services ………………… 78 Safety Precautions (ALWAYS FOLLOW THESE Making/Receiving Calls ……………………………… 78 PRECAUTIONS) …………………………………………... - Page 8 About Phone ……………………………………………120 Calculator ………………………………………………186 SmartWorld ……………………………………………186 Mail / Internet ……………………………… 122 YouTube …………………………………………………187 Polaris Office ……………………………………………187 sp-mode Mail …………………………………………122 iD設定アプリ (iD appli) ………………………………188 SMS ……………………………………………………122 Electronic Dictionary …………………………………189 Gmail ……………………………………………………124 Downloads………………………………………………191 Early Warning "Area Mail" ……………………………125 Application Manager …………………………………191 Browser …………………………………………………126 Data Backup and Settings Backup …………………192 Talk ………………………………………………………129...
- Page 9 Export Administration Regulations …………………235 Intellectual Property Right ……………………………235 Index ……………………………………………………238 Contents / Precautions...
-
Page 10: Notes On Using This Terminal
• In order to improve the quality of this terminal, Notes on Using this Terminal sometimes the OS is upgraded through software updates. Therefore, it is required to always use the • This terminal does not support accessing the i-mode latest version of the OS. -
Page 11: Safety Precautions
• Backup your data such as images, videos and music Safety Precautions (ALWAYS on PC. For details about connection method, refer FOLLOW THESE PRECAUTIONS) to "File Management" (P131) and "External Device Connection" (P138). Also, it is recommended to use various on-line data backup services. „... - Page 12 „ The following symbols indicate special warnings „ "Safety Precautions" are explained in the following regarding product usage. seven sections. General Precautions for Terminal, Battery Pack, Adapter, UIM ………………………………………P11 Denotes things not to do (prohibition). Precautions for Terminal …………………………P13 Precautions for Battery Pack ……………………P15 Don’t Precautions for Adapter …………………………P17 Precautions for UIM ………………………………P19...
-
Page 13: General Precautions For Terminal, Battery Pack
Use the battery pack and adapter specified by General Precautions for NTT DOCOMO for this terminal. Terminal, Battery Pack, Adapter, Fire, burns, injury, or electric shock may result. Do not subject this terminal and its Do not use or leave this terminal and its accessories to severe shocks, or throw them. - Page 14 Make sure to turn off the terminal or stop Do not store this terminal and its accessories charging before going to the places like a gas in humid, dusty places, or in hot areas. Don’t Fire, burns, or electric shock may result. station where a flammable gas fumes.
-
Page 15: Precautions For Terminal
Turn off the terminal in places where use is Precautions for Terminal prohibited such as airplanes or hospitals. Electronic devices or electronic medical devices may be adversely affected. Follow the instructions when using inside medical facilities. Also, you will get punished Do not lighten the light near eyes. - Page 16 When you use electronic medical equipment, When the display or camera lens is check with the equipment manufacturer to accidentally broken, be careful of broken glass determine how the device is affected by radio or exposed internal parts of the terminal. Since the reinforced glass is used on the waves before using.
-
Page 17: Precautions For Battery Pack
If the display part is accidentally broken and When watching the display, take a certain liquid crystal leaks out, do not make the distance from the display in a fully bright place. Don’t Visual loss may result. material contact with your skin of face or hands. - Page 18 When inserting battery pack into the terminal, make sure to confirm the direction of the Don’t battery pack and not place excessive force on Do not use this terminal when transformation or damage is resulted from falling down. Fire, explosion, getting heated or liquid leak of Don’t Fire, explosion, getting heated or liquid leak of the battery pack may result.
-
Page 19: Precautions For Adapter
Precautions for Adapter Do not discard it as combustible waste. Fire and environmental pollution may result. Don’t Bring the terminal to a docomo Shop after Do not use it if the adapter cord gets damaged. insulating the battery pack by wrapping the Fire, burns, or electric shock may result. - Page 20 Do not place heavy objects on the adapter Use the specified fuse when the fuse of DC cord. adapter blows. Don’t Fire, burns, or electric shock may result. Fire, burns, or electric shock may result. Refer to the manual for detailed information of the specified fuse.
-
Page 21: Precautions For Uim
Immediately remove the power plug from the Precautions for UIM outlet or cigar lighter socket if water or other Unplug fluids get into the adapter. Fire, burns, or electric shock may result. Be careful not to touch the edge of UIM when Always remove the power plug from the outlet removing it. - Page 22 If you use electronic medical equipment such as an implanted cardiac pacemaker or implanted defibrillator, use the mobile terminal Be sure to adhere to the following regulations 22cm or more away from the implanted cardiac inside medical facilities. pacemaker or implanted defibrillator. •...
-
Page 23: Material List
Material List Part Material Surface Treatment Speaker grill Part Material Surface Treatment Screws Mild steel ZnB plating Tempered Outer Display PC resin PC resin Battery Battery Glass case pack pack PC resin NCVM Front Ink coating Sticker cover Terminals Au + Ni Gold plating Back PC resin... -
Page 24: Handling And Care
„ Keep the connector contacts clean with a dry cotton Handling and Care swab. Clean the connector contacts with a dry cotton swab to prevent contacts from getting dirty which can General Usage Guidelines result in intermittent connections. Be careful when cleaning the connector contacts. „... -
Page 25: Notes About The Terminal
„ Always use the terminal with the microUSB connector Notes about the Terminal terminal cover closed. Malfunction may result from dust or water. „ Do not place excessive force on pressing the „ Do not use the terminal without the back cover. touch panel, or operate by sharp objects such as Battery pack may come off. - Page 26 Notes about the Battery Pack Notes about the Adapter „ The battery pack is a consumable accessory. „ Charge the battery pack in an environment with the Battery life varies depending on usage conditions, proper ambient temperature (5˚C to 35˚C). etc., but it is time to change battery packs when the „...
- Page 27 Notes about the UIM Notes about the Bluetooth Function „ Do not put excessive force on the UIM when inserting into or removing from this terminal. „ To secure the Bluetooth communication security, the „ Note that DOCOMO assumes no responsibility for terminal supports the security function compliant malfunctions occurring as the result of inserting and with Bluetooth standards, but the security may not be...
- Page 28 „ Frequency band „ Bluetooth Device Cautions Frequency bands used by the terminal Bluetooth The operating frequency band of this terminal is function/Wireless LAN function are described on the used by industrial, scientific, consumer and medical terminal battery compartment. They are described equipment including microwave ovens, premises as follows.
- Page 29 „ 2.4 GHz Device Cautions Notes about Wireless LAN (WLAN) The operating frequency band of the WLAN device is used by home electrical appliances such as Wireless LAN (WLAN) uses radio waves to enable microwave ovens, industrial, scientific, consumer and communications between compatible devices, thus medical equipment including premises radio stations allowing connection to a local area network from...
- Page 30 „ Be careful when using the terminal while driving. Handling the FeliCa Reader/Writer Using the mobile phone in your hand while driving is subject to punishment. „ The FeliCa reader/writer function for this terminal However, absolutely necessary cases such as handles delicate signals that require no radio station rescue of a sick person or maintaining public safety license.
-
Page 31: Confirmation And Settings Before Using
Confirmation and Settings before Using Bluetooth/Wi-Fi Part Names and Functions antenna area Main camera Earpiece (receiver) microSD card slot Front camera (internal) Proximity sensor: Flash Switch the touch UIM slot (internal) screen to on or GPS/Xi antenna area off to prevent from unintentionally mark activating functions... - Page 32 There are three keys on the front of the terminal. The Earphone microphone roles of these keys are shown below. terminal Top microphone Menu key microUSB connection Tap this key to display the options menu for terminal the current screen or application. Power key/Screen lock Home key •...
-
Page 33: Uim
Inserting the UIM UIM is an IC card that stores informations of each Insert a fingernail into the groove in the customer. back cover, and pull up in the direction You cannot use some of the terminal functions if the ●... - Page 34 Remove the battery pack (P35), and Removing the UIM insert the UIM into the slot with the gold-colored IC side facing down Remove the back cover and the battery pack. Gently press the UIM with your Notch fingertip and slide it out (gold colored) Notch Confirmation and Settings before Using...
-
Page 35: Microsd Card
Insert the microSD card into the slot microSD Card with the metal contacts facing down A microSD card can be used with any other compatible • Insert a microSD card properly, paying attention devices. to the insertion direction. Improper insertion of a •... -
Page 36: Battery Pack
Check the direction of the back cover Battery Pack and attach it to the terminal (b). Press portion to close it firmly (c) Attaching the Battery Pack • Make sure there is no gap between the terminal and the back cover. Remove the back cover (P31) Insert the battery pack in the direction of the arrow (a) with the "CE"... -
Page 37: Charging
Removing the Battery Pack Charging Remove the back cover (P31) Battery Pack Life Put your fingernail into the groove, and lift out the battery pack in the direction • The battery pack is a consumable accessory. The usage time of the battery per one charge decreases of the arrow (b), pushing it to the gradually each time the battery is recharged. -
Page 38: Charging Time (Estimate)
• The shape of the AC adapter plug is for AC 100V Charging Time (estimate) (Japanese standard). The conversion plug adapter for overseas is required if you use an adapter for The estimated time for charging an empty battery pack AC 100V to 240V. -
Page 39: Charging With The Ac Adapter
Open the microUSB connector terminal Charging with the AC Adapter cover of the terminal How to use the supplied AC adapter L03 to charge the Insert the microUSB connector of USB terminal is described below. connection cable L02 into the microUSB To AC 100V outlet connection terminal of the terminal •... -
Page 40: Charging With The Desktop Holder
„ Charging by attaching the terminal Charging with the Desktop Holder Insert the USB connector of the Using the optional desktop holder L12, you can charge supplied USB connection cable L02 by attaching the terminal, and also charge by attaching into the USB connection terminal of AC the battery pack L15. -
Page 41: Charging With A Pc
Insert the AC adapter L03 plug into the Charging with a PC outlet Open the microUSB connector terminal • Charging begins. The charge indicator turns OFF during charging. cover of the terminal • After charging is completed, a message Insert the microUSB connector of USB explaining that charging is completed is connection cable L02 into the microUSB displayed on the screen. -
Page 42: Turning On/Off The Power
Turning ON/OFF the Power Note • The "Locked" screen appears when the power is turned ON or when the backlight is turned on. Turning ON the Power • If the screen lock has been set using a screen unlock pattern, the "Draw pattern to unlock" Press and hold the power key for over 1 screen appears when the power is turned ON. -
Page 43: Basic Operations (Touch Screen Operations)
Turning on Backlight Basic Operations (Touch Screen Operations) To prevent unintended operation and to save power, the backlight turns off after a set period. If you then turn The display of the terminal has a touch screen that on the backlight to release the screen lock, the screen allows you to perform various operations by touching it. -
Page 44: Checking Or Unchecking Options
Touch Screen Operations Scrolling Screen You can perform the following actions on the touch You can scroll the screen up or down. On some web screen. pages, you can also scroll side to side. • Tap: Touch the screen lightly •... -
Page 45: Zooming In Or Out
Zooming In or Out Note • Sometimes appears when you drag the Some applications allow you to zoom in on small text screen. You can also zoom in or out by tapping that is difficult to read. After zooming in, you can also this zoom control icon. -
Page 46: Using Motion Gesture
Using Motion Gesture Using motion gesture while an incoming call arrives Various functions can be operated simply by moving the terminal. „ Muting ringtone • To use motion gestures, tap u "Settings" u When an incoming call arrives, flip the "Gesture"... -
Page 47: Changing Screen Orientation
Using motion gesture in gallery Changing Screen Orientation „ Viewing previous/next image The terminal screen automatically rotates to horizontal While an image in gallery is being (landscape) or vertical (portrait) views, depending on the direction in which it is turned. displayed, tap the left or right side of the terminal •... -
Page 48: Initial Settings
Set each item on the "Wi-Fi settings" Initial Settings screen and tap "Next" Tap "Next" on the "Add a Google First-time Settings account" screen and set by following screen instructions When the power is first turned ON, you need to set the language and date for the terminal. - Page 49 Note Note • A data connection (LTE/3G/GPRS) is required • Packet communication can be connected, even to set online services. For details on enabling when Wi-Fi function is ON. However, while Wi- data connection, refer to "Wireless & Networks" Fi is available, Wi-Fi is prioritized. When the (P101).
- Page 50 Connecting to a Wi-Fi network Note • There are two types of available networks - open From the Home screen, u "Settings" networks and protected networks. The network u "Wireless & networks" type is indicated by an icon to the network •...
- Page 51 Connecting to a Wi-Fi network by Notifying when Wi-Fi network with no specifying a static IP address security protection is detected From the Home screen, u "Settings" From the Home screen, u "Settings" u "Wireless & networks" u "Wi-Fi u "Wireless & networks" u "Wi-Fi settings"...
- Page 52 Adding a Wi-Fi network Changing the Wi-Fi network password From the Home screen, u "Settings" From the Home screen, u "Settings" u "Wireless & networks" u "Wi-Fi u "Wireless & networks" u "Wi-Fi settings" settings" • The "Wi-Fi settings" screen appears. •...
- Page 53 Setting Wi-Fi to sleep mode Setting Online Service Accounts Set Wi-Fi to sleep mode and specify the timing of You can update your status on Google and other online switching the terminal to data communications. services once you have set up your online service From the Home screen, u "Settings"...
- Page 54 Deleting an online service account Note • If you mark the "Background data" checkbox, From the Home screen, u "Settings" all installed applications on the terminal u "Accounts & sync" will automatically communicate with their • The "Accounts & sync settings" screen appears. respective services.
-
Page 55: Screen Display/Icons
Main status icons Screen Display/Icons Signal strength Status Bar Out of service area The status bar is displayed at the top of the screen. The Bluetooth ON terminal status and notifications are displayed in the status bar. Notification icons are displayed on the left Connected to Bluetooth device side, and the terminal status icons are displayed on the right side. - Page 56 Main notification icons The battery needs to be charged The battery is charging New Gmail GPS enabled New SMS message GPS is positioning Problem with an SMS message Airplane mode activated New Google Talk message UIM locked or UIM not inserted Making a call or during a call Phone microphone is muted Call on hold...
-
Page 57: Notification Panel
Notification Panel Uploading data Downloading data/Data download Notification icons are displayed in the Notification completed panel. You can open notifications, such as messages, reminders, or event notifications, directly from the Problem with login or synchronization Notification panel. Update of installed application available Opening the Notification panel Viewing 1Seg Drag or swipe the status bar downwards... - Page 58 Silent mode Viewing notification details Switch between on and off. Touch for over 1 second Tap the notification message on the to display the "Sound settings" screen. Notification panel Wi-Fi Switch between on and off. Touch for over 1 second •...
-
Page 59: Character Entry
„ On-screen QWERTY keyboard Character Entry Use this for entering Japanese in "Roman letter input". The terminal has an on-screen keyboard that is displayed in the touch screen for character entry. Character Entry Using the On- screen Keyboard If you tap a text box on the screen, the on-screen keyboard appears in the touch panel. -
Page 60: Switching The Keyboard
Deletion key Note Deletes the character to the left of the cursor. Touch • The key display varies depending on the entry this for over 1 second to delete the characters screen or character mode. continuously. • For information on switching the type of on- Right cursor key screen keyboard, refer to "Switching the The highlight moves to the right. -
Page 61: Entering Symbols/Emoticons
"10-key ⇔ QWERTY" Entering symbols/emoticons • The keyboard is switched. in a character entry screen to switch to symbol/ • When the input mode is changed, the keyboard emoticon input mode, and display the available symbols switches automatically. Switch back using "10- and emoticons on the display. - Page 62 Keyboard This allows you to set the type of Conversion keyboard to use on each screen Type If you mark this checkbox, the phrase Input Word view (horizontal/vertical) or for each confirmed by the conversion process Learning input mode. is learned by iWnn IME. Voice Input Mark the checkbox to enable voice Mark this checkbox to display the...
- Page 63 Dictionary Tap this to display the "Word List Japanese in Japanese User Dictionary" User screen. Tap to register, edit or Dictionary delete words, or to delete the entire Japanese User Dictionary. Tap this to display the "Word List in English User English User Dictionary"...
-
Page 64: Docomo Palette Ui
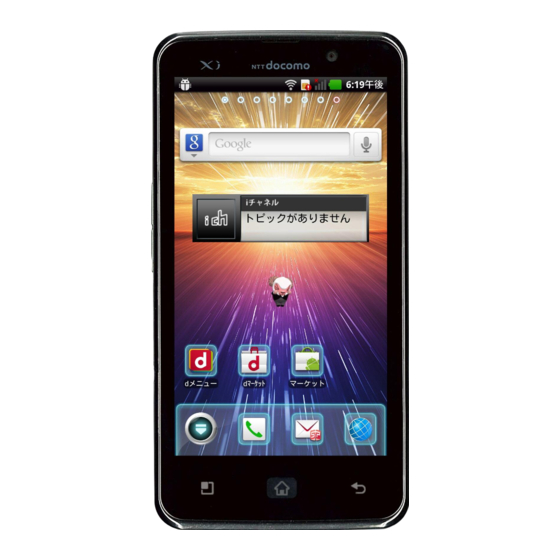
The Home screen has up to 12 screens each on the left and right for adding shortcuts and widgets. Application shortcuts Open the Launch application browser list screen Launch Launch phone, sp-mode phonebook, mail call log * “ ® (Butler sheep)” © NTT DOCOMO docomo Palette UI... -
Page 65: Home Screen Management
Moving Shortcuts, etc. Home Screen Management From the Home screen, touch the icon you What You can Add to the Home want to move for over 1 second Screen Drag the icon and release your finger • The icon is moved. You can customize the Home screen. -
Page 66: Changing Folder Names
Uninstalling Applications and Changing Kisekae Widgets Change the wallpaper and icon of the Home screen to change the image. From the Home screen, "Applications" Touch the Home screen for over 1 second Touch the application you want to delete for • The "Add to home screen"... -
Page 67: Changing Wallpaper
Changing Wallpaper Adding Home Screens You can add Home screens. Touch the Home screen for over 1 second From the Home screen, u "Home "Wallpaper" screens" "Gallery" / "Live wallpapers" / "Wallpaper • The "Home screens" screen appears. gallery" • You can create up to 12 Home screens. • If you have tapped "Gallery", tap an image that Tap one of the thumbnails with a "+"... -
Page 68: Viewing The Application Screen
Deleting Home Screens Viewing the Application Screen From the Home screen, tap u "Home screens" From the Home screen, "Applications" • The "Home screens" screen appears. Groups of applications are displayed as an icon Touch the thumbnail for over 1 second, list. -
Page 69: Application List
Application List docomo This is the application for backup backing up and restoring Some applications need to be applied separately (paid). data such as for the phonebook. DOCOMO Services Basic Functions dmenu This is a shortcut application for "dmenu" to easily find fun Make or receive a call. - Page 70 sp モードメー 災害用キット This allows you to send This application is for ル and receive emails using a registering and confirming docomo email address messages on the disaster (@docomo.ne.jp). It allows message board. you to use pictograms Browser Browse web page. (P126) and Deco-mail, and also supports auto receive.
- Page 71 G ガイド Entertainment With this application you 番組表 can view program guides This is the application for Hulu for terrestrial digital, BS watching popular Hollywood digital, and other broadcast movies and overseas services. You can search dramas at a fixed rate. for a program by keyword, This service is for genre, etc., and schedule...
- Page 72 Book Store This is the application for Tools MyShelf viewing e-books that were A software for shooting still Camera purchased through the images (photos) or videos. dmarket BOOK Store. (P141) BOOK ストア This is an electronic book Memo is available to use. Memo 2Dfacto store where you can...
- Page 73 Maps View current location, Name card This is the application for search places or routes. creator creating original name cards (P160) that can be displayed to your My profile box in the Voice guidance is available Navigation "Phonebook" application. to show the route to destination.
- Page 74 Osaifu/Shopping docomo This is the application location for providing location You can set Osaifu-Keitai. Osaifu-Keitai information information by imadoco (P177) search, imadoco kantan iD 設定アプリ This is the application for search, Keitai-Osagashi setting e-money iD for using. Service, and emergency (P188) information location notifications.
-
Page 75: Manage Applications
Manage Applications Note • This is a list of the applications that have been installed in this terminal at the time of purchase. Adding Shortcuts to the Home • If the software is updated, application content Screen and icon positions may change. • The names of some applications may not be From the Home screen, "Applications"... -
Page 76: Group Management
Moving Applications Group Management Manage groups on the application screen and sort From the Home screen, "Applications" icons. Touch the application you want to move for over 1 second Adding Groups Drag the application and release your From the Home screen, "Applications" finger u "Add group"... - Page 77 Editing Group Names Adding Groups to the Home Screen From the Home screen, "Applications" From the Home screen, "Applications" Touch the group name for over 1 second, and tap "Edit name" Touch the group name for over 1 second, and tap "Add" Enter a new group name and tap "OK"...
-
Page 78: Searching Applications
Searching Applications Home Application Information You can view the operation guide for the docomo Palette From the Home screen, "Applications" u "Search" From the Home screen, u "More" u • The Search widget starts. Enter a keyword or "Help" use Voice Input to search. • An explanation for the docomo palette UI operation is displayed. - Page 79 Home Application Settings From the Home screen, u "More" u "Home settings" • "Home settings" screen appears. Personal area Personal area is displayed. The wallpaper display is Wallpaper loop looped. Auto communication is Sync function executed when personal area information is updated. Auto communication is International executed during international...
-
Page 80: Calling / Network Services
Calling / Network Services Making/Receiving Calls Making a Call You can use the terminal to make international calls and emergency calls, as well as standard calls. You can also enter a pause when using phone services, such as reserving tickets or checking your bank balance. Making a call From the Home screen, "Phone"... -
Page 81: Emergency Call
Call button Ending a call "Add to phonebook" button During a call, "End" The input phone number is registered to the Phonebook. Emergency call Edit button The input text is deleted. Emergency call Phone number "Koe-no-Takuhaibin" button The Koe-no-Takuhaibin is sent to the input phone Police number. - Page 82 • Subscription fee and monthly fee will not be charged. • Depending on the location from which you make • Contact "General Inquiries" on the back of this an emergency call, connection may be made manual for detailed information about WORLD CALL. to the fire department or the police of another •...
-
Page 83: Declining A Call
Calls to mobile phone Receiving a call From the Home screen, "Phone" u When an incoming call arrives, tap "Dial" "Activate" u "Accept" • The "Dial" tab appears. • You can talk to the caller. Enter "010" u Country code u Note Recipient's mobile phone number, and •... -
Page 84: Operations During A Call
Operations during a Call Note • Do not hold the terminal against your ear with During a call, you can adjust the volume, turn the the speaker ON. speaker ON/OFF, mute the microphone, and put the call • Speak into the terminal from a distance of no on hold, depending on the usage conditions. -
Page 85: Call Log
Call icon Call Log : Call icon without caller ID notification : Call icon other than without caller ID notification This automatically records a history of your incoming and outgoing calls. You can also use the call log to call a Logs with the same person are displayed together as phone number or add it to Phonebook. -
Page 86: Calling A Number From The Call Log
Calling a Number from the Call Log Registering Phone Numbers from the Call Log to the Phonebook You can make calls to the phone numbers stored in the call log. You can register unregistered items from the call log to From the Home screen, "Phone"... -
Page 87: Phonebook
Deleting the Call Log Displaying the Phonebook The call log is automatically added. However, you can You can view all the information that is saved in delete a call log or all call logs. Phonebook. From the Home screen, "Phone" u Deleting a desired call log "Phonebook"... - Page 88 The Phonebook (profile) is displayed. Registering Phonebook Call log is displayed. You can also confirm the sent/ You can register a new phonebook. received details for sp-mode mail and SMS. On the "Phonebook" tab, "Register" Your profile (My profile) is displayed. •...
-
Page 89: Searching The Phonebook
Searching the Phonebook Making Calls/Sending Emails/ Chatting via Phonebook You can search for a phonebook on the "Phonebook" tab by dragging in the tab or by text entry. You can make a call directly from Phonebook. If you On the "Phonebook" tab, "Search" have added an email address or chat account to the phonebook entry, you can also send an email or launch Enter the word(s) that you are looking... - Page 90 Viewing the Map of a Contact's Note Address • You can also delete a phonebook by tapping u "Delete" on the "Phonebook" tab, placing a If the address has been added to the Phonebook, you mark on the phonebook you want to delete, and can view its location in a map.
- Page 91 Adding a Phonebook to Favorites Using Phonebook Copy Tool When you add a phonebook to Favorites, it appears on Copy Phonebook data between this terminal and other the "Favorites" tab. The "Favorites" tab allows you to terminals via microSD card. Also, you can copy the quickly display a specific Phonebook.
- Page 92 Importing Phonebook from microSD card Note Insert the microSD card on which your • When the items of Phonebook (number, etc.) in other terminals are different from those in this Phonebook data is saved to the terminal terminal, the item names may be changed or From "インポート"...
-
Page 93: Network Services
Message recording Network Services From the Home screen, "Phone" u "Dial" Available Network Service Enter the phone number u Tap "Koe-no-Takuhaibin" You can use the following DOCOMO network services • The terminal is connected to the Koe - no- on the terminal. Takuhaibin Service Center. -
Page 94: Voice Mail Service
Voice Mail Service Monthly Service name Application Page charge If you are in a location with no radio reception, the Call Notification Free P106 terminal is powered off, or you are unable to take the Service required call within the preset ring time, the Voice Mail Service answers a call with a voice mail greeting and records English Free... - Page 95 Basic flow of the Voice Mail Service Setting the Voice Mail Service From the Home screen, u "Settings" Start the Voice Mail Service. u "Call settings" u "Network service" u ▼ "Voice mail service" A call is made to your terminal. ▼...
- Page 96 Playing a voice message Checking Check whether there is a new Voice Mail message. After messages Drag or swipe the status bar downwards checking, the completion message appears. • The Notification panel appears. "Voice mail" u "OK" Message Configure the setting for whether to notify when new messages •...
-
Page 97: Call Waiting
Call Waiting Service Putting the current call on hold and answering an incoming call When there is another incoming call while you are on a If you hear a beep during a call, call, the in-call ringtone notifies you of the second call. You can answer the second call by putting the first call "Activate"... -
Page 98: Call Forwarding Service
Call Forwarding Service Putting the current call on hold and making a call to another party The Call Forwarding Service forwards a call to a preset During a call, "Add call" forwarding number if you do not answer the call within the preset ring time, or are outside of the service area •... - Page 99 Setting the Call Forwarding Service Call charge for the Call Forwarding Service From the Home screen, u "Settings" u "Call settings" u "Network service" u Caller "Call forwarding service" ▼ Call charges are incurred by • The "Call forwarding service" screen appears. the caller.
-
Page 100: Caller Id Notification Service
Caller ID Notification Service Setting the Call Forwarding guidance on/off When making a call, your phone number can be shown From the Home screen, "Phone"u "Dial" in the display of the other party's phone. • The "Dial" tab appears. Note "1"... -
Page 101: Public Mode (Power Off)
Public Mode (Power OFF) When you receive at a public location where you want to refrain from using or while driving, guidance is provided to callers. Public mode (Power OFF) guidance is also played when you are outside of the service area or when there is no signal. -
Page 102: Settings
Settings Settings Menu Location & Configure settings such as GPS, screen lock and passwords. (P110) security u "Settings" on the Home screen on the terminal Configure applications' settings. Applications to display the "Settings" screen that allows you to (P115) configure various settings. The menu displayed on this screen is shown below. -
Page 103: Wireless & Networks
Date & time Configure the date and time Mobile Set an access point and configure settings. (P120) data roaming and network mode networks settings. Display information related to this About phone terminal. (P120) Note • When searching LTE using "Network operators" Wireless &... - Page 104 Setting Wi-Fi access point Wi-Fi Tethering Settings From the Home screen, u "Settings" Connect wireless LAN compatible device up to eight devices to the Internet simultaneously using the terminal u "Wireless & networks" u "Portable as a Wi-Fi hotspot. hotspot" "Portable Wi-Fi hotspot settings"...
- Page 105 Connecting to a VPN Connecting to VPN (Virtual Private Network) In VPN list, tap a VPN name to connect • A menu appears. VPN (Virtual Private Network) is a technique to access Tap "Username" u Enter a user name to the information protected in local network from other networks.
- Page 106 Deleting a VPN Setting an additional access point <New APN> In VPN list, touch a VPN name to delete for over 1 second From the Home screen, u "Settings" u "Wireless & networks" u "Mobile • A menu appears. networks" u "Access Point Names" u "Delete network"...
-
Page 107: Mopera U
NTT DOCOMO website. website. mopera U mopera U is an NTT DOCOMO ISP. If you have subscribed to mopera U, you can use the Internet after making the simple settings. mopera U is a paid service that requires subscription. -
Page 108: Call Settings
Call Settings Caller ID "Caller ID Notification Service" (P98) notification Configure various call settings. Reject nuisance calls from the Nuisance same number. call blocking Configure docomo network service Network service service settings. Set to play guidance Caller ID Configure settings for international Roaming requesting number notification notification... -
Page 109: Docomo Service
docomo Service Remote Set to remotely control the terminal from a docomo mobile operation Configure docomo services. phone, land-line phone, NTT settings public phone, etc. Configure settings for regular update Application Public mode "Public Mode (Power OFF) manager confirmation, etc. Settings"... -
Page 110: Sound
Sound Feedback Set whether to play a sound when a Audible touch This allows you to configure various sound settings, phone number is entered. tones such as the type and volume of ringtones, Silent mode and Vibrate. Audible Set whether to play a sound when a menu item is selected. -
Page 111: Display
Display Gesture This allows you to configure display settings, such as This allows you to enable or disable each motion screen brightness and animation. gesture. Brightness Set the screen brightness. Home screen Set whether to automatically change You can change item locations by Auto-rotate Rearrange the screen display when the terminal... -
Page 112: Location & Security
Location & Security Device administration Add or delete the administrator of Select device This allows you to configure settings such as GPS, this terminal. administrators screen lock and passwords. Credential storage My location Set whether to allow the application Use secure Display the current location in an Use wireless to access the secure certification... - Page 113 Security Code and UIM Protection Note <On-Screen Unlock> For convenient and secure use of the terminal, you can • If you enter incorrect screen-unlock patterns set codes to lock the terminal and network security 5 times, a message prompting you for reentry codes to be used with network services.
-
Page 114: Pin Code
PIN code • Your PIN unblocking key is written in the application form (copy for subscriber) given at The UIM can set security code named PIN code. This the time of contract. If you have subscribed at code is set to "0000" at the time of subscription, but you a place other than a docomo Shop, bring your can subsequently change it. - Page 115 PIN unblocking key (PUK) Changing PIN code The PIN unblocking key (PUK) is an 8-digit number From the Home screen, u "Settings" used to unblock the PIN code. You cannot change it by u "Location & security" yourself. • If you enter the PUK code incorrectly ten times in a "Set up SIM/RUIM card lock"...
- Page 116 Enter PIN code Device management This the following operations if you are asked to enter Configure device management settings to use Omakase the PIN code when the terminal is powered on. Lock. Enter the PIN code of the UIM, and tap From the Home screen, u "Settings"...
-
Page 117: Applications
Applications Accounts & Sync This allows you to configure applications' settings. This allows you to configure the settings of accounts and their synchronization. Configure whether to allow the Unknown sources installation of the applications that General sync settings are supplied by other than Android Set whether the applications always Background market. -
Page 118: Privacy
Privacy Storage This allows you to initialize data. This allows you to display the microSD card status, mount and format, and the free space in internal Personal data memory. Delete all data from the terminal. Factory data SD card reset Display the total space on microSD Total space card. -
Page 119: Language & Keyboard
Language & Keyboard Voice Input & Output This allows you to configure the terminal's language and This allows you to configure settings for voice input and keyboard settings. output. Language settings Voice input Select the language used on the Configure the settings of voice Select Voice terminal. -
Page 120: Connectivity Settings
● What is LG On-Screen Phone (OSP)? Connectivity Settings LG On-Screen Phone is a function for displaying the screen of the terminal on a PC, and for using mouse Configure the settings for USB connection mode and and keyboard input on the PC for simple operation of the On-Screen Phone function. - Page 121 Activating USB Tethering Note • Hardware requirements of a PC for USB Connect the terminal and a PC using USB connection tethering are as follows: cable L02 to connect the PC to the Internet using the - OS*: Windows 7/Windows Vista/Windows XP terminal as a modem.
-
Page 122: Date & Time
Date & Time About Phone This allows you to configure the date and time settings. This allows you to display various informations of the terminal. Set the automatic retrieval of date Automatic and time information via the network. Software Change software update settings. Update Configure the date settings. -
Page 123: Displaying Your Own Number
Software Display the software version of the terminal. version Displaying your Own Number From the Home screen, u "Settings" u"About phone" "Status" • The "Status" screen appears. Your own number appears as "My phone number". Settings... -
Page 124: Mail / Internet
Mail / Internet sp-mode Mail This allows you to send and receive emails using an You can send and receive text messages containing i-mode mail address (@docomo.ne.jp). up to 70 double-byte characters (or 160 single-byte It allows you to use pictograms and Deco-mail, and also alphanumeric characters) to other terminals. - Page 125 Receiving/Viewing an SMS Note Message • Tap u "Insert smiley" while entering a message to insert a pictogram. Although an From the Home screen, "Applications" emoticon appears on your "Enter Message" box, the pictogram is displayed if the message is u "Messaging"...
-
Page 126: Gmail
Creating and Sending an Gmail Gmail If you have a Google account, you can send and From the "Inbox" screen, receive emails using Gmail. If you do not have a Google "Compose" account, you must open an account before using Gmail. •... -
Page 127: Early Warning "Area Mail
Receiving Area Mail Early Warning "Area Mail" You can receive Earthquake Early Warnings provided by Receiving Area Mail automatically the Japan Meteorological Agency. • When an Area Mail is received, a dedicated • Area Mail is a free service that does not require ringtone sounds and the text of the Area Mail is application. -
Page 128: Browser
Setting Area Mail Browser From the Home screen, "Applications" Browser allows you to view web pages in the same way that you can from a PC. u "Area Mail" • The "Early warning 'Area Mail' Inbox" screen Opening Browser appears. u "Settings"... - Page 129 Bookmark button The "Bookmarks" tab appears. Previous web page The previous page is displayed. Next web page The next page is displayed. Zoom Tilt the terminal toward you while touching to zoom in the web page. Tilt it away from you to zoom out. Switching windows You can switch to the selected window when accessing web pages via multiple windows.
- Page 130 Searching for a web page by voice entry Using Bookmark and History Tap the search box Bookmarking a web page allows you to quickly access that web page. You can also view previously visited web pages by • "Speak now" appears. displaying your browsing history.
-
Page 131: Talk
Changing Browser Settings Talk From the Browser screen, u "More" Google Talk is a Google instant messaging program. It allows you to chat (text chatting) with friends who have u "Settings" Google accounts. To use Google Talk, you must set up •... - Page 132 Chatting Tap a friend's account on the "Talk" screen • The Chat screen appears. Tap the "Type to compose" box u Enter your message and tap "Send" • The text that you entered in the "Type to compose" box is sent. •...
-
Page 133: File Management
File Management File Operation Note • Operating environment of a PC for file operation You can synchronize music with "Windows Media is as follows: Player" on your PC by connecting the terminal with the - OS*: Windows 7/Windows Vista/Windows XP PC via the supplied USB connection cable L02, and (Service Pack 3 or later) transfer the data between the PC and the terminal by... - Page 134 Folder Structure in the Terminal Note • Shot photos and videos are saved in "DCIM" When you connect the terminal with PC, the microSD folder in microSD card. Music data card in the terminal is recognized with the name synchronized with Windows Media Player on PC "Removable disk".
-
Page 135: Folder And File Operations
Drag and drop data between the terminal Folder and File Operations and the PC Note Synchronizing Data with • Do not turn off the terminal while reading or Windows Media Player writing data. • Do not unplug USB connection cable L02 while This allows you to synchronize music and videos with reading or writing data. -
Page 136: Bluetooth Communication
Disconnecting the terminal from a PC Bluetooth Communication Stop and remove the removable disk Connect the terminal to Bluetooth devices wirelessly, safely from PC and enable to exchange data. • For Bluetooth compatible version or profile, refer to ® ® •... - Page 137 cannot be performed when nearby electric devices „ Reception interference caused by wireless LAN are powered on. TVs and radios may receive noise devices or video interference. • As the terminal's Bluetooth device and wireless • Move the Bluetooth device to a place where LAN devices use the same frequency (2.4 GHz), connection is available when there is a broadcast reception interference may occur or the...
- Page 138 Turning ON Bluetooth Function to Pairing/Connecting with Other Make the Terminal Discoverable Bluetooth Device To transfer data by Bluetooth connection, perform From the Home screen, u "Settings" pairing (pairing setting) with the device in advance and u "Wireless & networks" u "Bluetooth register it to the terminal.
- Page 139 When the other device requests for Note pairing • Even for device requiring entry of pass code (PIN) when pairing, once pairing is performed, When a screen asking for pairing for Bluetooth entering pass code (PIN) is not necessary for connection appears, tap "Pair &...
-
Page 140: External Device Connection
Sending/Receiving Data via External Device Connection Bluetooth Function Connecting the Terminal with a PC • Set the Bluetooth function to ON beforehand to be discoverable. Make sure that Windows Media Player 11 or later and dedicated driver are installed on PC. If Windows Media Sending data via Bluetooth Player 11 or later and dedicated driver are not installed, You can send data of Phonebook (name card data in... - Page 141 Connect the microUSB connector • Request for installation of the device driver may appear on your PC. If it appears, cancel it. of USB connection cable L02 to the • is displayed in the status bar. microUSB connection terminal of the •...
- Page 142 Note • While connecting to a PC, drag or swipe the status bar down to open the Notification panel, and then tap "Charge only", "Mass storage", "PC sync", or "USB tethering" to display the "USB connection mode" screen, and then you can change the USB connection mode.
-
Page 143: Application
Application Notes for capturing images Camera • The Camera employs high precision technology, but The terminal has a built-in camera that can shoot some pixels or lines may seem brighter or darker photos and videos. than others. Also, when you shoot photos in places with insufficient lighting, noises seen as white line Before Shooting increase. -
Page 144: Shooting A Photo
• Shooting a fast moving object may result in an image Shooting a Photo slightly distorted from the image displayed on the screen at the time of shooting, or the image may be You can shoot photos with both horizontal and vertical blurred. - Page 145 Flash Shooting a photo Set flash mode to Auto, Off or On. From the Home screen, "Applications" Settings (while shooting photos) u "Camera" Set Focus/Image size/Scene mode/ISO/White balance/Color effect/Timer/Shot mode/Auto review/ • The photo shooting screen is displayed. Tag location (horizontal screen). •...
-
Page 146: Shooting Videos
Shooting Videos Note • Menus are displayed on the preview screen You can shoot videos by switching modes. Videos are after shooting a photo. The following operations shot horizontally. are available. Viewing shooting screen <Left part (Top part for vertical screen)> - "Share": Send via Bluetooth, Gmail, Picasa, The meanings of marks (icons and others) on the video etc. - Page 147 Flash Shooting videos Set flash mode to ON or OFF. Drag on the photo shooting screen. Settings (when shooting video) Set the video size/white balance/color effects/audio • The screen switches to the video shooting recording/auto review. screen. • Menus appear on the screen to allow you to Sound (On/Off) configure various settings to suit the scene and Switch button...
-
Page 148: Gallery
Gallery Note • Menus are displayed on the preview screen Gallery allows you to view photos/videos in a slide show. after shooting a video. The following operations Photos can be trimmed. are available. <Left part> Viewing Photos and Videos - "Play": Play the shot video. - "Share": Send via Bluetooth, Gmail, YouTube, From the Home screen, "Applications"... - Page 149 - Tap the left/right side of the terminal to view Note previous/next image when you place a • A screen appears to enable/disable thumbnail check mark on "Previous/next picture" for the selection if you tap on the Gallery screen, "Gesture" settings (P44). or touch one thumbnail for over 1 second.
-
Page 150: Media Player
Copying Music Files and Videos Media Player to the Terminal The "Media Player" application plays music files and video files saved on the microSD card. Media Player From Media Player, you can play music files and video supports the following file formats. files of your own after copying them to a microSD card. - Page 151 Opening the Media Player Note • While the terminal is connected to your PC, From the Home screen, "Applications" you cannot use applications, such as Camera, u "Media Player" Gallery, Media Player, etc., that use a microSD card. • The "Media Player" screen appears. •...
- Page 152 • MUSIC Store: Access the dmarket Music Store. Quick play bar While a list of videos is displayed, the "VIDEO This is displayed when there is music playing/ Store" icon appears. Tap this to access the paused. dmarket VIDEO Store. Tap this to display the Music screen.
- Page 153 Cover flow Playing Music Tap to switch between display/not display elapsed time, play progress bar, and song length. In the song list, tap a song you want to Flick left or right to scroll through the thumbnails on play horizontal screen. •...
-
Page 154: Playing Videos
Playing Videos Note • While a song is playing, is displayed in the From the "Media Player" screen, tap status bar. • A list of playable videos saved on the microSD • From the Music screen, tap u "Settings" card appears. u "This song : Ringtone settings"... -
Page 155: Using Playlists
Elapsed time Using Playlists Play progress bar Playlists allow you to play your favorite songs in a Drag or tap to play a video from a desired point desired order. within the video. Video information Set to view playlists Displays titles/artist names. With the initial setting, the bottom bar of the "Media Video list button Player"... -
Page 156: Play List
Displaying playlists Creating a playlist From the "Media Player" screen, tap In the Playlists, tap "New" "Play list" "Add songs to playlist" • Current playlists are displayed. • Tap the "All songs", "Artists", and "Albums" tabs • The following quick playlists are available. to switch the display list. - Page 157 After you finish editing, tap "Save" Setting the Media Player Deleting/sorting a playlist From the "Media Player" screen, "Settings" In the Playlists, tap "Edit" • The "Settings" menu appears. • Tap "Delete all playlists" to delete all playlists. Change the settings if required •...
-
Page 158: Market
Market Arrange icons Drag and drop to change the icons displayed on the bottom Android Market enables you to access applications and bar of the "Media Player" screen. games you like and download them to install into the terminal. • If you change the icons to "Play list", "Genre", or "Age", you can display lists Opening Android Market... - Page 159 • If you tap and enter a key word on the • NTT DOCOMO is not liable for malfunctions, if "Market" screen, you can search for an any, caused by the application you installed. application by its name.
- Page 160 Updating an Application Note • Read the application details carefully. Once you If an installed application is updated, the notification install the application, you accept liability for its icon appears on the status bar. You can also check the use. update information on the "My Apps"...
-
Page 161: Purchasing An Application
Uninstalling an Application Purchasing an Application You can uninstall applications whenever you want. Before downloading a paid application, you must first purchase it. Try it for free within a certain period. If you Tap any of application on the "My Apps" do not ask for a refund within a certain period after screen purchasing, your credit card will be charged. -
Page 162: Maps
Tap the answer that best matches your Purchasing an application reason, and then "OK" Tap an application that you want to purchase Maps • The application's functions and other users' comments and evaluations appear. "Maps" enables you to show your current location, Price button u "Accept &... - Page 163 results may not be obtained due to the differences Location Information Services in signal conditions caused by the locations of the satellites. Mobile networks, Wi-Fi and GPS methods are available • Since GPS uses signals from satellites, in the to obtain current locations. With Wi-Fi current locations following environments there are locations where can be speedily determined, but accuracy is lacking.
- Page 164 Enabling location search by Wi-Fi Note • This terminal is equipped with a GPS receiver From the Home screen, u "Settings" that uses satellite signals to calculate current u "Location & security" locations. Some GPS functions use the Internet. Place a check mark on "Use wireless Transferring data may incur charges.
-
Page 165: Open Maps
Open Maps Viewing Street View You can switch to the Street View of your current From the Home screen, "Applications" location. u "Maps" From the Maps screen, touch the section • Google Maps opens. that you want to view in Street View for •... - Page 166 Searching for a Specific Location Note • You can also search by voice entry. For details, From the Maps screen, tap the "Search refer to "Searching for a web page by voice Maps" box and enter the location that entry" (P128). you are looking for •...
- Page 167 Deleting a layer My Maps View My Maps you created on your PC. You can only view My in the "Maps" screen Maps on the terminal. You cannot create My Maps on the terminal. • The "Layers" menu appears. Tap the checked layer Wikipedia Display to view a Wikipedia article...
- Page 168 Select as your mode of Note transportation • If the routes are searched by car, on foot, or on "Get directions" bicycle, the routes are displayed on the map. • Tap the icon on the top left of the screen to •...
-
Page 169: Latitude
Clearing a Map Latitude You can clear all displayed layers and route search Google Latitude enables you and your friends to check results. each other's locations on maps and share status messages with each other. It also enables you to send in the "Maps"... -
Page 170: Navigation
Tap one of the items Opening Latitude Enter or select your destination to start route From the Home screen, "Applications" guidance. u "Latitude" • "Speak Destination": Search for destination via voice. • Latitude opens and a list of members with •... -
Page 171: Places
Places 1Seg You can use Places to easily search for nearby 1Seg is a digital terrestrial TV broadcasting service for restaurants, cafes, bars, travel spot, ATMs, gas stations, mobile devices that allows you to receive data programs and other places of interest. along with video and audio. - Page 172 ● Broadcast wave • For details on digital terrestrial channel packs, 1Seg is one of broadcast services, and receives refer to the following homepage. radio waves (broadcast waves) that are different The Ministry of Internal Affairs and from FOMA/LTE service. Therefore, it is not possible Communications, TV Recipient Support Center, to receive at locations where broadcast waves do not Channel Change Call Center...
- Page 173 ● About the 1Seg antenna Note • To view 1Seg, fully extend the 1Seg antenna. If you give too much force when the antenna is not fully • When retracting the 1Seg antenna, hold the extended, it may be damaged. antenna straight up and push down.
- Page 174 TV broadcast area Viewing the 1Seg viewing screen Flick left or right to switch channels. Vertical screen display shows the data broadcast. Tap to display the TV operation screen. Data broadcast area Tapping directly on the content of the data broadcast may allow you to operate.
- Page 175 Viewing the TV operation screen Tap the TV broadcast area/subtitle display area on the 1Seg viewing screen to temporarily display the TV operation screen. Channel, Broadcast station, Program name "Channels" tab Tap to display the channel list. Tap on a channel to switch channels.
-
Page 176: Viewing Reservations
Tap on a program Fixing the screen orientation • Program information is displayed. You can fix the screen orientation that is currently • Tap " ワンセグ " (1Seg) u " ワンセグ起動 " displayed. (Activate 1Seg) to switch the channel to view the From the 1Seg viewing screen, u "Fix 1Seg viewing screen. -
Page 177: Using Tv Link
Using TV Link Note • The start of a program cannot be notified if the Some data broadcasts may show link information terminal power is OFF at the reservation time. (TV link) to related sites. By registering a TV link, it is possible to connect to related sites later. - Page 178 1Seg Settings Other Channel Create and edit channel lists, switch channel settings setting From the 1Seg viewing screen, lists, and initialize channel lists. "Settings" • The "Settings" menu appears. Alarm Configure the settings for the viewing setting Change the settings if required reservation alarm.
-
Page 179: Osaifu-Keitai
Creating a channel list Osaifu-Keitai From the 1Seg viewing screen, Osaifu-Keitai is equipped with an IC card, so by waving "Settings" u "Channel setting" u the terminal close to a reader at a shop, it is possible to make payments or use coupons or participate in stamp "Channel list edit"... - Page 180 • We are not responsible for damages such as lost Swiping Close to Readers or changed data in the IC card, or other damages related to Osaifu-Keitai compatible services in any Communication can be executed by swiping the cases including terminal malfunction or terminal mark close to a reader.
- Page 181 Canceling the lock Locking Osaifu-Keitai From the Home screen, "Applications" Lock the Osaifu-Keitai service from being used. After locking, data cannot be acquired from the reader. u "Osaifu-Keitai" From the Home screen, "Applications" • The "Service List" screen appears. u "Osaifu-Keitai" u "Osaifu-Keitai Lock Setting"...
-
Page 182: Toruca
ToruCa • Depending on IP setting, ToruCa that can be displayed on the map from ToruCa (details) may ToruCa is an electronic card that can be loaded to your not be able to be displayed on the map from ToruCa list. mobile. -
Page 183: Alarm Clock
Setting Alarm Alarm Clock on the Alarm Clock screen From the Home screen, "Applications" u "Alarm Clock" • The "Alarm" screen appears. "New alarm" • The following functions are available by switching tabs. • The "Set alarm" screen is displayed, and the : Alarm following settings are available. -
Page 184: Setting The Timer
Set alarm details and tap "Save" Setting the Timer • The "Alarm" screen is displayed. The set alarm is added to the list. Set the alarm ON or OFF by on the Alarm Clock screen tapping • The Timer screen is displayed, and the following •... -
Page 185: Calendar
Setting the Stopwatch Calendar on the Alarm Clock screen Calendar "Start" • The stopwatch starts. Tap "Lap" to count lap The terminal has a calendar for managing your times. schedule. It can synchronize with scheduler built by • To stop the stopwatch, tap "Stop". Microsoft Exchange Server or with Google Calendar if you have a Google account. - Page 186 Setting calendar type to display Changing Calendar Display/ Displaying Schedule From the Calendar screen, "Calendars" Changing to Day/Week/Month view • The registered calendar types are displayed. of the calendar you want to Tap "Day" / "Week" / "Month" in the display change display box •...
-
Page 187: Changing Calendar Settings
Viewing your schedule Note From the Calendar screen, tap the • As the schedule time approaches, appears in the status bar. Drag or swipe the status bar schedule that you want to view downwards to open the Notification panel then •... -
Page 188: Calculator
Calculator SmartWorld From the Home screen, "Applications" From the Home screen, "Applications" u "Calculator" u "SmartWorld" • The Calculator screen appears. • The “SmartWorld" screen appears. Calculate SmartWorld menu • The results are displayed. For SmartWorld, the following menu is displayed. Note Item Description... -
Page 189: Youtube
YouTube Polaris Office You can play YouTube videos or upload the videos you From the Home screen, "Applications" have shot to YouTube. u "Polaris Office" • First-time users are required to accept "mobile terms • The "Polaris Office" screen appears. of service". -
Page 190: Id設定アプリ (Id Appli)
File Types and Formats Note • Only Word, Excel, and PowerPoint files can be You can use Polaris Office to read or edit Word, Excel, edited in Polaris Office. PowerPoint files saved on the terminal or microSD card • If you edit Word 2007, Excel 2007 or PowerPoint (as of November 2011). -
Page 191: Electronic Dictionary
From the Home screen, "Applications" Switching Dictionaries u "iD 設定アプリ" (iD appli) You can switch among "Obunsha ENG-JPN", "Obunsha • The " ご使用上の注意 " (Usage Precautions) JPN-ENG" and "Obunsha JPN-JPN" to search for a screen appears. After this, follow the on-screen word. - Page 192 Adding a Word to Wordbook/ Changing Dictionary Settings Viewing Wordbook From the Dictionary screen, u "Dict. Settings" You can register a search result on Wordbook. From the screen where the word • The "Dict. Settings" screen appears. meaning is displayed, u "Save"...
-
Page 193: Downloads
Downloads Application Manager The terminal can download images, music and web You can use Application Manager to confirm or end the pages from the Internet. Use the following operations to activated application. check, display or playback downloaded data. From the Home screen, "Applications" From the Home screen, "Applications"... -
Page 194: Data Backup And Settings Backup
Data Backup and Settings Tab name Description Backup Help Confirm the details about Application Manager. Using "Link Backup" Note Use "Link Backup" application to backup call log • When setting "Home Switcher" application to (history), calendar (schedule), system settings, text "Home", you can always check the number of message (SMS), and bookmark into microSD card. - Page 195 Backing up Restoring from a backup file When data is restored, the data on the terminal is From the Home screen, "Applications" replaced with the data included in the backup file on u "Link Backup" the microSD card. You should therefore exert adequate •...
- Page 196 Setting the backup schedule Changing Link Backup settings You can schedule the automatic backing up of data. From the Home screen, "Applications" From the Home screen, "Applications" u "Link Backup" u "Link Backup" • The Link Backup menu appears. • The Link Backup menu appears. u "Settings"...
- Page 197 Backing up Phonebook Importing a phonebook from a UIM or microSD card You can back up the Phonebook from your terminal to From the Home screen, "Phone" a microSD card. You can also import Phonebook from a UIM or microSD card to your terminal. Tap "Phonebook"...
- Page 198 Backing up SMS Messages to a You can copy or move up to 20 messages (SMS) to the UIM. From the Home screen, "Applications" u "Messaging" • The "Messaging" screen appears. Tap one of the received messages or threads • The message appears. Touch the message that you want to back up for over 1 second •...
-
Page 199: Using Overseas
Using Overseas Overview of International Note Roaming (WORLD WING) • For a country code, international call access code, and universal number international prefix, The international roaming service (WORLD WING) available countries, and international network allows you to use your terminal in the service areas of operators refer to "Mobile Phone User's Guide overseas operators affiliated with DOCOMO, with the [International Services]"... -
Page 200: Available Services
Available Services Confirming before Using Main communication GSM/ Confirming before Departure service GPRS Before using the terminal overseas, check the following ○ ○ ○ Calls in Japan. ● Contract ○ ○ ○ Check whether you have applied for WORLD WING. ○... -
Page 201: Confirming Overseas
● SMS rejection Confirming Overseas • You can set to reject SMS (including reception information when the FOMA terminal is out When you arrive overseas, the terminal automatically of service area) overseas. For the operating connects to an available network operator when it is procedures, refer to "Mobile Phone User's Guide powered on. - Page 202 ● About date & time ● About network services during international roaming If the "Automatic" checkbox in "Date & time" has been If you are subscribed to the network services, you marked, the time and time zone of the terminal's can use the Voice Mail Service, Call Forwarding clock will be automatically changed when information Service, and other network services overseas.
-
Page 203: After Returning To Japan
● About missed call notification After Returning to Japan If you were unable to answer a call during international roaming because the power of your When you return to Japan, the terminal automatically terminal was off or you were out of the service area, connects to the docomo network. -
Page 204: How To Make And Receive Calls At Your
Making Domestic Calls How to Make and Receive Calls at your Destination You can make a call to the other party's land-line phone or mobile phone in the same way as in Japan. From the Home screen, "Phone" Making Calls to Other Countries •... - Page 205 Settings for making/receiving calls International dial Automatic conversion function assist overseas Country code Configure the international roaming service to make/ receive calls while overseas. International prefix • This might not be available depending on the overseas operator. Configure settings overseas Network service From the Home screen, u "Settings"...
-
Page 206: Receiving Calls
Receiving Calls Making a Call from Other Parties ● Having the other party call you overseas from Japan You can receive calls in the same way as in Japan. Have the other party call you by dialing your phone Note number in the same way as when you are in Japan. -
Page 207: Settings For Network Connection At Overseas
Searching an Available Network Settings for Network and Setting Manually Connection at Overseas From the Home screen, u "Settings" When you use the terminal overseas, it is necessary to switch to the network of an operator that can be u "Wireless & networks" u "Mobile connected to in the country you are staying. -
Page 208: Automatically Selecting An Available Network
Automatically Selecting an Available Network From the Home screen, u "Settings" u "Wireless & networks" u "Mobile networks" u "Network operators" "Select automatically" Activating Data Roaming From the Home screen, u "Settings" u "Wireless & networks" u "Mobile networks" Place a check mark on "Data roaming" •... -
Page 209: Appendix / Index
Appendix / Index • In-Car Hands-Free Kit 01 Introduction of Options and • In-Car Holder 01 Related Devices • Carry Case 02 • Pocket Charger 01 You can expand the range of the terminal's uses, in both *1 Charging with the AC adapter L03 → P37 the personal and business realms, by combining it with *2 FOMA charging microUSB conversion adapter L01 various optional devices. -
Page 210: Troubleshooting (Faqs)
■ Charging Troubleshooting (FAQs) Symptom Check item Troubleshooting Cannot charge • Is the battery pack inserted correctly? • First, check whether a software update is required. • Is the adapter plug and cigar If required, update the software. (Updating lighter plug properly inserted Software →... - Page 211 Symptom Check item Symptom Check item "Please connect • Charge the battery pack if the Battery usage • Has the terminal been out of the battery is low. → P35 charger" time is short network service area for a long appears on the time? As the terminal searches screen...
- Page 212 Symptom Check item Symptom Check item Power turns • If the battery pack terminal is Terminal • An application that was installed off or restart dirty, the contact may become operation is to the terminal after purchasing automatically poor and the power may be unstable may be causing a problem.
- Page 213 Symptom Check item Symptom Check item Terminal • Widgets that you have created Calls are not • Turn the power off and on, or operation is may be gone. connected (The remove and reinsert the battery unstable • Safe mode is not the normal out of service or UIM.
- Page 214 ■ Screen ■ Camera Symptom Check item Symptom Check item The display is • Has the screen backlight time- Photos and • Check whether the lens is out been set? → P109 videos shot with cloudy or has dirt on it. •...
-
Page 215: Overseas Use
■ Osaifu-Keitai ■ Overseas use Symptom Check item Symptom Check item Osaifu-Keitai • When the battery pack is The terminal is „ Antenna mark appears cannot be used removed, Osaifu-Keitai not available to • Have you applied for WORLD functions cannot be used use overseas. -
Page 216: Data Management
■ Data management Symptom Check item Data • Set Data roaming to ON. Symptom Check item communication (P206) Data transfer is • Are you using a USB HUB? is not available not working If you use a USB HUB, data overseas transfer may not work properly. -
Page 217: Error Message
■ Bluetooth function Error Message Symptom Check item Error message Description The terminal • Put the Bluetooth compatible 通信サービスなし • You cannot use the terminal cannot find/ device (commercial) on standby ( No because it is out of the be connected and register it on the terminal. -
Page 218: Warranty And After-Sales Service
After-Sales Service Warranty and After-Sales Service When the terminal breaks down Before requesting repairs, read "Troubleshooting" in this Warranty instruction manual. If the problem still persists, contact "Repairs" (in Japanese only) on the back of this manual. • Be sure to receive a warranty at the time of purchase of the terminal. - Page 219 „ Repair may not be possible in the following cases Precautions • When a repair counter judges the cause of • Never modify the terminal or accessories. malfunction is exposure to water (e.g., when wet- - Doing so may result in fire, injuries or malfunctions. indication seal reacts).
-
Page 220: Updating Software
Used parts: speaker, microphone The NTT DOCOMO website provides information about • If the terminal has gotten wet or moist, immediately required software updates. power off the terminal, remove the battery pack, and... -
Page 221: Before Updating Software
Before Updating Software Note • You can update software while still retaining • Do not remove the battery pack while updating data (such as phonebook, camera images, software. This may result in a failed update. emails, downloaded data, etc.) on L-01D. •... - Page 222 • We recommend that you update software without • If a PIN code has been set, the PIN code entry screen appears during the restart after rewriting and moving and when you have strong reception (4 you are required to enter your PIN code. wave-level bars).
- Page 223 Drag or swipe the status bar downwards Auto Update settings • The Notification panel appears. From the Home screen, u "Settings" Tap "Software update is available" u "About phone" u "Software Update" Select an installation method u "Configure the software update" •...
- Page 224 Follow the instructions displayed on the Starting Software Update with screen Immediate Update • The update starts after the terminal is restarted. • All key operations are disabled during the From the Home screen, u "Settings" update. The update cannot be stopped either. u "About phone"...
- Page 225 Software update starts automatically Updating Software Immediately after the restart "Starts update" • All key operations are disabled during the update. The update cannot be stopped either. • When the update is complete, the terminal is restarted approximately 5 seconds later. The Home screen appears •...
- Page 226 When the scheduled time arrives Performing a Scheduled Update If you want to schedule the installation of the update package for a different time, you can set the software update time in advance. "Sets Time" • A screen for setting the installation start time appears.
-
Page 227: Main Specifications
• Software cannot be updated during OS version Main Specifications upgrade. • If L-01D is turned off at the scheduled time of „ Terminal the software update, the software update is performed when the time becomes the same as L-01D Model name the scheduled time after the terminal has been Dimensions... - Page 228 1Seg watching time Approx. 240 minutes Photo Main 3,264×2,448 (8M) 3,264×1,836 (W6M) recorded camera TFT 16,777,216 colors Display Type 2,560×1,920 (5M) size 2,048×1,536 (3M) Approx. 4.5 inches Size 2,304×1,296 (W3M) 720 dots × 1,280 dots HD Pixels 1,280×960 (1M) 1,536×864 (W1M) Image Type CMOS...
- Page 229 *4 These are Bluetooth standards that provide IEEE802.11b/g/n * Wireless LAN specifications for communications between compliant Bluetooth compatible device. Bluetooth standard Bluetooth Compatible • Continuous call time is an estimate of the battery life version 3.0 * Bluetooth during a continuous call with normal signal reception. version •...
-
Page 230: File Formats
„ Battery pack „ Number of shooting photos (estimate) Battery type Lithium-ion battery Number of shooting photos saved Resolution in microSD card (2GB) 3.8V Nominal voltage Approx. 43,430 640×480 (VGA) 1,800mAh Nominal capacity „ Video recording time (estimate) File formats Video recording time saved in The terminal supports the display or playback of the Resolution... -
Page 231: Specific Absorption Rate (Sar), Etc. Of
This mobile phone satisfies the international guidelines when used with a carrying case This model L-01D mobile phone complies with or a wearable accessory approved by NTT DOCOMO, Japanese technical regulations and international INC. * In case you are not using the approved guidelines regarding exposure to radio waves. -
Page 232: Radio Frequency (Rf) Signals
(in Japanese to exceed the emission limits for exposure to only) radio frequency (RF) energy set by the Federal NTT DOCOMO, INC. Website: Communications Commission of the U.S. Government. http://www.nttdocomo.co.jp/english/product/sar/ These limits are part of comprehensive guidelines and LG Electronics Inc. Website (Check the Specifications establish permitted levels of RF energy for the general page for this terminal.):... - Page 233 This is because the phone is designed to operate For body worn operation, this phone has been tested at multiple power levels so as to use only the power and meets the FCC RF exposure guidelines when used required to reach the network. In general, the closer with an accessory designated for this product or when you are to a wireless base station antenna, the lower used with an accessory that contains no metal and that...
-
Page 234: Declaration Of Conformity
Declaration of Conformity Tests for SAR have been conducted using standard operating positions with the phone The product "L-01D" is declared to conform with the transmitting at its highest certified power level in essential requirements of European Union Directive all tested frequency bands. Although the SAR is 1999/5/EC Radio and Telecommunications Terminal determined at the highest certified power level, Equipment Directive 3.1(a), 3.1(b) and 3.2. -
Page 235: Important Safety Information
European Union Directives Important Safety Information Conformance Statement AIRCRAFT Switch off your wireless device when boarding an Hereby, LG Electronics Inc. aircraft or whenever you are instructed to do so by declares that this product is in airline staff. If your device offers a 'flight mode' or compliance with: similar feature consult airline staff as to whether it can •... - Page 236 PETROL STATIONS Hearing Aids Obey all posted signs with respect to the use of Some digital wireless phones may interfere with some wireless devices or other radio equipment in locations hearing aids. In the event of such interference, you with flammable material and chemicals. Switch off your may want to consult your hearing aid manufacturer to wireless device whenever you are instructed to do so discuss alternatives.
- Page 237 Export Administration Intellectual Property Right Regulations Copyrights and Portrait Rights Japan Export Control Regulations ("Foreign Exchange and Foreign Trade Law" and relevant laws and You have no right to copy, modify, or distribute contents regulations) may apply to this product and its such as text, images, music, map data, or software accessories.
- Page 238 Electronics Inc. • The Bluetooth word mark and logos are owned by the Bluetooth SIG, INC. and any use of such marks by NTT DOCOMO, INC. is under license. Other trademarks and trade names are those of their respective owners.
- Page 239 ® ® - Windows XP indicates Microsoft Windows Others ® XP Professional operating system or Microsoft ® Windows XP Home Edition operating system. • Rovi, G-GUIDE, G-GUIDE MOBILE and • This product is licensed complying with the MPEG- G-Guide related logos are trademarks 4 Patent Portfolio License.
- Page 240 Index About phone …………………………………………120 Backing up data and settings ………………………192 Accessibility ……………………………………………117 Backlight ……………………………………………… 41 Access point ……………………………………………104 Battery pack ………………………………15, 24, 34, 228 Checking ……………………………………………104 Attaching …………………………………………… 34 Initializing ……………………………………………105 Life …………………………………………………… 35 Setting an additional access point ………………104 Removing ……………………………………………...
- Page 241 Creating a schedule ………………………………185 Voice Mail Service ………………………………… 92 Setting calendar type ………………………………184 Call settings ……………………………………………106 Viewing schedules …………………………………185 Call Waiting Service …………………………………… 95 Caller ID Notification Service ………………………… 98 Putting the current call on hold and answering Call Forwarding Service ……………………………… 96 an incoming call ……………………………………...
- Page 242 Data roaming …………………………………………206 FAQs ……………………………………………………208 Date & time ……………………………………………120 File formats ……………………………………………228 Declaration of Conformity ……………………………232 File management ………………………………………131 Desktop holder ……………………………………… 38 Folder and file operations …………………………133 Display …………………………………………………109 Hardware requirements ……………………………131 docomo Palette UI …………………………………… 62 Necessary equipment ……………………………131 docomo service ………………………………………107 Windows Media Player ……………………………131...
- Page 243 Making an international call ………………………… 80 Calls to fixed-line telephone ……………………… 80 Calls to mobile phone …………………………… 81 Icons …………………………………………………… 53 Maps …………………………………………… 160, 163 iD 設定アプリ (iD appli) ………………………………188 Activating GPS functions …………………………162 Important Safety Information …………………………233 Changing Layer ……………………………………164 Incoming/Outgoing history ……………………………...
- Page 244 Missed calls …………………………………………… 83 Entering symbols/emoticons ……………………… 59 mopera U ………………………………………………105 QWERTY keyboard ………………………………… 57 Switching the character mode …………………… 59 Switching the keyboard …………………………… 58 On-Screen Phone (OSP) ………………………………118 Name of each part …………………………………… 29 Operations during a call ……………………………… 82 Adjusting call volume ………………………………...
- Page 245 Searching an available network and Entering ………………………………………………114 setting manually ……………………………………205 PIN unblocking key (PUK) ……………………………113 Own number ……………………………………………121 Places …………………………………………………169 Polaris Office ……………………………………………187 Precautions for Terminal ……………………………… 13 Privacy …………………………………………………116 Public mode (Power OFF) …………………………… 99 Pass code (PIN) ………………………………………135 PUK locked ……………………………………………114 Pause ……………………………………………………...
- Page 246 SmartWorld ……………………………………………186 Trademarks ……………………………………………236 SMS ……………………………………………………122 Troubleshooting ………………………………………208 Backing up to UIM …………………………………196 Turning OFF the power ……………………………… 40 Receiving/Viewing …………………………………123 Turning ON the power ………………………………… 40 Sending ……………………………………………122 TV ………………………………………………… 69, 169 SMS rejection ………………………………………199 Software Update ………………………………………218 Auto Update …………………………………………220 Before Updating Software …………………………219 UIM …………………………………………19, 25, 31, 111 Immediate Update …………………………………222...
- Page 247 Connecting …………………………………………103 Deleting ………………………………………………104 Editing ………………………………………………103 Zooming in or out …………………………………… 43 Numerals Wallpaper ……………………………………………… 65 1Seg ……………………………………………………169 Warranty ………………………………………………216 1Seg antenna ………………………………………171 Widget ………………………………………………… 63 Program schedule …………………………………174 Wi-Fi …………………………………………………… 47 Setting ………………………………………………176 Adding ……………………………………………… 50 Viewing ………………………………………………171 Changing password ……………………………… 50 Viewing reservations ………………………………174 Connecting …………………………………………...
- Page 248 You can view/change your contract details, subscribe to services, and request information materials on the Internet. My docomo (http://www.mydocomo.com/) u 各種お申込・お手続き (Various Applications/Procedures) (in Japanese only) * You need your docomo ID/password in order to access this page. * If you do not have or you have forgotten your "docomo ID/password", contact "General Inquiries" on the back of this manual.
- Page 249 Be considerate of where you use your terminal and keep your voice and ringtone down „Keep your voice down when using the terminal „If you are in an outdoor public place, make sure in a quiet place such as a restaurant and hotel you do not disturb others.
- Page 250 Loss or theft of terminal or Failures encountered overseas payment of cumulative cost overseas <Network Support and Operation Center> <docomo Information Center> (available 24 hours a day) (available 24 hours a day) From DOCOMO mobile phones From DOCOMO mobile phones International call access code International call access code -81-3-6832-6600*...
- Page 251 Please con rm the phone number before you dial. For Applications or Repairs and After-Sales Service, please contact the above-mentioned information center or the docomo Shop etc. near you searched on the NTT DOCOMO website. NTT DOCOMO website http://www.nttdocomo.co.jp/english/ Don't forget your mobile phone … or your manners! When using your mobile phone in a public place, don't forget to show common courtesy and consideration to others around you.
Need help?
Do you have a question about the Optimus LTE L-01D and is the answer not in the manual?
Questions and answers