
Subscribe to Our Youtube Channel
Related Manuals for SMART Joy S2


Summary of Contents for SMART Joy S2
-
Page 1: User Manual
Digital Satellite Receiver SCART - DIGITAL AUDIO User Manual Version: 24.04.2013 - English... - Page 2 © smart electronic GmbH 2013 All rights, technical changes, errors as well as printing mistakes reserved. Any reproducing or copying of the con- tents requires prior written permission from smart.
-
Page 3: Table Of Contents
Content Content Commissioning Content 5.4.1 Language User Information 5.4.2 RAPS Start Use of this Manual 5.4.3 Automatic Programming Signs, Symbols, Layout Satellite List Product Description 5.5.1 Country 5.5.2 Regional Channel Scope of Delivery 5.5.3 Channel Filter Receiver Selecting the Operation 2.2.1 Front Panel Mode... - Page 4 Content 6.1.1 Antenna Type 6.12 Automatic Standby Function 6.1.2 Satellite List 6.13 Zoom Function 6.1.3 Antenna Setup 6.14 Satellite Overview 6.1.3.1 LNB Type 6.15 Switching TV/AV 6.1.3.2 Motor Type 6.16 Pause Function 6.1.3.3 Local Logitude 6.17 Software Version 6.1.3.4 Local Latitude 6.18 Factory Settings 6.1.3.5...
-
Page 5: User Information
User Information User Information Use of this Manual • Please carefully read this user manual before operating the device for the first time. • Please note all warnings and notes included in this user manual. • Consider this user manual to be an integral part of the product, and store it at a well accessible location. -
Page 6: Receiver
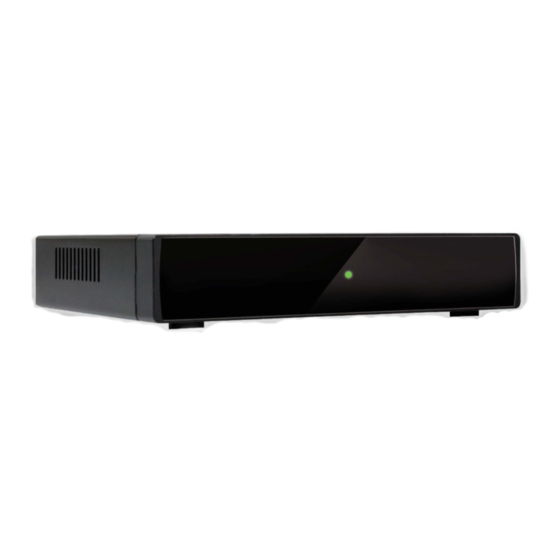
Product Description Receiver 2.2.1 Front Panel No. Description Standby LED, lights red if the receiver is in Standby mode. Signal-LED, lights green after the installation of programs is completed and a video signal is routed to the TV set.. The green LED (light emitting diode) on the receiver front panel does not light immediately after connecting the device to the power supply, but only after the installation of programs is completed (either via RAPS or via program scan). -
Page 7: Remote Control
Product Description Remote Control Marking Description To switch between operating and standby modes. Numeric keys Direct channel selection or input of alphanumeric characters. (0~9) TV/R To switch between TV and radio modes. Channel + or cursor up To start/finish Electronic Program Guide Volume - or menu option left / V- To load favorite channel list... -
Page 8: Save Energy
General Safety Instructions Marking Description SLEEP Sleep Timer Mute Mute switch To switch to the previously selected channel MENU Main menu To show channel list or confirm menu item Volume + or menu option to the right / V+ EXIT To exit menu or menu item To scroll page up in menu... -
Page 9: Risks In Case Of Intended Use
General Safety Instructions Risks in Case of Intended Use Humidity, wrong mains voltage and/or wrong mains frequency, lightning stroke or mechanical overload may cause malfunction of or damage to the device. Ensure that the receiver (in particular the mains plug) and the remote control are not exposed to any humidity. -
Page 10: Handling Of Batteries
Connecting the Receiver Place the receiver so that the mains plug can be disconnected at any time, correspondingly dis- connecting the device from the mains. If the device is transported from cold to hot environment, then condensing hu- midity may build up in the device. -
Page 11: Connecting Satellite Antenna
Basic Operation optional connection Connecting Satellite Antenna Connect the antenna cable to the receiver connection LNB IN. Connecting the TV set Connect the TV set to the receiver connection TV with a Scart cable. Connecting the home cinema system To improve audio playback, you can connect to your receiver - additionally to the TV set - also a multichannel home cinema system or a hi-fi system (if your home cinema system can process digital audio data SPDIF):... -
Page 12: Software Update
Basic Operation Software Update Once you have put your receiver into operation, you should first update the operating software of your receiver! There are two possibilities to update the software. 5.2.1 Software Update via Satellite 1. In the menu Tools, select the submenu S/W Upgrade by OTA and press OK. 2. -
Page 13: Raps Start
Basic Operation The submenu Language can be accessed anytime via the menu Language. 5.4.2 RAPS Start Your receiver is equipped with RAPS. RAPS means Receiver Automatic Programming System. RAPS can automatically update the channel lists of your receiver. What is RAPS? Currently, the satellites Astra 19.2°... -
Page 14: Satellite List
Basic Operation • Number of satellites included in the RAPS file: − Astra 19.2° East − Hotbird 13° East − Turksat 42° East − Astra 23.5° East − Eurobird 9A 9° East • Number of transponders included in the RAPS file •... -
Page 15: Channel Filter
Basic Operation 5.5.3 Channel Filter Select Erotic and/or Call TV by pressing the keys PR+ and PR-, and select the option Yes to include such channels into the channel list or No to not include such channels by respectively pressing V+ / V-. -
Page 16: New Password
Basic Operation 5.9.3 New password Here you can assign a new password. As-delivered the password is set to 0000. 5.10 Setting Time Reasonable operation of the receiver requires setting of system time. By default, the receiver is set to Usage, i.e. -
Page 17: Channel Selection Via Search Function
Basic Operation The Channel selection window shows: • Display of current channel list • Channels included in the current channel list • Frequency of current channel (example: 33800 is 338.00 MHz) • Symbol rate of current channel (in megasymbols/second) • Polarization of current channel •... -
Page 18: Name (Z-A)
Basic Operation 5.11.3.4 Name (Z-A) Select with the keys PR+ / PR- the menu item Name (Z-A) and confirm with OK. You'll get a list of all channels in descending alphabetical order. Press the keys PR+ / PR- to go up and down in the list. ... -
Page 19: Subtitles
Basic Operation 5.11.7 Teletext Teletext is an information system displayed on your TV set. Teletext is only possible if the selected channel supports such function. The information is organized in the main pages and subpages. Press the key TXT to activate teletext. If subtitles are offered for the program in the selected channel, a selection window appears. -
Page 20: Extended Settings And Functions
Extended Settings and Functions Extended Settings and Functions Installation The default settings apply to a standard satellite system. Any further system functions (e.g. unicable system or motor antenna) should be manually set in the menu Installation: In case of doubt, have those settings being made by an expert. Usually, there ... -
Page 21: Delete All
Extended Settings and Functions 6.1.3.5 Delete All Select the menu item Delete All to delete all previously set satellite positions. This menu item is only active, if you selected the motor control DiSEqC1.2 6.1.3.6 Motor Setting Select Motor Setting and press OK to open the submenu Motor Setting 1. -
Page 22: Multi Satellite Search
Extended Settings and Functions At Network Search, select if you want to search for an individual channel (No) or all chan- nels of a channel network (Yes), e.g. PRO7, SAT1, KABEL1, SIXX. The item Network Search will only be active after selecting the scan mode Preset Scan (i.e. Standard Scan). At Scan Mode, select the scan mode: ... -
Page 23: Skip Channels When
Extended Settings and Functions 2. Press the red FIND key and confirm by pressing OK. You will be requested to enter a password. 3. Enter a password. Locked channels are marked in the channel lists 4. Again press the red function key to leave the function Lock. ... -
Page 24: Delete All Channels
Extended Settings and Functions 4. Again press the blue L/R key (Delete) or the EXIT key to leave the Delete mode. 5. If you agree to overwrite the factory-set channel list when leaving the menu (see above), the marked channels will be deleted. 6.2.7 Delete All Channels To delete all channels... -
Page 25: Video Signal Format At The
Extended Settings and Functions Select Subtitle Language to set the preferred language for subtitles (per default OSD language and subtitle language are the same). Select Teletext to set the preferred language for teletext (per default OSD language and teletext language are the same). -
Page 26: Osd Timeout
Extended Settings and Functions 6.7.2 OSD Timeout In the sub-menu OSD Setting move the highlight on OSD Timeout and press the keys V+ / V- to set the number of seconds after which the OSD should be hidden. You may set values from 1 to 10 seconds. -
Page 27: Satellite Overview
Extended Settings and Functions Press the keys PR-, PR+, V- or V+ to move the cutout. Repeated pressing of the green ZOOM key enlarges the image more and more (up to 16-fold magnification). To leave the ZOOM menu, press EXIT. 6.14 Satellite Overview ... -
Page 28: Enabling Automatic Raps Updates
Operation in a Unicable System To activate the desired mode, select Start and press OK. 6.19.3 Enabling Automatic RAPS Updates Select Auto RAPS-Scan to set - using the keys V+ / V- - whether the channel list should be updated always at shut down (On) or not (Off). -
Page 29: Cleaning
Cleaning Select the menu item IF Channel and set a ZF channel there (start with channel "1"; assign one of the ZF channels in ascending order to every connected receiver). Select the menu item Center Freq and set the frequency belonging to the ZF channel (see as- signment table). -
Page 30: 11 Disposal
Disposal Indication Possible Cause Remedy The batteries are used up. Replace the batteries with new ones. The remote control is not working. The remote control is aligned Direct the remote control at the front panel incorrectly. of the receiver. If a malfunction cannot be eliminated by the above measures, please contact your specialized dealer. 11 Disposal ... -
Page 31: Video Decoder
GmbH Industriestraße 29 78112 St. Georgen Deutschland 14 Declaration of Conformity The smart electronic GmbH, Industriestraße 29, 78112 St. Georgen, Germany hereby declares that this product complies with the following directives and standards: Low Voltage Directive 2006/95/EC • −... - Page 32 Art.-Nr.: 90-60-01-0043...
Need help?
Do you have a question about the Joy S2 and is the answer not in the manual?
Questions and answers