Table of Contents
Advertisement
Quick Links
Advertisement
Table of Contents
Troubleshooting

Related Manuals for SMART ZAPPIX HD+


Summary of Contents for SMART ZAPPIX HD+
-
Page 1: User Manual
HDTV Satellite Receiver ZAPPIX HD+ User Manual Version: 14.05.2013 - English... - Page 2 Preface Preface Dear customer! Thank you for purchasing a smart HDTV satellite receiver. This manual explains how to • install, • connect, • customize, • operate, • clean or depollute the receiver. Please read the manual carefully before operating the unit.
-
Page 3: Table Of Contents
Connecting a Data Storage Device (optional) ..... 20 Connecting a Home Network (optional) ......21 Connecting the Power Supply ..........21 Inserting the Batteries of the RCU........21 Basic Operation ................. 21 Switching on the Receiver ........... 21 smart Zappix HD+... - Page 4 5.8.11 Audio ................... 40 5.8.12 Sleep Timer ................. 41 5.8.13 Parental Control ..............42 5.8.14 Mini Guide ................42 5.8.15 Full Guide ................44 5.8.16 Personal Planner ..............46 5.8.17 List Manager ............... 46 HbbTV ................. 46 smart Zappix HD+...
- Page 5 Deleting a Channel from a Favorite List ......60 7.1.9.7 Sorting a Channel List ............61 7.1.9.8 Moving a Channel in a Channel List ........61 7.1.9.9 More List Editor Functions ..........61 Guide ................... 62 Media Player ................ 62 7.3.1 Network streaming .............. 64 smart Zappix HD+...
- Page 6 Recording Subtitles ............. 77 7.5.4.5 Recording Audio Tracks............77 7.5.4.6 Recording Teletext .............. 77 7.5.4.7 Power at the USB Port ............77 7.5.4.8 Blocking the menu during recording........77 7.5.5 Parental Control / Pin Code ..........78 smart Zappix HD+...
- Page 7 Operation in a Unicable System ............91 About Unicable ..............91 Allocation ZF Channels and Frequencies ......91 Installation ................92 Management of USB Storage Devices ........... 93 USB Sticks ................93 USB Hard Drive 2.5 "(Inch) ..........93 smart Zappix HD+...
- Page 8 Remote Control ..............100 14.3 LAN/WLAN ................ 100 14.4 Power Supply ..............100 14.5 Connections ..............100 14.6 Temperature ..............100 14.7 Dimensions and Weight ............ 101 15 Open-Source-Software ..............101 16 Declaration of Conformity ............. 107 smart Zappix HD+...
-
Page 9: General Advice
General Advice General Advice Use of this Manual • This manual is valid for the smart HDTV satellite receiver smart Zappix HD+. • Read the manual completely before starting up the receiver the first time. • Pay attention to all warnings and notes in the manual. -
Page 10: Product Description
Product Description Scope of Delivery • HDTV satellite receiver smart Zappix HD+. • remote control (rc) • 2 batteries (AAA) for the rc • HD+ smartcard (in the CA bay behind the front flap), HD+ info flyer •... -
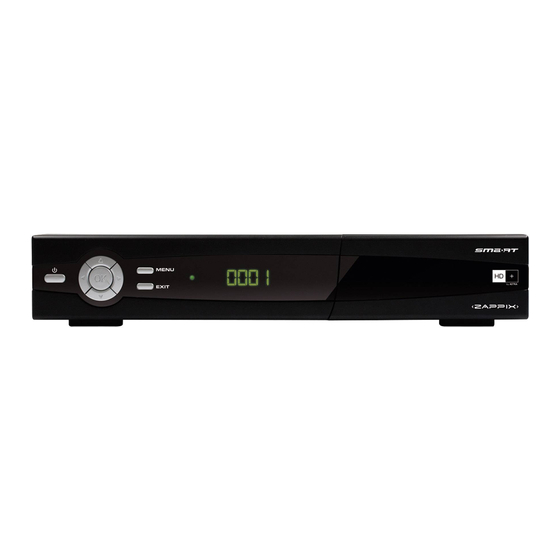
Page 11: Receiver
Show channel list / confirm menu item Channel Down / down in the menu Channel Up / up in the menu EXIT Exit menu or menu item MENU Display menu or exit menu Display 4-digit display (channel) Bay for smartcard smart Zappix HD+... -
Page 12: Rear Panel
Scart connection to a TV set Video Composite, analog TV video signal AUDIO L Analog audio left ON / OFF Mains switch High Definition Multimedia Interface, interface for the fully digital transmission of audio and video data. smart Zappix HD+... -
Page 13: Remote Control Unit
Remote Control Unit Description Switches between operating mode and standby V-FORMAT Toggles video resolution 0 - 9 Program selection, alphanumeric input TV/R Switches between TV mode and Radio mode Volume +/- Green function key Red function key smart Zappix HD+... - Page 14 Yellow function key Blue function key EXIT Exit menu or menu item BACK Back to the previous menu item Opens electronic program guide (EPG) Opens / close teletext Starts direct record Starts / pause playback Stops record / playback smart Zappix HD+...
-
Page 15: Save Energy
Safety Instructions Designated Use The HDTV Satellite Receiver smart Zappix HD+ is intended for the recep- tion of both, free to air and scrambled digital satellite programs (DVB- S/S2) in the private sector. It is designed exclusively for this purpose and may be used only for this. -
Page 16: Hazards During Designated Use
The satellite antenna must be grounded properly. Note the relevant VDE regulations smart recommends that the outdoor unit of the satellite system should be installed by a professional! Location Place the receiver onto a solid and level surface. -
Page 17: Proper Handling Of Batteries
We do not assume liability, if the designated protection of the unit is im- paired, especially in these cases: • The unit is not used according to the manual. • The application range is not correct. • The user makes unauthorized changes regarding the receiver hardware smart Zappix HD+... -
Page 18: Connecting The Zappix Hd
CAUTION! Make sure the cables are routed so, that you cannot step on them or stumble over them. Connecting the Satellite System Connect the cable of the satellite system to the LNB IN socket. smart Zappix HD+... -
Page 19: Connecting The Tv Set
Connecting the TV Set As shown in the connection diagram, there are various options to connect the smart Zappix HD+ and the TV set. It depends on the connectivity of your TV set which option is possible for you. Is there a HDMI socket at the TV set? NO. -
Page 20: Connecting A Data Storage Device (Optional)
Connect the receiver via the USB socket to a data storage device (USB stick or hard disk with USB socket) with a suitable cable. Then you can • store video recordings (see chapter , page 47) or Media Player • access various media files (see section , page 62). smart Zappix HD+... -
Page 21: Connecting A Home Network (Optional)
This chapter describes the necessary steps to use easily the radio and television programs broadcasted via satellite. Switching on the Receiver 1. Ensure that you chose the right AV input at your TV set (i. e. that the receiver signal will be displayed). smart Zappix HD+... -
Page 22: Installation With Raps
3. Switch on all connected devices. 4. Switch on the receiver with the mains switch on the rear panel (I, ON). The receiver boots up. For a short time the smart welcome screen is displayed, then the first installation window. You see “WELCOME” in the receiver display. - Page 23 The next window displays the found satellites (marked with +): 3. Press the green function key (continue), in order to take over these satellites select more satellites with the keys (of course, you should know that they are receivable) and confirm each with OK, then press smart Zappix HD+...
- Page 24 Subscription packages. You are asked, whether pay TV providers should be added to the channel list: E. g. if you select HD+, the SD channels will automatically be ex- changed with the corresponding HD channels, i. e. the HD channels smart Zappix HD+...
-
Page 25: Installation Without Raps
Default, the receiver contains a simple channel list with a small number of channels. Blankoliste Plain List Channels have to be added manually (e. g. by performing a Channel Search, see section 7.5.7, page 80). After pressing OK the receiver switches to TV mode. smart Zappix HD+... -
Page 26: Automatic (Hd+)
Wait until the channel search is completed. 4. Press the green function key (continue), in order to accept the HD+ channel list. 5. Press the green function key (continue) after the channel search is completed, in order to save/confirm the found channels. smart Zappix HD+... -
Page 27: Software Update
5.4.1 Update via USB You can transfer the current software via the USB interface: 1. Look for the update file on the website www.smart-electronic.de (item Support Zappix HD+ Download). 2. Save the file to your PC. 3. Unpack the file, which is a .zip archive. -
Page 28: Ota Update
4. After the update reset the receiver to factory defaults (section 7.5.8, page 81). 5.4.4 Automatic Update The receiver also checks in subsequent operation continuously, whether online or via satellite a newer software file than the already installed is available. OTA = Over The Air = via satellite smart Zappix HD+... -
Page 29: Update During Operation
The operation mode after the first switch on (or after re- storing the factory settings) is television (TV). When you switch-on the receiver after it was off, the mode is always the selected prior to switch-off. smart Zappix HD+... -
Page 30: Open/Close Menu
The menu operation is basically independent from the operation mode (Radio or TV). Open/Close Menu Your smart receiver is operated via an OSD (OnScreenDisplay). Press the key MENU (of the remote control or at the receiver) in order to open the menu:... -
Page 31: Menu Navigation
If there are more values in a list than what is display- able, you will get additional symbols at the top and at the bottom, which indicate, that the list is longer than you can see. list goes on at bottom. list goes on at top. smart Zappix HD+... -
Page 32: Watching Tv
, in order to navigate through the channel list and to select a channel (the selected channel is highlighted). Press OK, in order to switch to the selected channel (this channel will be shown in the thumbnail view). smart Zappix HD+... -
Page 33: Select Channel List
The number of already loaded teletext pages is displayed at the bottom left side. The page memory will be cleared if you switch to another channel. Teletext information is broadcast in the vertical blanking interval between image frames in a broadcast television signal. smart Zappix HD+... -
Page 34: Quick Access Menus
Press the key EXIT or once more the key TXT, in order to switch off teletext again. Now, the volume can be changed again via the arrow keys ◄ and ►. 5.8.5 Quick Access Menus Press the key INFO. You see the info window with details about the current channel: smart Zappix HD+... - Page 35 The current channel is included in a favorite list (the standard channel list is also considered as a favorite list). The current program provides subtitles. The current channel is broadcasted in legacy 4:3 format or in 16:9 for- smart Zappix HD+...
- Page 36 Mini Guide Subtitles Full Guide Aspect Ratio Personal Planner TV Resolution List Manager Soundtrack FTA = Free To Air, the channel is broadcasted without scrambling EPG = Electronic Program Guide = electronic program guide, electronic program magazine smart Zappix HD+...
-
Page 37: Adding A Channel To A Favorite
OK. 4. Press EXIT, in order to go back to the TV mode. 5.8.8 Aspect Ratio 1. Press the keys INFO and several times , in order to go to the quick access menu Aspect Ratio. smart Zappix HD+... - Page 38 5. Press EXIT, in order to go back to the TV mode change to another quick access menu. Sometimes there are programs on the HD+ channels in 4:3 format, where you cannot change the aspect ratio! smart Zappix HD+...
-
Page 39: Tv Resolution
5. Press EXIT, in order to go back to the TV mode. If your receiver and your TV set are connected via Scart, the maximum resolution 576i. Vertical resolution in lines p = progressive, i = interlaced smart Zappix HD+... -
Page 40: 5.8.10 Soundtrack
, in order to select the best value for the current program. Mode Meaning Dolby Digital At the receiver outputs the encoded Dolby Digital audio signal is available (for items that are broadcast with Dolby Digital sound). smart Zappix HD+... -
Page 41: 5.8.12 Sleep Timer
3. Press OK once more, in order to activate the entry of the hours and set them with the keys 4. Press , in order to go to the entry of the minutes and set them with the keys 5. Press OK, in order to confirm your entries. smart Zappix HD+... -
Page 42: 5.8.13 Parental Control
The Electronic Program Guide (EPG) is a convenient substitute for a print- ed program guide. You can also use EPG to program records easily. The Zappix HD+ offers two EPG versions. Press the keys INFO and one time , in order to open the window Mini Guide: smart Zappix HD+... - Page 43 If you are in the window Mini Guide you can access further functions: Press OK, in order to get detailed information about the current pro- gram and in order to get access to following functions: Press the keys and , in order to scroll forward or backward. smart Zappix HD+...
-
Page 44: 5.8.15 Full Guide
Press OK, in order to open a window with detailed information about the current program and to access the following functions. Press the keys , in order to view the EPG data of all channels in the current channel list. smart Zappix HD+... - Page 45 The possible display and edit functions are explained in section More Options , on page 7.7. Press the green function key, in order to switch between Full Guide and Single Channel. The window Single Channel only shows the programs of one channel: smart Zappix HD+...
-
Page 46: 5.8.16 Personal Planner
4.6 on page 21 and 7.5.6 on page 78. 2. Press the red function key in order to view the HbbTV notification. HbbTV = Hybrid Broadcast Broadband TV, linkage between TV and internet content smart Zappix HD+... -
Page 47: Pvr
For a short time the info window (section 5.8.2) will be displayed, extend- ed by a disk icon. You will find adequate USB sticks and external hard disks in the smart accessory shop on www.smart- electronic.de. Note that if you have a disk divided into multiple parti- tions you first must specify the default folders for record and timeshift (see section 7.1.4, page 53)! -
Page 48: Programming Via Epg
Select Tune, in order to switch to the selected program, when that begins. Select Reminder, in order to display a hint in the current program, when the selected program begins. 2. Press , in order to go to To take place and to change the repeat mode. smart Zappix HD+... -
Page 49: Time Shifting
Press , in order to pause the current program (freeze frame) and to start the time shift record. For a short time the info window (section 5.8.5) will be displayed. smart Zappix HD+... -
Page 50: Playback
You can also playback USB recordings via the Media Player. Recording one Channel and Watching another at the same Time If you start a record with the key REC and then want to open the channel list with OK, you’ll get such a message: smart Zappix HD+... -
Page 51: Recording And Playing Epg Data
Live Radio Select the submenu Live Radio and press OK. You see the first channel of the current Radio channel list. For a short time the info window will be displayed (see section 5.8.5, page 34). smart Zappix HD+... -
Page 52: Recorded Tv
If you open a file with OK, the movie will be played back in the preview window. Press OK once more, in order to play back the movie in full screen mode. For a short time an info window will be displayed: smart Zappix HD+... -
Page 53: Define Default Directories
7.1.4 Define default directories Press the blue function key in the submenu TV/Radio / Recorded TV, in order to define an open directory as default directory for • Recording or • Timeshift or • Web Download. smart Zappix HD+... -
Page 54: Formatting A Storage Device
In the upper part you see information regarding the USB storage device. Press the red function key. Following window opens: Select with the keys the desired file system (FAT32 – Windows or EXT3FS – Linux) or select Cancel. smart Zappix HD+... -
Page 55: Mounting/Unmounting An Usb Device
Extended Functions and Settings For compatibility reasons smart recommends to use the file system FAT32. With FAT32 the maximum file size is 4GB. If a recording exceeds this size, the file will auto- matically be split in several parts. - Page 56 3. Press the key , in order to set the month. 4. Press the keys , in order to change to the right month. 5. Press the key , in order to go to the next input field. smart Zappix HD+...
- Page 57 Select Daily, in order to record the selected program every day at the same time. Press OK to confirm. Select Mon-Fri, in order to record the selected program from Monday to Friday at the same time. Press OK to confirm. smart Zappix HD+...
-
Page 58: List Manager
Gesamt TV channel list ( ) will be marked. 7.1.9.1 Delete a Channel List one of the shown lists and press the red Select with the keys function key, in order to delete the list completely. smart Zappix HD+... -
Page 59: New Channel List
Press OK, in order to confirm the new name, to leave the edit mode, and to go back to the previous window. 7.1.9.4 Editing Channel Lists Select with the keys one of the shown channel lists and press OK, in order to edit them additionally. smart Zappix HD+... -
Page 60: Adding A Channel To A Favorite List
Press the green function key, in order to mark the first of several channels. Enlarge the marking with the keys and press once more the green function key, in order to set the end of the marking. smart Zappix HD+... -
Page 61: Sorting A Channel List
Select Edit to list, in order to set the list on the right side of the List Editor. Select Lock/unlock channel, in order to lock the access to the marked program or to unlock it. smart Zappix HD+... -
Page 62: Guide
Ensure that a storage device containing the files you want to play is plugged in. Navigate to the menu Media. Only possible with the smartPORTAL-Stick PX1, which is available in the accessory shop www.smart-electronic.de smart Zappix HD+... - Page 63 OK. The folder tree now only shows the files that correspond to the desired file type. Only if you have selected, for example music, you will see existing music files. only with connected smartPORTAL-Stick PX1 smart Zappix HD+...
-
Page 64: Network Streaming
-keyboard or a connected USB keyboard. The input format should be: Workgroup or Domain/Computername sliderX = 4 in 1 universal remote control which is available as an accessory for the smart receivers CX10, VX10 and Zappix HD+. smart Zappix HD+... -
Page 65: How To Share Folders And Drives
How to Share Folders and Drives with Windows XP Share Settings Properties 1. Right-click the folder that you want to share, and then click Sharing tab 2. Select the NAS = Network Attached Storage, storage device (hard disk) which is directly connected to the network smart Zappix HD+... -
Page 66: How To Share Folders And Drives With Windows 7
Sharing of any folder / drive is very complex, if you are using a device that does not support Windows 7 (for example a PC with an earlier version of Windows or a Linux PC, the smart receiver). To share a folder a number of steps are necessary:... - Page 67 3. Click Advanced Sharing Settings. home work) 4. Open the active profile (probably 5. Scroll until you see password protected sharing. password protected sharing 6. Switch off and confirm all. smart Zappix HD+...
-
Page 68: Example Music
Select with the keys Yes or No and confirm with OK. If you select Yes the file will be deleted and you get back to the previous window. If you select No only the current window will be closed. smart Zappix HD+... -
Page 69: Example Photos
• the transmitted data volume via this dial-in node . With plugged in smartPORTAL-Stick PX1 and properly configured WLAN connection you have via the menu Web access to the smart portal and smart Zappix HD+... -
Page 70: Control Panel
Press the yellow function key in order to directly ac- cess the smartPORTAL from TV mode. The smart web offerings are continuously enhanced. For details, visit www.smart-electronic.de. Control Panel In the menu Control Panel you can adjust many parameters in several sub-menus for the operation of the Zappix HD+ and view the current set- tings. -
Page 71: User Preferences
Select Energy mode, in order to set the energy mode being used in standby mode: Energy mode Meaning Economic Minimum power consumption, longer start-up time Light standby Middle power consumption, middle start-up time Rapid start-up Higher power consumption, very short start-up time smart Zappix HD+... -
Page 72: User Interface
Select HbbTV Applications, in order to set, how you want to be in- formed about existing HbbTV content or how you want to use it . The- re are these options: Only applicable with plugged in smartPORTAL-Stick PX1 and properly configured WLAN connection. smart Zappix HD+... -
Page 73: Automatic Standby-Mode
Personal planner (section 7.1.8, page 55) Library Open the menu Media / USB … (section 7.3, page 62) 7.5.1.8.2 Function of the Key EPG Select key ‚GUIDE/EPG, in order to set the function for the key EPG: smart Zappix HD+... -
Page 74: Automatic Playback Of A Multimedia File
Value Meaning HELP Opens the smart support website, default function Opens the smart portal (section 7.4, page 69) 7.5.1.9 Automatic Playback of a Multimedia File Select Auto playback to set, whether the playback of a multimedia file (audio, video, photo) starts only by selecting the file ( whether you must press ►... -
Page 75: Time / Date
Select Auto-daylight saving time ( ), in order to set whether the system time should automatically adjusted according the daylight saving time (daylight saving time from the last Sunday in March until the last Sunday in October) smart Zappix HD+... -
Page 76: Languages
Select Default Record Folder to get advice in which menu you can set the default directory for recordings. Select Default Timeshift Folder to get advice in which menu you can set the default directory for timeshift. smart Zappix HD+... -
Page 77: Channel Change During Recording
(“boot up”) the HDD. 7.5.4.8 Blocking the menu during recording Select Recording Protection, to set, whether the menu can be callled during recording. smart Zappix HD+... -
Page 78: Parental Control / Pin Code
PIN = Personal Identification Number, secret numeric password FSK = Freiwillige Selbstkontrolle der Filmwirtschaft (German) = Voluntary Self Regulation of the Movie Industry, FSK approval: e. g. rating of a film according to the youth protection law smart Zappix HD+... - Page 79 Press EXIT, in order to leave the menu. 7.5.6.1.4 WLAN: fixed IP Address or DHCP Select Auto IP config to set, whether you the receiver shoul have a fixed IP address in the wireless network ( Secure Set Identifier (engl.) = Netzwerkkennung smart Zappix HD+...
-
Page 80: Showing Network Connection Parameters
In the submenu Advanced Channel Search you can search for channels of a certain transponder. Select Satellite, in order to select the satellite, where the transponder is located. FTA = Free To Air = unscrambled channel smart Zappix HD+... -
Page 81: Factory Settings
Select Export settings to USB, in order to save settings and channel lists to a USB storage device. Select Import settings from USB, in order to load settings and chan- nel lists from an external a USB storage device. smart Zappix HD+... -
Page 82: System Update
7.5.10 System information Here you can get several information regarding your Zappix HD+. Especially if you want to contact the smart service hot- line, you should know the receiver’s software version. 7.5.11 Audio / Video 7.5.11.1 Digital Audio Out ... -
Page 83: Tv Scart
2-5 seconds each time you start playback. The adjustment is suitable when playing NTSC recordings (59.94 or 60 Hz) and movies (24 Hz), for which a frequency of 50 Hz is not optimal. Off, 50/60 Hz 24/50/60 Hz You can choose between Off: no adjustment smart Zappix HD+... -
Page 84: Antenna
24, 50 and 60 Hz. 7.5.12 Antenna The settings made by smart (factory-settings) are valid for a standard sat- ellite system. Any additional system features (like multi-feed LNB, unicable system ...) need to manual adjustments in the submenu Antenna: ... -
Page 85: Smartcard
Select RAPS Config, in order to set, a) Whether after reset to factory defaults the channel list will be created from scratch or whether it only will be updated and b) Whether automatic updates will be performed. smart Zappix HD+... -
Page 86: Sorting Channels
: only HD channels will be displayed. CAS filter • : the window CAS filter opens: Select with the keys , , a kind of scrambling and con- firm with OK. CAS = Conditional Access Sender = scrambled broadcasting smart Zappix HD+... -
Page 87: Epg More Options
3. Select with the keys the desired function. • Show tech info opens this window: Item Meaning Free To Air (not scrambled) ASTRA 1F,H,KR,L,M Satellite name Polarity: H Polarization of the satellite signal H = horizontal, V = vertical smart Zappix HD+... -
Page 88: Using Usb Input Devices (Mouse, Keyboard)
For easy navigation on smartPORTAL pages (Internet), it may be helpful to have a mouse available. In some cases (e. g. if alphanumerical entries are necessary), it can be reasonable to use, a complete keyboard, additionally with the remote con- trol. smart Zappix HD+... - Page 89 RETURN key Go to next field Alt + TAB Go to previous field Go to previous page Go to next page Refresh Display video in full screen mode Video pause Video play SHIFT KEY + - Slash (/) smart Zappix HD+...
-
Page 90: The Usb Mouse Or The Usb Keyboard Is The Only Usb Device
USB disk. You also use the Internet either with mouse or with keyboard. Connect a USB mouse or a USB keyboard to the receiver (USB inter- face at the rear). You can use the device now. smart Zappix HD+... -
Page 91: Several Usb Devices
Operation in a Unicable System About Unicable The HDTV receiver smart Zappix HD+ can be operated at a unicable sys- tem. Depending on the type of system it is possible to connect up to eight receivers to one trunk line. -
Page 92: Installation
6. Set the respective channel (one of the selectable channels in ascend- ing order for each connected receiver in the system). 7. Exit the menu by pressing EXIT (the settings are stored). 8. Select the menu Control Panel, the submenu Config RAPS and enter the PIN code. smart Zappix HD+... -
Page 93: Management Of Usb Storage Devices
2.5" USB hard drives are normally powered via the USB connector. Check the power consumption of your hard drive (consult the hard drive user manual), since the smart receivers provide a maximum current of 500 - 600 mA. If the power consumption of the drive is higher, it must be supplied with an external AC adapter. -
Page 94: Check The Read And Write Speed
The memory of a USB storage device can be split in several parts - so- called partitions. Smart recommends to partition disks with a size of 500 GB, while the par- titions should be no larger than 500 GB. Examples: •... -
Page 95: Troubleshooting Usb Storage Devices
Disk is not recognized Disk is not compatible Matching and tested stor- with the receiver, unsup- age devices can be found at ported file system, inade- the smart accessories store quate read and write (at www.smart- speed electronic.de) Cable connection broken... -
Page 96: Error Checking In Windows
CAUTION! 11 Transport and Shutdown This is the procedure, if you want to transport the receiver or do not want to use it anymore: 1. Disconnect the receiver and the connected units from the power sup- ply. smart Zappix HD+... -
Page 97: 12 Troubleshooting
AV input. Picture only black The video format of your Adjust the TV standard of your and white and/or receiver is not set receiver to that of the TV set. not properly syn- properly. chronized. smart Zappix HD+... -
Page 98: 13 Disposal
If necessary, new operating software will be published for the receiver. It can easily be downloaded via satellite or from the website www.smart- electronic.de. If a malfunction cannot be eliminated by new software or the above measures, please contact your specialized dealer. -
Page 99: 14 Specifications
WEEE = Waste Electrical and Electronic Equipment. The WEEE directive is the EC directive 2002/96/EC on reduction of the increasing amount of waste from electrical and electronic equipment not used any more. Its objective is prevention, reduction and environmentally friendly disposal of the increasing amounts of electronic waste. smart Zappix HD+... -
Page 100: 14.2 Remote Control
1 cinch socket - digital audio (SPDIF) 1 opt. socket - digital audio (SPDIF) 2 cinch sockets Video output 1 HDMI socket 1 scart socket (EURO AV) 1 chinch socket - composite video (FBAS) 14.6 Temperature Operating temperature 0° C to +40° C smart Zappix HD+... -
Page 101: Dimensions And Weight
Depth 215 mm Weight Approx. 1,5 kg 15 Open-Source-Software The smart Zappix HD+ software contains different modules of an open source operating system, which are available according to the • GNU GENERAL PUBLIC LICENSE, Version 2 and the • GNU LESSER GENERAL LICENCE, Version 2.1 Both licenses have been defined and published by the FSF (Free Software Foundation). - Page 102 Sections 1 and 2 above provided that you also do one It is not the purpose of this section to induce you to infringe any of the following: patents or other property right claims or to contest validity of any smart Zappix HD+...
- Page 103 GNU Library Public License, version 2, is to make it free software which everyone can redistribute and hence change under these terms. the version number 2.1.] smart Zappix HD+...
- Page 104 2. You may modify your copy or copies of the Library or any Lesser license provides advantages in certain special circum- portion of it, thus forming a work based on the Library, and copy stances. and distribute such modifications or work under the terms of smart Zappix HD+...
- Page 105 However, as a special compiled or linked with it, is called a "work that uses the exception, the materials to be distributed need not include anything that is normally distributed (in either source or binary smart Zappix HD+...
- Page 106 Zappix HD+...
-
Page 107: 16 Declaration Of Conformity
Public License along with this library; if not, write to the Free Software 16 Declaration of Conformity The smart electronic GmbH, Industriestrasse 29, 78112 St. Georgen, Germany declares that this product complies with the following guidelines and standards: • EMC Directive 2004/108/EC −... - Page 108 Doc-ID: 12121302...
Need help?
Do you have a question about the ZAPPIX HD+ and is the answer not in the manual?
Questions and answers