Escea ST900 Installation Manual
Direct vent gas fireplace
Hide thumbs
Also See for ST900:
- Installation manual (49 pages) ,
- User manual (18 pages) ,
- Manual (9 pages)
Table of Contents
Advertisement
Quick Links
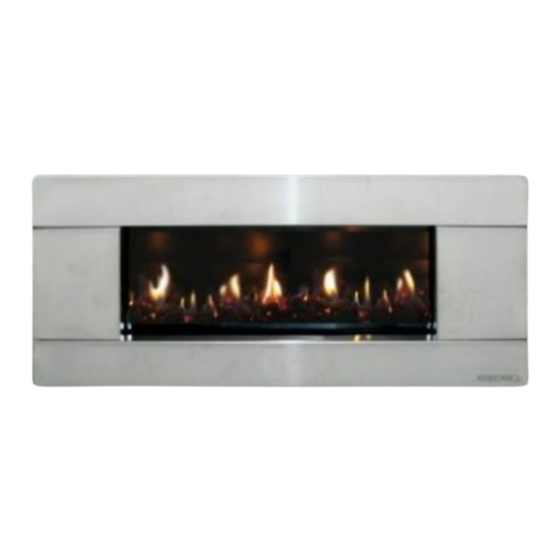
ST900 Direct Vent Gas Fireplace
Installation Manual
NORTH AMERICA EDITION
WARNING: FAILURE TO INSTALL THIS
APPLIANCE CORRECTLY WILL VOID
YOUR WARRANTY AND MAY CAUSE A
SERIOUS HOUSE FIRE.
- Do not store or use gasoline or other flammable
vapors and liquids in the vicinity of this or any
other appliance.
- WHAT TO DO IF YOU SMELL GAS
Do not try to light any appliance.
Do not touch any electrical switch do not
use any phone in your building.
Immediately call your gas supplier from a
neighbors phone. Follow the gas suppliers
instructions.
If you cannot reach your gas supplier, call
the fire department.
- Installation and service must be performed by a
qualified installer, service agency, or the gas
supplier.
INSTALLER: Leave this manual with the appliance.
CONSUMER: Retain this manual for future reference.
Ce manual est disponsible en Français sur demande.
Manufactured By: Escea Ltd, 17 Carnforth Street, Green Island, Dunedin 9018, NZ. Ph: +64 3 478 8220
For distribution details see: www.esceasales.com
www.escea.com
630296_0_Manual_Installation_US
This appliance may be installed as an OEM
installation in a manufactured home (USA
only) or mobile home and must be installed
in accordance with the manufacturer's
instructions and the Manufactured Home
Construction and Safety Standard, Title 24
CFR, Part 3280, in the United States, or the
Standard for Installation in Mobile Homes,
CAN/CSA Z240 MH, in Canada.
This appliance is only for use with the types
of gas indicated on the rating plate. A
conversion kit is supplied with the
appliance.
This appliance may be installed in an
aftermarket, permanently located,
manufactured home (USA only) or mobile
home, where not prohibited by local codes.
This appliance is only for use with the types
of gas indicated on the rating plate. A
conversion kit is supplied with the
appliance.
Advertisement
Table of Contents

Subscribe to Our Youtube Channel
Related Manuals for Escea ST900


Summary of Contents for Escea ST900
- Page 1 CONSUMER: Retain this manual for future reference. appliance. Ce manual est disponsible en Français sur demande. www.escea.com Manufactured By: Escea Ltd, 17 Carnforth Street, Green Island, Dunedin 9018, NZ. Ph: +64 3 478 8220 For distribution details see: www.esceasales.com...
- Page 2 The area around the ST900 MUST be kept clear and free from combustible materials, gasoline and other flammable vapors and liquids. Any safety screen or guard removed for servicing the ST900 must be replaced prior to operating it. Do not use this appliance if any part has been under water. Immediately call a qualified service technician to inspect the appliance and to replace any part of the control system and any gas control which has been under water.
-
Page 3: Product Specification
630296_0_Manual_Installation_US PRODUCT SPECIFICATION MODEL NAME ST900 Description of Appliance Decorative Gas Fire Approved to: 221:88:2014 Gas Type Natural Propane High 19500 BTU/h (20.6 MJ/h) 16000 BTU/h (16.9 MJ/h) Gas input 12500 BTU/h (13.2 MJ/h) 14600 BTU/h (15.40 MJ) Maximum 10.0 inch WC (2.5 kPa) 13.0 inch WC (3.25 kPa) - Page 4 630296_0_Manual_Installation_US Note: THERE ARE A FEW THINGS TO CONSIDER BEFORE INSTALLATION • Cavity Dimensions and Clearances • MUST be installed a minimum of 4” above the floor or nearest horizontal surface. • Coupling of flue to fireplace • Gas pipe placement to the front left of the cavity. •...
-
Page 5: Table Of Contents
630296_0_Manual_Installation_US Contents: Product Description Creating the Cavity Hearth and Floor Clearances Wall Linings Vertical Clearances Corner Installations Laying Gas Pipe Connecting Gas Pipe Power Supply 10.0 Fixing Fireplace to Wall 11.0 Removing the Firebox Glass 12.0 Installing the Flue system 13.0 Fitting the Flue restrictor 14.0... -
Page 6: Product Description
Installation must be carried out by a registered installer who, on completion of the installation, must issue a certificate of compliance, in accordance with national and/or local codes. If a certificate of compliance is not issued then the Escea warranty may be void. Warranty Repair and Annual Servicing: Warranty repair work must be carried out by a recognised Escea gas fireplace service agency. -
Page 7: Creating The Cavity
The dimensioned drawing below shows the size of opening that must be created to fit the ST900. The wall directly above the fireplace should be finished / clad / lined after the fireplace has been installed, unless there is an access hatch or the chase is open to the ceiling cavity, which allows the flue to be installed after the wall has been lined. - Page 8 For this reason TV location decisions rest solely with the householder and Escea will not be held liable for any adverse affects on a TV located near to an Escea fireplace that may be caused by heat.
-
Page 9: Corner Installations
ST900 = 19,500 BTU/h max on Natural Gas High Altitude Installations When installing this appliance at an elevation above 2000 feet, it may be necessary to decrease the input rating by changing the existing burner orifice to a smaller size. -
Page 10: Connecting Gas Pipe
630296_0_Manual_Installation_US Connecting the Gas Pipe: An accessible inline isolation or service valve must be fitted and pipe run to the fireplace as shown below. An inlet pressure test point must also be fitted to the inlet side of the appliance valve. Copper should be run directly to the fireplace and connected onto the Dormont hose with a 1/2”... -
Page 11: Removing The Firebox Glass
630296_0_Manual_Installation_US 10.0 Fixing the Fireplace to the base and wall: It is a requirement that this fireplace be securely fastened to the wall and base. Once the fireplace has been pushed back into the correct position, use wood screws (or other suitable fasteners) to fix the fireplace to the cavity through each of the four holes in the corners, as shown in the diagram to the right. -
Page 12: Installing The Flue System
630296_0_Manual_Installation_US 12.0 Installing the Flue System: Ensure all flue components are Simpson Duravent Direct Vent Pro 5” x 8,” or a compatible equivalent. Note: Consult Appendix A at the end of this installation manual (section 24.0) to ensure correct length of flue is calculated. There are two basic types of Balanced Flue System installations: 280.0 •... - Page 13 630296_0_Manual_Installation_US 12.5 Vertical Only Flue Diagram: Use this diagram to determine what percentage of flue restriction is required to ensure safe and correct operation of the ST900 Direct Vent Decorative Gas Fireplace. See Section 13.0...
- Page 14 630296_0_Manual_Installation_US 12.6 Horizontally Terminating Flue Diagram: Use this diagram to determine what percentage of flue restriction is required to ensure safe and correct operation of the ST900 Direct Vent Decorative Gas Fireplace. See Section 13.0...
- Page 15 630296_0_Manual_Installation_US 12.7 Vertically Terminating flue with a Horizontal Offset: Use this diagram to determine what percentage of flue restriction is required to ensure safe and correct operation of the ST900 Direct Vent Decorative Gas Fireplace. See Section 13.0...
- Page 16 630296_0_Manual_Installation_US 12.8 Standard Flueing Configurations: The following flue components are available from your Escea distributor/retailer in kitset form. DVF-H DVF-V...
- Page 17 630296_0_Manual_Installation_US 12.9 Locating the Flue Terminal: The flue terminal must be located using the information given in the following excerpt from ANSI Z21.88-2005 Vented Gas Fireplace Fireplaces.
- Page 18 630296_0_Manual_Installation_US 12.10 Supporting the flue system: Wall straps are required to fix the flue system in place for each installation. This will ensure that no undue strain is placed on flue components once installed. For a flue offset or horizontal run, it is recommended that wall straps be used to the flue system with a spacing of 3’...
-
Page 19: Fitting The Flue Restrictor
630296_0_Manual_Installation_US 13.0 Fitting the Flue Restrictor: If your flueing configuration requires that you fit a flue restrictor (see graph in section 12.5, 12.6, 12.7 of this manual to find out if your configuration requires a flue restrictor), follow the instructions below. First, prepare the Flue Restrictor by removing and discarding the inner rings to achieve either 60% or 70% restriction as required and hand bending the five tabs 90°... -
Page 20: Converting To Propane Gas
630296_0_Manual_Installation_US 14.0 Converting to Propane Gas: Where a conversion to propane gas is needed, the following steps should be followed 14.1 First you need to remove the burner by removing the screw holding it in place on the left hand side of the firebox (Fig. 1). Then remove the 1.9mm burner jet (Fig. -
Page 21: Changing Operating Pressure To Propane
9. 5. If no other adjustments are required, close the outlet pressure tap by turning the screw clockwise. Check all connections and pressure taps for leaks. 10. Finally, put the sticker supplied in the conversion kit in onto the existing dataplate of the ST900. - Page 22 ½ psi. The sticker must be signed and dated by the installer who has converted the fire. The ST900 dataplate is located in the lower left of the fireplace, on a metal plate tethered to the fireplace.
-
Page 23: Placing The Fuel Bed
630296_0_Manual_Installation_US 16.0 Placing the Fuel Bed Media: Your ST900 Gas fireplace will be supplied with a Fuel Bed kit. Follow the instructions below for the Fuel Bed kit that applies to you. 16.1 Driftwood Fuel Bed: First scatter one layer of the supplied white stones evenly across the base of the firebox, ensuring there are no stones or driftwood pieces inside the pilot flame surround guard. -
Page 24: Refitting The Glass Assembly
17.1 To clean the glass, remove it as described in section 11.0 and clean inside and out using standard window cleaner. Do not allow glass to become excessively dirty as this will be difficult to remove. If you require a replacement glass assembly one is available through escea retailers or dealers using the product code: 802207 WARNING: DO NOT ATTEMPT TO CLEAN THE GLASS WHILE IT IS HOT. -
Page 25: Covering Up The Fireplace
19.1 Assembling the Ferro fascia: The ST900 Ferro fascia has two brackets supplied in the fascia box which have not been fully assembled. To assemble them use the 4x screws supplied to fasten the brackets to the fascia as shown below. Position the brackets with the flange facing outwards, and the hooks facing the bottom of the fascia [Identify the bottom of the fascia by the large cut-out shown below]. - Page 26 630296_0_Manual_Installation_US The ST900 fascia uses these four hooks for attaching to the fire. Do this by lining up the fascia hooks with the receptacles on the sides of the fire. Lift the fascia so that the hooks are above the receptacles, and let it drop down into position until it is secure and free from movement.
-
Page 27: Operating Instructions
630296_0_Manual_Installation_US FOR YOUR SAFETY READ BEFORE OPERATING DANGER: If you do not follow these instructions exactly, a fire or explosion may result causing property damage, personal injury or loss of life. Improper installation, adjustment, alteration, service or maintenance can cause injury or property damage. Refer to the owners information manual provided with this appliance. For assistance or additional information consult a qualified installer, service agency or gas supplier. -
Page 28: Remote Instructions
630296_0_Manual_Installation_US 20.0 Remote Instructions 20.1 Pairing the Remote to the Control Unit: The remote supplied is already paired with the receiver (control) unit in the factory. Use the following only when required: 1. Press and hold the receiver’s reset button until you hear two beeps. The first beep is short and the second beep is long. -
Page 29: Annual Service Check
630296_0_Manual_Installation_US 22.0 Annual Service Check: The ST900 Fireplace should be serviced annually to ensure it continues to operate in a safe manner. This annual service check should involve the following Check thermocouple holds the cartridge Check glass assembly gasket ... -
Page 30: Appendix
630296_0_Manual_Installation_US 24.0 Appendix A: Points to note when planning the Installation of the Escea DV flue: This flue system cannot be cut to length. Correct lengths must be selected for each installation. The listed length of the flue pipe is not the installed length. 1 ½” needs to be subtracted for each join to determine the installed length of each piece of flue pipe. - Page 31 630296_0_Manual_Installation_US 24.1 Appendix B: Main Burner 8 Wire Cable Pilot Burner GV60 Valve hermocurrent Cable W Interrupter Block hermocurrent Cable C Membrane S witch Ignition Cable Receiver Reset Button Power Supply...
- Page 32 630296_0_Manual_Installation_US 24.2 Appendix C: Clearances to Combustible Surfaces: 24.3 Appendix D: Replacement Parts: Replacement parts for the ST900 gas fireplace are available from all Escea retailers or distributors. 802056 ST Replacement remote controller (if lost or damaged beyond repair) - GV60...
-
Page 33: Warranty Terms And Conditions
Where an Escea product is covered by a parts and labor warrantee, the warrantee covers both the repair by Escea of the defective part or the provision of a spare part to replace the defective part and the installation of that part. - Page 34 Provide us with reasonable proof of purchase for the Escea product; and 5.2.4 If required by us, provide us (or any person nominated by us) with access to the premises at which the Escea product is located at times nominated by us (so that we can inspect the Escea product).
- Page 35 Where you make a claim under this warrantee, an authorized repairer may need to attend your premises to inspect the Escea product. We may charge you a service call fee if a repairer will be required to travel more than 30 miles from the nearest service centre to your location.
- Page 36 630296_0_Manual_Installation_US...
Need help?
Do you have a question about the ST900 and is the answer not in the manual?
Questions and answers