Table of Contents
Advertisement
Advertisement
Table of Contents

Summary of Contents for Microh LED Razor45
-
Page 2: Table Of Contents
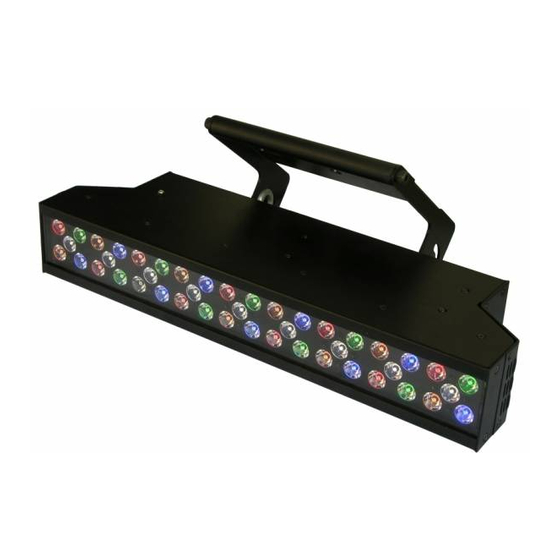
Please install and operate the fixture according to instructions. Meanwhile, please keep this manual for future reference. The MICROH LED Razor45 wash is made of a new type of high temperature strength of engineering plastics and cast aluminum. The fixture is designed and manufactured strictly following CE standards, complying with international standard DMX512 protocol. -
Page 3: Operation Instructions
Make sure the power cord is never crimped or damaged in any way, as this could cause shock and damage. If your power chord is damaged in any way, please purchase a new cable from your local MICROH dealer. Always disconnect power, when the device is not in use or before cleaning it. - Page 4 The fixture’s warranty will be voided if there are any malfunctions from not following the user manual or any illegal operation (shock short circuit, electronic shock, lamp broke, etc.) This fixture is equipped with 5 operating modes; DMX, Auto, Sound Active, Master/Slave and Program. In DMX mode, you have 5 modes to select according to programming requirement for your environment: 4ch, 8ch, 21ch, 48ch and 49ch mode.
- Page 5 SOUND ACTIVE MODE 1. Press MENU button till System Mode [xxx] displayed, then use Up/Down button to select System Mode [Sound] and press Fun button to enter. LCD shows: Sound Program [xx] 2. Press Up/Down button to select Sound Program [1-16]. [1-12] program is editable and [13-16] program is fixed. 3.
-
Page 6: Mounting And Installation
3. Press Up/Down button to select effect, color and speed for that program. Note: 1. Effects [1-12] and Colors [1-50] are from factory default settings or customized. 2. Speed 1 ~ 99 goes from fastest to slowest. ► NON editable program 13-18 Program Number [13]: 50-color step changing Program Number [14]: Color flowing in Red, Green, Blue, White and Amber Program Number [15]: 50-color crossfade... -
Page 7: Dmx-512 Control Connections
Connect the provided XLR cable to the female 3-pin or 5-pin XLR output of your controller and the other side to the male 3-pin or 5-pin XLR input of the MICROH LED PHANTOM. You can chain multiple units together through serial linking. The cable needed should be a two core, screened cable with XLR input and output connectors. -
Page 8: Menu Navigation
6. MENU NAVIGATION When navigating the menu: Use “UP” button to move up. Use “DOWN” button to move down. Use “FUN” button to move right. Use “MENU” button to move left. -
Page 9: Dmx Channels
7. DMX CHANNELS Mode 1: 4 DMX Channels Master Ch 2: Effects Ch 3: Colours Ch 4: Speed Effect Dimmer 000 – 005 Colour 1 131 – 135 Colour 26 006 – 010 Colour 2 136 – 140 Colour 27 011 –... - Page 10 Mode 3: 21 DMX Channels Channel Function Master Dimmer 000 – 255 Brightness Adjust 0 – 100% Effects 000 – 015 No Function 016 – 055 50 Colour Step Changing 056 – 095 50 Colour Cross Fade 096 – 135 50 Colour Flowing From Left to Right 136 –...
- Page 11 Mode 4: 48 DMX Channels Channel Function Master Dimmer 000 – 255 Brightness Adjust 0 – 100% Master Strobe 000 – 004 No Function 005 – 255 Strobe Slow to Fast Effects 000 – 015 No Function 016 – 055 50 Colour Step Changing 056 –...
-
Page 12: Key Features
Mode 5: 49 DMX Channels Channel Function (ID# Select) 000 – 008 ID #1 132 – 140 ID #16 009 – 017 ID #2 141 – 149 ID #17 018 – 026 ID #3 150 – 158 ID #18 027 – 035 ID #4 159 –... -
Page 13: Technical Specifications
LENS REPLACMENT - The MICROH RAZOR 45 comes with lens pre-installed at the factory. However, interchangeable lens system gives you options to change lens of different beam angle. Please follow the below instructions for proper replacement/installation. 1. Remove all 8 screws from side metal cover. -
Page 14: Unit Overview
10. UNIT OVERVIEW... -
Page 15: Maintenance And Cleaning
DISCLAIMER – MICROH believes that the information contained within this user manual is accurate. However, Microh is not responsible for any error or addendums to this manual. If you have any comments or general suggestions on how this manual can be improved please contact info@microhpro.com. Thank you...


Need help?
Do you have a question about the LED Razor45 and is the answer not in the manual?
Questions and answers