Table of Contents
Advertisement
Advertisement
Table of Contents

Related Manuals for Canon LBP7200Cdn


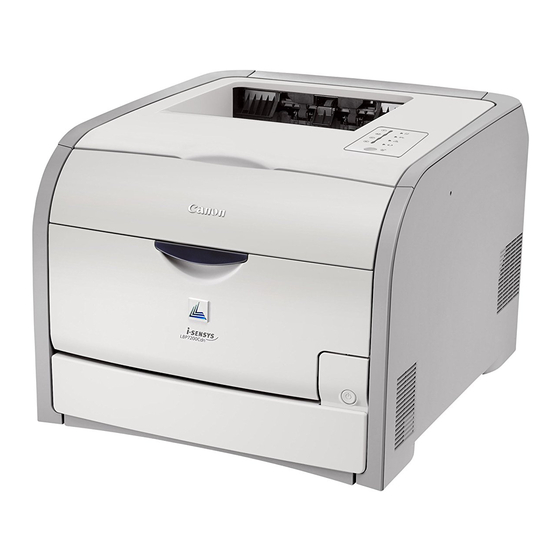
Summary of Contents for Canon LBP7200Cdn
-
Page 1: Service Manual
Service Manual LBP7200 Series LBP7200Cdn Feb 4 2009... - Page 3 Canon will release technical information as the need arises. In the event of major changes in the contents of this manual over a long or short period, Canon will issue a new edition of this manual.
-
Page 4: Symbols Used
Introduction Symbols Used This documentation uses the following symbols to indicate special information: Symbol Description Indicates an item of a non-specific nature, possibly classified as Note, Caution, or Warning. Indicates an item requiring care to avoid electric shocks. Indicates an item requiring care to avoid combustion (fire). Indicates an item prohibiting disassembly to avoid electric shocks or problems. - Page 5 Introduction The following rules apply throughout this Service Manual: 1. Each chapter contains sections explaining the purpose of specific functions and the relationship between electrical and mechanical systems with refer- ence to the timing of operation. In the diagrams, represents the path of mechanical drive; where a signal name accompanies the symbol , the arrow indicates the direction of the electric signal.
-
Page 7: Table Of Contents
Contents Contents Chapter 1 PRODUCT DESCRIPTION 1.1 Features ..............................1- 1 1.1.1 Feature ..................................1- 1 1.2 Product Specifications ..........................1- 1 1.2.1 Product Specifications ............................. 1- 1 1.3 Detailed Specifications ..........................1- 2 1.3.1 Print Speed................................1- 2 1.4 Name of Parts.............................1- 3 1.4.1 External View................................ - Page 8 Contents 2.5.1 Overview/Configuration............................2- 11 2.5.1.1 Overview ....................................2- 11 2.5.2 Detecting Jams ..............................2- 12 2.5.2.1 Jam Detection Outline................................2- 12 2.5.2.2 Delay Jams .................................... 2- 12 2.5.2.3 Stationary Jams ..................................2- 12 2.5.2.4 Other Jams .................................... 2- 13 2.5.3 Cassette Pickup ..............................2- 13 2.5.3.1 Separation Roller Method ..............................
- Page 9 Contents 3.1.8.1 Pre-procedure for removing duplex reverse drive unit......................3- 9 3.1.8.2 Removing duplex reverse drive unit............................3- 9 3.1.9 Operation Panel Unit ............................. 3- 10 3.1.9.1 Pre-procedure for removing control panel ..........................3- 10 3.1.9.2 Removing control panel ................................. 3- 10 3.1.10 DC Controller PCB...............................
- Page 10 Contents 3.4.5 Cassette Separation Roller ............................3- 26 3.4.5.1 Removing cassette separation roller............................3- 26 3.4.6 Manual Pickup Roller .............................3- 27 3.4.6.1 Removing MP tray pick-up roller............................3- 27 3.4.7 Manual Separation Pad ............................3- 27 3.4.7.1 Removing MP tray separation pad............................3- 27 3.4.8 Duplexing Feeding Unit............................3- 27 3.4.8.1 Pre-procedure for removing duplex feeding unit........................
- Page 11 Contents 5.5 Service Mode..............................5- 6 5.5.1 Outline ..................................5- 6 5.5.1.1 Outline...................................... 5- 6 5.5.2 Service Mode Table..............................5- 8 5.5.2.1 Service Mode List ..................................5- 8 5.5.2.2 Service Chart Print 1................................5- 8 5.5.2.3 Service Chart Print 2................................5- 11 5.5.2.4 Print Status Print ..................................
- Page 12 Contents...
-
Page 13: Chapter 1 Product Description
Chapter 1 PRODUCT DESCRIPTION... - Page 15 Contents Contents 1.1 Features ..................................1-1 1.1.1 Feature......................................1-1 1.2 Product Specifications..............................1-1 1.2.1 Product Specifications ................................. 1-1 1.3 Detailed Specifications ..............................1-2 1.3.1 Print Speed ....................................1-2 1.4 Name of Parts.................................1-3 1.4.1 External View ....................................1-3 1.4.2 Cross Sectional View ................................... 1-4 1.5 Using the Machine .................................1-5 1.5.1 Control Panel ....................................
-
Page 17: Features
Chapter 1 1.1 Features 1.1.1 Feature 0021-1249 1. Small and low-cost printer The printer uses a flat in-line cartridge method for the first time in the small printer. This lowers the height and reduces the printer size. The printer uses the transfer pad and the separation roller to reduce the parts expenses. -
Page 18: Detailed Specifications
Chapter 1 Interface USB: Hi-Speed USB/USB Network: Shared 10BASE-T/100BASE-TX (RJ-45) Full duplex/Half duplex Auto gradation correction available(A4, B5, Legal, Letter, Executive, and Foolscap) Operating environment 10 to 30 deg (Temperature range) Operating environment Operating environment (Humidity range) Temperature range: 10 to 30 deg C (50 to 86 deg F) Humidity range: 20 to 80 % RH (no condensation) Noise Lwad (declared A-weighted sound power level (1 B = 10 dB)) -
Page 19: Name Of Parts
Chapter 1 1.4 Name of Parts 1.4.1 External View 0021-1265 F-1-1 Front Cover Power Switch Manual Feed Tray Control Panel Manual Feed Feeding Guide Delivery Tray Pickup Cassette Carry Grip Delivery Tray [10] [11] F-1-2 Reset button Airway LAN connector Carry Grip USB connector Power Code Outlet... -
Page 20: Cross Sectional View
Chapter 1 1.4.2 Cross Sectional View 0021-1266 [2] [3] [17] [16] [15] [14] [13] [12] [11] [10] F-1-3 T-1-2 Cross Sectional View [10] Multi tray feed roller Pressure roller [11] Primary transfer pad Fixing sleeve [12] ITB Unit Fixing sleeve [13] Cassette pickup roller Cartridge... -
Page 21: Using The Machine
Chapter 1 1.5 Using the Machine 1.5.1 Control Panel 0021-1268 F-1-4 Functions of the LEDs T-1-3 Name Status Description Printing cannot be performed because a toner cartridge needs to be replaced, or a toner cartridge is not Blinking installed properly. [1] Toner Indicator A toner cartridge needs to be replaced. -
Page 22: Safety
Chapter 1 1.6 Safety 1.6.1 Safety of the Laser Light 0021-1270 Laser beam radiation may pose a danger to the human body. A laser scanner mounted on the machine is sealed with the protection housing and external cover to prevent the laser beam from leaking to the outside. The laser beam never leaks out of the scanner as far as users operate the machine normally The following warnings are given to comply with Safety Principles (EN60950). -
Page 23: Points To Note At Disassembly/Installation Procedure
Chapter 1 F-1-6 1.6.4 Points to note at disassembly/installation procedure 0021-1274 At disassembly/installation procedure, make sure to follow the instruction below to proceed. 1. Be sure to unplug the power code before disassembly/installation. 2. At installation, follow the procedure in the reverse order of disassembly unless otherwise instructed. 3. -
Page 25: Chapter 2 Technical Reference
Chapter 2 TECHNICAL REFERENCE... - Page 27 Contents Contents 2.1 Functional Configuration ...............................2-1 2.1.1 Outline......................................2-1 2.2 Basic Sequense................................2-1 2.2.1 Basic Sequence of Operation ............................... 2-1 2.3 LASER EXPOSURE SYSTEM.............................2-1 2.3.1 Overview/Configuration ................................2-1 2.3.1.1 Outline..........................................2-1 2.3.2 Laser Scanner Motor Control............................... 2-2 2.3.2.1 Fault Detection ........................................2-2 2.4 IMAGE FORMATION SYSTEM ..........................2-2 2.4.1 Overview/Configuration ................................
- Page 28 Contents 2.6.1.1 Outline .......................................... 2-14 2.6.2 Various Control Mechanisms ..............................2-14 2.6.2.1 Controlling the Speed of the Fixing Unit..............................2-14 2.6.2.1.1 The speed control of small size paper (throughput down control) ...................... 2-14 2.6.2.2 Fixing Temperature Control ..................................2-15 2.6.2.2.1 Fixing temperature control..................................2-15 2.6.3 Protective Functions...................................
-
Page 29: Functional Configuration
Chapter 2 2.1 Functional Configuration 2.1.1 Outline 0021-1275 The machine may be broadly divided into the following 6 functional blocks: engine control system, laser exposure system, image formation system, pickup/trans- port/delivery system, fixing system, and externals/auxiliary control system. Laser exposure system Image formation system Pickup/transport/delivery system Engine control... -
Page 30: Laser Scanner Motor Control
Chapter 2 The main components of the laser scanner unit are the laser driver and the scanner motor unit and are controlled by the signals sent from the DC controller. Laser driver PCB Polygon mirror Scaner motor unit BD PCB Photosensitive drum Photosensitive drum Photosensitive drum... -
Page 31: Image-Formation Process
Chapter 2 Fixing unit Laser scanner Laser beam Cartridge Photosensitive drum ITB cleaning unit Primary transfer pad Secondary transfer external roller High-voltage power supply DC controller F-2-3 2.4.1.2 Image-formation Process 0021-1307 The image-formation process consists of the following nine steps divided among six functional blocks: Step 1: Primary charging Step 2: Laser-beam exposure Step 3: Development... -
Page 32: Development Block
Chapter 2 The primary charging roller charges the photosensitive drum directly. The DC negative bias is applied to the primary charging roller to keep a negative potential on the drum surface. Primary charging roller DC bias Photosensitive drum F-2-5 Step 2: Laser-beam exposure The laser beam scans the photosensitive drum to neutralize the negative charge on portions of the drum surface. -
Page 33: Fixing Block
Chapter 2 Photosensitive drum Primary transfer pad DC bias F-2-8 Step 5: Secondary transfer The toner image on the ITB is transferred to the print media. The DC positive bias is applied to the secondary transfer roller. As the media passes between the secondary transfer roller and the ITB, the toner image is transferred to the media. -
Page 34: Itb Cleaning Block
Chapter 2 Fixing film Pressure roller Fixing heater Toner Media F-2-11 2.4.1.7 ITB cleaning block 0021-1312 The residual (waste) toner is cleared from the ITB surface. Step 8: ITB cleaning The ITB cleaning roller and the cleaning brush are applied with DC positive bias to charge the residual toner positive. As the primary transfer pad is also applied with DC positive bias, the positively charged residual toner is reverse transferred to the photosensitive drum from the ITB surface. -
Page 35: High-Voltage Control
Chapter 2 Cleaning blade Photosensitive drum Waste toner container Sweeper strip F-2-13 2.4.2 High-Voltage Control 2.4.2.1 Outline 0021-1314 The high-voltage power supply generates the high-voltage biases that are applied to the primary charging roller, developing roller, primary transfer pad, secondary transfer roller and ITB cleaning unit. -
Page 36: Image Stabilizaton Control
Chapter 2 Primary charging Developing bias Blade bias circuit bias circuit circuit Cartridge Photosensitive drum Primary transfer pad cleaning unit Secondary transfer external roller ITB cleaning brush ITB cleaning roller Secondary transfer Primary transfer bias circuit bias circuit bias circuit bias circuit High-voltage power supply DC controller... -
Page 37: Image Gradation Correction Control (D-Half Control)
Chapter 2 Execute Immediately (Level 1) Performed 15 minutes later Execute Immediately Execute Immediately (Level 2) Execute Immediately Execute Immediately - During toner cartridge replacement - After a specified sheet number printing (200 sheets) - If there is major environment change - after the printing is completed, or 300 minutes after Image density correction control (D-max control) - If there is calibration execution instruction from user. -
Page 38: Transfer Unit
Chapter 2 2.4.5 Transfer Unit 2.4.5.1 Pad transfer 0021-1320 The printer has a pad transfer method for the primary transfer operation. The pad transfer method stabilizes an image compared to the conventional separation roller method. The features for the pad transfer method are as follows: The wider nip width between the transfer pad and the photosensitive drum improves the transfer performance. -
Page 39: Pickup/Feeding/Delivery System
Chapter 2 2.5 Pickup/Feeding/Delivery System 2.5.1 Overview/Configuration 2.5.1.1 Overview 0021-1321 In the pickup/feeding system, each type of feeding roller is configured in the part where printing paper feeding and pickup are conducted. The main configuration for pickup/feeding system is as the following. <Pickup slot>... -
Page 40: Detecting Jams
Chapter 2 Name Signal name Driver Manual feed trayPickup solenoid Manual feed trayPickup solenoid control signal DC Controller Cassette pickup solenoid Cassette pickup solenoid driver signal DC Controller Duplex reversal solenoid Duplex reversal solenoid driver signal DC Controller Paper feederPre-registration sensor Paper feeder pre-registration detection signal DC Controller Registration sensor... -
Page 41: Other Jams
Chapter 2 2.5.2.3.2 Fixing delivery stationary jam 0021-1326 If within a specified time after the registration sensor (SR4) detects the paper trailing edge, the fixing delivery sensor (SR8) cannot detect the paper trailing edge. 2.5.2.4 Other Jams 2.5.2.4.1 Fixing wrapping-up jam 0021-1327 If the fixing delivery sensor (SR8) cannot detect the paper, after it detects paper leading edge until the fixing delivery stationary starts the detection. -
Page 42: Fixing Unit System
Chapter 2 2.6 FIXING UNIT SYSTEM 2.6.1 Overview/Configuration 2.6.1.1 Outline 0021-2021 The fixing power supply controls the temperature in the fixing unit. The printer uses an on-demand fixing method. TH802 Fixing DC Contoroller TH801 power suplly Fixing Controll circuit Fixing Heater Drive signal TH803 Fixing heater... -
Page 43: Fixing Temperature Control
Chapter 2 2.6.2.2 Fixing Temperature Control 2.6.2.2.1 Fixing temperature control 0021-2048 The fixing control circuit brings the fixing heater temperature at the targeted temperature. Fixing unit DC controller Fixing film unit Fuse FU901 /RLD+ Relay /RLD- drive RL901 circui TH802 Fixing heater FSRD+... -
Page 44: External And Controls System
Chapter 2 - If the detected temperature of the thermistor does not reach 70 deg C within a specified period after it once reaches 40 deg C after the heater energization during the wait period. - If the detected temperature of the thermistor does not reach the targeted temperature within a specified period under the heater temperature control during the initial rotation period. -
Page 45: Other Function
Chapter 2 low pressure power, and supplies to the host machine. 2.7.1.2 Other Function 2.7.1.2.1 Protective function 0021-2057 The low-voltage power supply has a protective function against overcurrent and overvoltage to prevent failures in the power supply circuit. If there flows an over- current or overvoltage, the low-voltage system automatically cuts off the output voltage. -
Page 46: Motor Control
If properly connected with a bi-directional interface, an external device may be used to check the printer status. When printing is executed in a Microsoft Windows or Macintosh environment, CAPT (Canon Advanced Printing Technology) serves to reduce processing speed and enhance the ease of operation to provide a user-friendly printing environment. To that end, CPU is designed for the following: - The print data from the application is turned into dot data and sent to the printer without conversion into the printer's page description language (PDL). -
Page 47: Overview Of The Block
Chapter 2 Host computer GDI data transmission from application Analyzes GDI data for Canon Advanced Printing Technology generation of print data Displays on screen Forms bit images Monitors printer status Host computer interface Printer interface Print status information Engine Print... - Page 48 Chapter 2 IC11 IC12 F-2-24 2-20...
-
Page 49: Chapter 3 Disassembly And Assembly
Chapter 3 DISASSEMBLY AND ASSEMBLY... - Page 51 Contents Contents 3.1 EXTERNAL AND CONTROLS SYSTEM ........................3-1 3.1.1 Rear Cover ....................................3-1 3.1.1.1 Removing rear cover .......................................3-1 3.1.1.2 Pre-procedure for removing rear cover lib unit...............................3-1 3.1.1.3 Removing rear cover lib unit...................................3-1 3.1.2 Rear Upper Cover ..................................3-1 3.1.2.1 Removing upper rear cover (left) ..................................3-1 3.1.2.2 Pre-procedure for removing lower rear cover ..............................3-1 3.1.2.3 Removing lower rear cover .....................................3-1 3.1.3 Right Cover ....................................
- Page 52 Contents 3.1.16.3 Pre-procedure for removing duplex feeding fan............................3-16 3.1.16.4 Removing duplex feeding fan..................................3-16 3.2 LASER EXPOSURE SYSTEM ..........................3-16 3.2.1 Laser Scanner Unit..................................3-16 3.2.1.1 Pre-procedure for removing laser scanner unit............................. 3-16 3.2.1.2 Removing laser scanner unit..................................3-16 3.3 IMAGE FORMATION SYSTEM ..........................
-
Page 53: External And Controls System
Chapter 3 3.1 EXTERNAL AND CONTROLS SYSTEM 3.1.1 Rear Cover 3.1.1.1 Removing rear cover 0021-3909 1) Open the rear cover assembly [1]. F-3-4 F-3-1 3.1.2 Rear Upper Cover 2) Close the duplex feeding assembly [1]. 3.1.2.1 Removing upper rear cover (left) 0021-3890 1) Open the rear cover assembly [1]. - Page 54 Chapter 3 F-3-7 2) Remove 2 stoppers [1] and then 2 link arms [2]. F-3-10 5) Close the duplex feeding unit [1] and rear cover lib unit [2], and remove the lower rear cover [3] in the arrow direction. F-3-8 3) Open the duplex feeding unit [1].
-
Page 55: Right Cover
Chapter 3 F-3-12 CAUTION: Point to note for assembling When you assemble the lower rear cover, be sure to fit the cable under the guide plate [1]. F-3-14 3.1.3.2 Pre-procedure for removing right frame cover 0021-3938 1) Remove the right cover.(page 3-3)Reference[Removing right cover] 2) Remove the upper rear cover (left).(page 3-1)Reference[Removing up- per rear cover (left)] 3) Remove the upper cover.(page 3-5)Reference[Removing upper cover]... -
Page 56: Left Cover
Chapter 3 F-3-16 3) Remove the sheet metal [1]. - Remove 2 screws [2]. F-3-19 3.1.4 Left Cover 3.1.4.1 Pre-procedure for removing left cover 0021-3902 1) Remove the right cover. (page 3-3)Reference[Removing right cover] F-3-17 2) Remove the upper rear cover (left).(page 3-1)Reference[Removing up- 4) Pull out the cassette. -
Page 57: Upper Cover
Chapter 3 F-3-21 MEMO: - Align the 6 claws [1] to the 6 protruded parts [2] on the main unit. 3.1.5 Upper Cover - Align the protrusion [3] on the cover to the notch [4] on the frame of the main unit. -
Page 58: Front Cover
Chapter 3 F-3-23 CAUTION: Point to note for assembling Pull out the flat cable [1] of the upper cover unit to the outside, and align and insert the 5 claws [2] to the holes [3] on the main unit. 3.1.6 Front Cover 3.1.6.1 Pre-procedure for removing front cover 0021-3957 1) Remove the right cover.(page 3-3)Reference[Removing right cover]... - Page 59 Chapter 3 F-3-25 3) Press the stopper [1] at the rear left in the arrow direction, and remove the cartridge tray [2] as pulling its left side to the front. F-3-28 6) Remove the protruded part [1] of the link, rotate the link [2] in the arrow direction, and remove it.
-
Page 60: Drive Unit
Chapter 3 11) Remove fixing motor.(page 3-32)Reference[Removing fixing motor] 3.1.7.2 Removing drive unit 0021-4201 1) Remove the cable guide [1] in the arrow direction. - 1 screw [2] F-3-31 2) Remove 1 mounting screw [2] of the sheet metal[1]. F-3-29 7) Remove the front cover [1]. -
Page 61: Duplexing Drive Unit
Chapter 3 F-3-37 F-3-34 5) Remove the cable [2] from the cable guide [1]. CAUTION: Point to note for assembling - The link arm on the drive unit must be engaged with the protrusion on the frame. - 2 protrusions on the drive unit must be inserted into the holes on the frame. F-3-35 6) Remove the cable guide [1] in the arrow direction. -
Page 62: Operation Panel Unit
Chapter 3 3.1.10 DC Controller PCB 3.1.10.1 Pre-procedure for removing DC controller PCB 0021-3972 1) Remove the right cover.(page 3-3)Reference[Removing right cover] 2) Remove the upper rear cover (left).(page 3-1)Reference[Removing up- per rear cover (left)] 3) Remove the upper cover.(page 3-5)Reference[Removing upper cover] 3.1.10.2 Removing DC controller PCB 0021-3975 1) Remove the cable cover plate [1]. -
Page 63: Main Controller Pcb
Chapter 3 F-3-46 F-3-43 2) Remove 1 flat cable [1] and 7 connectors [2] on the PCB. 3.1.12 Main Controller PCB 3.1.12.1 Pre-procedure for removing main controller PCB 0021-3981 1) Remove the right cover.(page 3-3)Reference[Removing right cover] 3.1.12.2 Removing main controller PCB 0021-3982 1) Remove the main controller PCB [1]. -
Page 64: Driver Pcb
Chapter 3 F-3-48 2) Remove the sheet metal [1] of the main controller PCB. - 7 screws [2] F-3-51 5) Remove the sub power supply PCB [1]. - 2 connectors [2] - 1 screw [3] F-3-49 3) Remove 3 connectors [1], and remove the cable [2] from the cable guide [3]. -
Page 65: Power Supply Board
Chapter 3 F-3-54 2) Remove the cable guide [1] in the arrow direction. - 1 boss [2] F-3-53 3.1.14 Power Supply Board 3.1.14.1 Pre-procedure for removing power supply unit 0021-4191 1) Remove the right cover.(page 3-3)Reference[Removing right cover] 2) Remove the upper rear cover (left).(page 3-1)Reference[Removing up- per rear cover (left)] 3) Remove the upper cover.(page 3-5)Reference[Removing upper cover] 5) Remove the right frame cover.(page 3-3)Reference[Removing right... -
Page 66: High-Voltage Pcb
Chapter 3 F-3-57 5) Remove the cable guide [1]. - 2 claws [2] F-3-60 CAUTION: Since the connector is connected to the power unit, do not pull it out forcibly. 8) Remove 3 connectors [1] from the power supply unit. F-3-58 6) Remove 1 screw [1] and 1 switch cap [2]. -
Page 67: Fan
Chapter 3 F-3-62 2) Remove the cable cover plate [1]. - 2 screws [2] F-3-65 5) Remove the high voltage power supply PCB [1]. - 6 screws [2] - 10 claws [3] - 1 connector [4] F-3-63 3) Remove the guide plate [1]. F-3-66 - 6 claws [2] 3.1.16 Fan... -
Page 68: Pre-Procedure For Removing Duplex Feeding Fan
Chapter 3 3.1.16.3 Pre-procedure for removing duplex feeding fan 3.2 LASER EXPOSURE SYSTEM 0021-6357 1) Remove the right cover.(page 3-3)Reference[Removing right cover] 2) Remove the upper rear cover (left).(page 3-1)Reference[Removing up- 3.2.1 Laser Scanner Unit per rear cover (left)] 3) Remove the upper cover.(page 3-5)Reference[Removing upper cover] 3.2.1.1 Pre-procedure for removing laser scanner unit 4) Remove the rear cover.(page 3-1)Reference[Removing rear cover] 0021-4242... - Page 69 Chapter 3 F-3-75 F-3-72 4) Remove the flat cable [1]. F-3-76 CAUTION: Point to note for assembling the cable guide When assembling the cable guide, insert the flag section [1] of the cable guide into the hole [2] on the sheet metal, and hook the spring [3] on the flag [4] of the laser scanner.
- Page 70 Chapter 3 7) Remove the sheet metal [1]. - 4 screws [2] F-3-79 F-3-77 10) Remove the laser scanner unit [1]. 8) Remove 1 flat cable [1] and 1 connector [2], and then remove the cable [3] from the guide. F-3-80 CAUTION: F-3-78...
-
Page 71: Image Formation System
Chapter 3 3.3 IMAGE FORMATION SYSTEM 3.3.1 Drum/ITB Motor 3.3.1.1 Pre-procedure for removing drum motor 0021-3990 1) Remove the right cover.(page 3-3)Reference[Removing right cover] 2) Remove the upper rear cover (left).(page 3-1)Reference[Removing up- per rear cover (left)] 3) Remove the upper cover.(page 3-5)Reference[Removing upper cover] 4) Remove the right frame cover.(page 3-3)Reference[Removing right frame cover] 3.3.1.2 Removing drum motor... -
Page 72: Itb Unit
Chapter 3 F-3-89 4) Pull out the cartridge tray [1] to the front until it stops. F-3-86 3.3.3 ITB Unit 3.3.3.1 Removing ITB unit 0021-4270 1) Open the rear cover [1]. F-3-90 5) Press the stopper [1] at the rear left in the arrow direction, and remove the cartridge tray [2] as pulling its left side to the front. -
Page 73: Rd Sensor Unit
Chapter 3 F-3-92 CAUTION: Further pull out the RD sensor unit [1] to the front so as not to damage the belt when removing the ITB unit. F-3-94 9) Hold two handles [1] of the ITB at the front side of the main unit and re- move the ITB unit [2] in the arrow direction. -
Page 74: Pickup/Feeding/Delivery System
Chapter 3 F-3-96 2) Remove the RD sensor unit [1]. F-3-98 2) Remove the cable guide [1] in the arrow direction. - 1 boss [2] F-3-97 CAUTION: When you pass the cable of the RD sensor unit to the hole on the side plate, be careful not to damage the cable. -
Page 75: Pickup Unit
Chapter 3 3.4.2 Pickup Unit 3.4.2.1 Pre-procedure for removing pick-up unit 0021-4276 1) Remove the right cover.(page 3-3)Reference[Removing right cover] 2) Remove the upper rear cover (left).(page 3-1)Reference[Removing up- per rear cover (left)] 3) Remove the upper cover.(page 3-5)Reference[Removing upper cover] 4) Remove the right frame cover.(page 3-3)Reference[Removing right frame cover] 3.4.2.2 Removing pick-up unit... -
Page 76: Removing Mp Tray Pick-Up Unit
Chapter 3 F-3-106 3) Remove 2 links [1] at the left and right sides from the bearing part [2] of the MP tray pick-up unit. 5) Remove the pick-up unit [1]. - 6 screws [2] F-3-107 CAUTION: When you remove the MP tray pick-up unit, the link parts become unengaged, and therefore you should be careful not to lose the links. -
Page 77: Delivery Unit
Chapter 3 F-3-110 CAUTION: When you assemble the delivery unit, be sure to place the cable in the correct position as shown in the figure. F-3-108 3.4.3 Delivery Unit 3.4.3.1 Pre-procedure for removing delivery unit 0021-6352 1) Remove the right cover.(page 3-3)Reference[Removing right cover] 2) Remove the upper rear cover (left).(page 3-1)Reference[Removing up- per rear cover (left)] 3) Remove the upper cover.(page 3-5)Reference[Removing upper cover]... -
Page 78: Cassette Pickup Roller
Chapter 3 8) The pick-up roller automatically rotates to the replacement position. 9) Remove the cassette. 10) Open two protruded parts [1] in the arrow direction and remove the pick- up roller [2]. F-3-111 4) Remove the cable [2] from the cable guide [1]. - 2 connectors [3] F-3-114 11) After replacing the pick-up roller, turn the power OFF and ON. -
Page 79: Manual Pickup Roller
Chapter 3 F-3-116 3.4.6 Manual Pickup Roller 3.4.6.1 Removing MP tray pick-up roller F-3-118 0021-4263 2) Turn the precision screwdriver and remove the MP tray separation pad [1] 1) Remove the MP tray pick-up roller [1]. in the arrow direction. - 2 claws [2] F-3-119 3.4.8 Duplexing Feeding Unit... -
Page 80: Secondary Transfer Feeding Unit
Chapter 3 F-3-123 CAUTION: When you remove the screw, the guide cap [1] is also detached, and therefore you should be careful not to lose it. F-3-120 2) Remove the link [1] from the duplex feeding unit. F-3-121 3.4.9 Secondary Transfer Feeding Unit 3.4.9.1 Removing secondary transfer feeding unit 0021-4280 1) Open the rear cover [1]. -
Page 81: Fixing System
Chapter 3 F-3-124 3.5 FIXING SYSTEM F-3-126 3.5.1 Fixing Assembly CAUTION: When you assemble the fixing unit, be sure to place the cable in the correct position as shown in the figure. 3.5.1.1 Pre-procedure for removing fixing unit 0021-4265 1) Remove the right cover.(page 3-3)Reference[Removing right cover] 2) Remove the upper rear cover (left).(page 3-1)Reference[Removing up- per rear cover (left)] 3) Remove the upper cover.(page 3-5)Reference[Removing upper cover]... -
Page 82: Fixing Film Unit
Chapter 3 F-3-127 3.5.2 Fixing Film Unit 3.5.2.1 Pre-procedure for removing fixing film unit 0021-4287 1) Remove the right cover.(page 3-9)Reference[Removing duplex reverse drive unit] 2) Remove the upper rear cover (left).(page 3-1)Reference[Removing up- per rear cover (left)] 3) Remove the upper cover.(page 3-5)Reference[Removing upper cover] 4) Remove the left cover.(page 3-1)Reference[Removing rear cover] 5) Remove the rear cover.(page 3-1)Reference[Removing rear cover] 6) Remove the lower rear cover.(page 3-1)Reference[Removing lower rear... -
Page 83: Fixing Pressure Roller
Chapter 3 7) Remove the fixing film unit [1]. F-3-131 5) Remove the cable [1] from the cable guide [2]. F-3-132 6) Remove the cable guide [1]. F-3-134 CAUTION: Since the spring is very small, you should be careful not to lose it when removing it. -
Page 84: Fixing Motor
Chapter 3 F-3-137 3) Remove three connectors [1], and remove the cable [2] from the cable guide [3]. F-3-135 CAUTION: Do not touch the surface of the fixing pressure roller. 3.5.4 Fixing Motor 3.5.4.1 Pre-procedure for removing fixing motor 0021-4098 1) Remove the right cover.(page 3-3)Reference[Removing right cover] 2) Remove the upper rear cover (left).(page 3-1)Reference[Removing up- per rear cover (left)]... - Page 85 Chapter 3 F-3-140 6) Remove the fixing motor unit [1]. - 3 screws [2] MEMO: When removing the fixing motor unit for removing other units, it is not necessary to remove the fixing motor. 7) Remove the fixing motor [1]. - 3 screws [2] F-3-141 CAUTION:...
-
Page 87: Chapter 4 Maintenance And Inspection
Chapter 4 MAINTENANCE AND INSPECTION... - Page 89 Contents Contents 4.1 Periodically Replaced Parts ............................4-1 4.1.1 Periodically Replaced Parts ................................. 4-1 4.2 Consumables ..................................4-1 4.2.1 Life Expectancy of Consumable Parts ............................4-1 4.3 Periodical Service ................................4-1 4.3.1 Periodic Service ................................... 4-1 4.4 Cleaning ..................................4-1 4.4.1 Cleaning method ..................................4-1...
-
Page 91: Periodically Replaced Parts
Chapter 4 4.1 Periodically Replaced Parts 4.1.1 Periodically Replaced Parts 0021-5288 The machine does not have parts that require periodical replacement. 4.2 Consumables 4.2.1 Life Expectancy of Consumable Parts 0022-0076 No consumable parts are required in this printer. 4.3 Periodical Service 4.3.1 Periodic Service 0022-0128 The printer has no parts that require periodic servicing. - Page 92 Chapter 4 Wipe with a lint-free cloth. Laser beam window glass Multi tray separation pad Wipe with a lint-free cloth. If dirt cannot be removed, dampen the lint-free cloth with alcohol. Multi tray pickup roller Multi tray feed roller Cassette pickup roller [7]* PF pickup roller [8]*...
-
Page 93: Chapter 5 Troubleshooting
Chapter 5 TROUBLESHOOTING... - Page 95 Contents Contents 5.1 MEASUREMENT AND ADJUSTMENT ........................5-1 5.1.1 Test Print ...................................... 5-1 5.1.1.1 Test Print .........................................5-1 5.1.2 Adjustment of Laser Exposure System............................5-1 5.1.2.1 After Replacing the laser scanner unit ................................5-1 5.1.3 Adjustment of Electrical Components ............................5-2 5.1.3.1 After Replacing the DC controller PCB................................5-2 5.1.3.2 After Replacing the Main Controller PCB..............................5-2 5.2 SERVICE TOOLS .................................5-3 5.2.1 Standard Tools .....................................
-
Page 97: Measurement And Adjustment
Chapter 5 5.1 MEASUREMENT AND ADJUSTMENT 5.1.1 Test Print 5.1.1.1 Test Print 0021-5292 Test Print is an object used to check whether this equipment works properly or not. Execute engine test print, as the following steps. 1.Turn ON the power, and when this equipment has turned to 'standby', press test print switch [1] located in the right side. -
Page 98: Adjustment Of Electrical Components
Chapter 5 T-5-2 The information in the NVRAM on the DC controller PCB is saved in NVRAM (IC2S) as backup data. When replacing the NVRAM, perform the same operation as replacing main controller PCB and execute the following item; Option Menu > Service Mode >... -
Page 99: Service Tools
Chapter 5 5.2 SERVICE TOOLS 5.2.1 Standard Tools 0022-0146 The table below lists the standard tools required for servicing the printer. T-5-3 Tool name Tool No. Remark Tool case TKN-0001 Jumper wire TKN-0069 With a clip Clearance gauge CK-0057 0.02 to 0.3 mm Compression spring scale CK-0058 0 to 600 g for checking the cassette spring pressure... - Page 100 Chapter 5 Code Detection Remedy E001 Abnormal high temperature in fixing assembly 0000 - Check the connectors of fixing assembly and DC controller PCB If abnormal high temperature is detected by main thermistor. - Replace the fixing film unit Cause - Replace the fixing power unit Failure in sub thermistor, failure in DC controller PCB.
-
Page 101: Version Up
Chapter 5 Code Detection Remedy Primary transfer disengagement system can not work properly. - Check the disengagement system Cause - Check the connectors of ITB tension sensor, pick up motor, and DC Breakdown in disengagement system, failure in ITB tension sensor, controller PCB failure in pickup motor, failure in DC controller PCB. -
Page 102: Service Mode
Chapter 5 5.5 Service Mode 5.5.1 Outline 5.5.1.1 Outline 0022-0151 The machine is equipped with service mode to enable the service person to check its condition. On a PC, enter the appropriate ID from the keyboard to add a special menu to the Printer Status Window screen. - Page 103 Chapter 5 F-5-7 F-5-8...
-
Page 104: Service Mode Table
Chapter 5 5.5.2 Service Mode Table 5.5.2.1 Service Mode List 0022-0152 T-5-7 Group Description Setting range/ Reference Service Chart Print Output from the service chart print 1 (CMYK17 gradation patch data) A4, page 4 Output from the service chart print 2 (CMYK256 gradation patch data) A4, page 8 Counter detail Display the entire printing sheets of the toner cartridge of each toner... - Page 105 Chapter 5 F-5-9 F-5-10...
- Page 106 Chapter 5 F-5-11 F-5-12 5-10...
-
Page 107: Service Chart Print 2
Chapter 5 F-5-13 F-5-14 5.5.2.3 Service Chart Print 2 0022-0177 Use Service Chart Print 2 to check image density and color tint. 5-11... - Page 108 Chapter 5 F-5-15 5-12...
- Page 109 Chapter 5 F-5-16 5-13...
- Page 110 Chapter 5 F-5-17 5-14...
- Page 111 Chapter 5 F-5-18 5-15...
- Page 112 Chapter 5 F-5-19 5-16...
-
Page 113: Print Status Print
Chapter 5 F-5-20 5.5.2.4 Print Status Print 0022-0178 Configuration Page shows a list of device setting items. The sample page is attached below. 5-17... -
Page 114: Status Print B
Chapter 5 F-5-21 5.5.2.5 Status Print B 0022-0180 In Configuration Page (status window > "Utility" menu), calibration log and scanner bending information are added. LOG NO 0001: Calibration log 00: Cyan 01: Magenta 02: Yellow 03: Black LOG NO 0002: Scanner bending information Line: Toner color (00: Yellow, 01: Magenta, 02: Cyan, 03: black) Column: 3 points location information (00: Left, 01: Center, 02: Right) Block 1: Bending information in sub scanning direction... -
Page 115: Special Administrator Mode
Chapter 5 F-5-22 5.6 Special Administrator Mode 5.6.1 Overview 5.6.1.1 Preface 0022-6620 Special management mode is the mode for users to solve a problem by themselves when an error occurs. However, information about this mode is not disclosed to users. 5.6.1.2 Entering the Special Administrator Mode 0022-6677 1.Turn ON the power, and printer driver screen will appear. - Page 116 Chapter 5 F-5-23 3.Using keyboard, enter the password (369*). 4.The Special Administrator Mode[1] will appear in the “option” menu in the status window screen. F-5-24 5.Enter the maintenance code, and press OK. 5-20...
- Page 117 Chapter 5 F-5-25 5-21...
-
Page 118: Menu List
Chapter 5 5.6.1.3 Menu List 0022-6678 T-5-8 Maintenance Mode name Item Setting code Store Internal Log ON/OFF*1, destination path name *2 0711 Log Retention Log Store Operation Message Log ON/OFF*1, destination path name *2 Store Userl Log ON/OFF*1, destination path name *2 0874 Display Status on Print Queue*3 ON/OFF*1... - Page 119 Chapter 5 5-23...
-
Page 121: Chapter 6 Appendix
Chapter 6 APPENDIX... - Page 123 Contents Contents 6.1 OUTLINE OF ELECTRICAL COMPONENTS......................6-1 6.1.1 Clutch/Solenoid.................................... 6-1 6.1.1.1 Cluth/Solenoid.........................................6-1 6.1.2 Motor/Fan ....................................6-2 6.1.2.1 Motor/Fan........................................6-2 6.1.3 Sensor......................................6-3 6.1.3.1 Sensor ..........................................6-3 6.1.4 PCBs ......................................6-4 6.1.4.1 PCBs..........................................6-4...
-
Page 125: Outline Of Electrical Components
Chapter 6 6.1 OUTLINE OF ELECTRICAL COMPONENTS 6.1.1 Clutch/Solenoid 6.1.1.1 Cluth/Solenoid 0021-5303 F-6-1 Symbol for component Name Clutch Manual feed tray feeding clutch Duplex feeding clutch Solenoid Manual feed tray pickup solenoid Cassette pickup solenoid Developing separation solenoid Duplex reversal solenoid Paper feeder pickup solenoid... -
Page 126: Motor/Fan
Chapter 6 6.1.2 Motor/Fan 6.1.2.1 Motor/Fan 0021-5299 F-6-2 Symbol for component Name Motor Drum motor Developing motor Registration motor Fixing motor Pickup motor Scanner motor Fixing/Fixing power supply cooling fan Duplex cooling fan... -
Page 127: Sensor
Chapter 6 6.1.3 Sensor 6.1.3.1 Sensor 0021-5300 SR13 SR15 SR10 SR12 SR14 F-6-3 Notation Name Notation Name Paper feeder pre-registration detection sensor Fixing pressure release sensor Front door open/close sensor SR10 Fixing loop sensor Paper feeder paper detection sensor SR12 Pre-registration detection sensor Registration detection sensor SR13... -
Page 128: Pcbs
Chapter 6 6.1.4 PCBs 6.1.4.1 PCBs 0021-5301 F-6-4 Name DC Controller PCB Fixing power supply PCB High-voltage power supply PCB Main Controller PCB... - Page 129 Chapter 6...
- Page 131 Feb 5 2009...
Need help?
Do you have a question about the LBP7200Cdn and is the answer not in the manual?
Questions and answers
als ik een printopdracht stuur naar mijn canon lbp7200cdn komt er een helemaal zwart vel geprint uit de printer
A Canon LBP7200Cdn printer may print a completely black page due to a malfunction in the laser scanner unit, high-voltage bias, or issues with the photosensitive drum. If the laser scanner does not properly discharge parts of the drum or the high-voltage system fails, the toner may cover the entire page instead of forming an image.
This answer is automatically generated