
Related Manuals for Max-Thrust RIOT


Summary of Contents for Max-Thrust RIOT
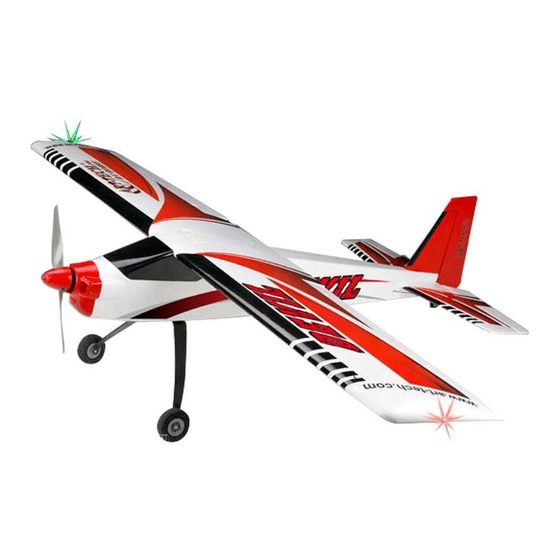
- Page 1 Designed by Mark Tilbury & Alan He. R/C AEROBATIC SPORTS AIRCRAFT ASSEMBLY AND INSTRUCTION MANUAL © Copyright Century UK Limited 2012 www.centuryuk.com...
- Page 2 It should not be operated by children without the supervision of a suitably experienced adult. Max-Thrust reserves the right to modify the specification of this model at any time. Safety Precautions 1. Do not attempt to repair or modify this aircraft with non-factory parts.
- Page 3 Overview Thank-you for purchasing this MAX-THRUST RIOT radio controlled model aircraft. The RIOT offers a stunning combination of terrific looks and sensational flight performance. Manufactured from “EPOFLEXY” it is extremely robust, however, in the event of a “less than perfect” arrival, we supply a range of spares to get you flying again in the shortest time.
- Page 4 Assembly Instructions 1. Undercarriage. Fix the undercarriage in position with the four 2.6 x 12mm self- tapping screws as shown, (image A). Note: The undercarriage legs are angled towards the front of the fuselage. 4 x Screw 2.6 x 12mm 2.
- Page 5 4. Tail-Plane Fixing. Fix the horizontal tail-plane and vertical fin in position with the two 2.6 x 35mm screws provided, (image D). The screws must be tightened sufficiently to securely fix the parts in position, however be careful not to over-tighten the screws. 2 x Screw 2.6 x 35mm 5.
- Page 6 6. Wing Assembly. Locate the 500mm aluminium wing joining spar and slide into the round aperture of one wing panel up to the centre locating collar. Locate the small plywood wing locking plate and insert into the rectangular aperture behind the main wing spar, (image G).
- Page 7 7. Wing Fixings. Note: The plastic connectors are angled for the wing camber. Insert the front and rear plastic connectors into the wing, (image J). They are angled to provide a perfect fit. Make certain you have them located correctly! The wing can now be trial-fixed in position onto the fuselage using the 3 x M4 x 50mm 3 x Screw M4 x 50mm...
- Page 8 9. Receiver Installation. Connect the speed controller to the throttle channel of your receiver, (not included). This wire is easily identified, it is the only one that is routed from the front of the model. © Copyright Century UK Limited 2012 www.centuryuk.com Connect the rudder and elevator servos to the corresponding channel outputs of the receiver and connect the one remaining lead from the circuit board to the aileron channel output.
- Page 9 12mm each way. We hope you enjoy many happy and safe flights with your new Max-Thrust RIOT model aircraft. Check-out other aircraft in the Max-Thrust range at your local model dealer, or by visiting www.max-thrust.com. Mark Tilbury: Designer. © Copyright Century UK Limited 2012 www.centuryuk.com...
Need help?
Do you have a question about the RIOT and is the answer not in the manual?
Questions and answers
where does the yellow wire go in riot v2