Schaerer Ambiente 2 User Manual
Hide thumbs
Also See for Ambiente 2:
- User manual (130 pages) ,
- Service manual (260 pages) ,
- Quick start manual (2 pages)
Table of Contents
Advertisement
Quick Links
Download this manual
See also:
Service Manual
Advertisement
Chapters
Table of Contents

Related Manuals for Schaerer Ambiente 2


Summary of Contents for Schaerer Ambiente 2
- Page 2 M.Schaerer Ltd. Phone: +41 31 858 51 11 User manual Gewerbestrasse 15 Fax: +41 31 858 51 40 BASO 2 - 02 3302 Moosseedorf E-Mail: info@scherer.com Switzerland Internet: www.schaerer.com Order number: 020'201...
-
Page 3: Introduction
All the information, technical data and illustrations in this instruction manual are based on the latest data available at the time of going to press. M. Schaerer AG reserves the right to undertake modifications at any time without further notice. - Page 4 Introduction Page 0-2 BASO-2 - 02.00 - V07...
-
Page 5: Safety Instructions And Warnings
Introduction SAFETY INSTRUCTIONS AND WARNINGS Read the information in the user manual carefully be- fore using the machine for the first time. It contains important information on safety, use and service of the machine. 0.1. Safety This chapter contains important safety information and liability provisions on how to avoid damaging the machine, outlined in this instruction man- ual. - Page 6 Introduction 0.2.1. Safety symbols used in these instructions The following symbols occur in conjunction with all important notes on safety in these operating instructions. Follow the instructions to the letter and proceed with particular care in such cases. • Identification of notes on safety: Danger! This note indicates a risk of severe and/or fatal injury if specific proce- dural rules are violated.
-
Page 7: Liability
Introduction 0.3. Liability Claims under guarantee and liability claims in the event of injury to peo- ple and damage to property cannot be entertained if they are due to one or more of the following causes: – Unconventional use of the machine Improper assembling, start-up, operation and service of the machine –... -
Page 8: Accident Prevention Regulations
Introduction 0.4. Accident prevention regulations 0.4.1. General Note: This chapter describes the safety instructions and accident prevention regulations, which you must adhere to for your own safety and the safety of others. Before each start-up of the machine: Check its operational safety! Carefully perform the checks as de- scribed in the individual chapters. - Page 9 The designated use of the coffee machine and the options connected with it are subject only to the contractually agreed mode of use and any existing supplementary agreements, the “general business conditions“ of M. Schaerer AG and this user manual.. Any use other than within the lim- its specified here shall be regarded as not in accordance with the desig- nated use.
-
Page 10: Safety Notes And Rating Plates
Introduction 0.4.8. Technical condition The machine must only be operated as designated, if technically safe and if you are fully aware of the safety and danger and follow the appro- priate regulations. If any malfunctions are detected, particularly such which could impair safety, they must immediately be rectified by the appropriate personnel. -
Page 11: Table Of Contents
Introduction CONTENTS Chapter Page Introduction ............................0-1 Copyright ...............................0-1 Safety instructions and warnings ......................0-3 Safety ..............................0-3 For your safety ............................0-3 Liability ..............................0-5 Accident prevention regulations ......................0-6 Safety notes and rating plates.......................0-8 Contents ..............................0-9 General ..............................1-1 Welcome ...............................1-1 Purpose and structure of this instruction manual..................1-1 Key ................................1-1 Description............................2-1 Coffee machine data ..........................2-2... - Page 12 Introduction Chapter Page Optional features..........................7-1 Refrigerator ............................7-2 Payment systems ..........................7-9 Chip cards ............................7-9 Chip card loader ........................... 7-9 Alarm functions............................. 7-9 Cappuccinatore CPT .......................... 7-13 Special steam ............................. 7-15 mill (duo mill)..........................7-16 Water softener (Filados/Brita) ......................7-16 7.10 Cup sensor ............................
-
Page 13: General
General General 1.1. Welcome Congratulations on purchasing your coffee machine. This ergonomically and cleverly designed machine has a generously sized workspace. Its modern design and the choice of colors available enable it to blend in with any de- cor. It combines outstanding quality with revolutionary technology and un- paralleled ease-of-use. - Page 14 General. Page 1-2 BASO-2 - 02.01 - V07...
- Page 15 Description Contents Chap. Text Page Description 2.1. Coffee machine data ........................2-2 2.1.1. Overview of the coffee machine.......................2-2 2.1.2. Installation chart of the coffee machine ...................2-3 2.1.3. Purpose of the coffee machine ......................2-4 2.1.4. Serial data of the coffee machine ....................2-4 2.2.
-
Page 16: Description
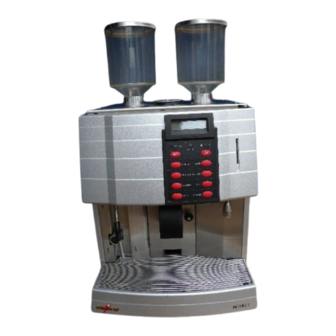
Description DESCRIPTION 2.1. Coffee machine data 2.1.1. Overview of the coffee machine 1. Mill 1 coffee bean container (standard coffee mill) 2. Sliding hatch for bean container 3. Opening for decaffeinated coffee powder and cleaning tablets 4. Cup hotplate 5. Surround 6. -
Page 17: Installation Chart Of The Coffee Machine
Description 2.1.2. Installation chart of the coffee machine Drawing number 3.8.5683 E Page 2-3 BASO-2 - 02.02 - V07... -
Page 18: Purpose Of The Coffee Machine
Description 2.1.3. Purpose of the coffee machine The coffee machine will supply the following beverages: Coffee Ristretto Espresso coffee Decaffeinated coffee Pot of coffee Macchiato Steam for frothing milk Hot water for tea Cappuccino Milk coffee Latté Hot milk Milk foam 2.1.4. -
Page 19: Operating Data Of The Coffee Machine
Description 2.2. Operating data of the coffee machine 2.2.1. Characteristics of the coffee machine The coffee machine is capable of supplying 100-120 cups of coffee or tea per hour. 2.2.2. Dimensions of the coffee machine Width 420 mm Height 755 mm Depth 510 mm Outlet height... -
Page 20: Equipment And Accessories Of The Coffee Machine
Description 2.2.4. Water connection/outlet If the coffee machine is to be connected to a newly installed water supply, the pipe and intake hose should be rinsed thoroughly to prevent any dirt par- ticles from entering the machine. The machine must be connected to a safe water supply with supply valve. Connect the pressure hose to the pressure reducer (set to 3 bar) on the tap using the G ½”... -
Page 21: Special Accessories Of The Coffee Machine (Not In Standard Delivery Package)
Description 2.3.3. Special accessories of the coffee machine (not in standard delivery package) Article Ref. no. - Supplementary chip cards: “PROGRAM” 063941 “KEY BLOCK” 063931 “COFFEE TEST” 063932 “MANAGER” 063940 “LOAD” 063937 “MASTER” 063934 “WAITER” 063936 “COPY WAITER” 063942 “PRINT” 063943 “MONEY A-J”... -
Page 22: Special Settings
Description 2.4. Special settings Note: The settings described in this section can only be programmed by the service engineer. 2.4.1. Time settings Service reminder After a certain period or a certain number of beverages, a reminder is displayed that it is time to have the machine serviced. -
Page 23: User Panel Of The Coffee Machine
Description 2.5. User panel of the coffee machine Two-line illuminated Cleaning and Plus key Shift key with LED LCD display with LED On/off LED Standby key on / off Minus and STOP key with LED Chip card slot Random product selection DECAF key with LED recognizes the function of keys with LED and product... -
Page 24: Chip Card Functions
Description 2.6. Chip card functions Attention! Chip cards should be handled with the same care as bank cards (do not bend, do not use as “door openers”, etc.) This coffee machine features the latest control technology. To facilitate programming, various program groups have been created which can be programmed directly with the aid of the respective chip cards. -
Page 25: Chip Card Options For Normal Operating Mode
Description 2.6.2. Chip card options for normal operating mode In normal operating mode, the PROGRAM card is used for statistical purposes. If a pay- ment system is installed, the requisite settings are made using the PROGRAM card: - Switch payment system ON/OFF - Switch price levels 1 + 2 (automatic coffee machines on, off and switchover time) - Change product price and article number - Display MONEY sales... - Page 26 Description Page 2-12 BASO-2 - 02.02 - V07...
-
Page 27: Installation
Installation INSTALLATION 3.1. First-time installation The coffee machine must be installed and initialized by a licensed after sales service agent. Note: Once the coffee machine is installed and after subsequent changes, it is important to save the new data on the SAVE DATA card provided. The SAVE DATA cards should be on hand at all times, including for the service engineer. - Page 28 Installation Additional hole required for “Container ejection” optional feature Buffet and counter version Refrigerator (optional feature) Page 3-2 BASO-2 - 02.03 - V07...
- Page 29 User Instructions Contents Chap. Text Page User instructions 4.1. Introduction ............................4-3 4.2. Operating modes of the coffee machine ..................4-4 4.3. Messages displayed when coffee machine is ready for operation ..........4-4 4.4. Routine operation ..........................4-5 4.4.1. Making the coffee machine ready for operation................4-5 4.4.2.
- Page 30 User Instructions 4.6.1.6. Change token price with or without MONEY card price levels 1 + 2 ..........4-21 Chap. Text Page 4.6.1.7. Change product price and article number (for external CCI / CSI payment systems)....4-22 4.6.1.8. Display MONEY sales........................4-22 4.6.1.9.
-
Page 31: User Instructions
User Instructions USER INSTRUCTIONS 4.1. Introduction This chapter describes the basic functions of the coffee machine. Read them attentively to ensure easy and problem-free routine operation. Note: As a prerequisite for a smooth operation of the milk solution machine, it must be installed and programmed by an after sales service organiza- tion, authorized by the manufacturer. -
Page 32: Operating Modes Of The Coffee Machine
User Instructions 4.2. Operating modes of the coffee machine The coffee machine has three different operating modes: If this message is displayed when the coffee machine is ready for operation, it is select product in normal operating mode, i.e. the corresponding product will be freshly pre- 12:00 15.10.2001 pared when the key is pressed. -
Page 33: Routine Operating
User Instructions 4.4. Routine operation 4.4.1. Making the coffee machine ready for operation 1. Check the following points before switching on the coffee machine: - That it is connected to the mains power supply - That the water supply is turned on - The coffee bean container is full Danger! DO NOT reach into the mill when refilling the coffee container(s) and DO NOT... -
Page 34: Prepare Coffee Products Using Second Level
User Instructions 4. The coffee is freshly prepared and served automatically. Depending on the programming: - The keys can be pre-selected in any order as many times as required. - Other messages may appear (error messages). The [ ] key cancels pre-selected products. Cancellation of pre-selected products is not possible in payment mode. -
Page 35: Prepare Decaffeinated Coffee Using The Coffee Mill And Decaf Key
User Instructions 4.4.3.2. Prepare decaffeinated coffee using the coffee mill and DECAF key The coffee machine is either programmed to prepare decaffeinated coffee via a cof- fee mill ex factory, or this feature may be enabled by the service engineer. 1. -
Page 36: Heat Beverage
User Instructions 4.4.5. Heat beverage Danger! Point the steam pipe towards the drip tray! 1. Briefly press the [ ] key twice in rapid succession to remove condensation from the pipe (only possible in start/stop mode). 2. Immerse the steam pipe into the beverage until it touches the bottom of the recipient. 3. -
Page 37: Prepare Milk Foam (Only With Optional Refrigerator)
User Instructions Note: The milk in the refrigerator must have a temperature of 3°C-5°C in order for perfect prod- uct quality to be guaranteed. Do not refill with milk, which temperature exceeds 6°C! 4.4.7. Prepare milk foam (only with optional refrigerator) Attention! Do not use unpasteurized milk! Only use pasteurized or UHT milk! Perform a rinsing operation every time you serve milk, unless automatic rinsing has been... -
Page 38: Terminating Operation / Switching The Coffee Machine Off
User Instructions 4.4.9. Terminating operation / Switching the coffee machine off If the coffee machine is not used for longer periods, e.g. nights, it can be switched to stand-by. In this mode the boilers are not kept at temperature and the dispensing of bev- erages is not possible. -
Page 39: Disassembly
User Instructions Attention! Be sure when operation restarts the first thing is to reopen the fresh water supply, and only then should the power supply be restored. 4.4.11. Disassembly 4.4.11.1. Disassembly of the coffee machine Please contact an after sales service organization, authorized by the manufacturer. 4.4.11.2. -
Page 40: Programming Using Standard Chip Cards
User Instructions 4.5. Programming using standard chip cards The CHEF and SAVE DATA cards are part of the standard delivery package. They provide a simple means of changing settings or retrieving information from the coffee machine. For all the functions described in this chapter, it is assumed that the coffee machine is ready for routine operation in normal operating mode. -
Page 41: Reset Counter
User Instructions 4.5.1.3. Reset counter 1. Insert CHEF card into the card reader. 2. Press [ ] or [ ] until the following menu is displayed: delete counter execute ` Decaf ` 3. Press [ ] key: delete counter delete ? ` Decaf ` 4. -
Page 42: Change Dosing Time Steam, Hot Milk And/Or Milk Foam
User Instructions 6. The new water setting is now activated. Repeat steps 7 to 8 for products with milk (only with optional refrigerator).For products without milk, go to step 9. change fill quantity milk quantity +0% 7. Press the [ ] or [ ] to raise or lower the amount of milk dispensed by +/- percent. 8. -
Page 43: Change Time
User Instructions 4. Set the hour at which the coffee machine is to come on using the [ ] or [ ] keys. switch on 23:00 5. Press [ ] key. 6. Set the minutes at which the coffee machine is to come on using the [ ] or [ ] keys. switch on 23:30 7. -
Page 44: Change Date
User Instructions 4.5.1.9. Change date 1. Insert CHEF card into the card reader. 2. Press [ ] or [ ] key until the following menu is displayed: change date execute ` Decaf ` Press [ ] key. change date 15.10.2001 4. -
Page 45: Save Data Card
User Instructions 3. Press [ ] key. service wanted delete? ‘Decaf’ 4. Press [ ] key. (The message is suppressed). If the “service wanted” reminder is programmed but cannot be suppressed using the CHEF card, the total number of coffees served and the total of all products may be queried from step 3 by holding the Decaf key pressed down. -
Page 46: Programming Using Optional Chip Cards
User Instructions 4.5.2.3. Load machine data from card to coffee machine Insert SAVE DATA card into the card reader. 2. Press [ ] or [ ] until the following menu is displayed: SAVE DATA card machine 3. Press [ ] key to save the data from the card to the coffee machine: .. -
Page 47: Programmable Security Level
User Instructions At the end of every menu: Remove PROGRAM card coffee machine ready in normal operating mode. Press [ ] or [ ] key to reach the next menu. 4.6.1.2. Programmable security level If the service engineer has programmed security levels 1 or 3 for the PROGRAM card, the PIN code must be entered each time the coffee machine is used. - Page 48 User Instructions 5. Confirm by pressing the [ ] key. price – 1 xx:00 6. Enter the numbers after the decimal point by pressing the [ ] and [ ] keys (price 1 0-99). 7. Confirm by pressing the [ ] key.
-
Page 49: Change Token Price With Or Without Money Card Price Levels 1 + 2
User Instructions If the changed data are to be saved on the DATA SAVE card, insert this card..Save … 11. Wait for the acoustic signal. credit operation 12:00 15.10.2001 12. If changed data are not to be saved to the DATA SAVE card, press [ ] key 4.6.1.6. -
Page 50: Change Product Price And Article Number (For External Cci / Csi Payment Systems)
User Instructions 4.6.1.7. Change product price and article number (for external CCI / CSI payment systems) 1. Insert PROGRAM card into the card reader: 2. Press [ ] or [ ] until the following menu is displayed: change price select product 3. -
Page 51: Reset Money Sales
User Instructions 4.6.1.9. Reset MONEY sales 1. Insert PROGRAM card into the card reader: 2. Press [ ] or [ ] until the following menu is displayed: sale amount MONEY amount 0.00 3. Press [ ] key. sale amount MONEY delete ? ` Decaf ` 4. -
Page 52: Delete Master Table
User Instructions Press [ ] key. remove card Remove PROGRAM card: insert card MASTER/PROGRAM Insert MASTER card. card logged on remove card Remove MASTER card. insert card MASTER/PROGRAM If other MASTER cards are to be logged on, repeat steps 5 and 6 several times. Press [ ] or [ ] to reach next menu, remove PROGRAM card coffee machine is ready in normal operating mode. -
Page 53: Key Block Card
User Instructions 4. Press [ ] key. PIN-Code 0000 ` +/- ` ` Decaf ` 5. Set the first digit of the new PIN code using keys [ ] and [ ] 6. Confirm by pressing the [ ] key. 7. -
Page 54: Coffee Test Card
User Instructions 3. Press the product key you wish to enable. The key lights up red. 4. Remove the KEY BLOCK card. If all the product keys had previously been disabled using the [ ] key, this action can be cancelled: Press [ ] key: the disabled product keys are enabled again. -
Page 55: Cleaning
Cleaning Contents Chapter Text Page CLEANING..................5-2 Important general notes on cleaning....................5-2 Rinsing in between:..........................5-3 5.2.1 Rinsing the coffee pipes ........................5-3 5.2.2 Rinsing the milk pipes (fridge option) ....................5-3 5.2.3 Steam cleaning the milk pipes (fridge option)..................5-4 Daily cleaning coffee machine with fridge ..................5-5 5.3.1 Inside Cleaning ...........................5-5 5.3.2... -
Page 56: Important General Notes On Cleaning
Cleaning 5 CLEANING 5.1 Important general notes on cleaning Danger of burns! Never reach inside the machine during the automatic cleaning and do not work underneath the beverage outlet. Watch for sharp edges when you clean. Danger! Never clean the machine with a hose, a high pressure cleaner or steam cleaner. Never immerse the machine in water! Attention! Please follow the generally valid hygiene HACCP regulations! -
Page 57: Rinsing In Between
Cleaning • The machine cleaning program consists of an automatic self-cleaning cycle and a manual cycle. Together they form an operation cycle. • In order that all dispensed beverages obtain the best possible quality, it is abso- lutely necessary to clean the machine and the existing options thoroughly on a daily and weekly basis. -
Page 58: Steam Cleaning The Milk Pipes (Fridge Option)
Cleaning Danger of burns! Do not reach underneath the beverage outlet during the automatic rinsing! 1. The milk pipes are rinsed automatically: Rinsing is registered after each milk product serving and is automatically activated after all pre-selected products have been served. A time delay (standard time 30 seconds) is programmed between the last product serving and the automatic rins- ing. -
Page 59: Inside Cleaning
Cleaning 5.3 Daily cleaning coffee machine with fridge 5.3.1 Inside Cleaning Wash your hands carefully. Protect open wounds. You may use protective gloves. Open the coffee machine’s service door (panel) while pulling the left side forwards and swinging it completely open. Display message: Selection locked door open... - Page 60 Cleaning Daily cleaning coffee machine with fridge Pull the foamer head (a) out. Remove the tube adapter (a) from the foamer head’s middle part. Remove the expander (a) from the T-piece (b). Remove the expander cover (a) and the baf- fle (b) from the expander (c).
- Page 61 Cleaning Daily cleaning coffee machine with fridg Place the baffle (b) on the expander (c). Seal off the smaller opening on the ex- pander (c) with your thumb. Fill the expander with water. Place the expander cover (a) on the ex- pander (c).
- Page 62 Cleaning Daily cleaning coffee machine with fridge a (blue) b (white) Attention! Make sure that the tubes (a and b) and the tube adapter’s plug-ins are connected according to color as shown in the picture. Put the tube adapter (c) back into the foamer white head (d).
- Page 63 Cleaning Daily cleaning coffee machine with fridg 12.2 ... rests at the slit guides (d) between the outlet cover’s (a 12.1) guide surfaces (c). 12.3 Now push the coffee outlet cup (g) into the guides with your thumb (as outlined in step 12.2) until it stops.
- Page 64 Cleaning Daily cleaning coffee machine with fridge Close the coffee machine’s service door (panel). Make sure that the service door is tightly closed. Display message: Select product 12:00 15.10.2001 14.1 Open the door to the fridge. 14.2 Remove the milk container from the fridge. 14.3 Clean the milk container with a dish deter- gent.
- Page 65 Cleaning Daily cleaning coffee machine with fridg Place the brown milk container in the fridge and close the door. Press the stop button (1) and push the out- let (2) upwards into the highest position. Press the [ ] cleaning button down for approx.
- Page 66 Cleaning Daily cleaning coffee machine with fridge Danger of injury! With the next step the brewing unit is moved into the suitable cleaning position. For safety reasons always use both hands to press the buttons [ ] and [ ] and do not place your hands in the machine! Make sure that no one is in the danger zone and be the only one to press the buttons...
- Page 67 Cleaning Daily cleaning coffee machine with fridg Danger of burns! In the next step the machine will automati- cally start the self-cleaning cycle. Never reach underneath the beverage outlet! The cleaning cycle starts immediately after the button is pressed. 24.1 The LED on the [ ] button blinks.
- Page 68 Cleaning Daily cleaning coffee machine with fridge Danger of burns! In the next step the machine will automati- cally start the self-cleaning cycle. Keep away from the beverage outlet! The cleaning cycle starts immediately after the button is pressed. Press the [ ] cleaning button.
- Page 69 Cleaning Daily cleaning coffee machine with fridg 5.3.2 Outside cleaning Don’t clean the outside until the rinse cycle has finished. Display message! Attention! Never clean the outside during the cleaning or Select product rinsing cycle! 12:00 15.10.2001 Attention! Never use scrubbers, abrasives, chemicals and cleaning tools made of metal! 29.1 Lift the drip grid out of the drip tray.
- Page 70 Cleaning WeeklWeekly cleaning coffee machine with fridgey cleaning coffee machine with fridg 5.4 Weekly cleaning coffee machine with fridge 5.4.1 Dismantling and cleaning the milk pipe system Wash your hands carefully. Protect open wounds. You may use protective gloves. Open the door to the fridge. Remove the milk container from the fridge.
- Page 71 Cleaning Weekly cleaning coffee machine with fridge Clean the recess of the tube holder thor- oughly with a clean paper cloth. Remove the tubes from the air valve’s (b) nipples (a). Press the ejector (c) downwards and pull the air valve (b) out of the holder horizontally. Open the coffee machine’s service door (panel) while pulling the left side forwards and swinging it completely open.
- Page 72 Cleaning Weekly cleaning coffee machine with fridge Swing the outlet cover (a) upwards. Take the outlet insert (b) out by pulling downwards. Clean the outlet insert (b) with a soft brush. Then rinse it with plenty of clean, lukewarm water. Pull the foamer head (a) out.
- Page 73 Cleaning Weekly cleaning coffee machine with fridge 12.1 Lift the T-piece (a) upwards out of the holder. 13.1 Dismantle the foamer head as shown in the picture. 13.2 Clean the foamer head parts with a soft brush under running water. 13.3 Check whether the packing rings (a and b) are still intact.
- Page 74 Cleaning Weekly cleaning coffee machine with fridge Read the following instructions before you continue cleaning. Attention! It is crucial that you read the measuring in- structions and danger notices on the deter- gent container’s label. Read chapter 10.2.2 “Cleaning agents”, page 10-4. Danger! Never mix the “weakly cleaning agent”...
- Page 75 Cleaning Weekly cleaning coffee machine with fridge 17.4 Place the expander cover (a) on the ex- pander (c). 17.5 Now press on the cover (a) with your finger: A fine water jet will escape from the baffle’s hole. 17.6 If this does not happen, clean the hole with a fine solid object and repeat from step 17.3 to 17.5.
- Page 76 Cleaning Weekly cleaning coffee machine with fridge 20.1 Connect the short white tube (a) with the Coffee machine tube nipple to the milk baffle (b) of the T- piece (c) (connection to the fridge). 20.2 Connect the long white tube (d) with the Fridge tube adapter to the tube nipple of the T- piece (c) (connection to the coffee machine).
- Page 77 Cleaning Weekly cleaning coffee machine with fridge Push the foamer head back on the two plug- ins (a), until it reaches the stop plate (b). 25.1 Place the coffee outlet cup (b) in the outlet cover (a). With one hand fix the coffee outlet cup (b) to this position.
- Page 78 Cleaning Weekly cleaning coffee machine with fridge Correct 25.4 Both outlet openings (a) are directed strait down and are equally long. Note: Only when the coffee outlet cup is inserted correctly coffee products can be served properly. correct Wrong 25.5 Both outlet openings (b) are slightly sloping to the right or the left.
- Page 79 Cleaning Weekly cleaning coffee machine with fridge Place the brown milk container in the fridge and close the door. Check the fitting of the tube system as shown in picture A, page 5-26. Carry out step 17 to 31 of the “daily clean- ing.”...
- Page 80 Cleaning Weekly cleaning coffee machine with fridge 5.4.3 Table for reassembling the milk pipe system 6 front 7 rear Coffee machine Legend picture A Fridge 1. Air valve 2. Baffle Milk 3. Expander 4. T-piece 5. Coffee outlet cup 6. Tube blue 7.
-
Page 81: Defrosting The Fridge
Cleaning 5.5 Defrosting the fridge Note: The fridge has to be defrosted when the layer of ice is more than 3 mm thick. This is an important prerequisite, if the machine is to operate smoothly. To defrost completely, turn the thermostat control anti-clockwise until it stops. The fridge is now turned off. - Page 82 Cleaning 5.7 Cleaning coffee machine (without fridge) 5.7.1 Inside Cleaning Wash your hands carefully. Protect open wounds. You may use protective gloves. Open the coffee machine’s service door (panel) while pulling the left side forwards and swing- ing it completely open. Display message: Selection locked door open...
-
Page 83: Cleaning Coffee Machine (Without Fridge)
Cleaning Cleaning coffee machine (without fridge) Place the coffee outlet cup (b) in the outlet cover (a). With one hand fix the coffee outlet cup (b) to this position. Then move the cof- fee outlet cup (b) with your other hand until it …... - Page 84 Cleaning Cleaning coffee machine (without fridge) Wrong Both outlet openings (b) are slightly sloping to the right or the left. The outlet openings are not of the same length. wrong Close the coffee machine’s service door (panel). Make sure that the service door is tightly closed.
- Page 85 Cleaning Cleaning coffee machine (without fridge) Pull the grouts container out within 6 sec- onds. Otherwise the machine goes back to its normal stand-by mode. The LED on the [ ] button blinks. Display message: Cleaning cleaning container Danger of injury! With the next step the brewing unit is moved into the appropriate cleaning position.
- Page 86 Cleaning Cleaning coffee machine (without fridge) Drop a cleaning tablet, that has been rec- ommended by the manufacturer or an after sales service organization, authorized by the manufacturer, in the filler funnel. Attention! It is crucial that you read the measuring in- structions and danger notices on the deter- gent container’s label.
-
Page 87: Outside Cleaning
Cleaning Cleaning coffee machine (without fridge) 5.7.2 Outside cleaning Do not clean the outside until the rinsing cycle has finished. Display message! Attention! Never clean the outside during the cleaning or Select product rinsing cycle! 12:00 15.10.2001 Attention! Never use scrubbers, abrasives, chemicals and cleaning tools made of metal! 15.1 Lift the drip grid out of the drip tray. -
Page 88: Cleaning Instructions For Cappuccinatore Cpt (Option)
Cleaning 5.8 Cleaning instructions for cappuccinatore CPT (option) Danger of burns! Never reach inside the machine during the automatic cleaning and do not work un- derneath the beverage output. Watch for sharp edges when you clean. Attention! If cleaning is not done on a regular basis, there is no guarantee that the machine will be operating at full capacity. -
Page 89: Daily Cleaning Of Cpt (Option)
Cleaning Cleaning Cappuccinatore CPT 5.8.1 Daily cleaning of CPT (option) Note: After use, the cappuccinatore device must be cleaned as follows: Read the following instructions before you con- tinue cleaning. Attention! It is crucial that you read the measuring in- structions and danger notices on the detergent container’s label. - Page 90 Cleaning Page 5-36 BASO-2 - 01.05 - V07...
-
Page 91: Problems
Problems and Error Messages Contents Chap. Text Page Problems 6.1. Problems and error messages .....................6-2 6.1.1. Coffee machine is blocked, no products can be served ..............6-2 6.1.2. Coffee products cannot be served ....................6-3 6.1.3. No steam products are served ......................6-4 6.1.4. -
Page 92: Problems And Error Messages
Problems and Error Messages PROBLEMS 6.1. Problems and error messages 6.1.1. Coffee machine is blocked, no products can be served Danger! Inform the authorized after sales service immediately if you cannot rectify a fault message! Never open up the machine! Note: Your machine cannot dispense products if the following messages appear on its display. -
Page 93: Coffee Products Cannot Be Served
Problems and Error Messages Communication with an external device has been interrupted. Check that the selection locked external devices are properly connected to the mains and to the coffee ma- ** LAN-Timeout ** chine. If so, and the message still appears: Contact After Sales Service! Communication with an external device has been interrupted. -
Page 94: No Steam Products Are Served
Problems and Error Messages The temperature sensor in the instantaneous coffee heater is defective. temp. sensor coffee Contact After Sales Service! Wait for approx. 5 minutes (too much coffee water may have been served). heating up coffee If the message does not disappear: Contact After Sales Service! rinsing The coffee machine is being automatically rinsed. -
Page 95: Products Can Still Be Served
Problems and Error Messages 6.1.5. Products can still be served The following error messages do not cause the coffee machine to block. How- ever, the problems should be eliminated as quickly as possible. Empty grouts container and put it back. selection locked Five further coffee products can be served after this message is displayed, after container full ! -
Page 96: Problems Without Messages (Display-Messages)
Problems and Error Messages 6.1.6. Chip card error messages The following messages indicate handling errors relating to the chip cards. * read error The card in the card reader is incorrectly inserted (note direction of arrow) or remove card defective. The coffee machine is requesting another card type. -
Page 97: Optional Features
Optional Features Contents Chap. Text Page Optional features Refrigerator ..........................7-2 7.1.1 Description ..........................7-2 7.1.1.1 Refrigerator overview........................7-2 7.1.1.2 Refrigerator installation chart......................7-2 7.1.1.3 Purpose............................7-2 7.1.1.4 Refrigerator serial data .......................7-3 7.1.2 Product data..........................7-3 7.1.2.1 Characteristics ..........................7-3 7.1.2.2 Dimensions ..........................7-3 7.1.2.3 Power supply of the refrigerator....................7-4 7.1.2.4 Standard refrigerator accessories....................7-4 7.1.3... -
Page 98: Optional Features
Optional Features OPTIONAL FEATURES Attention! Follow the safety instructions given in these operating instructions when using all optional components! Refrigerator 7.1.1 Description 7.1.1.1 Refrigerator overview 1. Refrigerator door 2. Milk container 3. Hoses for milk and milk foam 4. Refrigerator service door 7.1.1.2 Refrigerator installation chart See chapter 2.1.2. -
Page 99: Refrigerator Serial Data
Optional Features 7.1.1.4 Refrigerator serial data For warranty purposes, and in case of failure, please transfer the refrigerator’s rating plate to the following area! Serial plate Pull out milk container (sideways on inside) Inst. no ......... Type: ......... Serial number: ......... -
Page 100: Power Supply Of The Refrigerator
Optional Features 7.1.2.3 Power supply of the refrigerator Model Connected load VITRIFRIGO 70 W / 0.49 A 220/240 V AC (PNE) 50/60 Hz For special voltages, contact the manufacturer or the licensed after sales service agent. This appliance complies with EC standard 89/336 in relation to radio interference (EMC). 7.1.2.4 Standard refrigerator accessories Item... -
Page 101: Problems And Troubleshooting
Optional Features 7.1.3 Problems and troubleshooting 7.1.3.1 The refrigerator does not work Attention! Have the link between refrigerator and coffee machine checked only by a ser- vice technician! Check whether The temperature is set to zero; + Capture 7.1.5.2 Set temperature, page. The power supply has been cut off;... -
Page 102: Refrigerator Parts
Optional Features 7.1.4 Refrigerator parts Ventilator valve Thermostat Air supply system 1. Ventilator valve Assembling information for Minus – 2. Milk foam hose (white) Turn anti-clockwise the expander 3. Milk hose (blue) direction raise temperature. turn 4. Hoses in milk container refrigerator off, turn... -
Page 103: Installing The Refrigerator
Optional Features 7.1.5 Installing the refrigerator 7.1.5.1 First-time installation Note: The refrigerator must be installed and initialized by a licensed after sales service agent See also chapter 3. 7.1.5.2 Set temperature You can regulate the refrigerator's temperature with the built-in temperature control. You will find the temperature control when you lift the refrigerator’s panel. -
Page 104: Milk Container Level/Milk Empty (Optional Feature)
Optional Features 7.1.5.3 Milk container level/Milk empty (optional feature) Option: At given time intervals, a built-in ultrasonic temperature sensor in the refrig- erator will measure the milk level (the milk’s surface) in the milk container. If the milk level drops to a programmable “alarm level” the following message will be displayed on the coffee machine: select product milk empty... -
Page 105: Payment Systems
Optional Features Press the [ ] key to save the calibrated value. The following message is displayed: …Save… select product milk empty The milk container can now be filled. Once the filled milk container has been replaced in the refrigerator, the following mes- sage is displayed: select product 12:00... -
Page 106: Alarm Functions
Optional Features Alarm functions The purpose of the alarm functions is to attract your attention. If an optional acoustic and/or visual alarm is installed and one of the following informa- tion texts or error messages is activated, a corresponding warning signal is emitted in addition to the message on the display. - Page 107 Optional Features The battery needs changing. battery flat See also chapter 6.1.1. Serial EEPROM is defective. **EEPROM error! See also chapter 6.1.1. The flow meter is defective. flowmeter defect See also chapter 6.1.5. The coffee water temperature sensor is defective. temp.
-
Page 108: Disable Driver
Optional Features Communication with an external payment system is interrupted. comms. interrupted See also chapter 6.1.1. Communication with an external payment system is interrupted. EE LAN-Timeout See also chapter 6.1.1. 7.5.3 Disable driver The same driver level causes the machine to block. The driver is disabled because for some reason, the machine is no longer functioning correctly. -
Page 109: Cpt Cappuccino Unit
Optional Features CPT cappuccino unit Option: The following products can be prepared using the CPT: Cappuccino, manual preparation Hot milk, manual preparation For further information, contact your licensed dealer. Danger! Once you have pressed the dispense buttons, keep your hands and other parts of your body away from the beverage dispensing area in order to protect yourself against scalding! 7.6.1... -
Page 110: How To Prepare Cappuccino Magic And Hot Milk Manually Using A Cpt (Optional Extra)
Optional Features 7.6.2 How to prepare Cappuccino Magic and hot milk manually using a CPT (optional extra) Danger! Never point the steam jet towards parts of your body! Option: 1. Press the [ ] key twice in rapid succession to remove any condensation from the pipe (only possible in start/stop mode). -
Page 111: Special Steam
Optional Features Special steam 7.7.1 Special steam with automatic steam cut-off Danger! Never point the steam jet towards parts of your body! Option: This special steam outlet measures the temperature of the product to be heated. The steam output automatically cuts off when the fixed temperature setting programmed by the service engineer is reached. -
Page 112: Nd Mill (Duo Mill)
Optional Features mill (duo mill) Option: Installing a second coffee mill enables normal and decaffeinated coffee to be freshly ground. Can be retrofitted. For further information, contact your licensed dealer. Water softener (Filados/Brita) Option: Using a water softener improves the quality of the water or softens it to the hardness recommended for the coffee machine. -
Page 113: User Instructions For Special Coffee Machines (Water Tank)
Optional Features 7.13 User instructions for special machines (water tank) The following information only applies to machines with fresh and wastewater tanks. 7.13.1 Refill fresh water tank When the level in fresh water tank is too low, the [ ] key flashes. The following message is displayed: selection locked watertank empty... - Page 114 Optional Features Page 7-18 BASO-2 - 02.07 - V07...
-
Page 115: Payment Systems
Payment Systems Contents Optional features: This chapter addresses users who have a payment system installed on their coffee machine. Available payment systems The coffee machine can be used with or without payment. Various systems and possibilities exist for payment mode. Chap. - Page 116 Payment Systems Chap. Text Page 8.4.1.2.4. Log on waiter..........................8-17 8.4.1.2.5. Log off waiter..........................8-18 8.4.1.2.6. Display waiter numbers......................8-19 8.4.1.2.7. Data backup ..........................8-19 8.4.1.2.8. Change PIN code........................8-19 8.4.1.3. COPY WAITER card ........................ 8-20 8.4.1.3.1. Menu ............................8-20 8.4.1.3.2.
-
Page 117: Payment Systems
Payment Systems Payment systems 8.1. Cards compatible with all payment systems 8.1.1. MASTER card The MASTER card is a chip payment card that is compatible with all payment sys- tems, both external and internal. It entitles the bearer to obtain beverages from the machine free of charge, without these being booked to the payment system. -
Page 118: Money Card
Payment Systems 8.2.1.1. MONEY card The MONEY card is a credit card, which is inserted into the card reader to obtain a beverage. Payment is debited from the card and the remaining credit displayed. The various MONEY cards (MONEY A-J) have different price levels (0%-255% of the programmed product price). -
Page 119: Program The Amount Of Water/Coffee Powder Dispensed For Individual Coffee Products
Payment Systems Program the amount of water/coffee powder dispensed for individual coffee products 8.2.1.1.2. credit operation 12:00 15.10.2001 Insert MONEY card into the card reader: credit xx.xx select product 2. Hold [ ] key down for approximately 4 seconds. select product store ? ` Decaf ` 3. -
Page 120: Load Card
Payment Systems 8.2.1.2. LOAD card The LOAD card is used to load or delete credit onto/from MONEY cards. If you have no LOAD card, MONEY cards can be reloaded by your licensed after sales service. The LOAD card is an optional feature and is not included in the standard delivery package. -
Page 121: Delete Credit From Money Card
Payment Systems 4. Remove LOAD card. insert card MONEY / LOAD - 5. Insert MONEY card into the card reader. amount xx.xx Amount = Credit balance entry x.xx Enter = Credit to be loaded 6. Using the [ ] and [ ], enter the amount of credit to be loaded. Pressing the [ ] or [ ] key adds or subtracts credit by the factor programmed by the service en- gineer. -
Page 122: Display Total Amount Of Credit Loaded And Reset (Money Card)
Payment Systems 8. Delete another MONEY card Repeat steps 5-7. Back to menu Insert LOAD card into the card reader. delete MONEY-card execute ‘ Decaf ’ 9. Press [ ] or [ ] key to reach the next menu, remove LOAD card coffee machine ready in payment mode. -
Page 123: Enable Money Card
Payment Systems 8.2.1.2.7. Enable MONEY card 1. Insert LOAD card into the card reader. 2. Press [ ] or [ ] key until the following menu is displayed: release MONEY-card execute ` Decaf ` 3. Press [ ] key. remove card 4. -
Page 124: Money Card History
Payment Systems 8.2.1.2.9. MONEY card history Insert LOAD card into the card reader. Press [ ] or [ ] key until the following menu is displayed: MONEY history display ` Decaf ` 3. Press [ ] key. Nr. xx xxxxx 12:00 15.10.2001 The card and registration numbers and the time and date the card was last written to... -
Page 125: Change Pin Code
Payment Systems 8.2.1.3. PROGRAM card In payment mode using MONEY cards, the PROGRAM card is used for statistical purposes and for setting user-relevant data. The PROGRAM card is an optional feature and is not included in the standard deliv- ery package. 8.2.1.3.1. -
Page 126: Payment With Self-Service Systems
Payment Systems 8.3. Payment with self-service systems 8.3.1. Token slot and related systems Chip cards required - None - MASTER card (see chapter 8.1). For all the functions described in this chapter, it is assumed that the machine is ready for routine operation in payment mode. -
Page 127: Cf350 Totalisator Dual-Price Coin Slot
Payment Systems 8.3.2.1. Prepare beverages 1. When the coffee machine is ready, the following message is displayed: insert money 12:00 15.10.2001 2. Insert the required amount into the coin slot. Warning: Only use the coins intended for the coin slot. When a token is inserted: When coins are inserted: price level -1... -
Page 128: Prepare Beverages
Payment Systems 8.3.4.1. Prepare beverages 1. When the coffee machine is ready, the following message is displayed: waiter release 12:00 15.10.2001 2. Plug waiter jack into coffee-bar system. select product 12:00 15.10.2001 3. Press product key. Product is served. To ensure that payment mode functions correctly, the machine must be switched on and payment mode enabled using the PROGRAM card (see chap- ter 4.6.1.3). -
Page 129: Payment Using Waiter Account
Payment Systems 8.4. Payment using Waiter Account 8.4.1. Waiter Account chip card system For all the functions described in this chapter, it is assumed that the coffee machine is ready for routine operation in payment mode. Chip cards required: - WAITER card(s) - MANAGER card - PROGRAM card - COPY WAITER card... -
Page 130: Manager Card
Payment Systems 8.4.1.2. MANAGER card The MANAGER-chip card is used to program data relevant to routine Waiter Account payment mode. • The MANAGER card is an optional feature and is not included in the standard deliv- ery package 8.4.1.2.1. Menu Waiter payment Data backup Display waiter... -
Page 131: Reset Waiter Card
Payment Systems 8.4.1.2.3.2. Reset WAITER card This function enables you to reset waiter sales. The logged on WAITER cards are required in order to do so. 1. Insert MANAGER card in to the card reader. 2. Press [ ] or [ ] until the following menu is displayed: waiter accounting execute ‘... -
Page 132: Log Off Waiter
Payment Systems If 0 is entered, the following message is displayed: waiter 0 no. invalid If a number is entered which already exists, the following message is displayed: waiter 1 no. exists In both cases, remove the WAITER card, re-insert it and enter a new number 7. -
Page 133: Display Waiter Numbers
Payment Systems 8.4.1.2.6. Display waiter numbers This function enables you to disable waiter sales. The logged-on WAITER cards are not required in order to do so. Insert MANAGER card into the card reader. 2. Press [ ] or [ ] until the following menu is displayed: 3. -
Page 134: Copy Waiter Card
Payment Systems 8.4.1.3. COPY WAITER card The COPY WAITER chip card enables you to transfer the table of logged-on WAITER cards to another machine. The COPY WAITER card is an optional feature and is not included in the stan- dard delivery package. 8.4.1.3.1. -
Page 135: Program Card
Payment Systems 8.4.1.4. PROGRAM card In Waiter Account payment mode, the PROGRAM card is used for statistical pur- poses and for setting user-relevant data. The PROGRAM card is an optional feature and is not included in the standard delivery package. (For description, see chapter 4.6.1/article ref. - Page 136 Payment Systems Page 8-22 BASO-2 - 02.08 - V07...
- Page 137 Standard Settings Contents Chap. Text Page 9.1. Standard Settings (Software NT 2000 V 1.05) ................9-2 Page 9-1 BASO-2 - 02.09 - V07...
- Page 138 Standard settings 9.1. Standard Settings (Software NT 2000 V 1.05) Products enabled / enabled / enabled / Ristretto Links 45 % disabled disabled disabled enabled / enabled / enabled / Espresso Links 45 % disabled disabled disabled enabled / enabled / enabled / Coffee Links...
-
Page 139: Standard Settings
Standard settings Standard Settings (Software NT 2000 V 1.05) Start / Stop Milk timeout 0-150 sec Milk 0-99.0 sec Milk enabled / disabled Standard 10.0 sec Standard 10.0 sec Start / Stop Milk foam timeout 0-150 sec Milk foam 0-99.0 sec Milk foam enabled / disabled Standard 10.0 sec... - Page 140 Standard settings Page 9-4 BASO-2 - 02.09 - V07...
-
Page 141: Appendix
Appendix Contents Chap. Text Page appendix................... 10-2 10.1 CE Declaration of conformity ......................10-2 10.1.1 Cleaning agents “Weekly cleaning agents” ..................10-4 10.1.2 Cleaning tablet for the coffee machine.....................10-5 10.2 Performance plate of the steam generator and the instant heater ...........10-6 10.2.1 Coffee machine..........................10-6 10.2.1.1 Steam generator (Type - DA 61156) ....................10-6... -
Page 142: Ce Declaration Of Conformity
Electrical Equipment for Use within Stipulated Voltage Lim- its. 89/336/EEC Electromagnetic Compatibility. The declaration of conformity can be obtained from the following ad- dresses: M. Schaerer AG Gewerbestrasse 15 CH - 3302 Moosseedorf / Switzerland Phone: ++41 031 85 85 111... - Page 143 Appendix 10.2 Cleaning agents 10.2.1 Cleaning agent “Daily cleaning agent” Attention! Before you use the cleaning agent read the label attached to the cleaning agent container and the "HEALTH & SAFETY DATA SHEET." Should you not be in possession of the safety sheet, please order it from the distributing firm.
-
Page 144: Cleaning Agents "Weekly Cleaning Agents
Appendix 10.1.1 Cleaning agents “Weekly cleaning agents” Attention Before you use the cleaning agent read the label attached to the cleaning agent container and the "HEALTH & SAFETY DATA SHEET.” Should you not be in possession of this safety sheet, please order it from the distributing firm. -
Page 145: Cleaning Tablet For The Coffee Machine
Appendix 10.1.2 Cleaning tablet for the coffee machine Attention! Before you use the cleaning agent read the label attached to the cleaning agent container and the “HEALTH AND SAFETY DATA SHEET.” Should you not be in possession of this safety sheet, please order it from the distributing firm. -
Page 146: Performance Plate Of The Steam Generator And The Instant Heater
0.8 l Year of construction 20.. 20.. 20... Manufacture number DA..HW..HW..Steam generator (Type - DA 61156) 10.2.1.1 M. Schaerer AG, CH-3302 Moosseedorf F-Nr. DA..Constr. year: 20.. pmax 12 bar Tmax 192ºC Vol. 0.8 l : 230 VAC Tmin 10ºC... -
Page 147: Cleaning Agent
Appendix 10.3 Environmental aspects Packaging The machines are shipped in reusable cartons and palettes. Spare parts Parts exchanged during a service are reconditioned as far as possible and used again. Coffee grouts The grouts in the grouts container can put in the garden or added to the compost. - Page 148 Appendix Page 10-8 BASO-2 - 02.10 - V07...
-
Page 149: Index
Index Index A C D E F G H I K L M N O P Q R S T U W Text Kapitel Seite Index Accident prevention regulations ..................0.4....0 -7 Alarm functions........................7.5 ....7 -10 Alarm group 1 (Info)...................... - Page 150 Index Text Kapitel Seite Coffee machine is blocked, no products can be served............ 6.1.1....6 -2 Coffee products cannot be served ..................6.1.2....6 -3 COFFEE TEST card......................4.6.3....4 26 COPY WAITER card ......................8.4.1.3... 8 -20 Copy waiter table “Card à Coffee machine” ..............8.4.1.3.2..8 -20 Copy waiter table “Coffee machine à...
- Page 151 Index Text Kapitel Seite Index First-time installation......................3.1....3 -1 First-time installation......................7.1.5.1 ..For your safety........................0.2....0 -4 Fridge maintenance......................5.6 ....5 -27 Index General..........................0.4.1..... 0 -7 Ground coffee test program ....................4.6.3.2..4 -26 Index Heat beverage ........................
- Page 152 Index Text Kapitel Seite Index Making the coffee machine ready for operation ..............4.4.1....4 -5 Malfunctions........................0.4.3....0 -7 MANAGER card......................... 8.4.1.2... 8 -16 MASTER card........................8.1.1....8 -3 Menu..........................4.5.1.1... 4 -12 Menu..........................4.5.2.1... 4 -17 Menu..........................4.6.1.1... 4 -18 Menu..........................
- Page 153 Index Text Kapitel Seite Prepare beverages ......................8.3.1.1..8 -12 Prepare beverages ......................8.3.2.1..8 -13 Prepare beverages ......................8.3.4.1..8 -14 Prepare Cappuccino Magic, milk coffee, Latté or Macchiato automatically (with optio. 4.4.8..... 4 -9 refrigera.) ...........................
- Page 154 Index Text Kapitel Seite Rinsing in between: ......................5.2....5 -3 Rinsing the coffee pipes ....................5.2.1....5 -3 Rinsing the milk pipes (fridge option) ................5.2.2....5 -3 Routine operation ......................4.4....4 -5 Index Safety..........................0.1....0 -4 Safety notes and rating plates ...................
- Page 155 Index Text Kapitel Seite Water connection/outlet..................... 2.2.4..... 2 -6 Water softener (Filados/Brita) ................... 7.9 ....7 -16 Weekly cleaning coffee machine with fridge ..............5.4 ....5 -16 Weekly cleaning of CPT (option)..................5.8.2 ..... 5 -35 Welcome..........................1.1....1 -1 Page 11-7 BASO-2 - 02.11 - V07...
- Page 156 Index Page 11-8 BASO-2 - 02.11 - V07...
Need help?
Do you have a question about the Ambiente 2 and is the answer not in the manual?
Questions and answers