Table of Contents
Advertisement
Quick Links
Assembly and Operating Instructions for
Photographs are not to scale.
Specifications subject to change
without prior notice.
WARNING
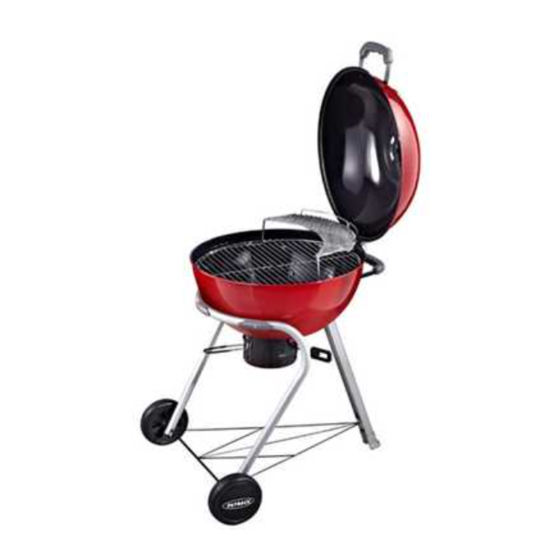
Outback® Charcoal Kettle
CK575
For outdoor use only. Not for commercial use.
Read instructions before using the appliance. Failure to follow instructions could
result in death, serious bodily injury, and/or property loss.
Warning: accessible parts may be very hot. Keep young children and pets away.
CAUTION: Do not use spirit or petrol for lighting or re-lighting! Use only
firelighters complying to EN1860-3!
Do not move the appliance during use.
Any modification of the appliance, misuse, or failure to follow the instructions
may be dangerous and will invalidate your warranty. This does not affect your
statutory rights.
Retain these instructions for future reference.
For Flare-up control please refer to the 'OPERATION' section of this manual.
Advertisement
Table of Contents

Related Manuals for Outback Charcoal Kettle CK575


Summary of Contents for Outback Charcoal Kettle CK575
- Page 1 Assembly and Operating Instructions for Outback® Charcoal Kettle CK575 Photographs are not to scale. Specifications subject to change without prior notice. For outdoor use only. Not for commercial use. Read instructions before using the appliance. Failure to follow instructions could result in death, serious bodily injury, and/or property loss.
-
Page 2: Parts List
Parts List Quantity varies according to model purchased. Specifications subject to change without prior notice. For more details on hardware, please see the corresponding ‘Hardware Reference Diagram’. Outback® Charcoal Kettle CODE PART Hood Hood Handle HOOD Hood Heat Shield Heat Indicator... -
Page 3: Parts Diagram
Parts Diagram Quantity varies according to model purchased. Specifications subject to change without prior notice. For more details on hardware, please see the corresponding ‘Hardware Reference Diagram’. - Page 4 Hardware Reference Diagram Specifications subject to change without prior notice.
- Page 5 Assembly IMPORTANT! TOOLS NEEDED FOR ASSEMBLY: Medium size flat blade or Phillips/Crosspoint screwdriver, adjustable spanner or metric spanner set. Remove any internal components or packaging from the barbecue body. Whilst every care is taken in the manufacture of this product, care must be taken during assembly in case sharp edges are present.
- Page 6 Thread the straight ends of the Leg Support Rack (C3) through the holes in the bent leg and then insert the securing end of the leg support rack into the hole in the end of the leg, as shown. Secure the Legs (C2) to the leg supports by inserting M6x15 Bolts (D1x2pcs) and screwing into leg supports.
- Page 7 Carefully turn the completed trolley over, right side up. Screwing bolts of the bent leg and barbecue body. Make sure it is firmly connected. Note- Spacer (D3) need for large side up, as shown. Place the Hood (A1) onto the barbecue body and align the hinge tops and bottoms. Insert the Hinge Pin (D6) through both hinge halves and lock into place with R-Clip (D7) as shown.
- Page 8 Place the Ash Tray / Vent Tool (B8) to insert Ash Tray (B7), and slide it into position underneath the barbecue body. Caution: The ash tray may become very hot. Place the Charcoal Grill (B2) onto the lower brackets in barbecue body. Ensure the charcoal grill lies level within the body.
- Page 9 Place the Warming Rack (B4) onto the cooking grill in barbecue body. Ensure the warming rack lies level within the body. ASSEMBLY IS NOW COMPLETE. PROCEED TO THE NEXT PAGE FOR INSTRUCTIONS ON OPERATION AND MAINTENANCE.
- Page 10 Grill Lifting Handle use reference To remove cooking grill To add charcoal...
-
Page 11: Installation
Important Information not the ash tray. Ensure the ash tray is in place before use. Please read these instructions carefully Do not move the cooking grill and charcoal before assembly and use of your barbecue. grill until after the appliance has completely cooled down. - Page 12 to be closer than 5cm to the surrounding charcoal. With the vents open, more air will sides of the barbecue body. circulate and the charcoal will burn faster than with the vents closed. Caution—the appliance may become very hot. Oven gloves and ash Preparation Before Cooking tray / vent tool.
-
Page 13: Care And Maintenance
yourself from the flames. cleaning. Do not leave the barbecue exposed to outside weather conditions or stored in damp, moist areas. If a fat fire occurs, please see the instructions given below. Never handle hot parts with unprotected hands. Fat Fires Empty and clean the ash tray of food debris Never douse the barbecue with water when after each cooking session. - Page 14 a fault in the barbecue and is therefore not Notes: covered by the terms of the warranty. If required, the tray can be washed in hot soapy water. Barbecue Body Regularly remove excess grease or fat from the barbecue body using a cloth wrung out in hot soapy water and dry thoroughly.
- Page 15 The porcelain-enamelled hood and porcelain-enamelled bowl of the Charcoal Kettle are warranted for a period of five (5) years from the date of purchase. Outback UK will, within this period, supply replacements for defective parts free of charge provided that: The product has not been used for trade, professional or hire purposes.
Need help?
Do you have a question about the Charcoal Kettle CK575 and is the answer not in the manual?
Questions and answers