Table of Contents
Advertisement
Quick Links
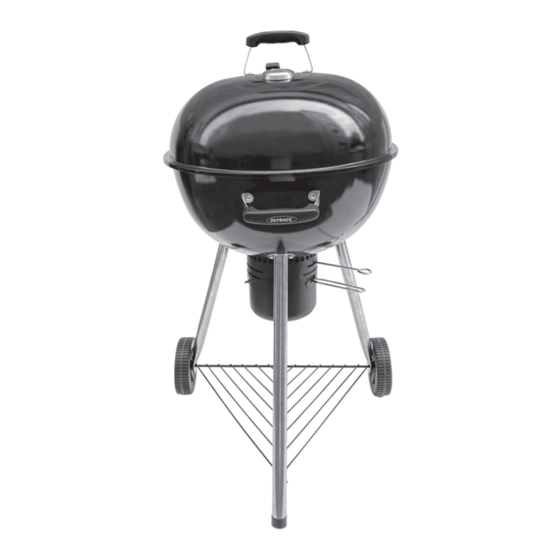
Assembly and Operating Instructions for
Outback
Photographs are not to scale.
Specifications subject to change
without prior notice.
WARNING
®
Comet Kettle Charcoal Barbecue
For outdoor use only. Do not use indoors! Not for commercial use.
Read instructions before using the appliance. Failure to follow instructions
could result in death, serious bodily injury, and/or property loss.
WARNING! Do not use spirit or petrol for lighting or re-lighting! Use only
firelighters complying to EN1860-3!
WARNING! This barbecue will become very hot, do not move it during operation!
WARNING! Accessible parts may be very hot. Keep children and pets away!
The barbecue has to be installed on a secure level base prior to use.
Any modification of the appliance, misuse, or failure to follow the instructions
may be dangerous and will invalidate your warranty. This does not affect your
statutory rights.
Retain these instructions for future reference.
Do not use the barbecue in a confined and/or habitable space e.g. houses, tents,
caravans, motor homes, boats. Danger of carbon monoxide poisoning fatality.
Do not cook before the fuel has a coating of ash.
K102
Advertisement
Table of Contents

Summary of Contents for Outback Comet Kettle K102
- Page 1 Assembly and Operating Instructions for ® Outback Comet Kettle Charcoal Barbecue Photographs are not to scale. Specifications subject to change K102 without prior notice. For outdoor use only. Do not use indoors! Not for commercial use. Read instructions before using the appliance. Failure to follow instructions could result in death, serious bodily injury, and/or property loss.
-
Page 2: Parts List
Parts List Quantity varies according to model purchased. Specifications subject to change without prior notice. For more details on hardware, please see the corresponding ‘Hardware Reference Diagram’. Outback® Comet CODE PART Kettle Charcoal BBQ Hood Hood Hook HOOD Handle Hood Air Vent... -
Page 3: Parts Diagram
Parts Diagram Quantity varies according to model purchased. Specifications subject to change without prior notice. For more details on hardware, please see the corresponding ‘Hardware Reference Diagram’. - Page 4 Assembly IMPORTANT! TOOLS NEEDED FOR ASSEMBLY: Medium size flat blade or Phillips/Crosspoint screwdriver, adjustable spanner or metric spanner set. Remove any internal components or packaging from the barbecue body. Whilst every care is taken in the manufacture of this product, care must be taken during assembly in ...
- Page 5 Attach the Left Rear Leg (C2) and the Grill Bracket (B5) onto the Barbecue Body(B1) using the M6x12 bolts (D1x2pcs), M6 washers (D4X2pcs) and M6 Nuts(D2x2pcs) as shown. Repeat the above process for the Right Rear Leg(C3). Attach the Leg Support Rack (C4) onto the legs as shown.
- Page 6 Slide the Wheels (C5) onto each straight bar of the leg support rack. Secure the wheels into place with the Axle Nut (D7x2pcs) . Place the Wheel Hubcaps (C6) onto the outside of the wheels. Place the air vent wire handle pass through the ash tray bracket slot as per above image .
- Page 7 Top View Bottom View Attach the Ash Tray Bracket Assembly onto the Barbecue Body (B1) using the M5x12 bolts (D5x3pcs) and M5 Nuts (D6x3pcs) as shown. Attach the Air vent(B9) to Barbecue body(B1) using the M6 X 12 Bolt(D1x1pce) and M6 Nut(D2x1pce).
- Page 8 Place the Charcoal Grill (B2) onto the lower brackets in the barbecue body. Ensure the charcoal grill lies level within the body. Place the Cooking Grill (B3) onto the upper brackets in the barbecue body. Ensure the cooking grill lies level within the body. Attach the Handle (A3) and Hood Hook (A2) onto the Hood (A1) using M6x12 Bolt (D1x2pcs), M6 washers (D4X2pcs) and M6 Nuts(D2x2pcs) as shown.
- Page 9 Attach the Heat Indicator (A5) onto the Hood (A1) using the M8 Nut (D3x1pc) as shown. Attach the Air Vent (A4) onto the Hood (A1) using the M5x12 bolt (D5x1pc) and M5 Nut (D6x1pc) as shown. ASSEMBLY COMPLETE. PROCEED NEXT PAGE INSTRUCTIONS ON OPERATION AND MAINTENANCE.
- Page 10 Grill Lifting Handle usage reference To remove the cooking grill for adding charcoal.
-
Page 11: Installation
Important Information Ensure the ash tray is in place before use. Do not move the cooking grill and charcoal Please read these instructions carefully grill until after the appliance has completely before assembly and use of your barbecue. cooled down. - Page 12 When placing charcoal, never allow charcoal Heat Control The adjustable vents in the hood and ash tray to be closer than 5cm to the surrounding can be used to control the burning of the sides of the barbecue body. charcoal.
-
Page 13: Care And Maintenance
directly onto the charcoal. Always protect your and especially after extended periods of hands when handling anything near the cooking storage. Ensure barbecue surface of the barbecue and take care to protect components sufficiently cool before yourself from the flames. cleaning. - Page 14 Failure to keep it clean, and excessive build up Notes: can result in a fat fire. This can be hazardous and severely damage the barbecue. This is not a fault in the barbecue and is therefore not covered by the terms of the warranty. If required, the tray can be washed in hot soapy water.
- Page 15 The product has not sustained damage through foreign objects, substances or accidents. ® The care and maintenance instructions given in your OUTBACK manual have been followed. Any warranty and guarantee claims shall be rendered void in the event of improper use of the barbecue or the use of non-approved fuels.


Need help?
Do you have a question about the Comet Kettle K102 and is the answer not in the manual?
Questions and answers