Table of Contents
Advertisement
Quick Links
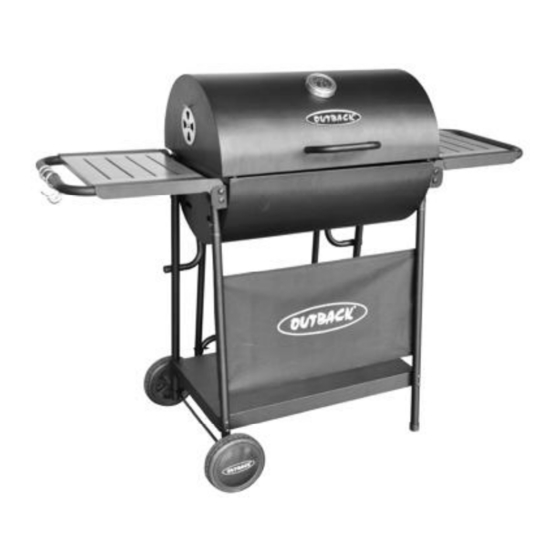
Assembly and Operating Instructions for
Outback® Full Drum Charcoal BBQ
Photographs are not to scale.
Specifications subject to change
without prior notice.
WARNING
CD200
•
For outdoor use only. Not for commercial use.
•
Read instructions before using the appliance. Failure to follow instructions could
result in death, serious bodily injury, and/or property loss.
•
Warning: accessible parts may be very hot. Keep young children and pets away.
•
CAUTION: Do not use spirit or petrol for lighting or re-lighting! Use only
firelighters complying to EN1860-3!
•
Do not move the appliance during use.
•
Any modification of the appliance, misuse, or failure to follow the instructions
may be dangerous and will invalidate your warranty. This does not affect your
statutory rights.
•
Retain these instructions for future reference.
•
For Flare-up control please refer to the 'OPERATION' section of this manual.
Advertisement
Table of Contents

Subscribe to Our Youtube Channel
Related Manuals for Outback CD200


Summary of Contents for Outback CD200
- Page 1 Assembly and Operating Instructions for Outback® Full Drum Charcoal BBQ CD200 Photographs are not to scale. Specifications subject to change without prior notice. • For outdoor use only. Not for commercial use. • Read instructions before using the appliance. Failure to follow instructions could result in death, serious bodily injury, and/or property loss.
-
Page 2: Parts List
Parts List Quantity varies according to model purchased. Specifications subject to change without prior notice. For more details on hardware, please see the corresponding ‘Hardware Reference Diagram’. Outback® Full Drum CODE PART Charcoal BBQ Hood Heat Indicator HOOD Hood Handle... -
Page 3: Parts Diagram
Parts Diagram Quantity varies according to model purchased. Specifications subject to change without prior notice. For more details on hardware, please see the corresponding ‘Hardware Reference Diagram’. - Page 4 Hardware Reference Diagram Specifications subject to change without prior notice.
- Page 5 Assembly IMPORTANT! TOOLS NEEDED FOR ASSEMBLY: Medium size flat blade or Phillips/Crosspoint screwdriver, • adjustable spanner or metric spanner set. Remove any internal components or packaging from the barbecue body. • Whilst every care is taken in the manufacture of this product, care must be taken during assembly in •...
- Page 6 Unscrew the Locknuts (C8) from both ends of the Axle (C9). Slide the axle through the corresponding holes in the left legs. Slide the Axle Spacer (C7) and the Wheels (C10) over each end of the axle. Secure the wheels into place with the locknuts. Place the Wheel Hubcaps (C11) onto the outside of the wheels.
- Page 7 Carefully place the barbecue body assembly onto the trolley assembly and fix using M6x35 Bolts (D2x4pcs) and M6 Nuts (D3x4pcs) as shown. Rear view of the barbecue Attach the Bend Bracket Hook (B16) onto the Barbecue Body (B1) using the M5x10 Bolts (D9x2pcs) and M5 Nuts (D10x2pcs).
- Page 8 Attach the Bend Bracket (C14) to the rear legs and fix both ends using the ST4.0x10 Screws (D6x2pcs) as shown. Attach one Rear Support Leg (C12) to the Bend Bracket (C14) using the Leg Pin (D8) and R Shape Clips (D4) as shown. Repeat above process for other rear leg.
- Page 9 Attach the Rear Bracket (C13) to the rear support legs using the M6x35 Bolts (D2x2pcs) and M6 Nuts (D3x2pcs) as shown. Attach one Silicone Pad (C15) onto the Bend Bracket (C14) using the ST4.0x10 Screw (D6) and M4 Spacer (D7) as shown. Repeat above process for other silicone pad. Then place the support assembly onto the bend bracket hook.
- Page 10 Attach a Side Shelf Bracket (B3) onto the Barbecue Body (B1) using the M6x15 Bolts (D1x2pcs) and M6 Nuts (D3x2pcs). Slide the Side Shelf Pin (D5) through the upper fixing hole in Side Shelf Bracket(B3), and secure with a R Shape Clip (D4) as shown. Repeat above process for other side shelf bracket.
- Page 11 Remove the retaining bolts from Hood Handle (A3), then attach it onto the Hood (A1) using the retaining bolts. Rear view of the barbecue Attach the hood assembly onto the barbecue body using the M5x10 Bolts (D9x6pcs).
- Page 12 Connection pin Connection plate Fix the hood through the connection plate holes hook-onto the connection pin, as shown. Charcoal grill support Hook the Charcoal Grills (A4) into charcoal grill support, as shown.
- Page 13 Cooking grill support Slide the Cooking Grills (A5) into the corresponding cooking grill support. Configuration: Upper layer cooking grill support - Left Cooking Grill; Lower layer cooking grill support - Right Cooking Grill. Warning: To prevent the hood cooking grill falling, when you close the cover, slide the hood right cooking grill to left-side.
- Page 14 Attach the Screen (C5) to the left/right front legs using the ST4.0x10 Screw (D6x6pcs) as shown. Hood Usage Reference Remove the charcoal grills and cooking grills from the barbecue hood.
- Page 15 Dual Body BBQ Usage Reference Step 1 Step 2 1. Open the rear support assembly. 2. Open the barbecue hood through the connection plate holes, as shown.
- Page 16 Grill Lifting Handle Usage Reference To replenishing the charcoal To remove and replace cooking grill...
-
Page 17: Installation
cooled before removing it. Important Information Parts sealed by the manufacturer or his agent must not be altered by the user Please read these instructions carefully before If you have any queries regarding these assembly and use of your barbecue. instructions, contact your local dealer. - Page 18 Lining the Ash Tray Roasting Hood Cooking Line the ash tray with aluminium foil. This will Barbecues equipped with a roasting hood give the option to form an ‘oven’ for roasting or baking protect the tray, help better reflect heat, and make cleaning easier when barbecuing is finished.
-
Page 19: Care And Maintenance
required. To prevent rusting, wipe chrome plated SHOULD BE A POWDER TYPE. parts with cooking oil after rinsing and drying. DO NOT REMOVE THE ASH TRAY. • • If the fire does not seem to be abating or Cooking Surfaces appears to be worsening, contact your local When the barbecue has cooled, clean with hot Fire Brigade for assistance. - Page 20 OUTBACK® WARRANTY OUTBACK® barbecues are warranted to the original purchaser against defects in materials and workmanship. OUTBACK® will supply replacements for defective parts free of charge provided that: The product has not been used for trade, professional or hire purposes.
Need help?
Do you have a question about the CD200 and is the answer not in the manual?
Questions and answers