Table of Contents
Advertisement
Assembly and Operating Instructions for
Outback® Cuisine and Outback® Connoisseur Gas Barbecues
Photographs are not to scale.
Specifications subject to
change without prior notice.
•
For outdoor use only. Not for commercial use.
•
Read instructions before using the appliance. Failure to follow instructions
could result in death, serious bodily injury, and/or property loss.
•
Warning: accessible parts may be very hot. Keep young children away.
•
Do not move the appliance during use.
•
Turn off the gas supply at the gas bottle after use.
•
Any modification of the appliance, misuse, or failure to follow the instructions
may be dangerous and will invalidate your warranty. This does not affect your
statutory rights.
WARNING
•
Retain these instructions for future reference.
•
Leak test annually, and whenever the gas bottle is removed or replaced.
•
For Flare-up control please refer to the 'OPERATION' section of this manual.
FOR YOUR SAFETY
If you smell gas:
1. Shut off gas to the appliance.
2. Extinguish any open flame.
3. Open barbecue lid or hood.
4. If odour continues, discontinue use and
contact your local dealer.
Gas Barbecues
FOR YOUR SAFETY
1. Do not store or use petrol or other flammable
vapours or liquids in the vicinity of this or any
other appliance.
2. A gas bottle not connected for use shall not be
stored in the vicinity of this or any other
appliance.
EN (Europe)
0359
Advertisement
Table of Contents

Related Manuals for Outback Cuisine


Summary of Contents for Outback Cuisine
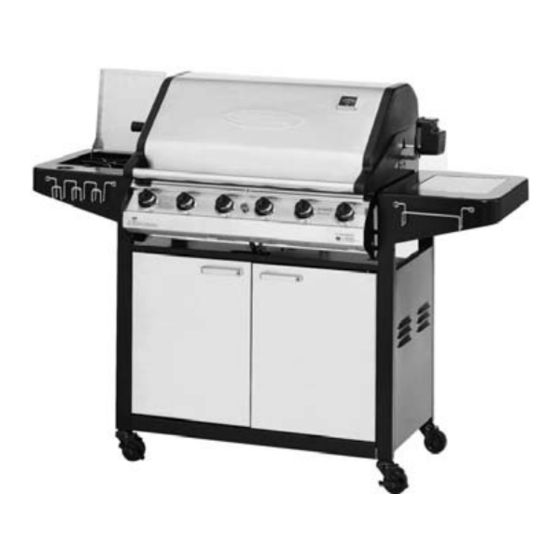
- Page 1 Gas Barbecues Assembly and Operating Instructions for Outback® Cuisine and Outback® Connoisseur Gas Barbecues EN (Europe) Photographs are not to scale. Specifications subject to 0359 change without prior notice. • For outdoor use only. Not for commercial use. • Read instructions before using the appliance. Failure to follow instructions could result in death, serious bodily injury, and/or property loss.
-
Page 2: Parts List
Parts List Quantities vary according to model purchased. Specifications subject to change without prior notice. For more details on hardware, please see ‘Hardware Reference Diagram’. Outback® Outback® CODE PART Cuisine Connoisseur Hood Handle Hood Hinge Pin HOOD Hinge Pin Clip... - Page 3 Outback® Cuisine Parts Diagrams Quantities vary according to model purchased. Specifications subject to change without prior notice. For more details on hardware, please see ‘Hardware Reference Diagram’.
- Page 4 Outback® Connoisseur Parts Diagrams Quantities vary according to model purchased. Specifications subject to change without prior notice. For more details on hardware, please see ‘Hardware Reference Diagram’.
- Page 5 Hardware Reference Diagram Specifications subject to change without prior notice. E3, E4, E5, E6 E1, E2 E7, E8...
- Page 6 Assembly IMPORTANT! • Tools Required: Medium size flat blade or Phillips/Crosspoint screwdriver, adjustable spanner or metric spanner set • The assembly of this barbecue requires 2 people. • Carefully unpack the trolley box and remove all internal packaging before commencing assembly. •...
- Page 7 Nuts (E2). Cuisine Connoisseur Cuisine Users: Attach the Support (C23) between the Top and Bottom Panels using the Screws (E1) and Nuts (E2). Connoiseur Users: Attach the Divider (C9) between the Top and Bottom Panels using the Screws (E1) and Nuts (E2).
- Page 8 Attach the Back Panel (C12) to the assembled portion of the cabinet using the Screws (E1). Screw the Casters (C18) into the L/H Panel and the Lockable Casters (C19) into the R/H Panel.
- Page 9 Remove the Screws from the L/H Panel. Attach the L/H Side Burner Shelf (C3) to the L/H Panel by replacing the Screws. Remove the Screws from the R/H Panel. Attach the R/H Side Shelf (C5) to the R/H Panel by replacing the Screws.
- Page 10 Insert Spacers (E5) into holes in the sidewall of the body and turn 90 degrees to lock in place. Carefully lay the Barbecue Body (B1) onto the supports on the cabinet. WARNING: DO NOT RELEASE THE BARBECUE BODY WHILE THE BARBECUE HAS NOT BEEN PROPERLY SEATED. THIS MAY RESULT IN INJURY OR DAMAGE TO YOUR BARBECUE.
- Page 11 Outback® Cuisine Electronic Ignition Assembly Diagram Blue Black Yellow Black Side Burner 9V Battery (not included) Connect the wires as shown in the Ignition diagram. Pushbutton Outback® Connoisseur Electronic Ignition Green Assembly Diagram Black Black Side Black Burner 9V Battery...
- Page 12 Attach the Magnet Strips (C17) to the Top Panel (C11) and Bottom Panel (C13) using the Screws (E1) and Nuts (E2). Fit the Door Handles (C16) to the L/H and R/H Doors (C14, C15) by using the pre-assembled Door Handle Screws. Fit the Doors (C14, C15) to the cabinet by depressing the spring pins and placing into the Cabinet.
- Page 13 Attach the Tool Hook (C4) to the L/H Side Burner Shelf using the Screws (E1) and Nuts (E2). Attach the Towel Rail (C6) to the R/H Side Shelf using the Screws (E1) and Nuts (E2). Remove the plastic wrap from the Briquette Baskets (B9) and lay them into the body ensuring that they lie level within the body.
- Page 14 Connect the gas hose to the BBQ Body and L/H Side Burner Shelf. Ensure the mating faces of the connection are clean and not damaged. Do not use any sealing tape, paste, or liquid on the joint. The nut must be tightened with the use of a spanner. Do not use force which may damage the assembly.
- Page 15 Hang the Rotisserie Motor (D4) to the R/H Bracket. Place the Forks (D2) onto the Spit Rod (D3) and insert the Spit Rod into the Slot in the Motor. Slide the Drip Tray (B6) into place underneath the barbecue body. underneath the Place the Foil Liner (B8) into the Drip Pan (B7) and slide into place drip tray .
- Page 16 Leak Test Diagram Assembly is now complete. All joints and connections must now be leak tested before using the barbecue. For details of leak testing, please refer to instructions on Page 20.
-
Page 17: Rotisserie Kit Assembly
Rotisserie Kit Assembly The rotisserie kit is packed in the barbecue trolley carton. Specifications subject to change without prior notice. PARTS LIST: 2. Slide the ceramic briquettes baskets to the Rotisserie Handle centre of the barbecue body. It is over this area Fork that the meat will be cooked. - Page 18 ESSENTIAL INFORMATION Please read instructions before using your barbecue. BEFORE YOU USE YOUR BARBECUE (also see installation) • Perform a leak test. This is the only safe and sure way to detect any gas leaking from joints and connections of the barbecue after assembly. Follow the leak test instructions on page 20. Check that the gas hose is free of any tension, twisting, cuts, or cracks.
-
Page 19: Important Information
Cover the burners with foil to keep the burner holes free from insects or other debris. • If you intend to leave your barbecue outside make sure it is protected from the elements by a heavy duty cover, these are available from most Outback® stockists. IMPORTANT INFORMATION •... - Page 20 • Repeat test • If bubbles form again do not use the barbecue and contact your local Outback distributor for assistance. OPERATION Your barbecue is not designed to be used with more than 50% of the cooking area as a solid plate –...
-
Page 21: Care And Maintenance
• If the right hand burner fails to light, turn off the gas and contact your local Outback dealer. CARE AND MAINTENANCE Never handle hot parts of the BBQ with unprotected hands. - Page 22 Cleaning Material Where used Cleaning Method Recommended Porcelain Grills Enamel is a thin, glass based coating fused onto metal and as such Enamel Griddles needs to be treated with care. Cooking oil, together with fat from Body food being cooked can turn to carbon as a result of heating and result in black flakes coming away from the cooking surfaces.
-
Page 23: Troubleshooting
Troubleshooting Problem Possible Cause Solution Burners will not light LP gas bottle is empty Replace with full gas bottle using the ignition Faulty regulator Have regulator checked or replaced system Obstructions in burners Clean burners Obstructions in gas jets or Clean jets and gas hose gas hose Electrode or pushbutton... -
Page 24: Technical Specifications
Technical Specifications Injector Model Name Heat Input Burners Gas /Pressure Approval Size Butane/ 28mbar Outback® Propane/ 37mbar 13kW 0.91 Cuisine Butane/Propane 30mbar Outback® 0359 15.75kW 0.81 Connoisseur 359AS128 Butane/Propane 50mbar Side Burner 2.8kW 0.84 Butane / Propane 36mbar Countries of Use:...
Need help?
Do you have a question about the Cuisine and is the answer not in the manual?
Questions and answers