Table of Contents

Related Manuals for Physis Piano H1


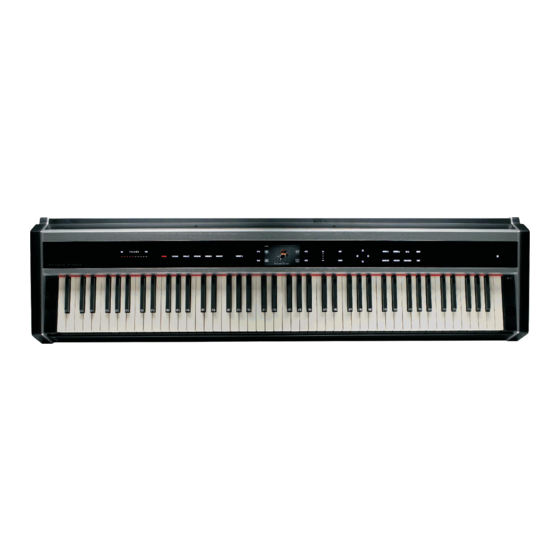
Summary of Contents for Physis Piano H1
- Page 1 H 1 - H 2 - H3 User Manual - EN Ver. 1.5...
-
Page 3: Table Of Contents
5.2 Selecting a configuration .............................. 17 5.3 Saving a user-made configuration ..........................17 5.4 Renaming a user-made configuration .......................... 18 6. The structure of the Physis Piano......................... 19 6.1 Data and signal routes ..............................19 6.2 Memory structure ................................20 7. -
Page 4: Important Notes
Do not place heavy objects on the cable. Do not place the cable where it could be trampled. 1.2 NOTES ABOUT THE MANUAL • The Physis Piano documents include This User Manual, describing all the instrument controls and connections, together with the basic functions required to play it;... -
Page 5: Introduction
Xylophone, vibraphone and marimba can be customized by setting the bar material, the striking point, the mallet's material and much more. Physis piano H1 is equipped with an 88-keys weighted keyboard PGK Physis Grand Keyboard, with "Ivory feel" keys, which faithfully replicates the feeling of the greatest acoustic pianos. -
Page 6: Switching On And Connections
The Sostenuto and Soft pedals can be assigned different functions. For further information, see par. 11.6 • Owners of Physis Piano H2 or H3 can still buy the pedal group as an optional. To do so, get in touch with your favourite retailer. -
Page 7: Connecting An Audio System
Keep in mind that using headphones at a sufficiently high volume might cause hearing loss. AMPLIFIER Insert the amplifier's mono jack into the [L/MONO] connector located on the rear panel of your Physis Piano. Insert the other end of the cable into the audio input of the amplifier. - Page 8 User Manual – Switching on and connections LOUDSPEAKERS Insert the mono jack cable from the first speaker to the [L/MONO] connector, located on the rear panel of the Piano. Place this speaker on the left. Insert the mono jack cable from the second speaker to the [R] connector, located on the Piano's rear panel of the Piano.
-
Page 9: Power Cable Connection
Because of the complexity and power of the instrument, the switching on phase takes some time. Please wait until the system is completely loaded. When switched on, Physis Piano will automatically select the acoustic piano physical model Sound (if the Last Selection function is set as Off, see par.11.3). -
Page 10: Playing Demo Songs
3.5 PLAYING DEMO SONGS Physis Piano comes with a set of demo songs, so as to evaluate the sound capabilites of the instrument. It is possible to play short song fragments for each Sound or complete songs, in which several instruments play. For more information on Sounds, see chapter 8. -
Page 11: Controls And Connections
4.1 FRONT PANEL Physis Piano is equipped with a black glass multi-touch panel. The panel has several touch sensitive areas. In fact there are no sliders or buttons: all settings and operations can be performed by touching the glass area identified by a back light, corresponding to a given control. - Page 12 User Manual – Controls and connections Display and navigation section: this section contains the graphic display and all the controls to navigate menus and pages. EXIT ENTER The Key Touch in this section are: [F1], [F2], [F3] and F4]: These controls change function according to the current video page. The function assigned to each Key Touch is shown on the display, beside each Key Touch.
-
Page 13: Beside The Keyboard
User Manual – Controls and connections Key Touch [ ]: activates/deactivates stand-by mode. Deactivating the stand- function, that switching instrument, will restore configurations (volume, sounds, levels etc.) to their previous condition (i.e.before the instrument was set in stand-by mode). To put the instrument on stand-by, press the [ ] Key Touch twice. -
Page 14: Rear Panel
User Manual – Controls and connections 4.3 REAR PANEL All the connection of the Physis Piano can be found in the rear panel. POWER AC-IN Power section: this section contains all the power supply components: [POWER]: on/off switch. [AC-IN]: power cable connector. - Page 15 Exit the power saving mode on your computer before connecting the cable. • After connecting the [USB TO HOST] cable for the first time, Physis Piano will install its drivers on the computer. When the process has been completed, a pop-up message will appear, to confirm that the new hardware is ready for use.
- Page 16 User Manual – Controls and connections [SOSTENUTO]: plug in here a foot-switch pedal jack to control the Sostenuto effect. [1]: plug in here the jack connector from a pedal (either foot-switch or potentiometer) to control the assigned function. [2]: plug in here the jack connector from a pedal (either foot-switch or potentiometer) to control the assigned function.
-
Page 17: Pedals
Usually, three pedals are used with the piano to enhance its expressivity. Physis Piano replicates the effect of these pedals as accurately as possible, so as to simulate a real acoustic piano. Physis Piano H1 is provided with a set of three pedals (which can be purchased separately also for the H2 and H3). SOFT... -
Page 18: Customizing The Multitouch Panel
User Manual – Customizing the multitouch panel 5. CUSTOMIZING THE MULTITOUCH PANEL 5.1 MANUAL SETTINGS To ensure the best comfort, convenience and aesthetic appeal, the multi-touch panel can be configured. The colours of the Key Touch can be changed, the lights turned on or off, and the display background and colours can be selected. To access these options press the [VIEW] Key Touch. -
Page 19: Selecting A Configuration
User Manual – Customizing the multitouch panel 5.2 SELECTING A CONFIGURATION While in the VIEW video page, Press [F3]. A list of already made settings will appear: The first 10 configurations of this list are presets, included in each instrument. They can be modified but not overwritten. The following 10 configurations are user-made and can be modified and saved (see next paragraph). -
Page 20: Renaming A User-Made Configuration
User Manual – Customizing the multitouch panel 5.4 RENAMING A USER-MADE CONFIGURATION To rename a user-made configuration, place the cursor on the configuration to rename and press [F1]. Use the virtual keyboard to enter a new name. The currently selected key is highlighted in red. To select a key, use the [ ], [ ], [ ] or [ ] Key Touch. -
Page 21: The Structure Of The Physis Piano
MIDI Thru: this section sends out the MIDI data received through the [MIDI IN] connector, to create a MIDI chain. MIDI Out: this section sends out data through the [MIDI OUT] connector. It transmits data about Physis Piano's activity (notes, sounds, volumes etc.). -
Page 22: Memory Structure
For further information on the SOUND EDIT and MIXER functions, see chapter 10 and par. 9.3. 6.2 MEMORY STRUCTURE Physis Piano's internal memory is divided into three main areas: Sound: contains all the information saved with a Sound, related to the Sound Generator section and to the "Pedal"... -
Page 23: Memories
User Manual – Memories 7. MEMORIES 7.1 WHAT IS A MEMORY Memories are locations in which one or two Sounds and a keyboard mode are saved. A location contains the following data: Sound for Part 1 (see par.8.3). Sound for Part 2 (see par.8.3). Keyboard mode and split point, if need be (see par. -
Page 24: Saving A Memory
Press [ENTER] 7.4 SAVING A MEMORY Physis Piano's configurations can be saved in any User location of any memory family. However, for your convenience and easy recalling, we advise you save a memory in its corresponding Sound family. To save a Memory, press and hold the [MEMORY ] Key Touch: The memory list will appear, showing the family's 32 user locations. -
Page 25: Renaming A Memory
User Manual – Memories Touch. The current Sound family is written on the top left of the screen. Use the [+], [-], [ ] or [ ] Key Touch to move the cursor on the memory to overwrite. Now press [F3] to save the current configuration on the selected location. When the process is complete, a pop-up message appears: In this page you can also modify the Memories order in a given family. - Page 26 User Manual – Memories Ins: Insert function. The “Insert” led on the display shows whether the function is active or not. When the led is on, all new characters are placed between old characters. When the led is off, new characters will replace old characters. Home: places the cursor at the beginning of the text.
-
Page 27: Sounds
User Manual – Sounds 8. SOUNDS 8.1 WHAT IS A SOUND The Sound section is the main section of the sound generation process. However, as seen in chap. 6, the section does not simply contain the current sound. Sounds should be seen more as memory locations containing the settings of these functions: SOUND EDIT (see chap. -
Page 28: Sound Selection
User Manual – Sounds 8.3 SOUND SELECTION There are several ways to select a Sound: Use the [+], [-], [ ] or [ ] Key Touch to navigate and select Sounds from the current Sound family. Press [ENTER] to show a list of the Sounds belonging to the currently selected family: The currently selected family is shown on the top left of the display. -
Page 29: Keyboard Mode
8.4 KEYBOARD MODE Physis Piano can be played with one or two Sounds at the same time. The term “keyboard mode” indicates how one or two sounds can be used on different areas of the same keyboard. These areas are called “Parts”. - Page 30 User Manual – Sounds [F3] or [F4]. Press [EXIT] or [ENTER] to return to the main Sound page: The keyboard mode always appears on the top left of the display. To shift between Dual and Split mode, press [F3]. [F1] and [F2] still perform the Play Song and Transpose function.
-
Page 31: Transposer
User Manual – Sounds 8.5 TRANSPOSER To set up and activate the Transposer, press the [F2] Key Touch under the main Sound page. Alternatively, access the FUNCTION menu by pressing the [FUNCTION] Key Touch and selecting the Transpose function. The following video page will appear: The parameters are: Master: master transposer. -
Page 32: Selecting The Velocity Curve
8.6 SELECTING THE VELOCITY CURVE Physis Piano offers a wide range of velocity curves, affecting the sound generator's response to the player's touch on the keyboard. Velocity is usually associated to volume and timbre, however in some Sounds and Effects, the touch intensity will affect other sound features, such as the guitar's wah-wah. -
Page 33: Creating A User-Made Velocity Curve
User Manual – Sounds Resultant velocity Hard: A hard curve, still linear with medium pressure levels. Recommended to avoid highlighting too much the sound while still achieving good expression. velocity Resultant velocity Hard Plus: A very hard curve. It can reach the maximum velocity level but only with effort. -
Page 34: Activating The Metronome
8.8 ACTIVATING THE METRONOME Physis Piano offers a metronome function, useful when practicing. To set up and activate the metronome, press [F4] under the main Sound page, or press [FUNCTION] and select the Metronome function. The following page will appear: To move the cursor, use [ ] or [ ]. -
Page 35: Post-Processing Section
User Manual – Post-Processing section 9. POST-PROCESSING SECTION As already mentioned under the panel section, Physis Piano is equipped with a signal post-processing section. Under this section are: MASTER EFFECT: adds a modulation or delay effect. MASTER REVERB: applies a reverberation effect MASTER EQ: applies equalization filters to the general sound. -
Page 36: Equalizer
User Manual – Post-Processing section 9.2 EQUALIZER To equalize the sound, generated by the Sound section and modified by effects, activate the MASTER EQ (equalizer). To do so, press [EQ ]. The Key Touch light will turn on. To set up the equalizer, keep and hold the same Key Touch. To modify values, [ ] or [ ] to select the field, and then [+] and [-] to modify the value. -
Page 37: Modifying A Sound
10. MODIFYING A SOUND One of the main functions of Physis Piano is the SOUND EDIT function. It allows the user to configure the signal chain and modify a wide range of sound generation parameters. Settings for these parameters can be saved to sounds (User locations, see par. -
Page 38: Saving A Sound
EFX block This block applies effects to the sound. Physis PIano effects are: delay (echo), chorus, flanger, vibrato, tremolo, phaser, wah-wah and rotary. As with other blocks, each effect contains parameters that can be modified, to obtain any possible sound nuance. -
Page 39: Renaming A Sound
User Manual – Modifying a Sound 10.3 RENAMING A SOUND To rename a Sound, select it with the cursor and press [F1]: Use the virtual keyboard to enter a new name. The currently selected key is highlighted in red. To select a key, use [ ], [ ], [ ] o [ ]. -
Page 40: Instrument General Settings
11. INSTRUMENT GENERAL SETTINGS The FUNCTION menu contains all settings that do not belong to single Sounds (except for pedals settings) or memories, but to the whole Physis Piano. To access this menu, press [FUNCTION]. You can recall the following functions: Touch: select the keyboard's velocity curve. -
Page 41: Selecting The Language Of The On-Line Guide
User Manual – Instrument general settings Press [ENTER] to start the process or [EXIT] to abort. To visualize other functions of the Setup menu, press [ ] or [ ]. Press [EXIT] to recall the FUNCTION menu. When starting a Factory Reset, all changes made by the user will be irreparably lost. To prevent that, first save your own Sounds, memories and/or settings to a USB pen (see procedure in par. -
Page 42: Checking And Updating The Operating System Release
Download the file and the copy it to a USB pen. To check the current operating system release of your Physis Piano, access the FUNCTION menu. Then select the Setup function; place the cursor on the Software Update field and press [ENTER]. -
Page 43: Setting Time And Date
Type: Set the pedal type. Set Switch for foot-switch pedals, or Potent. for potentiometer (expression) pedals. Physis Piano automatically detects the type of pedal connected to the [FOOT CONTROLLER] connector. However, you can set manually a different pedal type. This manual setting will remain until a new pedal is connected. -
Page 44: Fine Tuning
Sustain function. 11.7 FINE TUNING Physis Piano can be fine tuned by setting the exact frequency (in Hertz). Furthermore, the user can choose from a wide range of historical temperaments from different ages and countries. To do so, access the FUNCTION menu and select the Tuning function. -
Page 45: Moving Files Or Folders
This is especially useful to create backup version of your own settings, or to transfer these settings to another Physis Piano. To access this function, select the File Manager field under the FUNCTION menu. When accessing this function for the first time after switching on, this page will appear. It shows the three folders of the instrument's internal memory. - Page 46 Path and folder name are always shown on the top of the screen. “Root” (see previous picture) is the first-level folder (root folder) of the memory unit. “INT” stands for internal memory, “USB” stands for external memory (USB pen). Physis Piano works with these file types. .mem: Memory .snd: Sound...
- Page 47 User Manual – Instrument general settings COPYING FILES FROM INTERNAL MEMORY TO USB DRIVE Open the internal memory. The characters “INT” will appear on the top of the screen. Beside the [F4] Key Touch appears a “USB Pen” icon. Press [+], [-], [ ] or [ ] to move the cursor on the file or folder you wish to move to the USB pen.
- Page 48 Manuale Utente – Instrument general settings As described in step 2, you can change the display order of the files. Press [F3] if you want to create a new folder within the folder you are viewing (this is only possible in the Songs folder and its related sub-folders).
- Page 49 User Manual – Instrument general settings Press [F3]. The following page will appear: Press [F2] to copy a single file or folder. Press [F4] to select all the files and folders that you are viewing. Press again the same key Touch to deselect or [F2] to start copying; in the latter case the screen changes to: Press [F4] to access the internal memory.
- Page 50 When listening to Audio or MIDI files, if you leave the File Manager, playback is automatically stopped. • snd and mem files created with newer operating system versions cannot be copied in a Physis Piano running an older version. When attempting to do so, the following message will appear:...
-
Page 51: Deleting Files Or Folders
User Manual – Instrument general settings 11.10 DELETING FILES OR FOLDERS To delete files or folders, either from the internal memory or USB pen, enter the FUNCTION menu. Select the File Manager function, then use [+], [-], [ ] o [ ] and [ENTER] to navigate the folders. Select a file or folder with the cursor. Press [F1] to delete the single file or folder. -
Page 52: Rename Files And Folders
Manuale Utente – Instrument general settings 11.11 RENAME FILES AND FOLDERS To rename files or folders stored in the internal memory or USB memory stick, either from the internal memory or USB pen, enter the FUNCTION menu. Select the File Manager function, then use [+], [-], [ ] o [ ] and [ENTER] to navigate the folders. Select a file or folder with the cursor and press [F2]. -
Page 53: Recording And Playing Songs
12. RECORDING AND PLAYING SONGS Physis Piano is equipped with a music player for MIDI and audio files; it can also record and save music sequences to the internal memory or to a USB pen as MIDI files. The system can manage the following file extension: MIDI sequences: .mid, .kar... - Page 54 Disposal of old Electrical & Electronic Equipment (Applìcable throughout the European Union and other European countries with separate collection programs) Dir. 2002/95/CE, 2002/96/CE e 2003/108/CE This syrnbol, found on your product or on its packaging, indicates that this product should not be treated as household waste when you wish to dispose of it.
- Page 56 WWW.PHYSISPIANO.COM ® © 2012 – PHYSIS PIANO is a registered trade mark – Viscount International SpA Via Borgo 68/70 – 47836 Mondaino (Rimini) Italy – Tel +39 0541 981700 – Fax +39 0541 981052...
Need help?
Do you have a question about the H1 and is the answer not in the manual?
Questions and answers