Danfoss DHP-H Installation And Service Instructions Manual
Hide thumbs
Also See for DHP-H:
- Installation and service instructions manual (60 pages) ,
- Installation instructions manual (52 pages) ,
- User manual (46 pages)
Table of Contents
Advertisement
Quick Links
Advertisement
Chapters
Table of Contents

Related Manuals for Danfoss DHP-H


Summary of Contents for Danfoss DHP-H
- Page 1 Installation and Service instructions DHP-H DHP-L DHP-A DHP-AL DHP-C VMBMA602...
- Page 2 If these instructions are not followed during installation, operation and maintenance, Danfoss AS’s liability according to the applicable warranty is not binding. © 2008 Copyright Danfoss AS. Danfoss AS retains the right to make changes to components and specifications without prior notice. VMBMA602...
-
Page 3: Table Of Contents
Auxiliary heating, DHP-H, -L, -C ........42... -
Page 4: Installation Instructions
(for the amount of refrigerant see manufacturer’s plate) ⚠ The heat pump must be placed in an area with a floor drain. through the service valves. All warranties from Danfoss AS are void if, when filling with refrigerant other than Danfoss recommended ⚠... -
Page 5: Control And Safety Devices
Control and safety devices nection to the drain and visibly flow into this in a frost-free environ- ment. To ensure a correct function of the heat pump there are a number Compressor of control and safety devices. The compressor is equipped with a thermal overload relay which The figure below shows the heat pump’s three liquid circuits with protects the compressor from over current. -
Page 6: Heat Pump Information
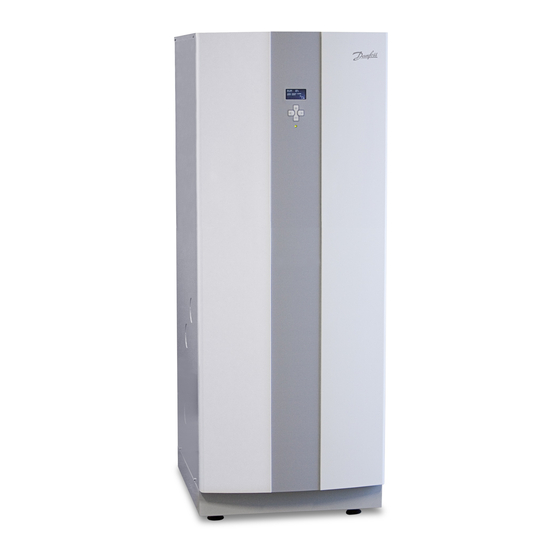
DHP-H Dimensions and connections 40±10 Figure 4: DHP-H and connections. The brine pipes can be connected on either the left or right-hand sides of the heat pump. Position Name Brine in, 28 Cu Brine out, 28 Cu... - Page 7 Components Left view Front view Right view Figure 5: DHP-H, components. Position Name Water heater, 180 litres Return line sensor, heating system Evaporator, insulated Exchange valve Supply line sensor Heating system circulation pump Auxiliary heating, immersion heater Brine in Heating system supply line...
-
Page 8: Dhp-H Opti Pro
The brine pipes can be connected on either the left or right-hand sides of the heat pump. 40±10 Figure 6: DHP-H, DHP-H Opti Pro and connections. Position Name Brine in, 28 Cu Brine out, 28 Cu Heating system supply line, 22 Cu: 4-10 kW, 28 Cu: 12-16 kW... - Page 9 Components Left view Front view Right view Figure 7: DHP-H Opti Pro, components. Position Name Water heater, 180 litres Return line sensor, heating system Evaporator, insulated HGW shunt valve Supply line sensor Heating system circulation pump Auxiliary heating, immersion heater...
-
Page 10: Dhp-C
DHP-C Dimensions and connections The brine pipes can be connected on either the left or right-hand sides of the heat pump. 40±10 Figure 8: DHP-C, Dimensions and connections. Position Name Brine in, 28 Cu Brine out, 28 Cu Supply line heating system, 22 Cu Return line heating system, 22 Cu Expansion line, 22 Cu Hot water line, 22 Brass... - Page 11 Components Left view Front view Right view Figure 9: DHP-C, components. Position Name Water heater, 180 litres Return line sensor, heating system Evaporator, insulated HGW shunt valve Exchange valve cooling Shunt cooling Exchange valve, heating/hot water Supply line sensor Heating system circulation pump Auxiliary heating, immersion heater Brine in Heating system supply line...
-
Page 12: Dhp-L, Dhp-L Opti
DHP-L, DHP-L Opti Dimensions and connections The brine pipes can be connected on either the left or right-hand sides of the heat pump. 40±10 Figure 10: DHP-L, DHP-L Opti, Dimensions and connections. Position Name Brine in, 28 Cu Brine out, 28 Cu Heating system supply line, 22 Cu: 4-10 kW, 28 Cu: 12-16 kW Heating system return line, 22 Cu: 4-10 kW, 28 Cu: 12-16 kW Alternative for brine out... - Page 13 Components Left view Front view Right view Figure 11: DHP-L, DHP-L Opti components. Position Name Auxiliary heater, immersion heater on supply line Return line, heating system Exchange valve Evaporator, insulated Heating system circulation pump Supply line sensor, heating system Brine out Brine pump brine system Drying filter Expansion valve...
-
Page 14: Dhp-A, Dhp-A Opti
DHP-A, DHP-A Opti Dimensions and connections The brine pipes can be connected on either the left or right-hand sides of the heat pump. 1175 Figure 13: Outdoor unit, Dimensions and connections. Position Name Brine in (from HP Brine out) 28 Cu Brine out (to HP Brine in) 28 Cu Figure 14: Outdoor unit components and connections... - Page 15 Components Left view Front view Right view Figure 15: DHP-A, DHP-A Opti, components. Position Name Water heater, 180 litres Defrosting tank Evaporator, insulated Shunt valve, defrosting Exchange valve, heating system Supply line sensor Heating system circulation pump Auxiliary heating, immersion heater Brine pump brine system Brine in Drying filter...
-
Page 16: Dhp-Al, Dhp-Al Opti
DHP-AL, DHP-AL Opti Dimensions and connections The brine lines can be connected on either the left or right-hand sides of the heat pump. Heat pump Water heater 40±10 40±10 Figure 16: DHP-AL, DHP-AL Opti dimensions and connections. Position Name Brine in, 28 Cu Brine out, during normal operation, 28 Cu Brine out, during defrosting to hwh pos 8, 28 Cu Return pipe from water heater pos 9, 28 Cu... - Page 17 Components Left view Front view Right view Figure 19: DHP-AL, DHP-AL Opti components. Position Name Heating system supply line Brine out to outdoor unit Return line, heating system Auxiliary heating, immersion heater Electrical panel Heating system circulation pump Evaporator Circulation pump coolant system Exchange valve, heating system Drying filter Expansion valve...
-
Page 18: Package Contents
Package contents Sizes 12kW - 16kW: Part no. Quantity Name Delivery check 086U2369 Safety valve 9 bar 1/2" 1. Check that there is no transport damage. The heat pump is packaged in cardboard. 2. Check that the delivery contains the following components. Sizes 4kW - 10kW: 086U2701 Outdoor sensor... -
Page 19: Heat Pump Control Panel
• An up button with a plus sign • A down button with a minus sign • A right button with a right arrow • A left button with a left arrow The main menu, INFORMATION, is opened by pressing the left or DHP-H right buttons. From INFORMATION one of the four sub-menus can DHP-C DHP-L be opened: OPERAT.; HEATCURVE; TEMPERATURE and OPERAT. TIME. -
Page 20: Space Requirement, Outdoor Unit, Dhp-A, -Al
Drilling holes for brine pipes 2.12 Space requirement, outdoor unit, DHP- A, -AL ⚠ NOTE! Ensure that the holes for the insert pipes are posi- • To ensure the function of the outdoor unit, there must be at least tioned so that there is room for the other installations. 300 mm of space behind and 1500 mm at the front. ⚠... -
Page 21: Separating The Heat Pump
Separating the heat pump -Top sensor (325, 326) 11. Unscrew the electrical panel’s screws. Does not apply to DHP-A, -AL. 12. Turn the electrical panel through 180° and place it in front of If there is a shortage of space when transporting the heat pump to the heat pump unit. -
Page 22: Unpacking And Installation
Unpacking and installation 2. Tilt the front cover outwards. 3. Lift the front cover upwards to remove it from the heat pump. Setting up Unpacking and installing the outdoor unit • The heat pump has feet that can be adjusted 20 mm to compen- sate for irregularities in the surface on which it is sitting. If the Applies to DHP-A, -AL. - Page 23 8. Screw the outdoor unit onto the stand. Use 4 x M6x20 screws. It may be necessary to push and pull the stand slightly in order to get the screw holes to align. NOTE! When filling the brine system the outdoor unit must ⚠...
-
Page 24: Piping Installation
Please also note that for DHP-H Opti Pro SP heat pumps it is therefore imperative that the maximum hot water tempera- ture is altered from the default factory setting from 95 °C to 85 °C. - Page 25 DHP-L, connection diagram VL system DHP-AL, connection diagram VL system 12 13 14 Figure 45: General connection diagram DHP-AL. Figure 43: General connection diagram DHP-L. Position Name Supply line Return line Position Name Heat pump (part of the delivery) Supply line Safety valve Return line Expansion tank...
-
Page 26: D System, Dhp-L
D system, DHP-L VLD system, DHP-A, -AL With a DHP-L in a D system, the heat pump can produce both heat- A VLD system is largely similar to a VL system, but with an external ing and hot water with the compressor and an external auxiliary auxiliary heater (often a boiler that is fired with solid fuel) in combi- heater (oil boiler, electric boiler, district heating or similar) that is nation with a DHP-A or DHP-AL. -
Page 27: Safety Valves
Flexible hoses are available to purchase from Danfoss AS. The figures below show how appropriate and inappropriate installations look using this type of hose. -
Page 28: Filling The Water Heater And Heating System
Position Name Terminal block (applies to the expansion card) Terminal block (applies to DHP-A, -AL) Defrost card (applies to DHP-A, -AL) Terminal block Space for Danfoss Online Warning decal Space for expansion card Contactor for compressor Automatic fuses Resetting overheating protection... -
Page 29: Connect Power Supply, 400V 3N
• The sensor must be positioned at least 1 m from openings in the walls that emit hot air. • If the sensor cable is connected through a pipe, the pipe must be sealed so that the sensor is not affected by outgoing air. The outdoor sensor is connected by a two core cable. For a cross section of 0.75 mm a maximum cable length of 50 m applies. For greater lengths a cross section of 1.5 mm is used, up to a maxi- mum of 120 m. -
Page 30: Resetting To System D Or Vld
Resetting to system D or VLD For a description of the different system solutions, see section Piping installation. The heat pump has VL as factory setting. For D system, DHP-L: If D system is selected, the cables for the internal auxiliary heater must be disconnected according to the figure below. -
Page 31: Brine Installation
(available as an acces- sory from the Danfoss range) that stops the heat pump if the flow in the brine pipe is too low, which can create a risk of freezing in the ground water exchanger. -
Page 32: Information Collector Pipe
(2 x 66.5) (2 x 24) (2 x 86.5) Choke valves with flow indicators (available as accessories from the Danfoss range) are used to adjust the brine flow so that it is the (2 x 10.5) (2 x 49) (2 x 15) (2 x 75) same in all coils. -
Page 33: Connection Diagram
Safety valve (1.5 bar) Safety valve (1.5 bar) Bleed and expansion tank Bleed and expansion tank Shut-off valve Shut-off valve Pressure tank DHP-H, DHP-L: Outdoor unit: Figure 68: Connection diagram, DHP-A -AL outdoor unit Position Name Brine out Brine in... -
Page 34: Installing Brine Pipes
DHP-AL, mixed to achieve frost protection down to -32°C. 4. Route the out pipe for brine out through the corresponding hole (with rubber collar) in the heat pump side. Calculated volume, DHP-H, -C, -L ⚠ When the brine lines are connected to the right for DHP-A,... -
Page 35: Bleeding The Brine Circuit
Bleed screws 3. Check that the freezing point of the mixture is reached using a refractometer (-15°C for DHP-H, -C, -L)(-32°C for DHP-A, -AL). 4. Fill the system with the mixture using an external pump (11) which can bleed the brine pipes. Connect the pressure side of the pump to the filler connection at valve (5). -
Page 36: Installing Accessories/Additional Functions
Installing accessories/additional EVU function functions The EVU function prevents the operation of HEATPUMP, ADD.HEAT and CIRC.PUMP as long as the contact is closed. The text EVU STOP is shown in the display when this function is active. Room temperature sensor • The EVU function is activated by making a connection between terminal blocks 307 and 308 using an external 1-pin timer. -
Page 37: 10 Start Up
5. Start the brine system’s brine pump by setting the value service instructions. BRINEPUMP to 1. DHP-H Opti Pro SP (Single Phase) heat pumps it is imper- ⚠ 6. Check that the brine pump is running by: ative that the maximum hot water temperature is altered • listening... -
Page 38: Commissioning
10.3 Commissioning Starting circulation pumps manually If any of the circulation pumps do not start, it may need to be helped as follows: ⚠ NOTE! Hot! Figure 76: The pressure pipe should get hot during operation. 20. Check that: Figure 77: Bleed screw location. -
Page 39: 11 Customer Information
11 Customer information After installation and test operation, the customer must be informed about their new heat pump installation. Below is a check- list regarding the information that the installer must give the cus- tomer: • The model of the heat pump that has been installed • Run through the Maintenance instructions and show what it con- tains • Describe the various operating modes and what they mean • Describe the most common alarms and corrective actions • Demonstrate how to navigate the control computer and which... -
Page 40: Service Instructions
Service instructions 12 The heat pump 12.1 Function description A heat pump utilises the free energy found in a natural heat source, such as rock, ground, ground water or air. The heat pump can be com- pared to a reversed refrigerator. In a refrigerator, heat is transferred from the inside of the refrigerator to the outside. In a heat pump the heat that is stored in a heat source is transferred to the inside of the house. -
Page 41: Outdoor Unit And Defroster Function, Dhp-A, -Al Models
1 Heat pump unit • Scroll compressor • Stainless steel heat exchangers • Circulation pumps for brine and heating systems • Valves and safety equipment for cooling systems and corresponding electrical components. 2 Water heater • 180 litres • Internal anti-corrosion protection with copper or stainless steel • It has an anode that does not require replacing, which means that it is maintenance-free 3 Exchange valve • The heated water either passes through to the heating system or to the water heater depending on whether heating or hot water is to be produced 4 Auxiliary heat • 9 kW electric heating element (4.5 kW at 230 V 1N heat pump installation) • Electric heating element control in maximum of three steps (five steps for 400 V 3N DHP-A, -AL mod- els) • Installed on the heating system’s supply line... -
Page 42: Passive Cooling Function, Dhp-C
HGW technology, DHP-H Opti Pro The HGW technique is a new and unique method for hot water heating, which is used in DHP-H Opti Pro. At the same time as the water is heated to be distributed around the house heating system, a small proportion flows via an extra de-superheater, which heats the water before it enters the water heater. -
Page 43: Water Heater, Dhp-H, -C
12.9 Water heater, DHP-H, -C Danfoss heat pumps DHP-H, -C, are supplied with an integrated 180 litre water heater. Position Name Hot water line Temperature sensors Water heater TWS coil Start temperature sensor Return from TWS coil Filler pipe Flow line to TWS coil Figure 81: Water heater in DHP-H and DHP-C. -
Page 44: 12.11 Important Parameters
12.11 Important parameters Heat production - calculating The indoor temperature is adjusted by changing the heat pump’s heat curve, which is the control computer’s tool for calculating what the supply temperature should be for water that is sent out in the heating system. The heat curve calculates the supply temperature depend- ing on the outdoor temperature. - Page 45 ROOM If you wish to increase or reduce the indoor temperature, change the ROOM value. The difference between changing the ROOM value and the CURVE value is that the system’s heat curve does not become steeper or flatter if the ROOM value is changed, which the curve becomes if the CURVE value changes, instead the entire heat curve is moved by 3°C for every degree change of the ROOM value.
- Page 46 HEATSTOP The HEATSTOP function automatically stops all production of radiator heat when the outdoor temperature is equal to, or higher than, the value entered for heat-stop. When the heat-stop function is activated, the circulation pump will be turned off - except when hot water is being produced. The circula- tion pump will be “exercised”...
- Page 47 HYSTERESIS In order to start the heat pump in advance during sudden changes of the heat demand, there is a value, HYSTERESIS, which controls the difference between the actual supply temperature, t and the calculated supply temperature, t . If the difference is the same or greater than the set HYSTERESIS value (x), i.e.
- Page 48 DEFR CURVE, defrosting curve for DHP-A, -AL To start defrosting the outdoor unit for DHP-A, -AL, the control computer makes a calculation using the temperature of the brine return and the outdoor temperature. What guides the calculation is a linear defrosting curve that can be set so that the heat pump and outdoor unit work optimally. The setting of three different values can be changed: DEFR CURVE 0, DEFR CURVE –20 and OUTDOOR STOP.
-
Page 49: 13 Control Computer
13 Control computer 13.1 Function description A control computer is used to automatically calculate the heat demand in the house where the heat pump is installed and to ensure that the correct amount of heat is produced and emitted where necessary. There are many different values (parameters) that must be referred to during the calculation of the heat demand. -
Page 50: Display
13.2 Display The display of the control computer shows information about the heat pump’s operation, status and any alarms, in text form. The status, indicated by symbols, is also shown in the lower section which shows the heat pump’s active process. Operating mode Appears with applicable heat pump operating status text. - Page 51 Message Meaning START Indicates that there is a demand for heating production and that no start delay is active. EVU STOP Indicates that the additional function EVU is active. This means that the heat pump is off as long as EVU is active. NO DEMAND HEAT Indicates that there is no heating production demand.
-
Page 52: 14 Menus
14 Menus 14.1 Main menu INFORMATION This menu is used to change the heat pump’s operating modes and adjust the heat curve. History and operating times can also be viewed here. Open the menu by pressing the left or right button. The sub menus available in the INFORMATION menu are shown in the following table: Main menu Sub menu... - Page 53 Sub menu INFORMATION -> OPERATION Used to select operating mode. Menu selection Meaning Factory setting The installation is off. Any active alarms reset. (OFF) AUTO Automatic operation with both heat pump and auxiliary heater permitted. If the number of power stages for auxiliary heating are set to zero (SERVICE -> AUX. HEAT ->...
- Page 54 Sub menu INFORMATION -> HEAT CURVE 2 The menu is active if the expansion card is installed and only appears if shunt group sensor is connected and activated in menu SERVICE -> INSTALLATION -> SYSTEM -> SHUNTGROUP (Expansion card). Used to change settings for heat curve 2. Menu selection Meaning Factory setting...
- Page 55 Sub menu INFORMATION -> DEFROST (DHP-A, -AL) The menu applies to DHP-A, -AL with defroster card and only appears if OUTDOOR AIR in the SERVICE -> INSTALLATION -> SYSTEM -> HEAT SOURCE menu is selected. Used to obtain information about outdoor unit defrosting and to make certain settings. Menu selection Meaning Factory setting...
-
Page 56: Main Menu Service
14.2 Main menu SERVICE This menu is for use during installation and service to optimise and adjust the operation of the heat pump. Access the menu by holding the left arrow in for five seconds. The sub menus available in the SERVICE menu are shown in the following table: SERVICE CONT’D. - Page 57 Sub menu SERVICE -> HOT WATER Used to change the settings for hot water production. Menu selection Meaning Factory setting START Start temperature for hot water production. Shows the actual hot water tem- 40°C perature and the value within brackets indicates the start temperature. (interval: , 30°C / 55°C) = no sensor alarm)
- Page 58 Sub menu SERVICE -> ADD. HEAT Used to change the heat pump stage’s operating settings. Menu selection Meaning Factory setting INTEGRAL A2 Two conditions must be fulfilled in order to start the auxiliary heater: the inte- 600 (interval: 50 / 990) gral’s value to start must be less than integral A1 + A2, and the supply tempera- ture must be 2°...
- Page 59 (Expansion card) 1 = start passive cooling (brine pump starts and shunt cooling regulates to set point value) HGW-SHUNT - = shuts shunt (DHP-H Opti Pro) 0 = shunt unaffected + = opens shunt COOLING ACTIVE 0 = stop active cooling (Expansion card)
- Page 60 Menu selection Meaning Factory setting NOTE! Only used for test operation. Simulates time 60 times as fast, which SERVICETIME means that the waiting times are eliminated during test operation. 0 = deactivates SERVICETIME 1 = activates SERVICETIME which speeds up the control computer’s integral cal- culation and start delay by 60 times.
- Page 61 Sub menu SERVICE ->HGW (DHP-H Opti Pro) The menu applies to the DHP-H Opti Pro model with de-superheater and only appears if ON in SERVICE -> INSTALLATION -> SYSTEM -> ADDITION -> HGW SHUNT menu is selected. Used to change the de-superheater’s operating settings.
- Page 62 Menyval Betydelse Fabriksinställning MAX TEMP. Max temperature of the water in the water heater. The temperature is measured 95°C on the peak sensor in the water heater. (interval: 60°C / 100°C) NOTE! Domestic hot water can have this temperature, which can mean that an external mixer valve may be required.
-
Page 63: 15 Troubleshooting
15 Troubleshooting 15.1 Alarm list Shown in display in the event of an alarm. To reset alarms 1-5, set the operating mode to OFF or cut the power supply. Message Meaning HIGHPRESS ERROR Tripped high pressure switch. Compressor stopped. No hot water production. LOWPRESS ERROR Tripped low pressure switch. -
Page 64: Check Points
4K ±1 K Expansion valve factory setting Name Setting Danfoss TUBE R404A, 4.2 kW From fully closed position, screw 3 turns out Danfoss TUBE R404A, 5.6 kW From fully closed position, screw 5.5 turns out Danfoss TUBE R404A, 8.4 kW From fully closed position, screw 5 turns out Danfoss TUBE R404A, 12.0 kW... -
Page 65: Operational Problems
15.4 Operational problems ALARM ........................65 Problem –... - Page 66 Cause Troubleshooting Remedy 6. The low pressure pressure switch opens • Incorrect pressure switch installed. Higher If the low pressure pressure switch opens too soon. break pressure than intended. See marking. too soon or is always open, replace it. • Pressure switch fault, opens at a higher pres- sure than indicated (mark pressure). Check using the manometer apparatus.
-
Page 67: Problem - Alarm Hp (High Pressure Pressure Switch)
Problem – Alarm HP (high pressure pressure switch) Cause Troubleshooting Remedy 1. Blocked strainer in the heating system. Check that the strainer is not blocked. Clean the strainer if necessary. 2. Air in the heating system. Listen for air in the heat pump and heating Bleed the heating system circuit accord- system. -
Page 68: Problem - Alarm Ms (Motor Protection)
Cause Troubleshooting Remedy 12. Overfilled refrigerant circuit. Using manometer apparatus and thermometer, Follow the correct procedure (depend- check that the unit’s overheating is correct for ing on type of refrigerant) to add the the specific refrigerant. correct amount of refrigerant. If there appears to be a leak in the refrig- erant circuit, carry out leak tracing and any necessary corrective action. -
Page 69: Problem - Alarm Sensor (All)
Cause Troubleshooting Remedy 6. Defective compressor. Measurement check the voltage on the three If the compressor is defective, replace it. phases (each to zero) at the compressor. Deviations from the average of the three val- ues should not be more than 12% on any of the phases. -
Page 70: Problem - Alarm Brine Out
Cause Troubleshooting Remedy 5. No or insufficient circulation in the heat- • That the strainer is not blocked. The circulation pump may have ing system. jammed, if so, open the bleed screw and • That no air is in the heating system. try to release the paddle wheel using a screwdriver for example. Open closed valves or taps. Check, and, if necessary, clean the strainer. -
Page 71: Problem - Operating Pressure Switch Open Alternatively High Hot Gas Temperature
Problem – Operating pressure switch open alternatively high hot gas temperature (indicated by med in the display’s lower left corner) Cause Troubleshooting Remedy 1. The operating pressure switch does not 1. Switch off the main switch for the heat If the pressure switch is closed, bridge the close again. -
Page 72: Noise
Cause Troubleshooting Remedy 7. Lack of condensation insulation on cold Establish where the condensation is coming The brine pipe must always be insulated. water pipe and/or brine pipe. from. In the event of problems with condensa- tion on the cold water pipes, insulate them. Condensation often accumulates in joints and angled sections of the insulation. -
Page 73: Problem - Loud Compressor Noise
Cause Troubleshooting Remedy 5. Circulation noise (whistling noise in the Check the heating system. If the incorrect type of valve is used to heating system). choke the flow, replace with the correct • Closed valves, choke valves, adjuster type. valves or other restrictions in the radiator system can cause circulation noise. -
Page 74: Problem - Noise - Miscellaneous
Problem – Noise – miscellaneous Cause Troubleshooting Remedy 1. Vibrating protective sleeves on the pres- Establish where the vibration noise is com- Prevent the protection sleeve vibrating by sure switches. ing from. using insulation tape for example. 2. Vibration noise from the electrical instal- Check for electrical steps or similar devices Carry out according to the installation lation. -
Page 75: Heating Comfort
Cause Troubleshooting Remedy 9. Insufficient exchange surface to transfer Is the exchange surface too small? Replace with a heater with a larger the heat pump’s output to the heater. exchange surface. Can the heater cope with the heat pump’s (Only applies to heat pumps with a separate output? heater) 10. - Page 76 Cause Troubleshooting Remedy 6. The heat pump has stopped on HIGH • Check what the MAX RETURN value is set If the MAX RETURN value is not adjusted for RETURN. at in the heat pump’s control computer. It the system according to the troubleshoot- must be adjusted to the unit’s maximum ing window, adjust it.
-
Page 77: Problem - Too Hot
Cause Troubleshooting Remedy 13. Changed conditions. • If the heat pump has been dimensioned If the heat pump cannot cope with the for a certain demand and this demand is demand, replace it with one with a higher Have you increased your heating and/or hot increased, the heat pump might not be able output or supplement it with a higher out- water demand? to maintain the desired room temperature. -
Page 78: Other
Problem – Irregular indoor temperature Cause Troubleshooting Remedy 1. The heat pump’s control computer is Check the ROOM and CURVE, MIN, MAX Adjust incorrect values in the heat pump’s not set/adjusted to the customer’s require- CURVE5, CURVE0, CURVE-5 and HEATSTOP control computer. -
Page 79: Problem - Runs On Electric Heating Element
Problem – Runs on electric heating element Cause Troubleshooting Remedy 1. Operating mode ADD.HEAT is selected. If this operating mode is selected, the aux- If ADD.HEAT mode is selected and you no iliary heater is used for heating and hot longer want it, change to AUTO, the heat water production, not the compressor. -
Page 80: Problem - The Auxiliary Heater Is In Operation But Not The Compressor
Problem – The auxiliary heater is in operation but not the compressor Cause Troubleshooting Remedy 1. Operating mode ADD.HEAT is selected. If this operating mode is selected, the aux- If ADD.HEAT mode is selected and you no iliary heater is used for heating and hot longer want it, change to AUTO, the heat water production, not the compressor. -
Page 81: Problem - The Heat Pump Consumes Too Much Energy
Cause Troubleshooting Remedy 7. The compressor runs backwards. The • If the text ERR PHASE SEQ appears in the If the phases are in the incorrect order, incoming phases have the incorrect display when the heat pump is powered, switch two incoming phases at the main sequence (only applies to 3-phase heat (only appears in the first 10 minutes) this terminal block and recheck according to the pumps). - Page 82 Cause Troubleshooting Remedy 8. The compressor runs backwards. The • If the text ERR PHASE SEQ appears in the If the phases are in the incorrect order, incoming phases have the incorrect display when the heat pump is powered, switch two incoming phases at the main sequence (only applies to 3-phase heat (only appears in the first 10 minutes) this terminal block and recheck according to the pumps).
-
Page 83: Problem - Auxiliary Heater Cuts In Too Soon
Cause Troubleshooting Remedy 14. Changed conditions. Have you increased • If the heat pump has been dimensioned If the heat pump cannot cope with the your heating and/or hot water demand? for a certain demand and this demand is demand, replace it with one with a higher increased, the heat pump might not be able output or supplement it with a higher out- to maintain the desired room temperature. -
Page 84: Problem - Short Operating Times Despite Heating Demand
Problem – Short operating times despite heating demand Cause Troubleshooting Remedy ROOM and/or CURVE set too high in com- Check if the heat pumps starts, if the supply Adjust ROOM and CURVE if necessary, bination with a heating system with poor temperature rises quickly whilst nothing ensure that there is sufficient flow over the circulation due to closed radiator valves, too... -
Page 85: Problem - Build-Up Of Ice Under And Around The Outdoor Unit
Problem – Build-up of ice under and around the outdoor unit Cause Troubleshooting Remedy Insufficient drainage. Does a lot of ice accumulate under and Drain the ground under and around the around the outdoor unit because the melt- outdoor section ed water has no where to run? Install a drip tray with a drainpipe routed to an indoor drain or gully. -
Page 86: 16 Technical Data
16 Technical data Air to water heat pump DHP-A Opti Refrigerant Type R404A R404A R404A R404A Amount 0,95 1,45 1,50 1,60 Test pressure Design pressure 3,10 3,10 3,10 3,10 Compressor Type Scroll Scroll Scroll Scroll Electrical data Main supply Volt 3-N~50Hz Rated power compressor Rated power, circ.pumps/fan... - Page 87 Air to water heat pump DHP-A Refrigerant Type R404A R404A R404A R404A Amount 0,95 1,45 1,50 1,60 Test pressure Design pressure 3,10 3,10 3,10 3,10 Compressor Type Scroll Scroll Scroll Scroll Electrical data Main supply Volt 3-N~50Hz Rated power compressor Rated power, circ.pumps/fan Auxiliary heater, 5 steps 3/6/9/12/15...
- Page 88 Air to water heat pump DHP-AL Opti Refrigerant Type R404A R404A R404A R404A Amount 0,95 1,45 1,50 1,60 Test pressure Design pressure 3,10 3,10 3,10 3,10 Compressor Type Scroll Scroll Scroll Scroll Electrical data Main supply Volt 3-N~50Hz Rated power compressor Rated power, circ.pumps/fan Auxiliary heater, 5 steps 3/6/9/12/15...
- Page 89 Air to water heat pump DHP-AL Refrigerant Type R404A R404A R404A R404A Amount 0,95 1,45 1,50 1,60 Test pressure Design pressure 3,10 3,10 3,10 3,10 Compressor Type Scroll Scroll Scroll Scroll Electrical data Main supply Volt 3-N~50Hz Rated power compressor Rated power, circ.pumps/fan Auxiliary heater, 5 steps 3/6/9/12/15...
- Page 90 Brine to water heat pump DHP-C Refrigerant Type R407C R407C R407C R134a R134a R134a Amount 1,20 1,30 1,45 0,90 1,00 1,10 Test pressure Design pressure 2,45 2,45 2,45 Compressor Type Scroll Scroll Scroll Scroll Scroll Scroll Electrical data Main supply Volt 3-N~50Hz Rated power compressor...
- Page 91 Brine to water heat pump DHP-H Opti Pro Refrigerant Type R407C R407C R407C R407C R407C Amount 1,15 1,30 1,40 1,55 1,70 Test pressure Design pressure Compressor Type Scroll Scroll Scroll Scroll Scroll Scroll Electrical data Main supply Volt 3-N~50Hz Rated power compressor Rated power, circ.pumps...
- Page 92 Brine to water heat pump DHP-H Refrigerant Type R407C R407C R407C R407C R407C R407C Amount 0,75 1,20 1,30 1,45 1,55 2,00 Test pressure Design pressure Compressor Type Scroll Scroll Scroll Scroll Scroll Scroll Electrical data Main supply Volt 3-N~50Hz Rated power compressor Rated power, circ.pumps...
- Page 93 Brine to water heat pump DHP-L Opti Refrigerant Type R407C R407C R407C R407C R407C Amount 1,20 1,30 1,45 1,55 2,00 Test pressure Design pressure Compressor Type Scroll Scroll Scroll Scroll Scroll Scroll Electrical data Main supply Volt 3-N~50Hz Rated power compressor Rated power, circ.pumps Auxiliary heater, 3 steps 3/6/9...
- Page 94 Brine to water heat pump DHP-L Refrigerant Type R407C R407C R407C R407C R407C R407C Amount 0,75 1,20 1,30 1,45 1,55 2,00 Test pressure Design pressure Compressor Type Scroll Scroll Scroll Scroll Scroll Scroll Electrical data Main supply Volt 3-N~50Hz Rated power compressor Rated power, circ.pumps Auxiliary heater, 3 steps 3/6/9...
Need help?
Do you have a question about the DHP-H and is the answer not in the manual?
Questions and answers