
Related Manuals for Avdel 74201


Summary of Contents for Avdel 74201
- Page 1 I n s t r u c t i o n M a n u a l O r i g i n a l I n s t r u c t i o n 7 4 2 0 1 T h r e a d e d I n s e r t P o w e r To o l...
-
Page 3: Table Of Contents
AND REMEDIES. ANY IMPLIED WARRANTY AS TO QUALITY, FITNESS FOR PURPOSE, OR MERCHANTABILITY ARE HEREBY SPECIFICALLY DISCLAIMED AND EXCLUDED BY AVDEL. Avdel UK Limited policy is one of continuous product development and improvement and we reserve the right to change the specification of any product without prior notice. -
Page 4: Safety Rules
Any modification undertaken by the customer to the tool/machine, nose assemblies, accessories or any equipment supplied by Avdel UK Limited or their representatives, shall be the customer’s entire responsibility. Avdel UK Limited will be pleased to advise upon any proposed modification. -
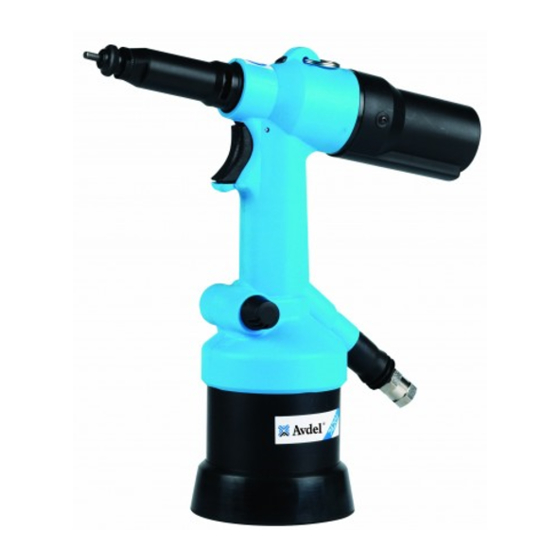
Page 5: Tool Dimensions
S p e c i f i c a t i o n s To o l S p e c i f i c a t i o n Air Pressure Minimum - Maximum 5-7 bar (75-100 lbf/in Free Air Volume Required @ 5 bar/75 lbf/in 7.5 litres (0.26 ft Stroke... -
Page 6: Intent Of Use
The tool is available in the basic configuration using code 74201-12000. In addition there are nose assembly kits available to match the type and size of the insert which is to be placed. (see selection tables on page 9). The tables also give the complete tool code (basic tool plus nose assembly kits). -
Page 7: Putting Into Service
P u t t i n g i n t o S e r v i c e A i r S u p p l y All tools are operated with compressed air at an optimum pressure of 5.5 bar. We recommend the use of pressure regulators and automatic cooling/filtering systems on the main air supply. -
Page 8: Nose Assemblies
N o s e A s s e m b l i e s It is essential that the correct nose assembly is fitted prior to operating the tool. If you know the code for your complete, original tool, or the details of the fastening systems which are to be used, you will be able to order a new complete nose assembly using the selection tables on page 9. -
Page 9: Selection
COMPONENT NUMBERS INSERT COMPLETE TOOL NOSE ASSEMBLY SIZE LARGE FLANGE INSERTS (9698,FS58,9408,9418,9498) + STANDARD NUTSERT ® (9500) + SQUARESERT ® (GK08) + EUROSERT ® (GJ08) 07555-00903 74201-00083 07555-09883 07555-01003 07555-09103 07555-09003 07555-09884 07555-00904 74201-00084 07555-09004 07555-01004 07555-09104 M5 • 74201-00085... -
Page 10: Servicing The Tool
S e r v i c i n g t h e To o l Regular servicing should be carried out and a comprehensive inspection performed annually or every 500,000 cycles, whichever is sooner. I M P O R T A N T The employer is responsible for ensuring that tool maintenance instructions are given to the appropriate personnel. -
Page 11: Service Kit
S e r v i c i n g t h e To o l S e r v i c e K i t For all servicing we recommend the use of the Service Kit (part number 74200-99990) supplied in its own plastic case. 74200-99990 SERVICE KIT Spanners are specified in inches and across flats unless otherwise stated ITEM PART Nº... -
Page 12: Maintenance
M a i n t e n a n c e Every 500,000 cycles the tool should be completely dismantled and components replaced where worn, damaged or when ® recommended. All ‘O’ rings and seals should be replaced with new ones and lubricated with Molykote 55M grease before assembling. -
Page 13: Differential Valve
M a i n t e n a n c e D i f f e r e n t i a l Va l v e • Using special flat spanner* unscrew Adaptor Nut 58, withdraw and remove Spring 54 and ‘O’ Ring 55. •... -
Page 14: General Assembly Of Base Tool
G e n e r a l A s s e m b l y o f B a s e To o l 7 4 2 0 1 - 1 2 0 0 0... -
Page 15: Parts List For 74201 - 12000
P a r t s L i s t f o r 7 4 2 0 1 - 1 2 0 0 0... -
Page 16: Pressure Switch Assembly
G e n e r a l A s s e m b l y o f B a s e To o l 7 4 2 0 1 - 1 2 0 0 0 P r e s s u r e S w i t c h A s s e m b l y P r e s s u r e S w i t c h R e m o v a l •... -
Page 17: Priming
P r i m i n g Priming is ALWAYS necessary after the tool has been dismantled and prior to operating. It may also be necessary to restore the full stroke after considerable use, when the stroke may have been reduced and fasteners are not now being fully placed by one operation of the trigger. -
Page 18: Fault Diagnosis
Hold tool square to application when placing Insert continued overleaf Item numbers in bold refer to General Assembly drawings and Parts List (pages 14-15). ® Other symptoms or failures should be reported to your local Avdel authorised distributor or repair centre. - Page 19 Item numbers in bold refer to General Assembly drawings and Parts List (pages 14-15). 93* see page 16. ® Other symptoms or failures should be reported to your local Avdel authorised distributor or repair centre.
- Page 20 N o t e s...
- Page 21 N o t e s...
- Page 22 N o t e s...
- Page 23 D e c l a r a t i o n o f C o n f o r m i t y We, Avdel UK Limited, Watchmead Industrial Estate, Welwyn Garden City, Herts, AL7 1LY declare under our sole responsibility that the product: Model Type 74201 Serial No.
- Page 24 This document is for informational purposes only. Infastech makes no warranties, expressed or implied, in this document. Data shown is subject to change without prior notice as a result of continuous product development and improvement policy. Your local Avdel representative is at your disposal should you need to confirm latest information.
Need help?
Do you have a question about the 74201 and is the answer not in the manual?
Questions and answers