Vision Fitness SIMPLE Owner's Manual
Fitness bikes and elliptical trainers
Hide thumbs
Also See for SIMPLE:
- Owner's manual (68 pages) ,
- User manual (60 pages) ,
- Owner's manual (68 pages)
Table of Contents
Advertisement
Advertisement
Table of Contents
Troubleshooting

Related Manuals for Vision Fitness SIMPLE


Summary of Contents for Vision Fitness SIMPLE
- Page 1 OWNER’S Fitness Bikes Elliptical Trainers SIMPLE, DELUXE, PREMIER...
-
Page 3: Table Of Contents
Table of Contents SAFETY INSTRUCTIONS ..... 2 D E L U X E CONSOLE CONTACT HEART RATE ....... 4 DISPLAY CONSOLE OVERVIEW ..29 DISPLAY DESCRIPTIONS ....30 THE PROGRAMS ......32 A L L B I K E M O D E L S USING THE PROGRAMS .... -
Page 4: Safety Instructions
To disconnect, turn the switch to the OFF position, then remove plug from outlet. • Only use the power cord provided with your VISION FITNESS product. • Never place the power cord under carpeting or place any object on top of the power cord that may pinch and damage it. - Page 5 OTHER SAFETY TIPS FOR YOUR VISION FITNESS PRODUCT CAUTION! If you experience chest pains, nausea, dizziness or shortness of breath, stop exercising immediately and consult your physician before continuing. • Do not wear loose clothing that might catch on any part of the product.
-
Page 6: Contact Heart Rate
CONTACT HEART RATE HAND PULSE HEART RATE SENSORS The Contact Hand Pulse Sensors are included on each product to monitor your heart rate. To use, grasp the sensors with a comfortable grip during your workout. The console will display your heart rate. Although your signal will be displayed immediately, it may take the system a few seconds to zero in on your actual heart rate. - Page 7 HEART RATE MONITORING SYSTEMS MAY BE INACCURATE. OVER EXERCISE MAY RESULT IN SEROUS INJURY OR DEATH. IF YOU FEEL FAINT STOP EXERCISING IMMEDIATELY. START RESISTANCE STOP PRESS FOR EASY START HOLD TO RESET SIMPLE DELUXE PREMIER CONSOLE MAST CONSOLE HANDLEBARS CONSOLE...
-
Page 8: Assembly & Moving
Bike, contact your retailer. MOVING Your VISION FITNESS Bike has transport wheels included for ease of mobility. To move your semi-recumbent Bike, firmly grasp the rear of the seat rail or the rear of the frame assembly. Carefully lift and roll on the transport wheels. -
Page 9: Stabilizing & Seat Positioning
STABILIZING THE BIKE After positioning your Bike in its intended location, check its stability by attempting to rock it side to side. Rocking or wobbling indicates that the Bike needs to be leveled. Determine which leveler is not resting completely on the floor. Loosen the wing nut at the base of the leveler to allow the leveler to rotate. -
Page 10: Seat Adjustment
UPRIGHT SEAT ADJUSTMENT The Upright Bikes feature a locking seat adjustment pin to easily and safely adjust the seat height. To adjust, loosen the adjustment knob by turning it two half turns counter- clockwise. Pull out the knob to unlock the post, and adjust the post up or down to the desired setting. - Page 11 R2250 SEMI-RECUMBENT SEAT ADJUSTMENT While seated on your Bike, lift the spring-loaded seat lever on the right side of the seat to make adjustments. Slide the seat forward or backward to desired location. Release the spring-loaded seat lever and gently attempt to rock forward and backward to assure it is locked in place.
-
Page 12: Pedal Strap Adjustment
Your Bike uses a wall mount external power supply. Use only the power supply provided with your Bike. If you misplace this power supply, please contact your authorized VISION FITNESS retailer for an original replacement. Use of the wrong power supply may cause damage to your Bike. -
Page 13: Service & Troubleshooting
SERVICE AND TROUBLESHOOTING PREVENTATIVE MAINTENANCE TIPS • Locate Bike in a cool, dry place. • Clean the top surface of the pedals regularly. • Make sure pedals are kept tight to crank arms. • Keep the display console free from fingerprints and salt build-up caused by sweat. - Page 14 TROUBLESHOOTING Our Bikes are designed to be reliable and easy to use. If, however, you have a problem, these troubleshooting steps may reveal the cause. PROBLEM: The console does not light up. SOLUTION: Check to make sure the power switch located on the backside of the console is turned on.
- Page 15 R2250 ONLY PROBLEM: The seat on your semi- recumbent Bike rocks from side to side. SOLUTION: With a 13mm wrench, loosen the Fixing Nuts on the side of the seat frame. With an 11mm wrench, pivot the Adjusting Post so the Fixing Nut is at the top of the slot.
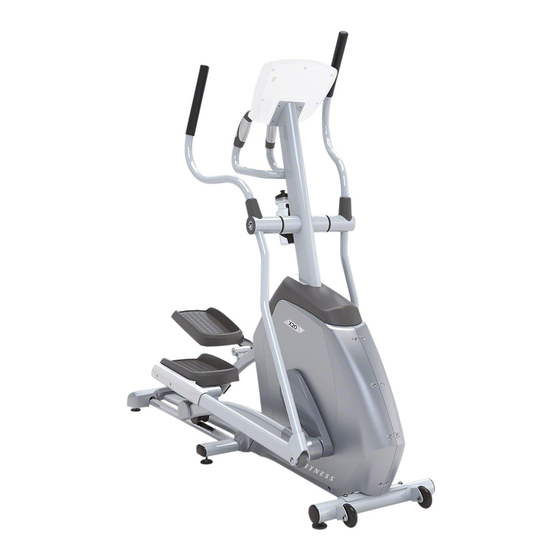
- Page 16 HEART RATE MONITORING SYSTEMS MAY BE INACCURATE. OVER EXERCISE MAY RESULT IN SEROUS INJURY OR DEATH. IF YOU FEEL FAINT STOP EXERCISING IMMEDIATELY. START RESISTANCE STOP PRESS FOR EASY START HOLD TO RESET PREMIER SIMPLE DELUXE CONSOLE DUAL-ACTION HANDLEBARS FOOT PAD SIDE STABILIZER GUIDE RAIL PEDAL ARM FRONT FOOT &...
-
Page 17: Assembly & Moving
ASSEMBLY It is recommended, when possible, that an authorized VISION FITNESS retailer assemble your Elliptical Trainer. If you have elected to assemble this product yourself, for your safety, please read and follow each of the steps in the enclosed assembly instructions. If you have any questions regarding any component or function of your Elliptical Trainer, contact your retailer. -
Page 18: Power Supply
Your Elliptical Trainer uses a wall mount external power supply. Use only the power supply provided with your Elliptical Trainer. If you misplace this power supply, please contact your authorized VISION FITNESS retailer for an original replacement. Use of the wrong power supply may cause... -
Page 19: Folding Elliptical Trainer
X6200 ONLY FOLDING YOUR ELLIPTICAL TRAINER It is important to always follow steps in the correct order when folding your Elliptical Trainer. STEP 1: On the left side of the machine, locate the arrow on the side cover that points to the four o’clock position of the disk. Rotate the disk so that the arrow is pointing to the disk axle (the point where the disk and pedal arm connect.) - Page 20 STEP 2: Move to the right side of the machine. Simultaneously lift both the pedal arm and the guide rail upon which the pedal arm rests to the vertical position (image A). The locking device, which is mounted to the guide rail, should now be aligned with the cylinder on the backside of the pedal arm.
- Page 21 STEP 3: To unfold your Elliptical Trainer, push the recessed lock key, found on the underside of the guide rail (image C), to release the lock. Pull the guide rail away from the pedal arm, and lower both to the floor. Repeat this step on the opposite side to completely unfold your Elliptical Trainer.
-
Page 22: Service & Troubleshooting
SERVICE AND TROUBLESHOOTING PREVENTATIVE MAINTENANCE TIPS • Locate Elliptical Trainer in a cool, dry place. • Make sure all bolts and fasteners are kept tight. • Keep the display console free from fingerprints and salt build-up caused by sweat. • Use a cotton cloth with water and a mild cleaning product to clean the Elliptical Trainer. - Page 23 TROUBLESHOOTING Our Elliptical Trainers are designed to be reliable and easy to use. If, however, you have a problem, these troubleshooting steps may reveal the cause. PROBLEM: The console does not light up. SOLUTION: Check to make sure the power switch located on the backside of the console is turned on.
-
Page 24: Display Console Overview
SIMPLE CONSOLE DISPLAY CONSOLE OVERVIEW The computerized display allows you to select a workout that helps you achieve your fitness goals. It also allows you to monitor the progress and feedback of each workout, so you can track improvements in fitness over time. - Page 25 CONSOLE HARDWARE DESCRIPTIONS A. POWER SWITCH Turn off power to your console if it will not be used for an extended period of time. B. MILES/KILOMETER SWITCH Changes your exercise feedback to the English or Metric system. C. ENTER KEY Use this key in setup mode to select your program, exercise time, and resistance level.
- Page 26 SIMPLE CONSOLE...
-
Page 27: Display Descriptions
SIMPLE CONSOLE DISPLAY DESCRIPTIONS A. PROFILE DISPLAY This window provides an 8x12 block profile of your program profile. Each horizontal row of blocks represents your segment time, which is total workout time divided by twelve. Each vertical column of blocks represents the resistance level, which is one block for every two levels. -
Page 28: Using The Console
USING THE SIMPLE CONSOLE QUICK START The quickest and easiest way to begin exercising is to simply press START. You will begin exercising in manual mode for a default time at the default resistance level. You can change the resistance manually with the arrow keys. -
Page 29: The Programs
SIMPLE PROGRAMS PROGRAM 1 (MANUAL) PROGRAM 5 (ROLLING HILLS) PROGRAM 2 (INTERVAL) PROGRAM 6 (MUSCLE TONER) PROGRAM 3 (INCLINE) PROGRAM 7 (MOUNTAIN) PROGRAM 4 (FAT BURN) -
Page 30: Engineering Mode
ENGINEERING MODE Engineering mode consists of six optional settings. Use the engineering mode to access information and enable certain features or displays on your console. ENTERING AND USING ENGINEERING MODE • Press and hold the UP s and DOWN t keys for approximately three seconds. -
Page 31: Deluxe Console
DELUXE CONSOLE DISPLAY CONSOLE OVERVIEW (DESCRIPTIONS ON NEXT PAGE) The computerized display allows the user to select a workout that meets their desired fitness goals. It also allows the user to monitor the progress and feedback of each workout, so they can track improvements in overall fitness over time. -
Page 32: Display Descriptions
DELUXE CONSOLE DISPLAY DESCRIPTIONS A. POWER SWITCH Turn off power to your console if it will not be used for an extended period of time. B. PROFILE DISPLAY This window provides a 10x16 block profile of the workout segments you are about to complete or have completed and the level of resistance for each segment. - Page 33 E. START/PAUSE/HOLD TO RESET KEY Press the START key to begin exercising at the set default time. Press START when instructed to by the scrolling LCD message center to begin a program. When exercising, press the START key to pause your workout.
-
Page 34: The Programs
THE DELUXE CONSOLE PROGRAMS WORKOUT OVERVIEW QUICK START Simply press START and you will skip the setup of specific workouts and begin exercising at a constant level (manual) workout. The resistance levels do not change automatically, but you can adjust the resistance with the arrows as you choose. - Page 35 FAT BURN is a program intended to target your stored body fat. This program is generally used at a slightly lower intensity, but runs for longer durations than other programs (30 to 60 minutes is recommended). MOUNTAIN features gradual increases in resistance to simulate riding through a mountain range.
-
Page 36: Using The Programs
USING THE PROGRAMS SELECTING QUICK START The easiest way to begin exercising is to simply press the START key. You will begin exercising at a MANUAL resistance program in which you can change the resistance levels to meet your goals. Current default settings will be used to determine exercise feedback. - Page 37 ENTERING TIME When prompted by the message center to enter a time, use the UP s arrow and DOWN t arrow to adjust the displayed exercise time to a desired value. ENTERING RESISTANCE LEVEL When prompted by the message center to enter resistance level, use the UP s arrow and DOWN t arrow to adjust the displayed resistance level.
-
Page 38: Using The Sprint 8 Program
USING THE SPRINT 8 PROGRAM The SPRINT 8 program is an anaerobic interval program designed to build muscle, improve speed, and naturally increase the release of Human Growth Hormone (HGH) in your body. Producing HGH through exercise and a proper diet has been shown as an effective way to burn fat and build lean muscle mass according to Phil Campbell, author of Ready, Set, Go! Synergy Fitness. -
Page 39: Using The Hrt Program
TARGET HRT PROGRAM The TARGET HRT program is designed to maintain your heart rate at 70% of your predicted maximum heart rate. It is intended to improve efficiency and endurance of your cardiovascular system by working your heart, lungs and circulatory systems. This is a great workout for anyone, but beginners may want to start lower and build their way up to 70% of their predicted maximum heart rate. - Page 40 Heart Rate Training means exercising at an intensity that keeps you in your ideal heart rate zone. Your personal heart rate training zone depends on your fitness goal, such as weight loss, cardiovascular endurance, or strength building. VISION FITNESS HRT programs are set up to keep ®...
- Page 41 TELEMETRIC HEART RATE CHEST STRAP The wireless Telemetric Chest Strap uses a pair of electrodes on the underside of the strap to send your heart rate signal to the console. Prior to wearing the chest strap, moisten the two rubber electrode pads with several drops of water.
- Page 42 TROUBLESHOOTING YOUR HEART RATE MONITOR CHEST STRAP PROBLEM: No pulse reading appears. SOLUTION: There may be a poor connection between the contact pads and skin; remoisten the electrode pads. SOLUTION: Transmitter is not properly positioned; reposition the chest strap. SOLUTION: Verify that the distance between the transmitter and receiver is not beyond the recommended range of 36 inches.
-
Page 43: Engineering Mode
ENGINEERING MODE Engineering mode consists of 13 optional settings. Use the engineering mode to enable certain features or displays on your console. ENTERING AND USING ENGINEERING MODE • Press and hold the UP s and DOWN t keys for approximately three seconds. -
Page 44: P R E M I Er Console
PREMIER CONSOLE OVERVIEW Stop Key Start Key Resistance Arrows Screen Keys Audio Out Jack (headphones) PREMIER WARNING! HEART RATE MONITORING SYSTEMS MAY BE INACCURATE. OVER EXERCISE MAY RESULT IN SEROUS INJURY OR DEATH. IF YOU FEEL FAINT STOP EXERCISING IMMEDIATELY. START RESISTANCE STOP... - Page 45 WELCOME SCREEN The welcome screen will take you through the log in process as a first time user or return user. The QUICK START function is also accessible from this screen. LOG IN AS A GUEST To log in as a GUEST select GUEST and enter your age and weight.
- Page 46 LOG IN OPERATION Once you have selected LOG IN on the Welcome Screen press any key next to a User Profile Icon that is not filled in. From there enter a user name, set age and weight and you are set to go. To edit a User Profile select EDIT USER.
-
Page 47: Basic Navigation
BASIC NAVIGATION ATM STYLE KEYS The Premier console is set up like a ATM machine with function keys next to icons on the screen for modifying screen data. To select a function or modify screen data simply press the key next to the icon you wish to choose. - Page 48 TRACK Follow the colored dot around the quarter mile track and watch the laps count up during your workout. HEART RATE SCREEN Only available for HRT programs. The colored graph shows target and current heart rate as well as the percent of your maximum heart rate.
- Page 49 TRAINING CALENDAR To view your Training Calendar log in as yourself and press the key next to the Training Calendar. From there you can select daily, weekly or monthly stats. Any day, week or month with an activity will be a lighter shade of green on the calendar.
-
Page 50: Program Overviews
For all programs follow the instructions given on the display. For additional information select INFORMATION/HELP. SPRINT 8 Exclusive to Vision Fitness, this is an anaerobic workout that includes eight 30 second sprint intervals followed by 90 second recovery intervals. Designed to burn fat,... - Page 51 FAT BURNER This program is designed to target your stored body fat. This program is generally used at a slightly lower resistance level but runs for longer durations than other programs. HILL CLIMB Hill Climb is a variable resistance program that adds variety and targets your muscles from different angles.
-
Page 52: Places To Go
PLACES TO GO 5K/10K/15K PROGRAMS (10K/20K/30K FOR BIKES) These consistent effort programs improve your cardiovascular fitness by simulating 5K/10K/15K (10K/20K/30K for bikes) distance based workouts with hills. CHOOSE YOUR BACKGROUND CHOOSE YOUR DISTANCE CHOOSE YOUR LEVEL* (*Level 1 follows elevation profile with user determined speed) -
Page 53: Goal Programming
GOAL PROGRAMS CALORIE GOAL Select the number of calories you would like to burn. The program will keep going until you reach your goal. A cool down starts once the goal is achieved. DISTANCE GOAL Select the Distance you would like to go. The program will keep going until you reach your goal. -
Page 54: Hrt Programming
HRT PROGRAMS TARGET HRT Target HRT allows you to set your target heart rate percentage. The machine will automatically change resistance levels to keep you at your preset heart rate target. The user must grasp the hand pulse sensors or wear a telemetric heart rate chest strap during use. - Page 55 NOTES FOR YOUR HEART RATE TRAINING PROGRAM • If there is no heart rate detected, the program will not adjust resistance. • If the heart rate detected is higher than the target zone by 10 BPM, the console will “beep” and the screen will display a warning message. •...
- Page 56 WIRELESS CHEST TRANSMITTER Prior to wearing the strap on your chest, moisten the two rubber contact pads with several drops of water and spread with your fingers. TRANSMITTER STRAP PLACEMENT Center the Transmitter Strap just below the breast or pectoral muscles, directly over your sternum with the logo facing out.
- Page 57 TARGET HEART RATE Target Heart Rate is a percentage of your maximum heart rate. Target Heart Rate will vary for each individual, depending on age, current level of conditioning, and personal fitness goals. Exercise heart rate should range from 55% to 85% of your maximum heart rate. As a point of reference, we use the predicted maximum heart rate formula of (220 minus age) to determine your heart rate training zone.
- Page 58 USING THE SPRINT 8 PROGRAM The SPRINT 8 program is an anaerobic interval program designed to build muscle, improve speed, and naturally increase the release of Human Growth Hormone (HGH) in your body. Producing HGH through exercise and a proper diet has been shown as an effective way to burn fat and build lean muscle mass according to Phil Campbell, author of Ready, Set, Go! Synergy Fitness.
- Page 59 CUSTOM USER PROGRAMS Run these programs like a manual program and the console will save your changes. When you are done you just save the program to replay it another day. can create five different custom programs.
-
Page 60: Audio/Video/Usb Capabilities
PREMIER CONSOLE AUDIO/VIDEO CAPABILITIES The Premier console has a port on its backside that contains RCA connectors for use with A/V equipment (DVD, CD, VCR, etc.). Plug in your A/V device and select the DVD function (3rd key down on the right side) while a program is in use. - Page 61 PREMIER CONSOLE USB CAPABILITIES The Premier console has three USB features: • Save workout to USB for www.livestrong.com workout tracking • Import Pictures for Viewing on Console • Software Updates The Advanced Feature allows users to view their workout history on www. Livestrong.com by using the Save Workout to USB function.
- Page 62 IMPORT PICTURES FOR vIEWING ON CONSOLE You can load up to 10 pictures onto the console for viewing during your workout. First you must convert the images to the proper format and then load them onto the console. • Convert Images: Images to be loaded onto your console must be formatted to the following format: JPEG or PNG.
- Page 63 vIEWING IMPORTED PICTURES ON YOUR CONSOLE After you have imported personal images onto your console, you can view a slide show or manually scroll through images. SLIDE SHOW FEATURE The console is set up to display imported images in a Slide Show with 30 second intervals.
-
Page 64: Engineering Mode
USER ENGINEERING ENGINEERING MODE SCREEN To enter user engineering mode, press and hold the UP and DOWN arrows simultaneously. CONFIGURATION SCREEN From this screen adjust program defaults, check accumulated time, change the language or change the unit of measure. UNIT SELECTION To change the unit of measure select MI or KM and check to see your desired unit of measure is... - Page 65 SETTING PROGRAM DEFAULTS To set program defaults select the setting you would like to change, make the necessary change and select BACK to return to the previous screen. Continue selecting BACK to return to main user engineering screen. SETTING DATE/TIME Select DATE/TIME when in the CONFIGURATION screen.
-
Page 66: X20, E1500, R1500
LABOR - ONE YEAR VISION FITNESS shall cover the Labor cost for the repair of the device for a period of one year from the date of original purchase, so long as the device remains in the possession of the original owner. - Page 67 WARRANTY REGISTRATION Your warranty card must be completed and sent to VISION FITNESS before a warranty claim can be processed. You may also register via our website at www.visionfitness.com. Inside the enclosed warranty card, you will find a customer survey.
-
Page 68: X6200, E3200, R2250
LABOR - ONE YEAR VISION FITNESS shall cover the Labor cost for the repair of the device for a period of one year from the date of original purchase, so long as the device remains in the possession of the original owner. - Page 69 WARRANTY REGISTRATION Your warranty card must be completed and sent to VISION FITNESS before a warranty claim can be processed. You may also register via our website at www.visionfitness.com. Inside the enclosed warranty card, you will find a customer survey.
-
Page 70: Corporate Warranty
LIMITED CORPORATE WARRANTY* Up to 3 hours use per day CORPORATE USES DEFINED VISION FITNESS warrants model X6200, E3200, and R2250 for use in corporate facilities including: Hotels; Resorts; Police & Fire Stations; Apartment Complexes; Corporate Fitness Centers; Hospitals; Rehabilitation and Sports Medicine Clinics, where average use is up to three hours per day. - Page 71 Your care in completing the survey will be of value to us in serving you in the future. Comments and suggestions are always welcome. We are certain you will enjoy your new fitness product. Thank you for selecting a VISION FITNESS product.
- Page 72 1600 Landmark Drive • Cottage Grove, WI 53527 toll free 800.335.4348 • fax 608.839.8731 www.visionfitness.com 2010 Vision Fitness. All Rights Reserved. Cambridge Motor Works, Comfort Arc, Easy-8, ECB-Plus, HRT, Quick-Set, Quiet-Glide, and SPRINT 8 are Trademarks of Vision Fitness. OM18.70PRD...
Need help?
Do you have a question about the SIMPLE and is the answer not in the manual?
Questions and answers