
Subscribe to Our Youtube Channel
Related Manuals for Advantech ADAM-6542


Summary of Contents for Advantech ADAM-6542
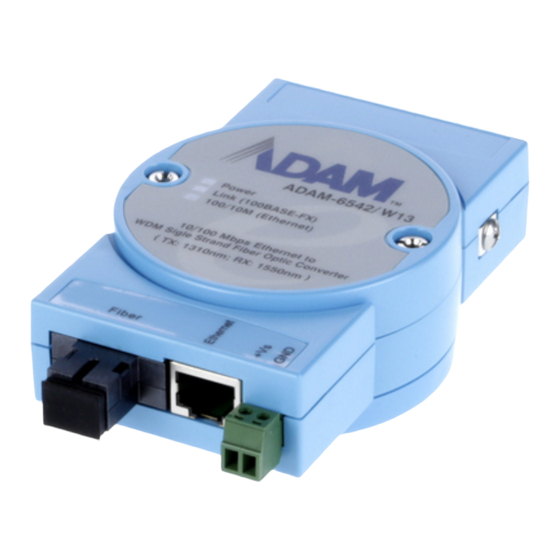
- Page 1 ADAM-6542 10/100Base-TX Ethernet to 100Base-FX WDM Single Strand Fiber Optic Converter...
- Page 2 Copyright Notice This document is copyrighted, 2003, by Advantech Co., Ltd. All rights are reserved. Advantech Co., Ltd., reserves the right to make improvements to the products described in this manual at any time without notice. No part of this manual may be reproduced, copied, translated or transmitted in any form or by any means without the prior written permission of Advantech Co., Ltd.
-
Page 3: Technical Support
Advantech has come to be known. Your satisfaction is our number one concern. Here is a guide to Advantech’s customer services. To ensure you get the full benefit of our services, please follow the instructions below carefully. -
Page 4: Product Warranty
Product Warranty Advantech warrants to you, the original purchaser, that each of its products will be free from defects in materials and workmanship for two years from the date of purchase. This warranty does not apply to any products which have been repaired or altered by other than repair personnel authorized by Advantech, or which have been subject to misuse, abuse, accident or improper installation. -
Page 5: Table Of Contents
Contents Chapter 1 Introduction ......... 1-1 1.1 Introduction ..............1-2 1.2 Features ................1-3 1.3 Specification ..............1-4 1.4 Package Checklist ............1-4 1.5 Ordering Information: ............. 1-4 Chapter 2 Installation ........1-5 2.1 Front / Rear View ............. 1-6 2.2 Connecting the Hardware .......... - Page 6 Figures Figure 2-1 ADAM-6542-Front Panel ............1-6 Figure 2-2 ADAM-6542-Rear Panel ............1-6 Figure 2-3 Panel Mounting ................1-7 Figure 2-4 Din Rail Mounting ............... 1-8 Figure 2-5 Piggyback Stack ................ 1-9 Figure A-1 RJ-45 Pin Assignment ............. 1-14 Figure A-2 EIA/TIA-568B ................1-14...
- Page 7 Tables Table 2-1 ADAM-6542 LED Definition ............1-6...
- Page 8 ADAM-6542 manual...
-
Page 9: Chapter 1 Introduction
Introduction... -
Page 10: Introduction
DIN Rail, panel, piggyback mounting. The ADAM-6542 also supplies +10~30 VDC operating voltage over the terminal block. In addition, the oper- ating temperature of the ADAM-6542 is from -10 ~ 70°C. The above functions make the ADAM-6542 a more stable and reliable industrial grade converter. -
Page 11: Features
The ADAM-6542 provides three LED indicators: Power, Link, 10/100Mbps which let you trouble shoot easier. Robust enough for industrial environment The ADAM-6542 can normally work from -10°C to 70°C, and accepts wide unregulated voltage range from +10 ~ 30 V . Beside, it also provides 3,000 V surge protection from over-voltage damages. -
Page 12: Specification
• LED: Power, LNK/ACT, 10/100 Mbps • Transmission Distance (Ethernet): 100 m • ADAM-6542: (Single mode fiber): 8.3/125, 8.7/125, 9/125 or 10/125 µm single mode fiber, 20 km for WDM (Wavelength Division Multiplexing) • Power Requirement: unregulated 10 to 30 V •... -
Page 13: Chapter 2 Installation
Installation... -
Page 14: Front / Rear View
In this chapter, you will be given an overview of the ADAM-6542 hardware installation procedures. 2.1 Front / Rear View There are six network LEDs located on the top panel of ADAM-6542, each with its own specific function. Color Description... -
Page 15: Connecting The Hardware
2.2 Connecting the Hardware Next, we will explain how to find a proper location for your ADAM-6542, connect to the network, hook up the power cable, and connect to the ADAM- 6542 Ethernet port. 2.2.1 Choosing a Location Due to its versatility and innovative design, the ADAM-6542 can be: •... -
Page 16: Figure 2-4 Din Rail Mounting
DIN Rail Mounting You can mount the ADAM-6542 on a standard DIN Rail. First, using two screws, attach the metal plate to the DIN Rail bracket. Because the screw heads are beveled, the tops of the screws will be flush with the metal plate. Din... -
Page 17: Figure 2-5 Piggyback Stack
Piggyback Stack ADAM-6542 can be stacked as seen in the figure below. Figure 2-5 Piggyback Stack Chapter 2 Installation 9... -
Page 18: Network Connection
Ethernet or 100Mbps Fast Ethernet.. ADAM-6542 can be connected to other hub or switch via a two-pair straight through cable or crossover cable. The connection can be made from any ADAM-6542 port (MDIX) to other Hub or Switch either MDI-X port or uplink MDI port. -
Page 19: Power Connection
2.3.4 Power Connection You should take the following steps to connect the ADAM-6542 power. 1. Connect the power cable to 2-pin connector 2. Connect power cable to power adapter Note: Please plug in a dust cover of fiber port to prevent from dust as you don’t use fiber port. - Page 20 12 ADAM-6542 manual...
-
Page 22: Figure A-1 Rj-45 Pin Assignment
It is suggested to adopt ELA/TIA as the wiring of the RJ45. Figure A-1 RJ-45 Pin Assignment 1. White, Green 2. Green 3. White, Orange 4. Blue 5. White, Blue 6. Orange 7. White, Brown 8. Brown Figure A-2 EIA/TIA-568B 14 ADAM-6542 manual...
Need help?
Do you have a question about the ADAM-6542 and is the answer not in the manual?
Questions and answers