HP ProCurve 2424M Installation Manual
Gigabit stacking module
Hide thumbs
Also See for ProCurve 2424M:
- Management and configuration manual (690 pages) ,
- Installation and configuration manual (504 pages) ,
- Installation and getting started manual (348 pages)

Related Manuals for HP ProCurve 2424M


Summary of Contents for HP ProCurve 2424M
- Page 1 ProCurve Switches and Hubs HP ProCurve Switch 2424M Gigabit Stacking Module Installation Guide L e s s Wo r k , M o r e N e t w o r k h t t p : / / w w w . h p . c o m / g o / p r o c u r v e...
- Page 3 HP ProCurve Switch 2424M Gigabit Stacking Module Installation Guide...
- Page 4 See the Customer Support/Warranty booklet included with the product. A copy of the specific warranty terms applicable to your Hewlett-Packard product and replacement parts can be obtained from your HP sales and service office or HP-authorized reseller. Hewlett-Packard Company 8000 Foothills Boulevard, m/s 5552 Roseville, California 95747-5552 http://www.hp.com/go/procurve...
-
Page 5: Table Of Contents
Contents Description ........... . 1 Installing the Module . -
Page 7: Description
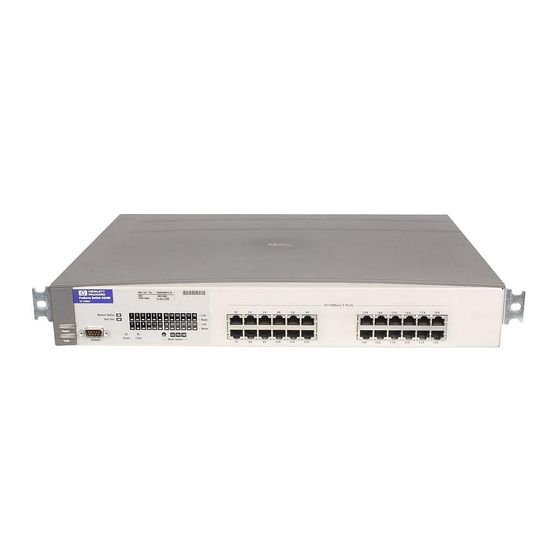
Description The HP ProCurve Switch 2424M Gigabit Stacking Module is a component that you can add to an HP ProCurve Switch 2424M to provide stacking between Switch 2424Ms and a variety of other network connectivity options. handle to assist module... -
Page 8: Installing The Module
OS version C.06.06 or later to support the Gigabit Stacking Module (see page 3). Install new software, if needed. The new software is found on the floppy disk included with the module. You can also copy the OS file from the HP networking products world wide web site: http://www.hp.com/go/procurve The software files to download are located under the [Support] button on that web page. -
Page 9: Download Switch Software
1. Download Switch Software Verify Current Switch Software Your HP ProCurve Switch 2424M must be running OS version C.06.06 or later to support the Gigabit Stacking Module. To determine which OS version is running in the switch, connect a console to the switch and perform the... -
Page 10: Download The New Os Software
PC directory you will use for downloading to the switch, or you can download it directly from the floppy disk. Go on to step 2. • If the source of your software file is the self-extracting file from the HP ProCurve web page (http://www.hp.com/go/procurve), do the following: a. -
Page 11: Install Transceivers Into The Module
Installing the Module 2. Install Transceivers Into the Module Any of the HP Gigabit Transceivers (Gigabit-SX, Gigabit-LX, or Gigabit Stacking) can be installed in either of the transceiver slots in the Gigabit Stacking Module. The order or location does not matter. -
Page 12: Install The Module
Installing the Module 3. Install the Module 1. Use a Torx T-10 or flat-bladed screwdriver to unscrew the screws in the module slot cover plate in the back of the Switch 2424M. Then remove the cover plate and store it for possible future use. 2. -
Page 13: Verify The Module Is Installed Correctly
Installing the Module 5. Tighten the two retaining screws to hold the module in place. The retaining screws should be secure but be careful to not overtighten them. tighten the two retaining screws 4. Verify the Module is Installed Correctly Observe the Module Status, Self Test, and Fault LEDs on the front of the switch to verify that the module is installed properly. -
Page 14: Connect The Network Cables
Gigabit Shielded twisted-pair cable supplied A 1/2-meter cable is included in the Stacking with the Gigabit Stacking Kit (HP J4116A) Gigabit Stacking Kit. A 10-meter cable has also been tested and verified. The cable is AMP part number 627124-1. - Page 15 Installing the Module 2. Check the port LEDs for the newly-installed module to ensure that the port(s) connected in the preceding step are operating correctly. For each of the two transceiver ports on the switch module there are Link and Mode LEDs as shown in the next illustration.
-
Page 16: Reset The Switch (If Necessary)
You can reset the switch by any of these methods: pressing the Reset button on the front of the switch power cycling the switch selecting the Reset or Reboot option from the switch console, web browser interface, or HP TopTools for Hubs & Switches... -
Page 17: Customize The Port Configuration (Optional)
Installing the Module 7. Customize the Port Configuration (Optional) If the module slot in the Switch 2424M was empty the last time the switch was either rebooted or reset (or the power to the switch was cycled), then the module will use preconfigured default parameter values that will work for most networks. -
Page 18: Sample Connections
Sample Connections Sample Connections The HP Gigabit Stacking Module allows you to easily stack multiple Switch 2424Ms with gigabit speed while at the same time connecting the stack to network backbones, servers and other network devices with gigabit fiber- optic connections. The following illustration shows an example of these connections. -
Page 19: Troubleshooting
Troubleshooting Troubleshooting The primary tools for troubleshooting the switch modules are the LEDs on the front of the switch and on the module. Refer to “LED Behavior” on page 7. Also, refer to the Installation Guide and the Management and Configuration Guide shipped with the switch, for more detailed troubleshooting informa- tion. - Page 20 Troubleshooting Number Problem Solution The module was When you “hot swap” modules in the switch slot, if you install a different module type installed in the than the one that was previously installed in the slot, you must reset the switch so the slot after a switch processor can properly initialize and configure the new module type.
-
Page 21: Customer Support Services
You can use the console interface to determine the state of the port and re-enable the port if necessary. If you have configured an IP address on the switch, you can use Telnet to access the console, or use the web browser interface, or HP TopTools for Hubs & Switches network management software. -
Page 22: Replacing Or Removing The Module
Replacing or Removing the Module Replacing or Removing the Module Follow these procedures to replace the Gigabit Stacking Module with another, or to remove the module without replacing it: 1. Remove any network cables from the ports on the module. 2. -
Page 23: Mode Conditioning Patch Cord For Gigabit-Lx
Mode Conditioning Patch Cord for Gigabit-LX Mode Conditioning Patch Cord for Gigabit-LX The following information applies to installations in which multimode fiber-optic cables are connected to a Gigabit LX Transceiver installed in the Gigabit Stacking Module. Unlike Gigabit SX, which connects to only multimode fiber-optic cabling, Gigabit LX can use either single-mode or multimode cable. -
Page 24: Installing The Patch Cord
Gigabit LX Transceiver and has multimode fibers that match the characteristics of the multimode fiber in your network. Recommended Patch Cords The following Mode Conditioning Patch Cords have been tested and verified to operate correctly with the HP Gigabit LX Transceiver: Part Number Connectors Multimode Section Fiber Type 62.5/125 µm... -
Page 25: Specifications
Gigabit-LX described on page 8. The Gigabit Stacking Transceiver has a proprietary connector. It accepts the 1/2-meter shielded twisted-pair cable that is shipped in the HP Gigabit Stacking Kit (HP J4116A), as described on page 8. -
Page 26: Emc Regulatory Statements
EMC Regulatory Statements EMC Regulatory Statements U.S.A. FCC Class A This equipment has been tested and found to comply with the limits for a Class A digital device, pursuant to Part 15 of the FCC Rules. These limits are designed to provide reasonable protection against interference when the equipment is operated in a commercial environment. -
Page 27: European Community Declaration Of Conformity
EMC Regulatory Statements Korea Taiwan European Community Declaration of Conformity This product is designed for operation with the HP ProCurve Switch 2424M. Please see the Declaration of Conformity included in the HP ProCurve Switch 2424M Installation Guide. - Page 28 Technical information in this document is subject to change without notice. ©Copyright Hewlett-Packard Company 1999. All rights reserved. Reproduction, adaptation, or translation without prior written permission is prohibited except as allowed under the copyright laws. Printed in Singapore 03/99 Manual Part Number J4130-90001 *J4130-90001*...
Need help?
Do you have a question about the ProCurve 2424M and is the answer not in the manual?
Questions and answers