
Related Manuals for Crestron V-Panel TPMC-V12


Summary of Contents for Crestron V-Panel TPMC-V12
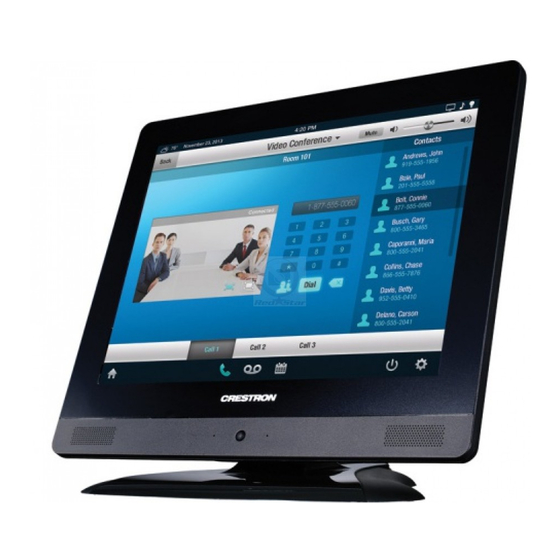
- Page 1 Crestron TPMC-V12 & TPMC-V15 V-Panel™ Integrated 12” & 15” Touch Screens Operations Guide...
- Page 2 Other trademarks, registered trademarks and trade names may be used in this document to refer to either the entities claiming the marks and names or their products. Crestron disclaims any proprietary interest in the marks and names of others.
-
Page 3: Table Of Contents
Tilt Tension Adjustment.................... 49 Recommended Cleaning.................... 49 Programming Software ......................50 Earliest Version Software Requirements for the PC ..........50 Programming with Crestron SystemBuilder.............. 50 Programming with SIMPL Windows ................ 50 Programming with VisionTools ................53 Embedded Applications..................... 57 Defaults for Embedded Windows Applications ............59 Programming Embedded Windows Applications............ -
Page 5: V-Panel™ Integrated 12" And 15" Touch Screens: Tpmc-V12/15
(TPMC-V15) displays with astounding 24-bit color graphics and video, advanced device control apps and objects, streaming multimedia, Web browsing and IP intercom, cohesively merged into one seamless user interface through Crestron Core 3. For simplicity within this guide, the term “TPMC-V12/15” is used except where noted. - Page 6 High speed Ethernet and Cresnet • Available in white or black Contact Crestron for a current list of embedded applications. To ensure reliable performance, new device drivers and applications are available only from Crestron through firmware updates. Sleek, Versatile Design Our V-Panels have been designed with appearance and versatility in mind.
- Page 7 IP Intercom Crestron IP intercom enables 2-way voice communication and room monitoring over Ethernet with other compatible Crestron touch screens. Keyboard/Mouse Options Onscreen keyboard and mouse capabilities enable complete control of the TPMC-V12/15’s embedded Web browser and other applications and can also be...
- Page 8 15 feet (4.5 meters). For longer distances up to 330 feet (100 meters), especially for in-wall applications, 3, 4 you may use a choice of several Crestron wire solutions or generic CAT5e cable. ® The TPMC-V-IMCW interface module provides both Cresnet and high speed Ethernet ports for control system communications and LAN access.
-
Page 9: Applications
Crestron TPMC-V12/15 V-Panel™ Integrated 12” & 15” Touch Screens Applications The following diagrams show a TPMC-V12 in a typical application. TPMC-V12 in a Typical Application (Each Diagram Varies with LAN Cable Length*) V-Panel™ Integrated 12” & 15” Touch Screens: TPMC-V12 & TPMC-V15 • 5... - Page 10 V-Panel™ Integrated 12” & 15” Touch Screens Crestron TPMC-V12/V15 The following diagrams show a TPMC-V15 in a typical application. TPMC-V15 in a Typical Application (Each Diagram Varies with LAN Cable Length*) 6 • V-Panel™ Integrated 12” & 15” Touch Screens: TPMC-V12 & TPMC-V15...
-
Page 11: Specifications
120 MB Graphics Engine 24-bit non-palette graphics + 8-bit alpha channel transparency, 16.7 million colors, Crestron Core 3 UI, multi-mode objects, dynamic graphics and text, PNG translucency, full motion (60 fps) animation, transition effects, color key view windowing, remote annotation (Continued on following page) V-Panel™... - Page 12 NTSC or PAL Input Resolutions 480i, 576i Color Depth 24-bit, 16.7 million colors Streaming/File Formats MJPEG via Crestron MJPEG Viewer based on HTTP protocol, plus all formats supported by the embedded media player applications Audio Hardware Features Built-in microphone and amplified speakers...
- Page 13 Crestron TPMC-V12/15 V-Panel™ Integrated 12” & 15” Touch Screens TPMC-V12/15 Specifications (Continued) SPECIFICATION DETAILS Default Net ID Minimum 2-Series Control Version 4.001.1012 or later 6, 7 System Update File Environmental Temperature 41º to 113º F (5º to 45º C) Humidity...
- Page 14 V-Panel™ Integrated 12” & 15” Touch Screens Crestron TPMC-V12/V15 TPMC-V12/15 Specifications (Continued) SPECIFICATION DETAILS Dimensions (Continued) TPMC-V15-TILT Height 11.69 in (297 mm) max at 0º tilt Width 15.33 in (390 mm) Depth 8.11 in (206 mm) 8.35 in (212 mm) max at 35º tilt...
- Page 15 BBI-V15 Pre-Construction Wall Mount Back Box for TPMC-V15-WALL – International Version CEN-NVS100 Network Video Streamer CRESCAT Crestron Home CAT5 AV Cable CRESCAT-D-HP Crestron Home “High Power” CAT5 AV Cable ® CRESCAT-QM QuickMedia Cable CRESNET Cresnet Control Cable CRESNET-HP Cresnet “High Power” Control Cable DM-CBL DigitalMedia™...
- Page 16 4. May be powered by power pack or Cresnet network power, not both. 5. Item included; refer to individual product specifications for additional information. 6. The latest software versions can be obtained from the Crestron Web site. Refer to the NOTE following these footnotes.
-
Page 17: Physical Description
Crestron TPMC-V12/15 V-Panel™ Integrated 12” & 15” Touch Screens Physical Description This section provides information on the connections, controls and indicators available on your TPMC-V12/15. TPMC-V12-TILT Physical View (Shown in Black) V-Panel™ Integrated 12” & 15” Touch Screens: TPMC-V12 & TPMC-V15 • 13... - Page 18 V-Panel™ Integrated 12” & 15” Touch Screens Crestron TPMC-V12/V15 TPMC-V12-WALL Physical View (Shown in White) 14 • V-Panel™ Integrated 12” & 15” Touch Screens: TPMC-V12 & TPMC-V15 Operations Guide – DOC. 6940B...
- Page 19 Crestron TPMC-V12/15 V-Panel™ Integrated 12” & 15” Touch Screens TPMC-V15-TILT Physical View (Shown in Black) V-Panel™ Integrated 12” & 15” Touch Screens: TPMC-V12 & TPMC-V15 • 15 Operations Guide – DOC. 6940B...
- Page 20 V-Panel™ Integrated 12” & 15” Touch Screens Crestron TPMC-V12/V15 TPMC-V15-WALL Physical View (Shown in White) TPMC-V15 Physical View (Rear Showing Connector Ports) 16 • V-Panel™ Integrated 12” & 15” Touch Screens: TPMC-V12 & TPMC-V15 Operations Guide – DOC. 6940B...
- Page 21 Crestron TPMC-V12/15 V-Panel™ Integrated 12” & 15” Touch Screens TPMC-V12 Overall Dimensions (Front and Side Views) 11.72 in (298 mm) 10.22 in (260 mm) 1.66 in (42 mm) Microphone V-Panel™ Integrated 12” & 15” Touch Screens: TPMC-V12 & TPMC-V15 • 17...
- Page 22 V-Panel™ Integrated 12” & 15” Touch Screens Crestron TPMC-V12/V15 TPMC-V12 Overall Dimensions (Rear View) 4.39 in 2.96 in (112 mm) (75 mm) 2.96 in (75 mm) 4.14 in (105 mm) NOTE: In the illustration above, the TPMC-V12 is shown with the rear cover removed.
- Page 23 Crestron TPMC-V12/15 V-Panel™ Integrated 12” & 15” Touch Screens TPMC-V12-TILT Overall Dimensions (Front View) 11.72 in (298 mm) 10.22 in (260 mm) 10.81 in (275 mm) Microphone V-Panel™ Integrated 12” & 15” Touch Screens: TPMC-V12 & TPMC-V15 • 19 Operations Guide – DOC. 6940B...
- Page 24 V-Panel™ Integrated 12” & 15” Touch Screens Crestron TPMC-V12/V15 TPMC-V12-TILT Overall Dimensions (Side View) 35º Max Tilt Angle 64.00 in ±1.00 1.66 in (~1.63 m) (42 mm) 8.11 in (206 mm) 20 • V-Panel™ Integrated 12” & 15” Touch Screens: TPMC-V12 & TPMC-V15...
- Page 25 Crestron TPMC-V12/15 V-Panel™ Integrated 12” & 15” Touch Screens TPMC-V15 Overall Dimensions (Front and Side Views) 15.33 in (390 mm) 11.10 in (282 mm) 1.85 in (47 mm) Microphone V-Panel™ Integrated 12” & 15” Touch Screens: TPMC-V12 & TPMC-V15 • 21...
- Page 26 V-Panel™ Integrated 12” & 15” Touch Screens Crestron TPMC-V12/V15 TPMC-V15 Overall Dimensions (Rear View) 6.19 in 2.96 in (158 mm) (75 mm) 2.96 in (75 mm) 4.14 in (105 mm) NOTE: In the illustration above, the TPMC-V15 is shown with the rear cover removed.
- Page 27 Crestron TPMC-V12/15 V-Panel™ Integrated 12” & 15” Touch Screens TPMC-V15-TILT Overall Dimensions (Front View) 15.33 in (390 mm) 11.10 in (282 mm) 11.69 in (297 mm) Microphone V-Panel™ Integrated 12” & 15” Touch Screens: TPMC-V12 & TPMC-V15 • 23 Operations Guide – DOC. 6940B...
- Page 28 V-Panel™ Integrated 12” & 15” Touch Screens Crestron TPMC-V12/V15 TPMC-V15-TILT Overall Dimensions (Side View) 35º Max Tilt Angle 64.00 in ±1.00 1.85 in (~1.63 m) (47 mm) 8.11 in (206 mm) TPMC-V12/15 Overall Dimensions (Rear View – V15 Shown) 24 • V-Panel™ Integrated 12” & 15” Touch Screens: TPMC-V12 & TPMC-V15...
- Page 29 Crestron TPMC-V12/15 V-Panel™ Integrated 12” & 15” Touch Screens Connectors, Controls & Indicators CONNECTORS DESCRIPTION CONTROLS & INDICATORS HARD KEY (1) Programmable push button, also reboots the touch screen if held for six seconds Power LED (1) Green LED, indicates touch screen is in active...
-
Page 30: Setup
The IP ID is set using the Internet setup menu (refer to “IP Table” on page 42. IP ID may also be set within the TPMC-V12/15’s table using Crestron Toolbox. For information on setting an IP table, refer to the Crestron Toolbox help file. The IP IDs of multiple TPMC-V12/15 devices in the same system must be unique. -
Page 31: Configuring The V-Panel
2. If the project has a button defined for this purpose, touching the button will provide entry into the setup menu. 3. Crestron Toolbox can be also used to enter the setup menu: Establish communication with the touch screen (refer to “Establishing Communication”... - Page 32 V-Panel™ Integrated 12” & 15” Touch Screens Crestron TPMC-V12/V15 TPMC-V12/15 Setup Menu The setup menu provides access to all basic functions and parameters. It is divided into Setup, Ethernet, Standby, Screen Brightness, Misc. Controls, Hard Button Feedback and Ethernet Status sections. There are also buttons for Save & Reboot, Shut Down and Exit.
- Page 33 Crestron TPMC-V12/15 V-Panel™ Integrated 12” & 15” Touch Screens Security The Security button opens the “Security Setup” window, which allows the user to change the username and password of the system account, setup and close network connections, setup a proxy server, close network connections and clear Internet browser temporary files, history and cookies.
- Page 34 V-Panel™ Integrated 12” & 15” Touch Screens Crestron TPMC-V12/V15 To add a new network connection, touch Add…. “Configure Network Connection” Window To add a network drive, perform the following procedure: 1. Touch to browse for the new network connection. If the remote...
- Page 35 Crestron TPMC-V12/15 V-Panel™ Integrated 12” & 15” Touch Screens To setup a proxy server, select Use Proxy Server. 1. Enter the IP address or name of the proxy server. 2. If desired, specify addresses that should not use the proxy server (i.e., intranet addresses).
-
Page 36: Touch Screen
NOTE: The touch screen’s calibration routine can also be accessed through Crestron Toolbox if the touch screen is connected to a control system via Cresnet and/or TCP/IP by selecting the device from the Network Device Tree and right-clicking the device to select Functions | Setup Mode…. - Page 37 Crestron TPMC-V12/15 V-Panel™ Integrated 12” & 15” Touch Screens When Touch Screen Test is touched, the test screen will be displayed (refer to illustration below). This screen allows the user to test the touch screen response at 17 points on the screen. Each button on the screen will light when touched. Touch Return to exit the test screen.
- Page 38 NOTE: When selecting Browse, the contents of the “Recent” folder will not be available. NOTE: Projects can also be loaded via Crestron Toolbox. NOTE: If External is checked, the display list cannot be viewed via Crestron Toolbox. NOTE: When loading a project to an external storage device (e.g. MMC card or flash drive), a subdirectory (not the root) must be used as the working path.
- Page 39 Crestron TPMC-V12/15 V-Panel™ Integrated 12” & 15” Touch Screens “Project and Firmware” Window (Firmware Tab) Current Loaded Firmware displays the version of the current firmware. In the Load New Firmware section, touch Browse and select the firmware file (i.e., the .csz or .zip file) to be loaded from a network drive, USB device or flash drive.
- Page 40 V-Panel™ Integrated 12” & 15” Touch Screens Crestron TPMC-V12/V15 Video is setup using the Overscan and Color controls (for Brightness, Hue, Contrast and Saturation). Overscan Overscan is the active image area in a video picture that is outside the edges of the display device.
- Page 41 Crestron TPMC-V12/15 V-Panel™ Integrated 12” & 15” Touch Screens Audio Touch Audio to open the “Audio Setup” window, shown in the illustration that follows. Volume controls and Mute buttons are available for Speakers, Local Audio and Key Clicks, as well as a Mute button for the Microphone input.
- Page 42 (child windows) that open when you are in Internet Explorer (not the popup windows of the embedded applications). NOTE: Refer to the Crestron Web site (www.crestron.com), online help Answer ID 4190, for information on the latest versions of the software.
- Page 43 USB mouse, right-click on the VNC viewer window, then select Save configuration info as…. NOTE: Refer to the Crestron Web site, online help Answer ID 4627, for information on how to set up the VNC viewer. Refer to Answer ID 3345 for information on how to program the MJPEG viewer.
- Page 44 The Ethernet portion of the setup menu allows configuration of the touch screen settings for Ethernet communications. The Crestron Swirl logo at the top of the Ethernet portion of the setup menu illuminates to indicate the status of your connection to the control system(s): •...
- Page 45 Crestron TPMC-V12/15 V-Panel™ Integrated 12” & 15” Touch Screens “Local Area Connection Properties” Window To establish dynamic or static processing, select Internet Protocol (TCP/IP) and touch Properties. “Internet Protocol (TCP/IP) Properties” Window Transmission Control Protocol/Internet Protocol (TCP/IP) is a set of protocols that defines how to transfer data between two computers.
- Page 46 The touch screen can communicate with multiple control systems. For more information on IP tables, refer to the latest version of the Crestron 2-Series Control Systems Reference Guide (Doc. 6256). “IP Table Setup” Window The IP ID is the ID number that is used to identify the touch screen in the control system’s IP table.
- Page 47 The hostname may be used when transferring a program over Ethernet using Crestron Toolbox. This window permits editing of the hostname and workgroup. “Network ID” Window NOTE: The hostname is required for Ethernet communication.
- Page 48 “Diagnostics” window. “Diagnostics” Window Reset CTP Port resets the default value of the CTP port to 41795, for terminal connection using Crestron Toolbox. To configure the appearance of popup messages, touch Configure Messages. The “Message Popup Configuration” window will open.
- Page 49 Crestron TPMC-V12/15 V-Panel™ Integrated 12” & 15” Touch Screens “Message Popup Configuration” Window There are three types of Network popup messages. Following are definitions of each message type: • Connected: A green popup message appears when the touch screen is connected to the control system.
- Page 50 V-Panel™ Integrated 12” & 15” Touch Screens Crestron TPMC-V12/V15 Right click: simulates right-click of mouse Size: toggles on-screen keyboard size (small, medium, large) Keyboard translucence down: decreases keyboard translucence Keyboard translucence up: increases keyboard translucence On-Screen Keyboard The initial position of the on-screen keyboard is determined by the VT Pro-e program or SIMPL Windows settings.
-
Page 51: Hardware Hookup
The TPMC-V12/15 can be connected using the included TPMC-V-IMCW interface module or (if the video inputs provided by the TPMC-V-IMCW are not needed) it can be connected directly to a Crestron control system (sold separately). Make the necessary connections as called out in the illustration that follows this paragraph. - Page 52 V-Panel™ Integrated 12” & 15” Touch Screens Crestron TPMC-V12/V15 CAUTION: Do not apply excessive pressure to the touch screen display during handling. Doing so can crack the screen and damage the touch screen. NOTE: Direct connection of the TPMC-V12/15 to a Cresnet power source and Ethernet LAN, without the use of the TPMC-V-IMCW, negates video connectivity.
-
Page 53: Tilt Tension Adjustment
Crestron TPMC-V12/15 V-Panel™ Integrated 12” & 15” Touch Screens Tilt Tension Adjustment Tilt tension on the TPMC-V12 and TPMC-V15 is preset at the factory to allow the screen to be tilted anywhere within its 35 degree tilt range and maintain its position during use. -
Page 54: Programming Software
Have a question or comment about Crestron software? Answers to frequently asked questions (FAQs) can be viewed in the Online Help section of the Crestron Web site. To post a question or view questions you have submitted to Crestron’s True Blue Support, log in at www.crestron.com/support. - Page 55 Crestron TPMC-V12/15 V-Panel™ Integrated 12” & 15” Touch Screens Locating the TPMC-V12/15 (Cresnet) in the Device Library b. To incorporate the TPMC-V12/15 (Ethernet) into the system, drag the TPMC-V12/15 from the Touchpanels | Touchpanels (Ethernet) folder of the Device Library and drop it in the System Views.
- Page 56 3. If necessary, double click a device to open the “Device Settings” window and change the Net ID or IP ID, as shown in the following figure(s). “Device Settings: Crestron TPMC-V12/15 (Cresnet)” Window (TPMC-V12 Shown) 52 • V-Panel™ Integrated 12” & 15” Touch Screens: TPMC-V12 & TPMC-V15...
-
Page 57: Programming With Visiontools
Net ID or IP ID of each unit. Refer to “Identity Code” on page Program Manager Program Manager is the view where programmers “program” a Crestron control system by assigning signals to symbols. The symbol can be viewed by double clicking on the icon or dragging it into Detail View. - Page 58 Pre-recorded WAV files for voice prompts and responses are available from Crestron. These files can be stored into and programmed for use in the touch screen directly or may be edited with the Sound Recorder. For example, the individual files can be combined to create custom messages.
- Page 59 Crestron TPMC-V12/15 V-Panel™ Integrated 12” & 15” Touch Screens that will fit in the memory space provided and have the touch screen remain very responsive. Relationship of Bits to Colors NUMBER OF BITS NUMBER OF COLORS 1 bit Black and White...
- Page 60 V-Panel™ Integrated 12” & 15” Touch Screens Crestron TPMC-V12/V15 MultiByte International Characters Most languages use a single byte of eight bits to represent a character, e.g. English, French, German, Hebrew, Russian, Thai, etc. Multibyte character fonts require more than the usual eight bits to specify a character.
-
Page 61: Embedded Applications
Crestron TPMC-V12/15 V-Panel™ Integrated 12” & 15” Touch Screens • Indonesian • Italian • Japanese • Korean • Latvian • Lithuanian • Norwegian • Polish • Portuguese • Romanian • Russian • Serbian • Slovak • Slovenian • Spanish •... - Page 62 V-Panel™ Integrated 12” & 15” Touch Screens Crestron TPMC-V12/V15 The embedded applications have the following features: • All embedded applications listed in the VT Pro-e ProjectView workspace are created by default for a new TPMC-V12/15 project. • All applications are created at project-level – one instance per project.
-
Page 63: Defaults For Embedded Windows Applications
Crestron TPMC-V12/15 V-Panel™ Integrated 12” & 15” Touch Screens Defaults for Embedded Windows Applications Use the Default Path text box in the “Embedded Applications Properties” window to enter the default document for the application. Edit the Default Position and Size in the “Embedded Application Properties”... - Page 64 V-Panel™ Integrated 12” & 15” Touch Screens Crestron TPMC-V12/V15 The example has Join #10 assigned to a button that is used to toggle the state of Internet Explorer. Press10 is routed to the clock line of a Toggle symbol. The output of the toggle is routed to fb11.
-
Page 65: Uploading And Upgrading
Alternatively, use a CAT5 crossover cable to connect the two LAN ports directly without using a hub or router. 3. Use the Address Book in Crestron Toolbox to create an entry for the TPMC-V12/15 with the TPMC-V12/15’s TCP/IP communication parameters. -
Page 66: Programs, Projects And Firmware
Crestron Toolbox. For details on uploading and upgrading, refer to the SIMPL Windows help file, VT Pro-e help file or the Crestron Toolbox help file. SIMPL Windows If a SIMPL Windows program is provided, it can be uploaded to the control system using SIMPL Windows or Crestron Toolbox. -
Page 67: Operation - Security Infrastructure
The implementation of the TPMC-V12/15 series has restrictions on starting any application or script. The only applications that can be started are those allowed by Crestron and these can only be started from the Crestron project. 2. Downloaded Program/Script The browser is customized in such a way that files cannot be downloaded. The only files the browser can open are the files it has plug-ins for, such as PDF, etc. -
Page 68: Problem Solving
V-Panel™ Integrated 12” & 15” Touch Screens Crestron TPMC-V12/V15 Problem Solving Troubleshooting The following table provides corrective action for possible trouble situations. If further assistance is required, please contact a Crestron customer service representative. TPMC-V12/15 Troubleshooting TROUBLE POSSIBLE CAUSE(S) CORRECTIVE ACTION... -
Page 69: Check Network Wiring
Cresnet power usage of the entire chain. If the unit is run from a Crestron system power supply network port, the Cresnet power usage of that unit is the Cresnet power usage of the entire run. The wire gauge and the Cresnet power usage of the run should be used in the following equation to calculate the cable length value on the equation’s left side. -
Page 70: Reference Documents
Make sure the cable length value is less than the value calculated on the right side of the equation. For example, a Cresnet run using 18 AWG Crestron Certified Wire and drawing 20 watts should not have a length of run more than 333 feet (101 meters). If Cresnet HP is used for the same run, its length could extend to 1250 feet (381 meters). -
Page 71: Software License Agreement
This Agreement may only be modified by a writing signed by an authorized officer of Crestron. Updates may be licensed to You by Crestron with additional or different terms. This is the entire agreement between Crestron and You relating to the Software and it supersedes any prior representations, discussions, undertakings, communications or advertising relating to the Software. - Page 72 “applets” incorporated into the Software), the accompanying media and printed materials and any copies of the Software are owned by Crestron or its suppliers. The Software is protected by copyright laws and international treaty provisions. Therefore, you must treat the Software like any other copyrighted material, subject to the provisions of this Agreement.
-
Page 73: Return And Warranty Policies
Purchasers should inquire of the dealer regarding the nature and extent of the dealer's warranty, if any. CRESTRON shall not be liable to honor the terms of this warranty if the product has been used in any application other than that for which it was intended or if it has been subjected to misuse, accidental damage, modification or improper installation procedures. -
Page 74: Microsoft Windows Xp Embedded End User License Agreement
Restricted Functionality. You are licensed to use the SOFTWARE to provide only the limited functionality (specific tasks or processes) for which the DEVICE has been designed and marketed by Crestron. This license specifically prohibits any other use of the SOFTWARE, or inclusion of additional software programs or functions, on the DEVICE. Subject to the terms of the “Limited Use of Particular Services”... - Page 75 Services tool. You may use the Remote Boot Installation Services tool only to deploy the SOFTWARE to one or more DEVICEs on which you are licensed to run the SOFTWARE (i.e., DEVICEs to which the appropriate Certificate of Authenticity is affixed). Please refer to the DEVICE documentation, if provided with your DEVICE, or contact Crestron for additional information.
- Page 76 Crestron Electronics, Inc. Operations Guide – DOC. 6940B 15 Volvo Drive Rockleigh, NJ 07647 (2027403) Tel: 888.CRESTRON 06.11 Fax: 201.767.7576 Specifications subject to www.crestron.com change without notice.
Need help?
Do you have a question about the V-Panel TPMC-V12 and is the answer not in the manual?
Questions and answers