
Related Manuals for Crestron TPMC-3SM


Summary of Contents for Crestron TPMC-3SM
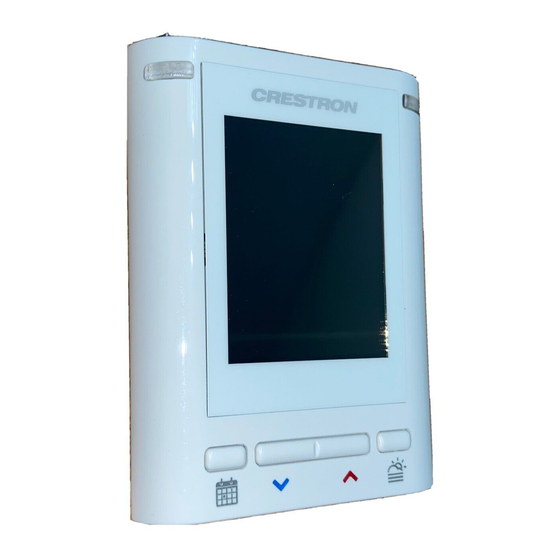
- Page 1 Crestron TPMC-3SM & TPMC-3SMD ® Isys 2.8” Wall Mount & Designer Touch Screens Configuration Guide...
- Page 2 Inc. in the United States and/or other countries. Other trademarks and trade names may be used in this document to refer to either the entities claiming the marks and names or their products. Crestron disclaims any proprietary interest in the marks and names of others.
-
Page 3: Table Of Contents
Crestron TPMC-3SM & TPMC-3SMD Wall Mount & Designer Touch Screens Contents ® Isys 2.8” Wall Mount & Designer Touch Screens: TPMC-3SM & TPMC-3SMD 1 Access the Setup Screens......................1 Configure the TPMC-3SM or TPMC-3SMD ................4 Ethernet Setup ......................4 Standby Setup...................... -
Page 5: Isys ® 2.8" Wall Mount & Designer Touch Screens: Tpmc-3Sm & Tpmc-3Smd
Touch Screens: TPMC-3SM & TPMC-3SMD Access the Setup Screens The setup screens are the starting point for configuring the TPMC-3SM and TPMC-3SMD. NOTE: If no project has been loaded or if an invalid project has been loaded, the TPMC-3SM and TPMC-3SMD default to the setup menu screen. - Page 6 Wall Mount & Designer Touch Screens Crestron TPMC-3SM & TPMC-3SMD NOTE: Most screens on the TPMC-3SM and TPMC-3SMD are identical. The few instances where they differ will be noted in the text. Touch the screen to display the “Panel Setup Options” screen, shown in the illustration below.
- Page 7 About the touch screen and (on the TPMC-3SM only), that select whether User Project mode is on or off. There is also a Save & Exit button. The functions of each are detailed in the next section of this guide.
-
Page 8: Configure The Tpmc-3Sm Or Tpmc-3Smd
Discovery and buttons that provide access to Control System Settings and IP Address Settings. Touch Control System Settings to display the “Control Systems” screen, shown in the following illustration. “Control Systems” Screen ® 4 • Isys 2.8” Touch Screens: TPMC-3SM & TPMC-3SMD Configuration Guide – DOC. 7269A... - Page 9 The “Control Systems” screen provides information about IP addresses, CIP ID, Device ID and Port for up to four entries. NOTE: The TPMC-3SM and TPMC-3SMD can communicate with up to 16 control systems but only the first four entries will be visible on the screen. Other entries will be visible with Crestron Toolbox™...
- Page 10 Touch Back on the “Control Systems” screen to return to the “Ethernet Setup” screen. On the TPMC-3SM and TPMC-3SMD, DHCP is enabled by default. To switch to a static IP address, touch IP Address Settings on the “Ethernet Setup” screen, to display the “Edit IP Settings”...
-
Page 11: Standby Setup
Crestron TPMC-3SM & TPMC-3SMD Wall Mount & Designer Touch Screens Touch Save to keep new settings or Cancel to cancel them. Touch Back on the “Ethernet Setup” screen to return to the “Panel Setup Options” screen. Standby Setup On the “Panel Setup Options” screen, touch Standby Setup to display the “Standby Timeout”... -
Page 12: Display Settings
Settings” screen. The “Display Settings” screens on the TPMC-3SM and TPMC-3SMD are different, as noted below. TPMC-3SM On the TPMC-3SM, the “Display Settings” screen, shown in the illustration below, provides controls to adjust LCD Brightness and a Key Backlight Settings button to access the “Key Backlight Settings” screen. - Page 13 Crestron TPMC-3SM & TPMC-3SMD Wall Mount & Designer Touch Screens TPMC-3SM “LED Color Settings” Screen The TPMC-3SM’s “LED Color Settings” screen provides control for selection of Left Key LED Color and Right Key LED Color as well as controls for turning each of the LEDs Off.
-
Page 14: System Messages Disabled/Enabled
About On the “Panel Setup Options” screen, touch About to display the “About the TPMC-3SM” (or “About the TPMC-3SMD”) screen. This screen displays information about the firmware and operating system versions in your unit. Touch Back to return to the “Panel Setup Options” screen. -
Page 15: Diagnostics
“Diagnostics” Screen The “Diagnostics” screen displays information about the Total RAM and Free RAM in your TPMC-3SM or TPMC3SMD. It also provides Keypad Test, Touch Test and Display Test Patterns buttons to access the “Keypad Test”, touch test and “Test Patterns”... - Page 16 NOTE: When touching the screen during calibration, be as accurate as possible. Use the tip of a capped pen or the eraser end of a pencil. ® 12 • Isys 2.8” Touch Screens: TPMC-3SM & TPMC-3SMD Configuration Guide – DOC. 7269A...
-
Page 17: User Project Mode Off/On
User Project Mode On. User Project Mode Off is the default state for using the TPMC-3SM with the Fusion RV™ Interface. For more information, refer to the latest version of the TPMC-3SM Fusion RV Interface Guide ®... - Page 18 Crestron Electronics, Inc. Configuration Guide – DOC. 7269A 15 Volvo Drive Rockleigh, NJ 07647 (2032521) Tel: 888.CRESTRON 12.11 Fax: 201.767.7576 Specifications subject to www.crestron.com change without notice.
Need help?
Do you have a question about the TPMC-3SM and is the answer not in the manual?
Questions and answers