Table of Contents
Advertisement
Quick Links
Advertisement
Table of Contents

Related Manuals for ClearOne Collaborate


Summary of Contents for ClearOne Collaborate
- Page 1 Collaborate™ - Conferencing Solutions nstallatIon uIde...
-
Page 2: Table Of Contents
Contents Collaborate ConferenCing SolutionS Tools Needed But Not Included ............................1 Basic Collaborate Solution ..............................1 Collaborate overview Cable Connections ................................2 Foot Stand Assembly (Single Monitor) ..........................3 Foot Stand Assembly (Dual Monitor)............................5 wall-Mount aSSeMbly overview Wall-Mount Kit ..................................7 Wall-Mount Assembly (Single Monitor)..........................8 Wall-Mount Assembly (Dual Monitor) ...........................9... -
Page 3: Collaborate Conferencing Solutions
Keyboard and Mouse Hd uSb Camera » Caution : The Console weighs about 100 lb. Please take all necessary precautions when lifting. ClearOne recommends only lifting and moving the Collaborate with a team of two or more people. nstallatIon uIde... -
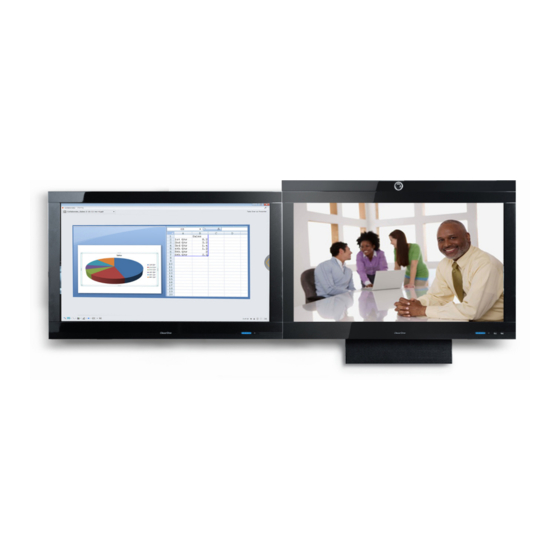
Page 4: Collaborate Overview
2: Wall Mount system - Accessory kit available for a dual monitor Wall Mount system. option 3: Dual Articulating Arm Cart or Media Stand system Please contact ClearOne for more details on pricing and shipping of any of the Collaborate accessory kits. -
Page 5: Foot Stand Assembly (Single Monitor)
Console and/or Display to prevent personal injury or damage to the product. Place the Collaborate Console face-down on a flat, clean, soft, non-abrasive surface as shown below and attach the feet brackets to the console, then attach the feet to the brackets as shown. - Page 6 » note: If mounting the camera with the optional Camera Bezel, use the four #6-32 screws provided with the Camera Bezel kit to mount the bezel. Attach the Collaborate Camera as shown. * Product shown with optional Camera Bezel installed.
-
Page 7: Foot Stand Assembly (Dual Monitor)
PC USB port. Clip the camera to the top of the Console then plug the camera into a USB port located along the bottom of the Collaborate Console as shown below. Open camera lens cover by turning ring. - Page 8 Camera Bezel. *Console shown with optional Camera Bezel. 6. Plug the Collaborate Console and Display monitors into an electrical outlet. 7. Press the power buttons on the front of the Console and Display to turn the units on.
-
Page 9: Wall-Mount Assembly Overview
The Collaborate monitor provides standard mounting sizes (M6 600 x 200 external, M6 600 x 100 internal) and locations for the mounting of the Collaborate monitor onto a wall. As always, comply with the appropriate mounting recommendations and ensure the wall is capable of handling a minimum monitor wall mount installation weight of 100 lb. -
Page 10: Wall-Mount Assembly (Single Monitor)
While the unit is still face-down, install the Collaborate Soundbar as shown below using the Long Soundbar Mounting Bracket with the screws provided and those on the soundbar as shown. -
Page 11: Wall-Mount Assembly (Dual Monitor)
Place the Collaborate Console and Display face-down on a flat, clean, soft, non-abrasive surface and attach the Collaborate Wall Mount Brackets onto the appropriate mounting holes on the back of each Collaborate unit (Refer to the manufacturers TV Wall Mount Kit documentation for appropriate bracket hole locations.) Review the port locations on page 2 and make the appropriate cable connections. - Page 12 Console. See page 6 of this manual for additional HD Camera mounting options using the optional Camera Bezel. Mount the Collaborate Console and Display units onto the TV Wall Mount brackets (See TV Wall Mount manufacturers instructions.) Plug the power cables into an outlet.
-
Page 13: Media Stand Assembly Overview
ClearOne Soundbar to the Collaborate Media Stand. For installing the monitor onto the Media stand it is recommended to mount the bracket and speak- er first, then attach the speaker wires for the Collaborate Console before installing the monitor onto the Media stand. - Page 14 : 800.283.5936 echnIcal upport...
-
Page 15: Titan Dual Articulating Arm Assembly Overview
Titan base. hd c amera nstallatIon Plug the HD Camera into one of the USB ports located along the bottom of the Collaborate Con- sole, then place the camera. » note: The HD Camera can be mounted onto the Collaborate Console (Conferencing) monitor using the optional Camera Bezel. - Page 16 : 800.283.5936 echnIcal upport...
-
Page 17: Hd Camera Topology
Hd CaMera topology hd c amera nstallatIon uIde... -
Page 18: Software Installation
The Collaborate Console software installation must be run under the Windows 7 Administrator’s account. Login to the Collaborate PC as Administrator. (It is recommended to log out of all other accounts on the PC prior to software installation.) When the system is first booted after the OS is installed it will contain a shortcut to a “Welcome to ClearOne Collaborate”... -
Page 19: Compliance
The country code must be set correctly in Console to ensure that the unit operates properly when connected to the telco network, and that it complies with the country’s telco requirements. Changing this code to a country other than the intended country of operation might cause Collaborate devices to be non-compliant. - Page 20 No user serviceable parts are contained in this product. If damage or malfunction occurs, contact ClearOne Communications for instructions on its repair or return Connection to party line service is subject to state tariffs. Contact the state public utility commission, public service commission or corporation commission for information.
-
Page 21: Specifications
Secondary Monitor output: VGA ollaBorate oundBar 15 - 80% Hd audio operation: ontrol anaGement 100 Hz - 20 kHz echanIcal Collaborate System Control Software approximate dimensions Channels: Monaural Collaborate Audio Mixer Console (primary Monitor) Sensitivity: W: 44.5” (1130.3 mm) ollaBorate udIo Ixer 85 dB 1W @ 1 foot (0.30 meter) - Page 22 800-401-032-01 - oct. 20, 2011 (rev. 1.4) © 2011 ClearOne All rights reserved. No part of this document may be reproduced in any form or by any means without written permission from ClearOne. ClearOne reserves specific privileges. Other product names may be trademarks of their respective owners.
Need help?
Do you have a question about the Collaborate and is the answer not in the manual?
Questions and answers