Table of Contents
Advertisement
Quick Links
Download this manual
See also:
User Manual
Advertisement
Table of Contents

Related Manuals for ClearOne COLLABORATE Room Pro


Summary of Contents for ClearOne COLLABORATE Room Pro
- Page 1 COLLABORATE Room Pro with Beamforming Microphone Array Professional Conferencing Quick-Start Guide...
-
Page 2: Table Of Contents
MOUNTING THE BEAMFORMING MICROPHONE ARRAY ..8 AUDIO OPTIMIZATION AND CONTROL ........9 hDmi a ............10 ptimizing for UDio USING THE BEAMFORMING MICROPHONE ARRAY WITH THE COLLABORATE ROOM PRO ............11 & m ................11 olUme PART NUMBERS ................13 CLEARONE CONTACTS.............. 14... -
Page 3: Collaborate Room Pro And The Beamforming Microphone Array
The Beamforming Microphone Array is supported for use as a ceiling- mounted, wall-mounted or tabletop assembly. The latest version of the COLLABORATE Pro firmware and the COLLABORATE Room Pro Installation and Setup Guide can be found on the ClearOne website at: http://www.clearone.com/resources#video_conferencing... -
Page 4: Components Included
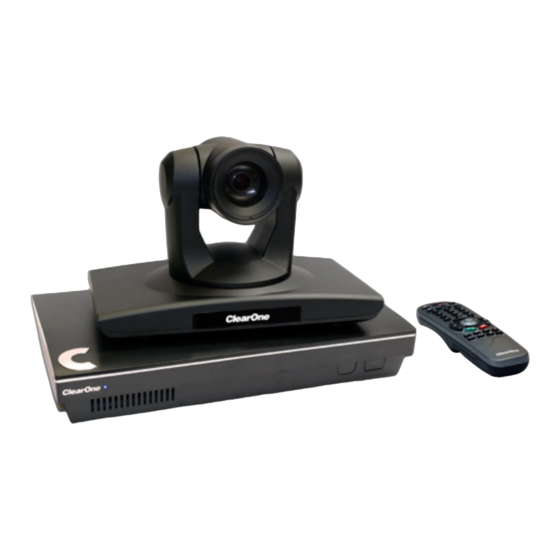
COLLABORATE ROOM PRO AND THE BEAMFORMING MICROPHONE ARRAY COMPONENTS INCLUDED The COLLABORATE Room Pro with Beamforming Microphone Array SKU’s include the following: COLLABORATE Room Pro 520/620 930-401-862 (520) or 930-401-872 (620) COLLABORATE Room Pro 510 or 610 codec with power supply and remote... - Page 5 QUICK-START GUIDE 910-001-003-B-C (Black) or 910-001-003-C (White) Beamforming Microphone Array (Black Beamforming Microphone Array Shown) 910-0002-004 IR Receiver with 6 ft. cable 910-001-004 Beamforming Microphone PoE Power Supply & Cable kit...
-
Page 6: Making The Connections
Connect the Beamforming Microphone Array unit to the USB adapter via an E-bus connection from the Link OUT using a CAT5-24AWG solid conductor RJ45 cable To the USB adapter Link IN connector. Connect the USB adapter to the COLLABORATE Room Pro with a USB connection. onneCtion... -
Page 7: B Eamforming M Icrophone A Rray P Ower C Onnection
If the Collaborate Room Pro codec is placed in a closet or rack or not in a line-of-sight location, it is recommended to use the external IR Receiver for the proper function of the remote control. -
Page 8: Usb A Dapter C Onnections
Dapter onneCtionS The audio connection from the Beamforming Microphone Array to the COLLABORATE Room Pro is made through the USB Adapter. The cable from the Beamforming Microphone array Link OUT goes to the USB Adapter Link IN as shown below. -
Page 9: Udio O Utput C Onnection O Ptions
There are three audio output options, accessed from the back of the COLLABORATE Room Pro, for connecting the audio. Balanced Audio output to an amplifier that is connected to speakers Line output to powered speakers HDMI output to the monitor receiving the signal... -
Page 10: Mounting The Beamforming Microphone Array
COLLABORATE ROOM PRO AND THE BEAMFORMING MICROPHONE ARRAY MOUNTING THE BEAMFORMING MICROPHONE ARRAY The array can be ceiling-mounted in either a suspended or solid ceiling, or on a wall-mount assembly with the PoE and E-bus wiring passing through the mounting assembly and plugging into the Beamforming Microphone Array unit. -
Page 11: Audio Optimization And Control
QUICK-START GUIDE AUDIO OPTIMIZATION AND CONTROL The audio of the COLLABORATE Room Pro system must be optimized for the outputs used and the room in which it is used. NOTE: For best audio performance, ClearOne recommends using Balanced Audio or Line output to a mixer or amplifier. HDMI audio to a monitor is also supported, but monitor speakers are usually lower quality. -
Page 12: O Ptimizing For Hdmi A Udio
THE BEAMFORMING MICROPHONE ARRAY hDmi a ptimizing for UDio Using the COLLABORATE Room Pro and Beamforming Microphone Array with the HDMI output to monitor speakers requires adjustment for audio levels and echo cancellation. Volume After attaching the HDMI output to the monitor, set the COLLABORATE Room Pro Volume to 50%, then play the sample audio by pressing the Play button. -
Page 13: Using The Beamforming Microphone Array With The Collaborate Room Pro
USING THE BEAMFORMING MICROPHONE ARRAY WITH THE COLLABORATE ROOM PRO When connected, the Beamforming Microphone Array will appear as an audio source within the COLLABORATE Room Pro user interface. & m olUme Volume is controlled through your COLLABORATE Room Pro. - Page 14 COLLABORATE ROOM PRO AND THE BEAMFORMING MICROPHONE ARRAY...
-
Page 15: Part Numbers
QUICK-START GUIDE PART NUMBERS 930-401-862 Room Pro 520 Includes: 870-401-860 Room Pro 500 Codec 910-401-199 910-401-199 UNITE FHD Camera 910-151-806 USB Adapter (CONVERGE USB) 910-001-003-C or Beamforming Microphone Array (White) 910-001-003-B-C (Black) 910-001-004 Beamforming Microphone PoE Power Supply & Cable kit 910-0002-004 IR Receiver with 6 ft. -
Page 16: Clearone Contacts
Tel: +852 3590 4526 e-mail: global@clearone.com e-mail: global@clearone.com LATAM: Middle East: Tel: 801-974-3621 Tel: +852 3590 4526 e-mail: global@clearone.com e-mail: global@clearone.com © 2014 ClearOne, Inc. All rights reserved. Information in this document is subject to change without notice. QSG-0016-001 Revision 1.0 Sept., 2014...
Need help?
Do you have a question about the COLLABORATE Room Pro and is the answer not in the manual?
Questions and answers