Advertisement
Table of Contents
- 1 Contact Information
- 2 Table of Contents
- 3 Components Included
- 4 Important Safety Instructions
- 5 The BMA CTH
- 6 Install the Components
- 7 Quick-Start Overview
- 8 Connect the Components
- 9 Component Connections
- 10 Test the Versa Pro CT
- 11 Compliance
- 12 Part Numbers
- 13 BMA CTH Isometric Diagrams
- Download this manual
Advertisement
Table of Contents

Related Manuals for ClearOne Aura VERSA Pro CT


Summary of Contents for ClearOne Aura VERSA Pro CT
- Page 1 Quick-Start Guide VERSA™ Pro CT AUDIO SOLUTION...
-
Page 2: Contact Information
Salt Lake City, UT 84116 aurasales@clearone.com US: +1.801.975.7200 Aura Tech Support International: +1.801.975.7200 US: +1.888.HEY.AURA International: +1.801.975.7200 auratechsupport@clearone.com © 2021 ClearOne, Inc. All rights reserved. Information in this document is subject to change without notice. Document: QSG-0081-002v1.0, January 2021 QSG-0081-002v1.0 January 2021... -
Page 3: Table Of Contents
Quick-Start Guide Contents Contact Information ..............i Components Included ............1 Important Safety Instructions ..........2 The BMA CTH .................4 Install the Components ............5 Quick-Start Overview ..............5 Connect the Components ............8 Component Connections ............9 Test the Versa Pro CT ............10 Compliance ................11 Part Numbers ................11 BMA CTH Isometric Diagrams ..........12 QSG-0081-002v1.0 January 2021... -
Page 4: Components Included
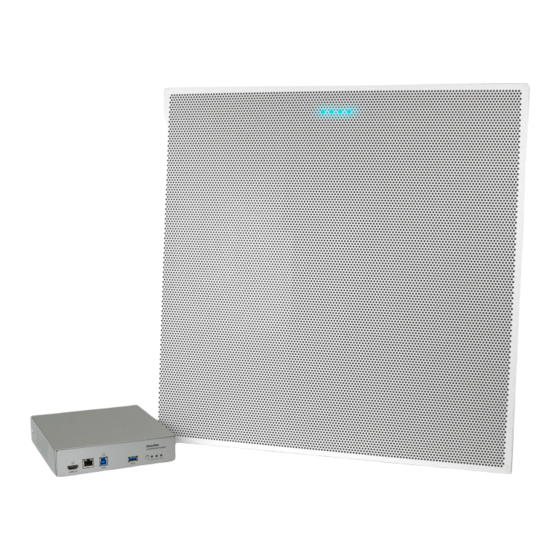
Versa™ Pro CT Components Included The Versa Pro CT includes the CONVERGE Huddle CTH and the Beamforming ® Microphone Array CTX. AUR-3200-706: (1) CONVERGE Huddle CTH (2-4) Terminal Block Connectors (5) USB 3.0 cable (6) TRRS cable (7) Mini COMBICON plug connectors (8-9) Phillips pan-head screws (10) Mounting ears kit 910-3200-205:... -
Page 5: Important Safety Instructions
Quick-Start Guide 910-3200-210: BMA Surface Mount Kit 24 in 910-3200-210-I (International): BMA Surface Mount Kit 600 mm Frame pieces, quantity 4 Spring clips, quantity 4 Free COLLABORATE Space lifetime subscription Important Safety Instructions 1. Read these instructions. 2. Keep these instructions. 3. - Page 6 Versa™ Pro CT grounding type plug has two blades and a third grounding prong. The wide blade or the third prong are provided for your safety. If the provided plug does not fit into your outlet, consult an electrician for replacement of the obsolete outlet.
-
Page 7: The Bma Cth
Quick-Start Guide CAUTION WARNING: TO RISK OF ELECTRIC SHOCK DO PREVENT FIRE Use only in THE EXCLAMATION POINT THE LIGHTING FLASH NOT OPEN WITHIN THE TRIANGLE IS A non-tropical AND ARROWHEAD WARNING SIGN ALERTING AVIS RISQUE DU CHOC ELECTRIQUE locations. ELECTRICAL WITHIN THE TRIANGE IS YOU OF IMPORTANT... -
Page 8: Install The Components
Versa™ Pro CT Quick-Start Overview These steps must be done in the following order to use the Versa Pro CT: Install the BMA CTH and Huddle CTH Connect the BMA CTH to the Huddle CTH. Connect the PoE to the Huddle CTH and also to the BMA CTH (if using speakers with either the Huddle CTH or BMA CTH). - Page 9 Quick-Start Guide Huddle CTH You can mount the Huddle CTH in the following ways: • On the bottom side of a table top • On a wall • Behind a display Note: Mounting hardware such as screws and anchors are not included with the Huddle CTH.
- Page 10 Versa™ Pro CT Mount the Huddle CTH on a Wall Select your hardware based on your specific installation needs. 1. Determine location for the Huddle CTH. Use a pencil to mark on the table the location of four mounting holes that align with the mounting holes on the unit’s mounting ears.
-
Page 11: Connect The Components
Quick-Start Guide Connect the Components Description of Controls and Connections Huddle CTH Figure 1. Huddle CTH Backplane Expander port: RJ45 connector Ethernet/PoE; RJ45 connector. PoE Injector Figure 2. PoE Connections RJ45 connector. Used to provide power to Huddle CTH. RJ45 connector. Not used. QSG-0081-002v1.0 January 2021... -
Page 12: Component Connections
Versa™ Pro CT BMA CTH Figure 3. BMA-CTH Back Panel Speakers Out. Two Phoenix Euroblock connectors for external 8 ohm speakers PoE In: RJ45 connector. Power Select sliding switch. Set this to the left for PoE In. P-Link In: RJ45 connector. Provides power and control to peripheral devices P-Link Out: RJ45 connector. -
Page 13: Test The Versa Pro Ct
Quick-Start Guide When you are ready to apply power, plug the PoE injector into a standard power outlet. Speaker Usage When connecting 2x10 W speakers, each device requires its own PoE injector. That is, if the amplifiers on either the Huddle CTH or the BMA CTH are used to drive loudspeakers, both devices require their own dedicated PoE power injec- tor. -
Page 14: Compliance
Versa™ Pro CT Compliance Details on compliance can be found on the ClearOne website under “Resource Library”. Part Numbers Item Part No. White BMA CTH 24 in 910-3200-205 White BMA CTH 600 mm 910-3200-205-I PoE Injector Kit AUR-3200-202 50 Ft RJ45 CAT6 Cable... -
Page 15: Bma Cth Isometric Diagrams
Quick-Start Guide BMA CTH Isometric Diagrams Side Views Back View QSG-0081-002v1.0 January 2021...
Need help?
Do you have a question about the Aura VERSA Pro CT and is the answer not in the manual?
Questions and answers